
Do you ever ask yourself that you owner beautiful and quality product but the decrease number of customers who visit or come back your online store?. What’s happened to your product or do you have basic mistakes?. Let’s experiment this article below with main topic: “7 Basic Mistakes Of DIY Footwear Product Photography”. It is maybe useful key help you unlock this question.
Quality product photography is one of necessary and crucial factors that help business create a great impression on customers and keep them come back. Poor product images quality will likely scare customers away.
If you add sharpness, appropriate lighting, and a few other necessary elements, do you believe that the result will very surprise for your sales. So, how you style your product or how you turn into your product?. It’s depend on lighting, your camera setting, the angles you shoot,…
With 7 basic mistakes of DIY footwear product photography below will a great topics that help you answer all questions and avoid the same mistakes.
Preparing the product before shooting
Before shooting your footwear product photography, they are many things you should do, but one of these preparations are the position of product in photography especially small spared details.
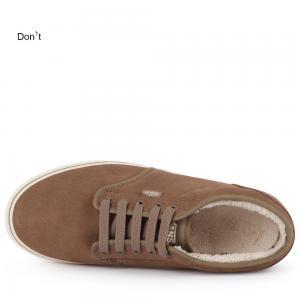
Avoid putting footwear droop
The faces of footwear product appear on website that is very important. If you choose limp, lifeless footwear to shooting – product are unflattering and conveys little accurate information to the customer. It is perceived as big mistakes that affect directly to the quality of your product and your sales. Let’s choose the simple and clear faces of footwear product and help footwear stand, this make it easy for your customers to visualize wearing your footwear.
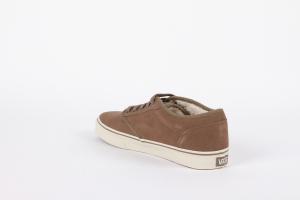
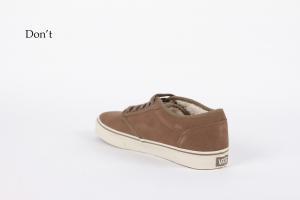

Advise : You should make sure that every piece of footwear looks its best by creating the illusion that the shoe is being worn. This shows both the item’s true shape and allows your customer to envision themselves wearing it.
Background

First, background is one of the necessary parts that contributes to create a good pictures. So, you should choose available background to turn into your product become special in photography. Don’t clutter the frame. Simply, a busy background will distract your customer from what you actually want them to look at. To solve this question, the best way for your product photography is that use a clear white background.
Lighting
Lighting is one of, if not the most, important parts of product photography. You absolutely need the appropriate type of lighting or your product will not look appealing to your customers. Harsh, direct lighting that casts deep shadows is the worst type of lighting for product photography.
Normally, photographer always use natural lighting because it one of the best and cheapest options available. You can choose and take your photos inside next to a large window where have many lights or use studio if you’d like to go the artificial lighting route.
Focus
You can focus your product what will appear in photography. Besides, Avoid using too redundant details in product footwear photography, this will make your customers distracted. The more your image is out of focus, the less your customer will see of your product.
Let’s use a higher aperture like f/11 on your DSLR camera to get every aspect of your footwear in focus. In addition, be sure to use a tripod; this will minimize camera shake and give your images maximum crispness.
Cropping
Cropping is one of popular ways of digital photos that customers can be easy to find the error if you make a mistakes especially inconsistent cropping in photography.Your customers will notice if some of your footwear images are more zoomed in than others, and they will notice if products the same distance away from the camera are higher or lower than each other.
To avoid making this mistake, you should keep your images consistent from frame to frame. Abiding by a template will speed your shooting and post production workflow and enhance the professional appearance of your website by supplying you with a consistent portfolio of product images that all seem to belong together.
Angles
One of the biggest mistakes in product photography is displaying very few angles of the product on the listing. Let’s try to shooting your footwear product photography in many different angles. These will help your customers feel confident as well as have a holistic and integrated view of your footwear product.

Take straight-on side shots, shots from the front, shots from the back, the top view, angled side shots, detail shots and all variations of those suggestions.
Shadows
Do you know that footwear images in particular benefit greatly from a little bit of natural shadow?. It’s standard best practice in eCommerce to place products on a pure white background in post-production. Let’s retain the natural shadow in post-production processing grounds the item in the frame and creates a much more professional result.
Referring and sharing these basic principles in your footwear product photography will dramatically improve the quality appeal of your online product. If you style your footwear, use a clean, uncluttered white background, soft lighting, full focus, multiple angles, and consistent post-production processing, please do not hesitate to share your experiences and contact us.
Now go experiment and show me what you can make!.