Categories
Support Tips & Tricks

5 Better Ideas For Holiday Photograph This Christmas

The Christmas holiday make for amazing Christmas photography opportunities. Even the least photographically inclined reach for camera to create beautiful collection.

It’s just a few weeks until Christmas so we thought a quick tutorial on the topic of Christmas photography might be appropriate. Do you have good ideas for this Christmas photography?. Here are 5 better ideas for holiday photograph this Christmas. Hopefully that these will give you some good Christmas photograph ideas and have the best Christmas collection.

Test Shot

Test shot is one of important the preparation step before shooting. Before you start to shoot your collection, let’s take a few shots of the ambient light to check cameras as well as background. This will allow you determine the best aperture, ISO, and shutter speed settings for your images.

fotosolution-5-Better-Ideas-For Holiday-Photograph-This-Christmas-2

Lighting

Lighting is probably one of the most important part of good pictures and can make or break them. Especially, let’s pay attention to the color present in the space and use different setting to try and capture them.

fotosolution-5-Better-Ideas-For Holiday-Photograph-This-Christmas-1

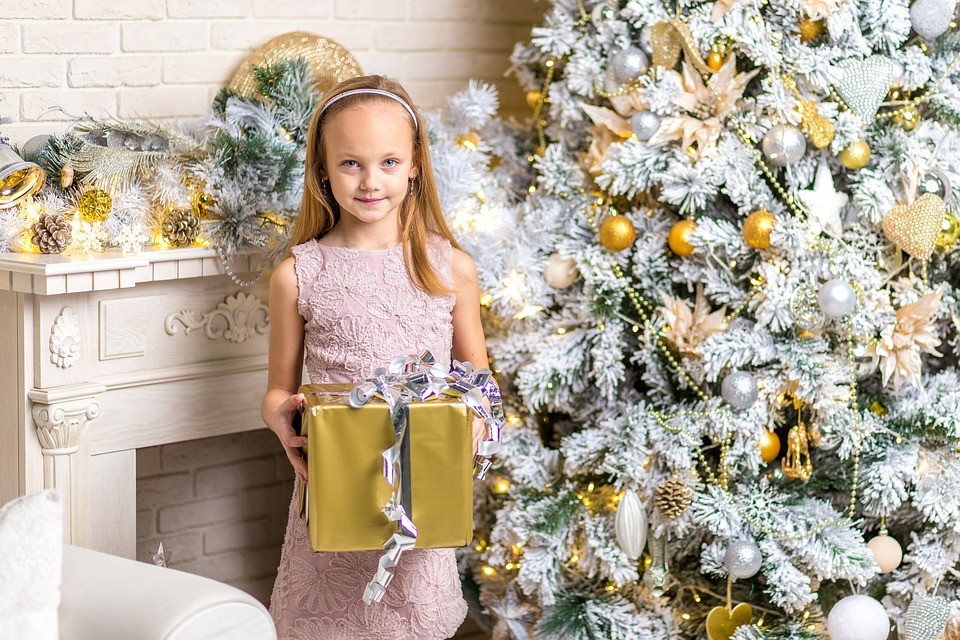
In Christmas night, lighting will cover and present more stunning. This is one of advantages to capture lighting. Is there warm light coming from the light bulbs, lamps, or Christmas ornaments?. All will make fantastic Christmas photos.

Shooting the objects that use to decorate

Families come together at holidays, but not just for the main event, they come to help decorate… and these are exciting, fun-filled moments so they are great opportunities to record the sweet moment.

Normally, we are familiar with Christmas photos that include: Christmas tree and bokeh, these bulbs into the circle of other shapes,.. Instead of shooting popular images, we can try to shoot new things. Maybe the shots before the event starts properly are often great because they show everything at it’s best before everyone descends on your party zone. Some suggestions for object that you can shoot are: food preparation, wrapping gifts, setting the table, …

Fresh Group Photos

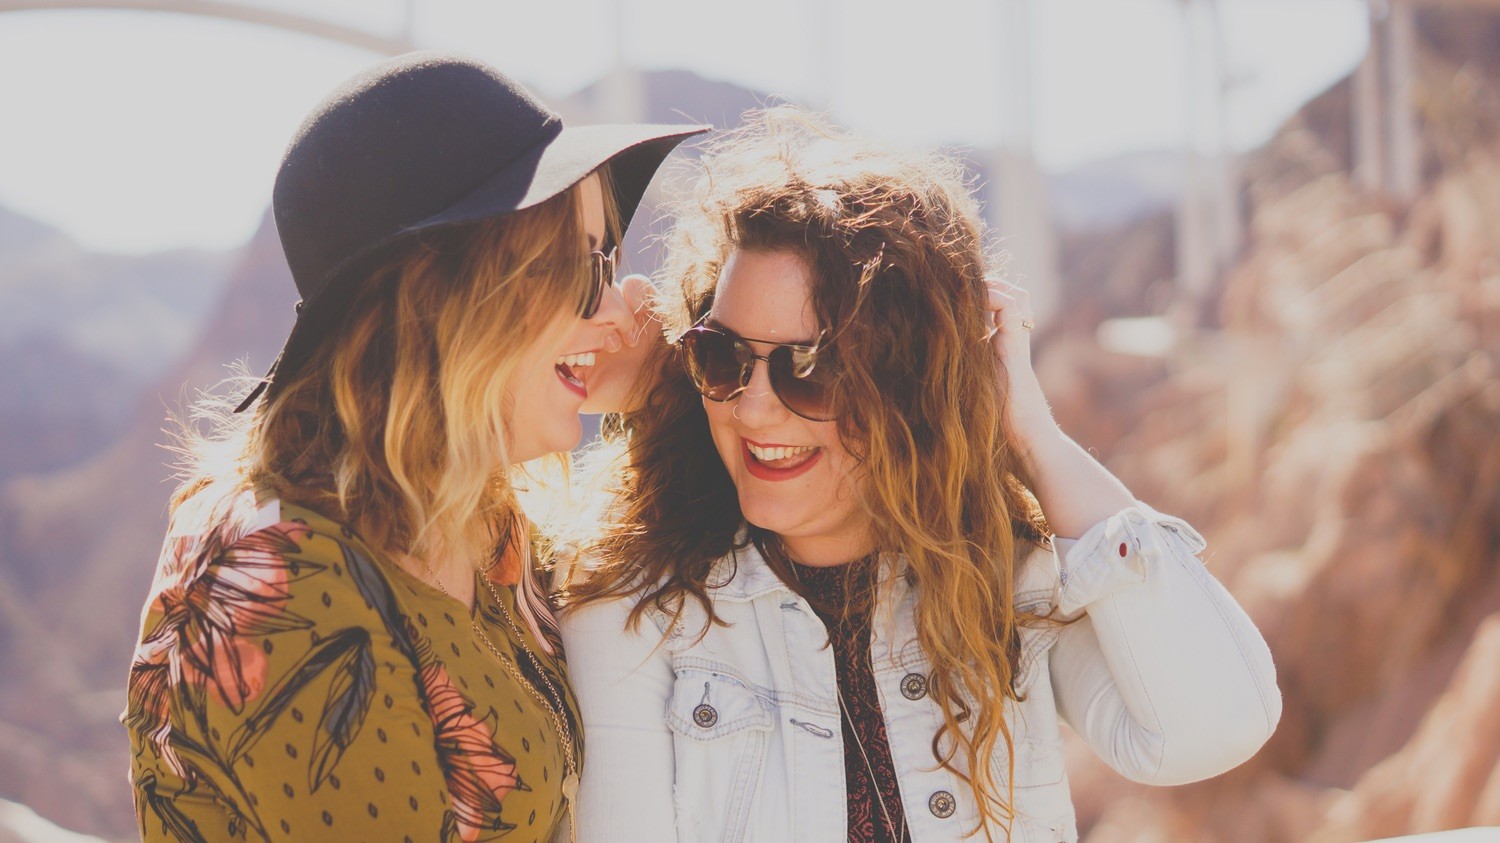
One of the most common types of shots at Christmas is the ‘group photo’. It’s usually taken at the end of the evening or day when everyone is looking at their worst. For a ‘fresher’ shot take it once everyone has arrived. Also think before hand about how you might pose everyone and where you might take the shot.

fotosolution-5-Better-Ideas-For Holiday-Photograph-This-Christmas-5

Focus on the Eyes

All pictures of people soar when you focus in on your subject’s eyes, and that’s no different with Christmastime photos. It’s critical to compose the image with as little headroom and dead space on the sides as possible, so the image is more about the faces and the eyes than anything else. You can use a flash with most indoor Christmas photos, but use a detachable flash or an angled flash and bounce the light off the ceiling. Remember, the ambient light levels will be raised by the Christmas lights.

In conclusion, the preparation  is just as important as the finished product when it comes to Christmas. Here are 5 better tips for holiday photograph this Christmas that will give you interesting things. Got any of your own favorite photo tips to share with other readers? We’d love to hear about them in the comments section below.

Categories
Support Tips & Tricks

5 Pro Tips To Shoot Great Home Photography

The housing demand is a crucial issue that many people are interested. So how do you make a good impression with your real estate photos or great home photography?. As a professional interior photographer for magazines, we will share reader some experiences to help you take better photographs of your home’s interior or design project. You can use some basic ways related to shooting home photography. Using a tripod, shooting from straight on and avoiding wide-angle lenses can take you a long way toward standard practices. Many professional photographers use them every day.
With useful tips, we hope that you’ll find special ideas that offer inspiration for your own home photography.
fotosolution-5-Pro-Tips-To-Shoot-Great-Home-Photography-1
Categories
Support Tips & Tricks

Why should you choose black and white photography

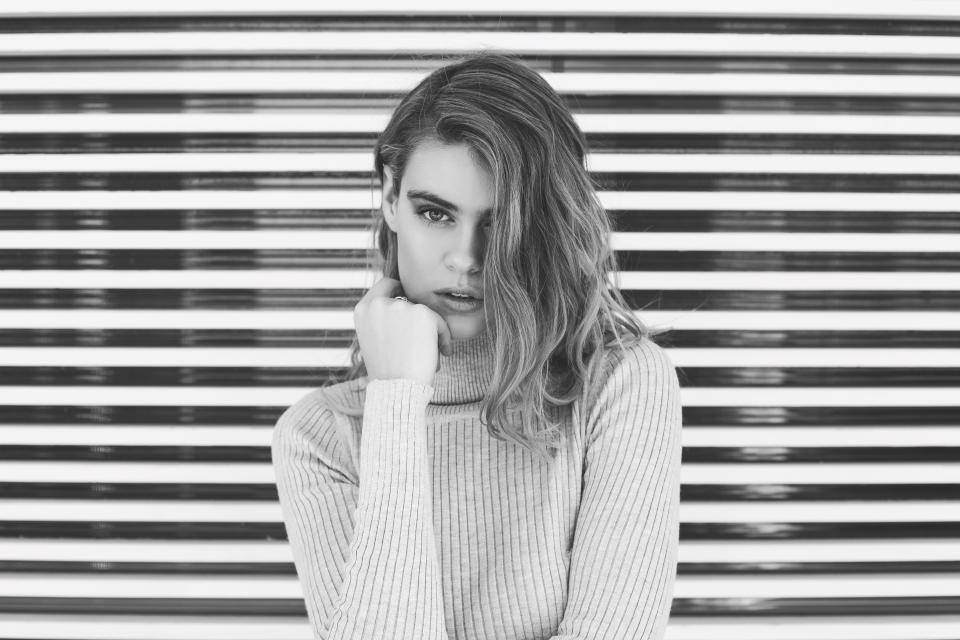
Black and white photography will allow photographer to create the great photos that own the same tones of color. This will help them focus on structure, layer and the body of subject.

As far as we know, black and white photos are very permanent or in other words, these photos always exist with times. These photos will increase the depth of subject and expand photographers creative ideas.

Here are a few of reasons that help readers answer the question: Why should you choose black and white photography?.

Focus on subject

One of the important and necessary elements for photographer is that focus on subject. Why should we say that?. A basic reason is that clothing, color temperature differences in ambient light sources, cars and colorful background distractions have stopped being an issue. These elements can be terribly distracting in some images and can take the focus away from your subjects. However, if you use black and white, it will help you limite your risk. Black and white allows you to focus on think about these key elements such as lighting, composition, element in and out of the frame.

In addition, it help emphasize emotion. For example, when we look at someone’s face, or into their eyes, without the distraction of color can provide a stronger emotional connection to your subject. This will help your artwork transmit message to readers and make your artwork more realistic.

The Timeless Quality from Black and White

fotosolution-Why-should-you-choose-black-and-white-photography-1

Black and white colors remind the past and the classic moment for viewers. Especially, black and white photos will allow photographer to keep the quality of images according to the change of time. And it is one of the most common reasons people especially photographers want to shoot in black and white.

Highlighting the beauty and skin tones of model

Black and white photography provides wonderful tonal range between the deepest blacks and the whitest whites. Pigments, discoloration and distracting elements of the skin can become less obvious. The colorful makeup for model would be distracting the strong point of subject. Using black and white colors will help your artwork avoid this mistake and highlight the beauty and skin tones.

fotosolution-Why-should-you-choose-black-and-white-photography-2

Moreover, black and white also support photographer to shape it into a myriad of shapes. And black and white images can be strong, high contrast and powerful – or they can be so soft, gentle and subtle.

Have you ever taken black and white photography?. Do you like black and white photos?. We hope that you will find some reasons in this article interesting. Let’s have experiences with black and white photography now. If  you have questions or concerns, please do not hesitate to contact us today for a free consultation. Interested in hear your thoughts in the comment below.

Categories
Support Tips & Tricks

How To Take Good Real Estate Photography For Beginners

Are you interested in real estate photography?. Welcome this main subject with ” How to take good real estate photography for beginner”!. Photography has never been more important to selling real estate than it is today. The markets are heating up again and demand for real estate creates demand for photography. This is good news to photographers, but like any business, there is plenty of competition. If you are new to architecture and real estate photography, here are some general guidelines to start you on the right path.

Camera Equipment

A camera, lens, and tripod, are all that is required to get start, but you might quickly learn that many competitors are very proficient at using supplemental lighting and Photoshop techniques.

Your camera should allow you to add a cable release, a flash, different lenses, and wireless triggers. Wide angle lenses are required. For cropped sensor cameras a lens around 10-22mm or 12-24mm is perfect, and for full frame sensor cameras, a lens around 16-35 mm will do the job.

fotosolution-How-To-Take-Good-House-Photos-For-Beginners-1

Tilt-shift lenses help avoid converging vertical lines such as wall edges and door frames leaning in or out. There are several tilt-shift lenses available from Canon’s 17mm, the 24mm from Canon and Nikon, and others. While these lenses are wonderful to use, they are fixed focal length so if you need  a perspective that is for example; 19 mm or 27 mm or somewhere in between, a 16-35mm zoom lens is a great companion to a tilt-shift lens.

Shooting techniques vary from exposure blending, HDR, wireless flash, and light painting with multiple exposures. No matter your shooting style the camera should not be moved to guarantee image alignment of multiple exposures. The camera’s self-timer, a cable release, or wireless triggers insure no camera movement.

Property

The first image a potential buyer sees when reviewing properties online is an exterior photo. That real estate photography is important so take the time to find the best angle and best light. Ask the realtor what are the important features to highlight. They usually want exterior photographs from front and rear, a deck or patio, landscaping and gardens, pool or hot tub, a barn, shop, or other outbuildings. Each feature should be emphasized in the composition by using the surroundings, like beautiful gardens leading to a cool garden shed.

Exterior Lighting

Most outdoor subjects benefit from early or late day lighting, including real estate. Using Google Maps and Google Earth can help you determine the best time of day prior to the real estate photos shoot.  Searching only takes minutes and provides an idea whether a home faces the sunrise or sunset, or neither.

fotosolution-How-To-Take-Good-House-Photos-For-Beginners-2

In winter, some homes facing south never have the sun hitting the front of the home to avoid shooting into the sun, photograph from the same end of the house as the sun.

fotosolution-How-To-Take-Good-House-Photos-For-Beginners-3

Overcast skies can eliminate any problems with sun’s position, but shooting on poor days is a decision best discussed with the realtor.  The advantage is you can shoot any time of the day but the disadvantage is white skies can lessen the impact of an otherwise great exterior image.

The dusk or dark technique is often requested by clients because it helps sell properties. The image is photographed outside and from the best angle to showcase the house. The technique is to turn on all the lights in a room and shoot at a certain time. After sunset the sky’s exposure will balance with the room lights’ exposure. A better approach is to add lights to the rooms creating even lighting, and working this way means not having to wait for that perfect balance between room lights and outdoor light.

Interior Photography

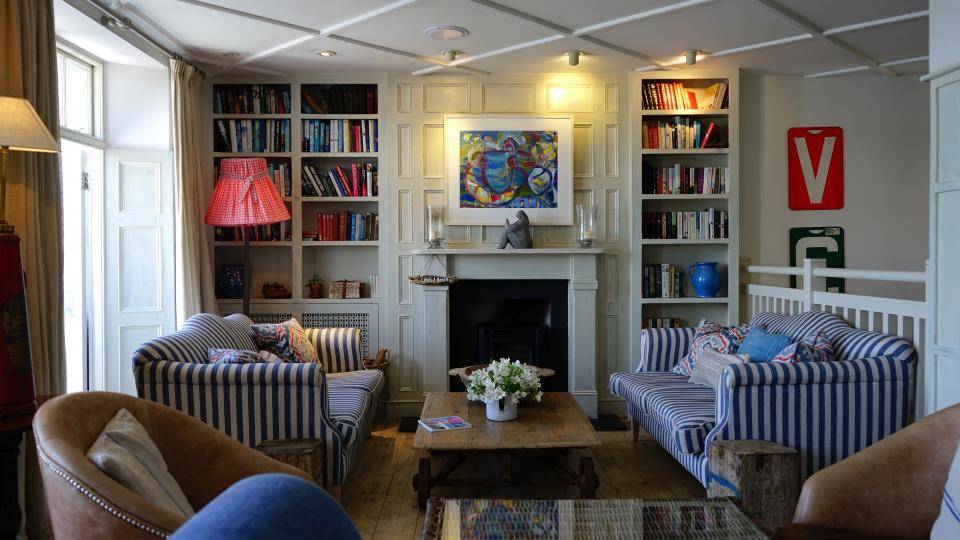
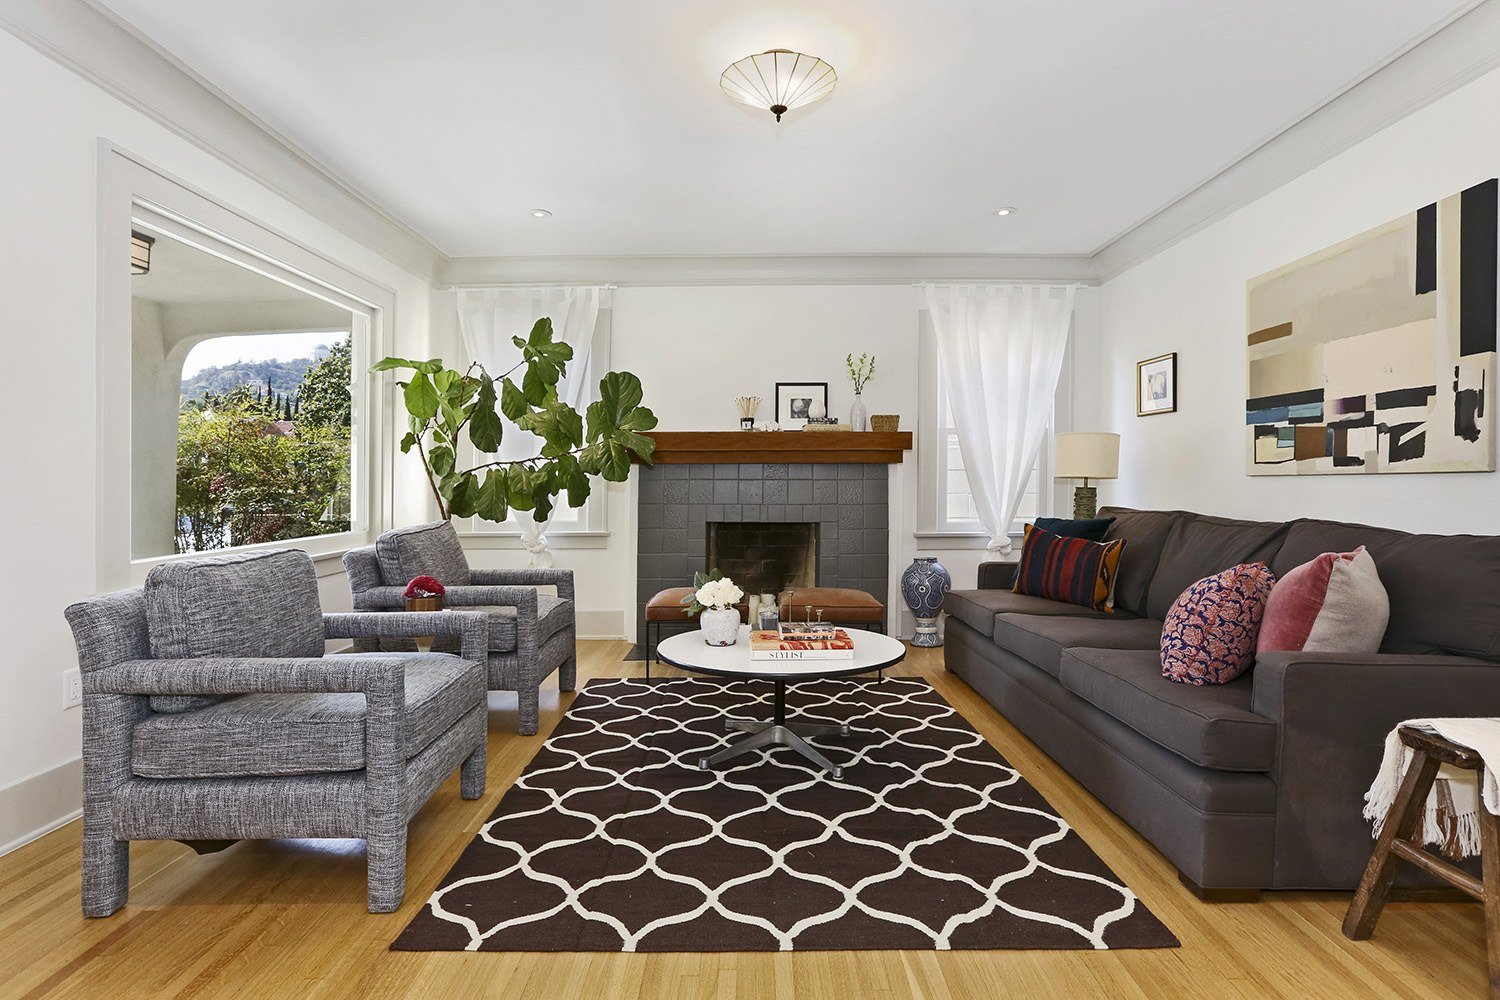
Homes come in all shapes, sizes, styles, and conditions. Here we send them a task list with our suggestions on prepping the home prior to the photo session. Once inside, you should set out to photograph the main rooms: the living room, kitchen, dining area, master bedroom, master bath, are all ‘must shoot’ rooms. There could also be a library, office, large walk-in closet, and more. The client can often tell you what they deem important. Next, seek the best perspective for each room.

fotosolution-How-To-Take-Good-House-Photos-For-Beginners-4

We describe our approach as using the inside elements: furniture, windows, and room layout, to create visual flow. We generally try to avoid composing something large in the foreground that prevents the eye from flowing through the room.

fotosolution-How-To-Take-Good-House-Photos-For-Beginners-5

There is broad agreement among clients and photographers, that if there is to be a rule it will state: verticals must be correct! In most interiors there are edges and corners of walls, door frames, and windows that have vertical sides and these edges need to truly be vertical. When you use a tilt-shift lens this problem is solved, but tilting the camera up or down with a non-TS wide angle lens makes vertical edges converge or diverge and they no longer appear straight.

Camera Height

fotosolution-How-To-Take-Good-House-Photos-For-Beginners-7

One widely used approach is to level the camera using a hot shoe bubble level, making edges straight. While this is a simple solution, it is not always the best solution when using a non-TS lens. A level camera at chest height can result in foreground subjects, like furniture being cutoff at the bottom with too much ceiling at the top. Lowering the camera height will improve this problem but how low can you go and still have an effective photo?.

So what is the perfect camera height? There are many opinions. Some suggest chest height while others suggest door knob height or even lower, all to avoid diverging verticals lines.

fotosolution-How-To-Take-Good-House-Photos-For-Beginners-6

Good Exposure

The perfect interior exposure is challenging when balancing bright window light, with darker interiors. You can deal with scene contrast many ways; one is to shoot when outdoor light levels are lower. Midday light will be much brighter outside than during or after sunset, or on a cloudy day. Turning on every light inside increases the interior brightness. If the outdoor brightness is lower a RAW file can often capture the scene in one frame.

fotosolution-How-To-Take-Good-House-Photos-For-Beginners-8

To make sure we have all the exposures for a great image, you should determine my ‘base exposure’, the image that has most of the data centred in the histogram. Then you bracket widely in one stop increments of varied exposures so you have variety just in case you need them. Lightroom and Photoshop allow selective lightening and darkening of shadows and highlights on a single image. If the contrast is too much, you can blend those bracketed images into a great final image.

fotosolution-How-To-Take-Good-House-Photos-For-Beginners-9

Interior Lighting

Just like a finely lit portrait, interiors can benefit greatly from nicely styled lighting. HDR can manage scene contrast but it does not create highlights and shadows in areas that have no directional light. If you have a dark cabinet against a dark wall, adding supplemental light can bring out that needed detail.

Most interiors have two light sources: window light and interior lights, both constant light sources. You can add constant lights or use strobe or flash. Constant lights, unlike flash, are like the lamp on the table or window light. Changing your exposure to darken window light also changes the exposure brightness of your constant lights. Flash is not a constant light! If you change your shutter speed to darken the window light exposure, flash exposure will not change. Flash or strobe provides flexibility when lighting interiors.

fotosolution-How-To-Take-Good-House-Photos-For-Beginners-0

Photographers shooting for architects or magazines often have plenty of time to photograph a property with finely crafted lighting techniques. But a real estate photographer’s time is usually limited, making flash the perfect tool. Some photographers have mastered the balancing act of using direct on-camera flash to fill in a scene while others use on-camera flash in a bounce capacity.

Also popular are multi-flash wireless set ups allowing the flash to be placed around a room for styled lighting. Also growing in popularity is the ‘light painting’ approach where areas are selectively lit and the exposures are blended.

fotosolution-How-To-Take-Good-House-Photos-For-Beginners-1 (1)

One side effect with outdoor lighting mixing with interior lighting is ‘lighting color balance. This is different than camera White Balance settings. Camera White Balance is set to either specific areas of your scene or set to average all light sources together.

Color and Decoration

When you have mixed light, such as daylight colored window light mixing with tungsten colored ceiling lights. Then throw in a fluorescent kitchen light, you have a veritable palette of different colors mixing together. Walls closest to windows will be blue while the wall closest to a lamp will be amber and the ceiling in the kitchen will have a green tint.

fotosolution-How-To-Take-Good-House-Photos-For-Beginners-2

In some cases the effects of mixed light will be minimal and other times require attention. You can prevent mixed color in many cases by color matching the inside lights to the same color. Besides, you can use Photoshop color correction techniques to change color of specific areas.

Once you have completed the assignment you will need to deliver the real estate photography files. Clients may have different preferences, but mine usually request low resolution for the web and high resolution for print publication.

Be sure to save your files in the proper file format and size for the intended use. Most Multiple Listing Service’s specify what is accepted format and acceptable sizes. I use Photoshop and the Save for Web option for the low resolution and TIFF format for high resolution.  Then final delivery of the files is made by Dropbox or a comparable online service.

Summary

Things to remember doing real estate photography:

  • You are not photographing for yourself,you are photographing for clients who will expect professional quality work.
  • Don’t get ALL the best gear, get only what is required to do the job well.
  • Master the creative side of photography such as angles, perspectives, and composition.
  • Master the technical side of exposure, HDR, supplemental lighting, color matching, and exposure blending.
  • Be careful when processing real estate images, like removing power lines, to avoid misrepresenting the property.

There are many styles and techniques you can use to photograph architecture and real estate and you should master them all. Here are some better tips for real estate photography or house photos that will give you interesting things. Got any of your own favorite photo tips to share with other readers? We’d love to hear about them in the comments section below.

Categories
Support Tips & Tricks

5 Bad Habits Photography That You Should Give Up

Bad habit photography is always one of the essential issues that obstruct the photographer’s success. As far as we know, photography is a fun and exciting hobby when we have a free time and are a important job for many people. However, whatever you do, the first criteria of every people are that shooting beautiful image collection. Especially, whatever you are professional photographer or normal photographer, you can also avoid the basic mistakes. Understanding these issues, here are 5 bad habits photography that we wanna share with readers and hope that they are useful for your project.

Failling to check your equipment before shooting

Check your equipment before shooting are important and essential thing for all people but we always forget or don’t take care this because the simply reason that we always believe ourself. The fact that have you ever discovered one or more essential pieces of equipment missing when you arrive at a shooting location?. Let’s check your camera bag before leaving home to avoid unexpected thing that to happen. Make sure it contains the camera bodies, lenses, memory cards, batteries, filters and cleaning equipment you need plus any peripherals like tripods, flash units and reflectors that may be required.

Hesitate and Fear before shooting

fotosolution-5-Bad-Habit-Photography-That-You-Should-Give-Up-1

If you are shy person, you feel anxious when taking images before the crowd or you may be concerned about what people think. Are you feeling the urge to take a shot of your crying child?. All things are basic factors but main things maybe affect direct the result of your images. Do you believe that there are many successful images that shoot in the random times?. So, if you hesitate to shoot the nice moment, it may be become a unfortunate thing. So, be confident and passionate expression of your creativity.

Falling to customise your camera

Custom cameras or white balance are one of the useful way to help you save your time when you are shooting. You can set up groups of camera settings to cover subjects like landscapes, portraits, sports; pretty much any type of subject you shoot regularly. This will allow you to easy to re-configure the camera to your pre-sets by simply selecting that mode from the custom memory bank.

Avoid centering a subject

fotosolution-5-Bad-Habit-Photography-That-You-Should-Give-Up-2

Subject of images are the first thing that photographer always take care. Centering can definitely be used with to great effect once you know what you are doing, but if you are too attentive for subject and forget the nice background that are around the theme, it is a mistake for your project. Learning the rules of composition will help your photography immensely.

Relying too much on postcapture editing

No matter how capable you think you are with any editing application, it’s best to get as much as possible right when you take the shot. That means exposure, focus and white balance for starters and plus consideration of ISO and noise potential.

This should be your objective. When it is achieved, there will be scope for subtle fine tuning on your computer.

Let’s think that do you make one of these five bad habits photography?. Bad habits are easy to pick up, and difficult to break. If you tried so hard to give up the bad ones, you’re sure to see your technique, and your photos, just keep getting better and better. What other bad habits have you known?. Let’s share the other bad habits and your tips in the comments below.

Categories
Support Tips & Tricks

How To Make Beautiful Real Estate Photos

Real Estate photos is one of exciting subjects that attract many readers especially people who are interested in real estate. Great real estate is one of the most important elements that affect directly business sales. If you’re selling your home, of course you want it to be presented in the best possible things. However if you are looking to buy, you don’t want to visit a potential property only to discover it doesn’t look anything like the photographs listed. You must attend many factors such as: lights, furniture, space,.. in house.

If you own a shopping online or you don’t have many times to find and look at directly all real estate, you can easily find their information on Internet. Thus, photos are usually the first thing a potential buyer sees, and if that initial impression doesn’t result in an interest to visit the property in person, then getting a sale could be difficult. So, how to make beautiful real estate photos that attend the viewer’s attention?.fotosolution-Tips-How-To-Make-Beautiful-Real-Estate-Photos-02

There are beautiful homes with superb design, architecture, and lighting. And there are homes that lack all three of these. So, what is the goal of a residential interior photographer? They must make and transform the ugliest home look appealing and more special. This guide below will help you how to choose the right equipment, use proper lighting, prep a home for a shoot, and create an appealing composition or how to make the beautiful real estate photos.

The essentials things that you’ll need for interior photography include a tripod, electronic flash, and non-distorting lenses. You need to choose wide angle for shooting. If you can, you should use prime lenses over zoom lenses as this will minimize curvature.

Great architects understand the importance of light and design houses around this. If you are fortunate enough to have a well designed lighting system, you might be able to get away with only using existing light.

Let’s turn on all the lights in the house, it will help you add more depth and color variance to your photos. Be sure that the lights do not show up as reflections in pictures, windows, mirrors, or other reflective surfaces. You can use a simple tactic is to replace the incandescent bulbs with more powerful tungsten bulbs instead of using the external lighting such as flashes or strobes. These products are more consistent in color temperature with outdoor lighting.

If you use a portable flash, you need to avoid pointing the light directly at your scene. Instead, aim it at a wall or ceiling. This will diffuse and spread the light throughout the entire room. Use caution with colored walls as the color may transfer to the light. Let’s avoid the bright and large windows because they can be cause various problems in an interior shoot. They distract the viewer and can cause exposure problems. Planning your shoot when the sun isn’t at its strongest or entering directly into the window is an easy solution to this.

fotosolution-Tips-How-To-Make-Beautiful-Real-Estate-Photos-01

The goal of residential interior photography is to present an attractive, beautiful things of home. You’d be quite lucky if you can find a home with everything perfectly staged and orderly. But often you’re going to want to rearrange furniture and tidy up the area.

Every room has a key element that you will want to feature prominently in your photos. Let’s move around every room is a great way to lure viewers’ eyes to these special factors in room. Simply, you just give bright objects on these key elements (fireplaces, stairs, grand piano, etc.) will make them stand out from other objects in the room.

After you’ve completed all the pre-production phases of interior photography, now comes the actual photo taking! Below are a few tips for taking better residential interior photos.

Be Spacious

To make rooms appear more spacious, you should avoid shooting straight at walls. This will make the photo look flat and can also warp the perspective. You need to shoot into the corners of rooms. This will create more depth and make the room appear larger. Photographing from a lower angle and with a wider angled lens is also a great way to increase the perceived size of the room.

Choose Attention Grabbing Areas

There is no way to photograph a room in one picture. When you photograph a room, let’s select the interesting parts in that room. Remember that choose objects of importance or parts of the room with more interesting architecture. This will help your photos lure the viewer’s eyes in the first times.

Keep the Lines Straight

Be sure that the vertical and horizontal lines in your photos are straight. If your photos are appeared the crooked lines, it means that signs of poor technical skills and will detract from the image.

Know Your Goal

Are you photographing the house to feature the architectural design or the ambiance? Understand your goals for the photo shoot and compose accordingly.

fotosolution-Tips-How-To-Make-Beautiful-Real-Estate-Photos-03

With the basic guide, we hope that you can find it interesting. Fotosolution team – we provide image processing services from an image. Real Estate images will be cleaned, retouched and made to pop. Also, there might be the need to manipulate the images for their colors, size and density. You can create a products entry for multiples style with our support.

To receive free test sample or products with various colors and size without spending too much times, details of our quotation or any further information, please do not hesitate to contact us.

Now go experiment and show me what you can make!.

Categories
Support Tips & Tricks

How to Use Natural Lighting for Best Product Photograph

A best product photograph need to use many differents elements and natural lighting is one of essential factors to creat the success of product photograph. If you love photograph and are photographer, have you ever used natural lighting for your photograph?. Below is some useful tips what help you learn how to use natural lighting for best product photograph.

When you use an artificial light source, these can affect directly your product’s colour, while using natural lighting for product photos preserves the natural colour of the product. So, natural lighting complements products photos really well. However, the light changes from hour to hour and day to day. You can choice the suitable light for your product.

Select the camera angle

Choosing the camera angle is a important parts when you take the product photos with natural light. When photographing with window light at low ISOs your exposure can be upwards of several seconds, depending on your aperture.

fotosolution-how-to-use-natural-lighting-for-best-product-photograph-2

Suggestion: you should use ISO 100 to keep the noise levels down.

Choose the best time of day

As you know, the light changes from hour to hour and day to day. To create natural lighting for your own photos, you should shoot your photos at the brightest time of day. You can work in late morning and early afternoon – the times of beautiful sunlight and these gives sufficient lighting near windows or in the shade. In general, morning light is bright and has less colour, while afternoon and evening light often has a warm undertone and brings out greater contrast in your images. You can always neutralise the image and make it cooler in post-production if want a cool, dark image.

fotosolution-how-to-use-natural-lighting-for-best-product-photograph-1-1

Avoid reflecting of your shadow fall because this shadow will hide some details of your product and lost some of it sparkles. Avoid spending times to take your photos in sunset. Sunset is considered as golden hour to make a beautiful photos but use too much, it can create harsh shadows or be too warm for a simple product photo. If you’re shooting indoors, you should put your item in place where has lots of windows. Don’t forget that you can weaken the light source by covering the window with a thin, solid curtain or various types of paper. Be careful!

Remember that you need to focus on the product – it is the most important things to decide your best photos. Producing a nicely arranged photo of your product in use can be really effective and natural lighting can often produce beautiful effects but you must guarantee the quality of product.

Natural lighting will help your photos look great. We hope that our useful tips will bring you precious experiences to make beautiful product photograph and increase your online sales.

Categories
Support Tips & Tricks

Why Product Visualizations Improve Drive Sales

Are you not sure how to approach your customers or to improve business sales?. Product visualizations are one of new products that many business prefered to use. They are already changing the way many industries function from design to market. Imagine if your sales team could more accurately qualify and identify the prospects most likely to purchase your product?. Let’s product visualizations answer this issues. Here are this article that we will learn more about how product visualizations can change your business and help you increase sales.

If you use product visualizations, you’ve probably seen product before sleeking perfectly lit product shots. This will help your customers have a real look about your product. Besides, instead of explaining verbally what a product will look like, you can give potential customers a hands-on experience before the product has ever been manufactured.

fotosolution-why-product-visualizations-improve-drive-sales-1

3D Visualization

Anyone who views your visualization can spin your product 360 degrees. So, let’s apply unlimited configurations and variations and zoom in sharp HD.

There’s a direct correlation between the richness of your product visualization and completed sales. When your customers see your real and concrete product more, you sell more because this will help them have big belief for your product.

As your customers can personalize your products and view any combination from any angle, the choice of customer are very high and your sales are more improved.

If you use product visualizations, you deliver detailed understandings of your product’s technical viability. With product visualization, this will allow not only architecture, designer, … However, your customers to see product and save times instead of reading information on it.

Moreover, using 3D visualization also bring many other advantages. It helps creators add animated effects and extra details in post-production to make a product or service appear more attractive. It allows engineers and concept artist to think out out of the box. In addition, 3D visualization come up with content ideas never before imaged.

fotosolution-Why-Product-Visualizations-Improve-Drive-Sales-

In conclusion, product visualization are effect product that can increase your sales. It also create a better look to attract your customers. Have you ever tried to use product visualization. Now, let’s learn more about how you can sell more by using product visualization?. Finally, if  you have questions or concerns, please do not hesitate to contact us today for a free consultation or let us your thought below.

Categories
Support Tips & Tricks

5 Tips To Own Best Nature Photography

Nature photography always friendly subject that win popularity. A best product photograph need to use many different elements. Natural lighting is one of essential factors to create the success of product photograph. If you love nature photos or you are photographer, have you ever used natural lighting for your photograph?. Below is some useful tips what help you learn how to make better nature photography.

Natural light is extremely straightforward: it’s daylight. You can work in late morning and early afternoon: the times of beautiful sunlight. These gives sufficient lighting near windows or in the shade. If you take a nature photography, viewers loves a great nature photo. It’s easy for viewers to put themselves into the picture. Even if they’ve never been to the mountains, people enjoy looking at pictures of mountains. It transports them, at least for a brief moment, to a peaceful place. So in order to help you get the most out of the time you spend outdoors with your camera, here are some fundamental tips for taking better nature photos.

Get close, get closer

This is a visual directive, not simply about moving closer. You can, of course, get visually closer to a subject by zooming in with a zoom lens. However, for wildlife photography, you need a big telephoto.

http://admin.admin.admin.admin.admin.admin.fotosolution.com/5-tips-to-own-be…ture-photography/

That means using a digital single lens reflex (SLR) that can hold at least a 300mm focal length lens or one of the large-zoom compact digital cameras that have an equivalent focal length of 300mm or more.

Look up, look down and look all around

There are many wonderful things to photograph above our heads, and even greater opportunities for creative photography. You can use interesting and dramatic cloud formations, and incorporate clouds in your shots of other natural scenes. Remember that hardly anyone likes looking at an uninteresting sky, so try and compose your shots with that in mind.

fotosolution-Tips-for-better-the-nature-photography-12

It doesn’t stop at merely looking for cool cloud formations either. Get instant creativity in your shots by using leading lines, and vertical perspectives to give your images a uniqueness, that is sure to catch the attention of your viewers. The key thing to remember here, is that your goal is to show things in nature in ways that most people don’t get to see, or have not even considered looking for in the first place.

Be patient to capture the best moments

As you know, the light changes from hour to hour and day to day. To create natural lighting for your own photos, you should shoot your photos at the brightest time of day. The perfect glint of sunlight playing off your prize rose bushes will not happen any sooner or later than you want it to. Keep your camera at the ready, and don’t force the shot. You may arrive five minutes too late for a great shot, but you may be five minutes early for the perfect shot. A small suggestion for you, you can work in late morning and early afternoon – the times of beautiful sunlight and these gives sufficient lighting near windows or in the shade. In general, morning light is bright and has less color, while afternoon and evening light often has a warm undertone and brings out greater contrast in your images. You can always neutralize the image and make it cooler in post-production if want a cool, dark image.

Understand the feature of nature

Nature have pure and simple beauty that bring to you many advantages when shooting photos but we also confirm one thing that you cannot fight the changes of Mother Nature. You should have plan on working with the elements of the natural environment you photograph because simply, animals, trees, bushes, grass,…everything associated with nature functions uniquely in different weather conditions. If you’re looking for a “money” shot, you need to understand the conditions you’re working in, and the subject matter you are photographing.

You can understand the feature of nature as well as the main subject that you want to capture to have a fantastic shooting.

Use and Capture The Light

Light is one of the important factors that contribute the success for beautiful photography. It is the basic force behind all nature photography. It illuminates your subjects, and brings shadows and contrast to your photos. Learning to understand the nature of light is a lifelong journey for any photographer. And using the natural light is one of the best way to help your images become more powerful and more prominent. In addition, direction of light is also very important, and can make a place or object look completely different depending on the angle of the sun. You can choose correctly direction and find as well as try on many different locations at varying times of day, this will help you find and choose the most beautiful moments.

fotosolution-Tips-for-better-the-nature-photography-13

Follow these five simple tips and make the most of your time shooting out in our amazing natural world. Be sure to share them in the comments below as well as your nature images. Moreover, if you have great tips, don’t hesitate, let’s share your experiences for us by give your opinions below.

Categories
Support Tips & Tricks

Why should you buy Mirrorless cameras?

Mirrorless cameras have been appeared on the market for a decade. They have really begun to make waves in the past few years. With many amazing features, Mirrorless cameras are more and more attractive and meet the need of users. Mirrorless cameras are usually lighter and smaller than their DSLR counterparts. They are good focus speed and and better photographers when focusing during video recording.

Today, choosing a mirrorless camera can be a daunting task with lots of options. Here we will show and give you the information you need if owning Mirrorless cameras. Buying your new cameras should a nice experience, let this guide help you have corrective choice.

Size and Weight

The easiest thing we can mention that the size of Mirrorless is small and light. It is very convenient for users. Using Mirrorless cameras – a lighter camera makes you for less strain on your shoulders and neck during a long day of shooting. In addition, the basic principles of Mirroless don’t use mirroless, so its body are slimmer.

Autofocus

Another strong point of Mirrorless camera is autofocus. Once considered a weakness of mirrorless cameras especially compared with the autofocus speed of DSLR. In fact, all mirrorless cameras assess focus from their imaging sensor rather than a separate module. They are able to be more accurate and consistent, especially when focusing wide-aperture lenses.

fotosolution-why-should-you-buy-mirrorless-cameras-1

So if you plan on shooting a lot of video or often need to hold the camera below waist level or above your head and compose. Using the rear screen, you’ll get much faster focus times with a mirrorless camera, especially when locking onto subjects near the edges of the frame.

Video quality

Mirrorless use hybrid autofocus mechanism (hybrid AF) and with superior autofocus in most models. Mirrorless cameras provide the best results for most filmmakers. Moreover, mirrorless cameras focus with continuous contrast-detection, you can maintain focus on moving subjects in your frame.

fotosolution-why-should-you-buy-mirrorless-cameras-2

Especially, when you use video camera, you will be able to control the depth of field via the aperture, and also manually focus your shot. This gives you greater creative control. Besides, the duration of Mirrorless video is better than DSLR’s duration, maybe lengthen from 30-40 minutes to meed your demande.

Superb lenses

Mirrorless camera systems offer an impressive range of lenses. The Micro Four Thirds mount alone boasts more than 60 compatible lenses. Mirrorless models are more restricted, offering access to a small number of lenses from the camera maker. If you choose Mirrorless camera, you may find that there are more modern, more affordable lenses available for some mirrorless systems than are available for the big DSLR brands.

fotosolution-why-should-you-buy-mirrorless-cameras-3

With these advantages of using Mirrorless cameras, we believe that you will find it interesting, however, Mirrorless cameras have also some disadvantages that you are interested in and attend when buying a new cameras.

If you are compared with DSLR cameras, the autofocus speed of DSLR are better and faster than Mirrorless. Mirrorless cameras were restricted to a technology called contrast detection, which uses the image sensor to detect the highest contrast. That’s the reason why the contrast detection is slower than DSLR.

Furthermore, the need to constantly power the sensor and screen while shooting, combined with attempts to capitalize on the size benefits of mirrorless. It mean that battery life is much more limited on most mirrorless cameras.

Mirrorless cameras are better than they’ve ever been before and we’ve highlighted the best models and the weak points that we’ve experiences here. With amazing sharing here, we hope that you can now be willing to choose the mirrorless camera that best suits your needs. If you have amazing sharing about Mirrorless cameras. If you have questions or concerns, please do not hesitate to contact us. Let us your thought below!.