Categories
Support Tips & Tricks

Using a Poor Photos Losing Your Sales?

” I don’t care how the quality of your product are?, are your product good or bad?, but simply that If they don’t look good and don’t attract to me, I won’t choose and buy it”.
A poor photos will affect directly to the quality of product event to losing your sales, have you ever posed this question when your sales showing signs of decline. Or how does it affect your sales?. Let’s find the best correct answer for this problem. In modern times, owning a website sometimes proves to be vital to a business. Your products are good. But they just won’t sell well online if your photographs don’t do them justice. From multinational corporations to local shops, having a good photography is a must if you want to ensure that your products reach the customers.

As far as we know, customers aren’t able to touch whatever you’re selling, good photos will a crucial key to retain and attract customers. It helps also you increase your sales. That’s exactly why product photography is so important in swaying a potential buyers purchase decision. Your images need to give them an experience as close to “real life” as possible.
In this article below, we show you 5 simple tips to improve your eCommerce product photography.

Use an Interesting Background

fotosolution-using-a-poor-photos-losing-your-sales-02

You don’t have to stick to the plain background rule to direct the focus to the product. The background should not compete with the product. Choosing background with clean, simple layout and it’s also easy to maintain consistency. Or you can stage unique props and background with your main product in the foreground.

Lighting

fotosolution-using-a-poor-photos-losing-your-sales-03

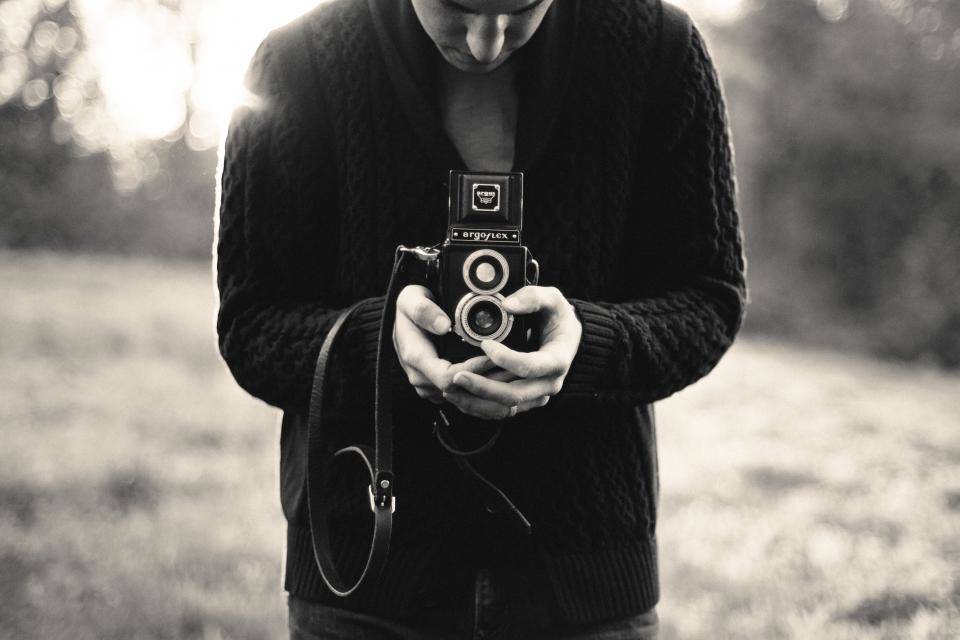
Lighting is one of important factors that contribute to the success of your photography – good or bad. It contains nature light and artificial light. Natural light can be the best choice for some products. It’s soft and imparts color in a way that artificial lighting doesn’t. This is without a doubt the toughest challenge in making good product shots. However, don’t worry, you don’t need to outfit your house with an elaborate studio of flashes and reflective screens. It doesn’t have to be expensive or difficult to get great results. Because for some products, simply using natural light may be a better option.
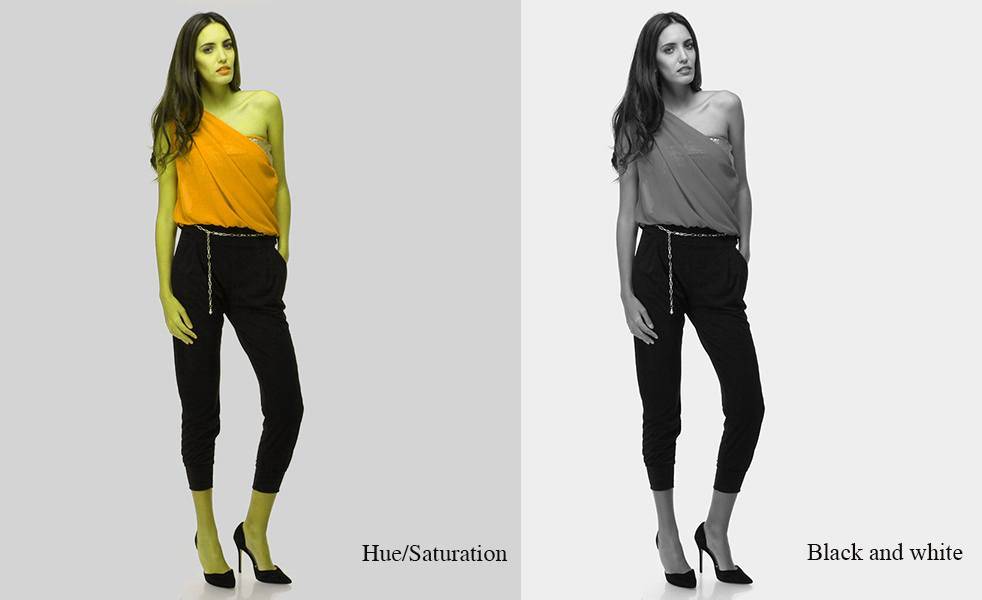
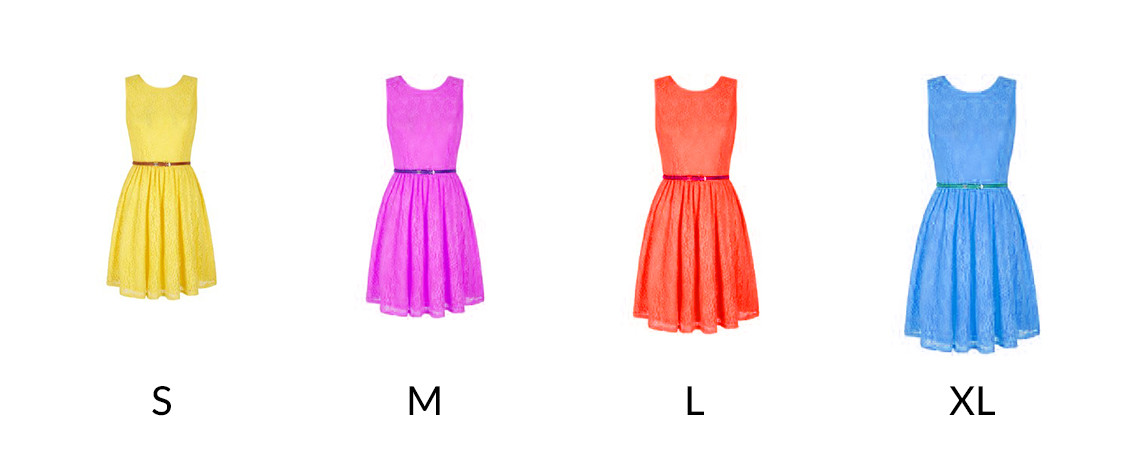
Color

Using color for product photography is one of the most important factors to make a great picture. Beautiful and eye – catching color will attract and seduce viewer’s eyes from the first moment. Every product will have a color subject to help your product become more nominal.
You can refer: The Best Colors For Food Photography with food – main topic.
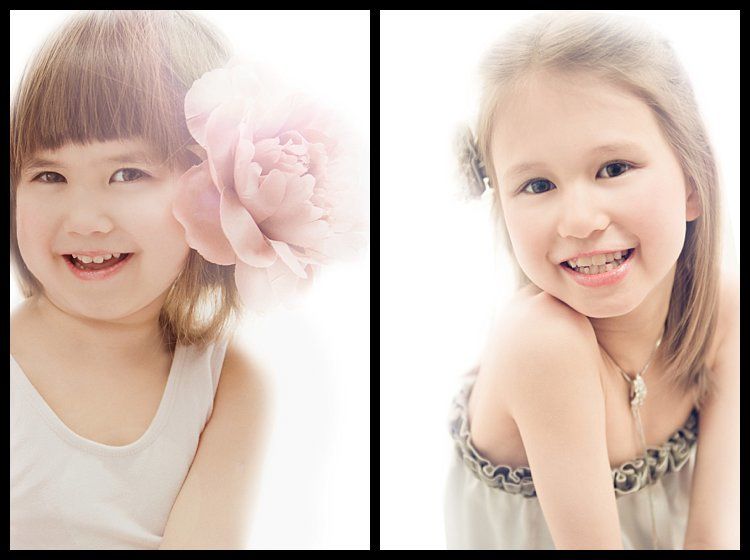
fotosolution-using-a-poor-photos-losing-your-sales-04

Attention to Detail

An essential starting point for any product photograph is that the subject itself should be clear and sharp even the smallest detail is very important. Firstly, you can express clear idea of what you’re selling, secondly, you also prove with your customer that you have nothing to hide. With clothing in particular, it’s important to show high-res images to emphasize you’re products are made properly and of good quality. Let’s observe carefully to ensure your product photography that is the best.

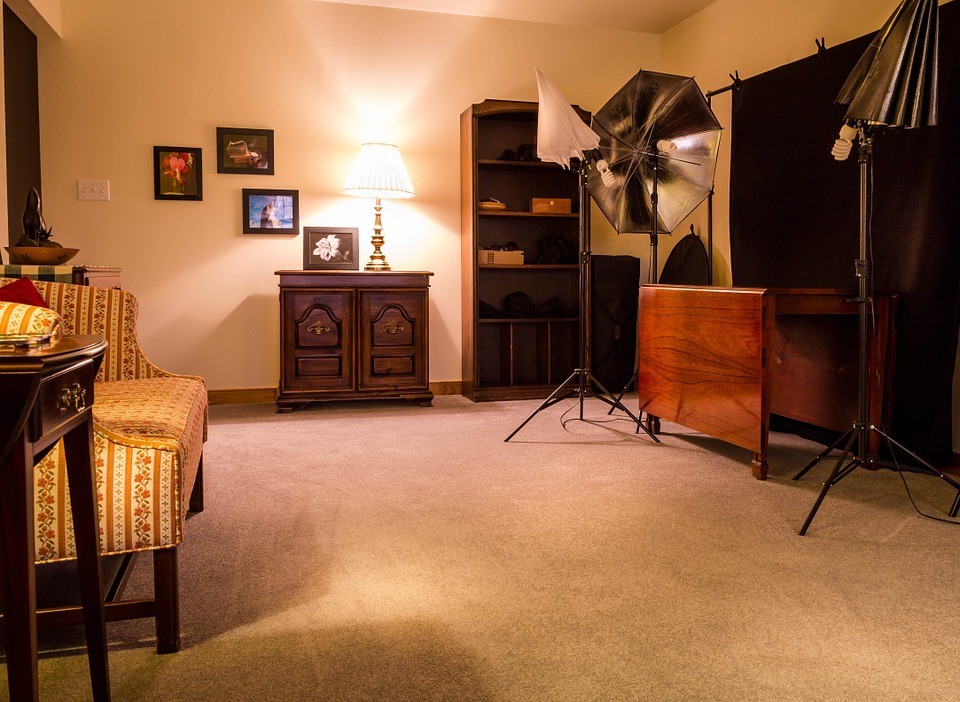
Quality photography and Show


fotosolution-using-a-poor-photos-losing-your-sales-05

Are you so keen on trying to capture the whole product that the most important aspect of it gets lost in the image?. For example, if your product is too small in the photograph or the quality of photography is not good, these will affect directly to your sales. Be-sure that your camera and lens allow you to get close enough to the product and ensure that the finally image quality is the best.
When you show your product on website, make sure that you show anything you mention in a tag line or the product description. The best way is that show your product in many colors and have multiple shots of the product in use. The customer gets a good sense of what it looks like in a variety of situations.
Product photography is not easy. You should spend many times and resources to do it well, but all the time you’re making do with poor quality images, you’re losing sales. Many small business believe that professionally created images are beyond their budget. Here are 5 basic tips to help business improve the quality of product photography.

If you feel worry about this problem or have any questions or concerns, please do not hesitate to contact us and comment below this post. Share this article to your friends especially who are interested in photography.

Categories
Support Tips & Tricks

10+ Awesome eCommerce Shopify Themes For Fashion Stores 2016

Website is an amazing online tool that online entrepreneurs and merchandisers always interested. It is a very powerful and effective marketing tool that can surely take your business to the successful future. Creating a website with an online shop is not much of a problem these days, but it still requires a trick or two to stand out from the rest, to be unique.
For setting up your online store, the easiest way to get a great looking website online is by using Shopify. It is a great choice for the entrepreneurs. However, with so many options for free and paid eCommerce Shopify themes available out there, you would not be blamed if you are a bit confused about which one to shortlist or choose for your eCommerce website. So, to have a stylish and professional shop, take a closer look at more than 10 awesome eCommerce Shopify Themes for Fashion Stores 2016.

True T-Shirts eCommerce Shopify Theme

fotosolution-10-awesome-ecommerce-shopify-themes-for-fashion-stores-2016-01

Custom T-Shirt Shopify Themes are the perfect solution for both business owners and webmasters especially who prefer simplicity and proven user interface practices. This themes helps visitors find their way around your site with the help of a minimalist hamburger menu, ghost buttons and an additional menu in the footer.Therefore, browse the beautiful custom t-shirt themes and select the one that suites your needs.

Download/Preview/Get Hosting

Plus Size Clothing eCommerce Shopify Theme

fotosolution-10-awesome-ecommerce-shopify-themes-for-fashion-stores-2016-02

If you want to create a website in order to sell a collection of clothes, Plus Size Clothing Shopify Theme will a crucial key for your projects. Fashion and beauty items are those things that are so much loved by all women. Using this theme will allow customers to find easily products what they are interested in.

Download/Preview/Get Hosting

Twen – Responsive Fashion eCommerce Shopify Theme

fotosolution-10-awesome-ecommerce-shopify-themes-for-fashion-stores-2016-04

Twen – Responsive Fashion Shopify Theme is a the best design shopify 2016 for business owners and webmasters. The theme has a simple, clean and clear layout. If you want to have a very unique and attractive design and trying to make your way among numerous store owners, Twen is a great starting point for you.

Download/Get Hosting

Fashion Room eCommerce Shopify Themes

fotosolution-10-awesome-ecommerce-shopify-themes-for-fashion-stores-2016-05

Fashion Room Shopify Theme is great choice for business and webmasters. Using this theme will help your customers find the products matching to their expectation faster with the help of the product filtering system that is powered with the integration of modules: Categories list, Filter based on product attribute,..The Theme Customize tool lets you change settings for most of the pages, sections in the site based on predefined parameters. Not only that, the theme has four premade unique demos with different layout structure, style and color theme.

Download/Preview/Get Hosting

Wendy – Responsive Fashion eCommerce Shopify Theme

fotosolution-10-awesome-ecommerce-shopify-themes-for-fashion-stores-2016-06

Wendy – Responsive Fashion Shopify Theme is a clear and stylish design with fully responsive width that adjusts automatically to any screen size or resolution, available for business owners who want to sell clothing, fashion, high fashion, men fashion, women fashion, accessories, digital, kids, watches, jewelries, shoes, kids, furniture, sports, tools. Homepage is designed to gain the attention of the visitors with a large slideshow above and below Mega Menu. Slideshow is great with smooth transitions of texts and nice images.

Download/Get Hosting

MODE – Great Fashion eCommerce Shopify Themes

fotosolution-10-awesome-ecommerce-shopify-themes-for-fashion-stores-2016-07

Mode is a new solution for business owners or webmaster who want to build online store in smartest and most professional way. This theme have a creative design and variety of premade design concepts to show off products in smartest ways and build professional Fashion store with all the necessary functionalities such as: Product listing, product detail, add to cart, checkout, quick view, etc. Moreover, the product filtering system is powered with the integration of modules: Categories list, Filter based on product attribute, New products, Related products… so the visitors can quickly get what they are interested in.

Download/Get Hosting

Apparel Responsive eCommerce Shopify Theme

fotosolution-10-awesome-ecommerce-shopify-themes-for-fashion-stores-2016-08

If you are interested in fashion services or want to open the fashion store online, Apparel Responsive Shopify Theme will a great suggestion for your business ideas. This is a fully responsive design intended for eCommerce sites selling fashion and beauty items.It designed a wide ranges with modern features like Newsletter Subscription Pop-ups, where you can give your customers their new information regularly. The kit also includes product badges to indicate the status and the value of the product that could gain some attention without trying. The users can also enlarge the product images to take a closer look. Especially, Thanks to advanced customization options and a set of pro features, this theme can be modified in so many ways. These are useful for your projects.

Download/Preview/Get Hosting

Fitshop eCommerce Shopify Themefotosolution-10-awesome-ecommerce-shopify-themes-for-fashion-stores-2016-09

Fitshop Shopify Theme is a Responsive Shopify Template for business owners, webmaster or customer who are interested fashion, clothes, high fashion,…This theme is fully responsive web design, you can display it on all electronic devices perfectly such as Desktop, Laptop, Ipad, Iphone, Computer. These are very useful and easy to use for customer, help them can visit site whenever and wherever they want. Especially, this theme is designed new technology such as Font Awesome 4, CSS3, HTML5 and full of essential features and functions for you to set up a business store.

Download/Preview/Get Hosting

Fasony Awesome eCommerce Shopify Theme

fotosolution-10-awesome-ecommerce-shopify-themes-for-fashion-stores-2016-10

Like as Fitshop Shopify Theme, Fasony Awesome Shopify Theme is other great choice that are designed new technology such as Font Awesome 4, CSS3, HTML5 and full of essential features and functions for you to set up a business store. Talk about Fasony Awesome Shopify Theme, we will remember famous and popular products such as: clothing,cookery, accessories, fashion, high fashion, men fashion, women fashion, digital, kids, watches, jewelries, shoes, bags, glasses …It is designed on all types of devices including smartphone, Ipad and these will help your customer can visit site whenever and wherever they want.

Download/Get Hosting

Zhigan eCommerce Shopify Theme

fotosolution-10-awesome-ecommerce-shopify-themes-for-fashion-stores-2016-11

Zhigan Shopify Theme is designed in accordance with modern standards, this professional combines a compelling look with a great functionality and smooth navigation that ensure the attraction to your customers from the first sight. You only need to do some minor design adjustments to make it match with the corporate style of your business. In addition, if you want to change your site’s palette, Switcher feature will help you turn into easily.

Download/Get Hosting

Bella Creative eCommerce Shopify Theme

fotosolution-10-awesome-ecommerce-shopify-themes-for-fashion-stores-2016-12

Bella Creative shopify theme is one of the newest shopify that we want to show you today. It is designed modern feature with smooth and modern CSS, available for selling clothing,cookery, accessories, fashion, high fashion, men fashion, women fashion, digital, kids, watches, jewelries, shoes, bags..Bella Shopify Theme has included 3 defined layouts for homepage to give you the best selections in customization. Home page is designed eye-catching with large slideshow above and below Mega Menu. Slideshow is great with smooth transitions of texts and nice images. In addition, you will feel surprised with other features like Wish List, Product List, Product Details, Product Hover & Quick View, Grid View & List View, Block-Color, Add to cart, Check out, SEO Optimization,… So, if you are looking for new topic for your business projects, let’s choose Belle Creative Shopify Theme as your perfect companion.

Download/Get Hosting

Categories
Support Tips & Tricks

10 Best Creative eCommerce Fashion Magento Themes

In the every era, fashion become modern trend and passion of all age especially eCommerce age. They want to look different and fashionable. People focus their dressing, hairstyle, footwear, walking style. way of talking and behavior. So, fashion business racks up a lot of money, so obviously everyone wants to have a great opportunity to owner delicious cake. Facing competition from everywhere, open your privacy store will a smart strategy, whether an established one or just a freshly newcomer, to have a remarkable online presence. A good looking and well functioning website would suffice. eCommerce Fashion Magento Themes are great suggestion for your ideal.
Magento is is the eCommerce software and platform trusted by the world’s leading brands and an brilliant easy type to use with over 150,000 online retailers and this ranges from small companies to major multinationals such as Samsung and other corporate giants. That good proof would be enough to show you the power of Magento. Today, we will show you 10 best creative eCommerce Fashion Magento Themes. Responsive fashion themes are all designed to bring elegance to your Fashion shop, clothing shop, sportswear shop, accessories shop, etc. These themes will bring your e-store to the highest level, impressing your customers with clear and precise structures.
Here are 10 best creative eCommerce Fashion Magento Themes that can bring your eCommerce store a fashionable and modern design.

Glory Shop – Multipurpose Magento Theme

fotosolution-10-best-creative-magento-ecommerce-themes-for-fashion-shops-10

Glory Shop Magento Responsive Theme is specifically developed for shoes, books, lighting, jewelry, cosmetic, underwear, designer clothing, charm shop, furnishings, toys, kids and Multipurpose shops. Theme includes various styles such as creative, unique, flat, material design, clean, elegant, minimal, modern, outstanding, eye-catching, retro, vintage. This is looking excellent with colors mix and design. All sub pages are customized and available for your project.

Download/Get Hosting

Focus – Multipurpose Responsive Magento Theme

fotosolution-10-best-creative-magento-ecommerce-themes-for-fashion-shops-04

Focus multipurpose Magento theme offers you a lot of advanced features that will easily lift your online store to another level. It’s extraordinarily customization, easy to use and absolutely responsive. This Magento theme is suitable for each sort of retailer. Using Focus Multipurpose Responsive Magento Theme is a perfect solution for your fashion, clothing, and beauty stores.

Download/Preview/Get Hosting

Style – Fashion Clothes Magento Theme

fotosolution-10-best-creative-magento-ecommerce-themes-for-fashion-shops-08

Style is a ultra-modern and today’s trend garments Magento Theme that is supposed to carry a polished look to your trend outfit such as beauty, healthcare or any other net store. The theme is incredibly flexible and dynamic.

Download/Get Hosting

F2 – Fashion Boutique Magento Theme

fotosolution-10-best-creative-magento-ecommerce-themes-for-fashion-shops-01
F2 is a trendy and modern Magento Theme that was developed with the latest web technologies. It fits perfectly for the fashion-related stores. Its trendy and stylish card-based layout features an edge-to-edge slider, a set of product banners and featured items. With the purpose to visually separate different content blocks from each other, the theme’s developers mixed bold banners with the sets of Special and New products, which are surrounded by white space. This theme has an elegant and attractive look thanks to the combination of colors, fonts and the logical arrangement of design elements. This theme is suitable for your eCommerce project.

Download/ Preview/Get Hosting
Hermes – Multi-Purpose Premium Responsive Magento Theme

fotosolution-10-best-creative-magento-ecommerce-themes-for-fashion-shops-09

Hermes is a Premium Responsive Magento theme that suitable for e-commerce websites especially for each sort of retailer. Hermes – Multi-Purpose Premium Responsive Magento Theme is versatile and sensible design and can be compatible with all of mobile devices. With Hermes Multi-Purpose premium responsive Magento Theme, you can waste lots of time or need to many techniques to adjust it. Everything is customized easily especially 6 main designs will give you more choice for your store.

Download/Get Hosting

Blanco – Clothes Magento Theme

fotosolution-10-best-creative-magento-ecommerce-themes-for-fashion-shops-07

Blanco is creative and easy to customize Magento Clothes Themes. It’s designed to easily change color and background. This eCommerce Fashion Magento Themes template is one of the most powerful and flexible templates at Magento store and completely compatible with heavy stores which have a variety of languages and currencies to create convenience for customers around the world.

Download/Get Hosting

Ves Fashion Responsive Magento Theme

fotosolution-10-best-creative-magento-ecommerce-themes-for-fashion-shops-05

Ves Fashion Responsive Magento Theme is a perfect choice for establishing any kind of business or eCommerce website. This eCommerce Fashion Magento Themes is modern and trendy and comes up with pure white and black. With combination of colors, textures and logical arrangement, this Magento will perfectly reflect your amazing products especially for your Fashion Shop, Clothes Store, Shoes Store,..

Download/Get Hosting

Vini – Fashion shop Magento 2 Theme

fotosolution-10-best-creative-magento-ecommerce-themes-for-fashion-shops-02

Vini Magento theme has minimalist design with ghost buttons, thin fonts and brief texts that’d make it a perfect solution for fashion stores. Internet site layout is highly visually appealing. This feature allow the visitors to be easy time with the navigation. The items are also can be tracked very easily with the search engine. This clever design will help customer can put up your nice photos of your items anywhere and in any size.

Download/Preview/Get Hosting

ALIKX Magento Theme

fotosolution-10-best-creative-magento-ecommerce-themes-for-fashion-shops-03

If you have a great business plan related to fashion, accessories, beauty stores,..ALIKX, a stylish, trendy and fully-featured Men’s Clothing Online Magento Theme will a good choice for you. The theme points a easy and minimalist design, with the sensible use of white house, which brings the shop’s merchandise to the foreground.

Download/Preview/Get Hosting

Milano Responsive Magento Fashion Theme

fotosolution-10-best-creative-magento-ecommerce-themes-for-fashion-shops-06

Milano is a Responsive Theme is designed especially for your fashion, clothing shop. It’s extremely customization, easy to use, features single click activation and all of the settings are store view independent. This eCommerce Fashion Magento Themes will a great solution for all types of eCommerce website themes.

Download/Get Hosting

Categories
Support Tips & Tricks

19 Amazing Sites To Find Free Best Images

Photography or good image have always been an integral part of life especially of web design. But finding images to use can sometimes be difficult because some of them cost money. To meet the need of customers, there’s been a growing number of websites with beautiful stock photography popping up all over the web and best of all, they’re free. And you can copy, modify, distribute and perform the work, even for commercial purposes, all without asking permission.
There are a variety of places where you can find free photos that are available for public use. Below are 19 amazing sites to find free best images, let’s choose one of them to take the best photos yourself.

Unsplash

fotosolution-19-amazing-sites-to-find-free-best-images-01
Unsplash offers ten new photos every ten days via an email subscription as well as simply on their website. It is perceived as one of collections with free high-resolution photos and best source for stock images. Using “Unsplash” you can copy, modify, distribute and use the photos for free, including commercial purposes, without asking permission from or providing attribution to the photographer or Unsplash.

Pixabay

fotosolution-19-amazing-sites-to-find-free-best-images-02
Pixabay offers over 530,000 free best images for both your personal and commercial use. Pixabay’s collection includes not only photos, but also illustrations and vector images. Especially, this sites allow you use images as social media images, that’s useful for your work.

Picjumbo

fotosolution-19-amazing-sites-to-find-free-best-images-03
Picjumbo is a collection of totally free best images and illustrations, available for personal or commercial use. The images are of high quality with cover a variety of scenes and topics, you can choose and use agreeably for your design as well as your collection. In addition, you can either click through the different categories of over 600 high resolution photos for free, or download a pack that includes all images.

IM Free

fotosolution-19-amazing-sites-to-find-free-best-images-04
IM Free offers thousands of high-resolution images in various collections, suitable for web design resources, all for commercial use. However, to use images of IM Free, you can notice that attribution to the creator is required.

Gratisography

fotosolution-19-amazing-sites-to-find-free-best-images-05
Gratisography is one of the most interesting of the free stock photo sites you can use on your personal and commercial projects. This sites are build by talent photographer, Ryan McGuire. You can not only update new photos every week but also share through McGuire’s Twitter and Facebook.

Negative Space

fotosolution-19-amazing-sites-to-find-free-best-images-06

Negative space one of great and free stock photos that provide 20 new photos every week. These free best images are sort by category, copy space, position, and color. Moreover, you can update and add new photos by following them on Facebook, Twitter, and Instagram.

StockSnapfotosolution-19-amazing-sites-to-find-free-best-images-07

StockSnap is a great choice of customers who want to find beautiful free stock photos and high resolution images.The free images can be sorted by date added, trending, number of views, number of downloads, as well as through keyword searches. It is perceived as the greatest characteristic of StockSnap.

Life of Pixfotosolution-19-amazing-sites-to-find-free-best-images-08

Life of Pix is a collection of free high-resolution stock images with no copyright restrictions which can be used for commercial or personal use.

Splitshirefotosolution-19-amazing-sites-to-find-free-best-images-09

Splitshire is a great collection of free best images that allow customers to use free for personal and commercial use.

Little Visualsfotosolution-19-amazing-sites-to-find-free-best-images-10

Little Visuals is a special and unique site that allow customers to run according to more of small-scale, handpicked approach than most stock – photo sites. In addition, to get 7 new photos sent to your inbox every week, let’s follow, download images of sites or register personal account.

Getrefefotosolution-19-amazing-sites-to-find-free-best-images-11

If you love photographer related to architecture and landscape’s topic, Getrefe will a great choice for you. Getrefe is a collection of beautiful images made by talent photographer who travel throughout Europe.

Freestock

fotosolution-19-amazing-sites-to-find-free-best-images-12

Freestock offers a wide range of high quality photos, you can use them for personal and commercial projects.

New Old Stock

fotosolution-19-amazing-sites-to-find-free-best-images-14

If you’re looking for more retro photos for your project, New Old Stock is a collection of antique photos who is for you.

SuperFamous

fotosolution-19-amazing-sites-to-find-free-best-images-15

Superfamous provides you with free stock photos related to nature especially rocks and stones. These images in SuperFamous have high-resolution images for personal and commercial use with credit.

Jeshoots

fotosolution-19-amazing-sites-to-find-free-best-images-16

Jeshoots is another great site with free high-quality stock photos. In collection of Jeshoots have many different topics as: people, animal, food or architecture. You can find easily favorite topic available for your projects.

Snapographic

fotosolution-19-amazing-sites-to-find-free-best-images-17

You can search for the categories what you need to use for your projects. All of the images on the website are taken by Thomas Mühl.

Epicantus

fotosolution-19-amazing-sites-to-find-free-best-images-18

With images on Epicantus site allow you use these hi-res photos for your landing pages, blog posts and designs.

Kabooms Pics

fotosolution-19-amazing-sites-to-find-free-best-images-19

Kaboom Pics offers a wide variety of high quality free stock photos with many topics as: architecture, fashion, food,…You can use free these images but cannot be sold or redistributed.

Picography

fotosolution-19-amazing-sites-to-find-free-best-images-20

Picography is another blog-style site filled with photos that are high-resolution, made by talent photographers. Especially, you can also submit photos to be included in the gallery if you like.

Categories
Support Tips & Tricks

How to remove background in Photoshop CS6 for the beginner

You know what one of the most important photo design is?. You always want to make your images become more stunning and perfect before the viewer’s eyes while posting product. But we know that when happening the break-down , some unwanted elements may be present in the background you’re using . That’s  reason why you should remove the background to enhance its quality. Also a clear background will highlight the details of your image. So, wondering how to remove background from images? Looking to cut out the background from an image, but aren’t quite sure how to do it?. Today, we will show video that guide you how to remove the background in Photoshop CS6 for the beginner.

You can refer writing – document: http://admin.admin.admin.admin.admin.admin.fotosolution.com/learn-how-to-remove-background-from-images/ to be able to understand it fully.


Categories
Support Tips & Tricks

Tips: 3 Easy Photoshop Edit You Should Know

Photoshop edit is the changing of images. These images can be digital photographs, illustrations, or prints. Edit the photos is one of the necessary process for photographer before posting production. In other words, the image editing process has become the photographer’s responsibility since the advent of digital photography. However, we always forget or make a small mistake in working process because we always think that editing photos is very easy and familiar. So, to help you to edit photos, today, we will present you 3 easy Photoshop edit that you should know.

fotosolution-real-estate-services-day-to-evening-07
Before we talk about 3 quick Photoshop edit, we will request somethings that you need to do in-camera, which will save you time in post-production.
– If you don’t want to spend time cleaning up dust spots on your images, you should make sure your lenses are clean.
– Make sure your sensor is clean, get your sensor cleaned when you start to notice sensor spots on your images.
– Use a tripod, straightening images in Photoshop or Light-room wastes your time.
– Choose your image is in focus and sharp. Zoom in on your LCD screen to be sure, if not, retake the shot.
The main mission with image editing is to take your good images, and make them look spectacular. So, here are some very quick Photoshop edit you can do to your images.

#1: Using Levels Or Curves

Levels and curves is two useful tools that help photographer edit photos or pictures. Every tools have different advantages for editing images. And this is something of an ongoing debate among photographers. So, what is levels or curves tool?.

Levels is a great tool to quickly make exposure adjustments to your image. Curves gives you the same ability, but in much more detail. If you use Levels tool for editing images, you need to go: image-> adjustment-> levels, the keyboard shortcut is CMD>L on a Mac and CTRL>L on a PC, OR add it as an adjustment layer for non-destructive editing.

fotosolution-Tips-3-Easy-Photoshop-Edit-You-Should-Know-01
The Levels tool will help photographer adjusts the exposure in each of them separately. The reason why this is important, is because exposure affects color. For example, if you make your exposure in a scene darker, your colors will become more saturated, if you brighten the exposure, your colors will saturate.
And how to use the curves tool?. Photoshop curves tool is perhaps the most powerful and flexible image transformation, yet it may also be one of the most intimidating. Since photographers effectively paint with light, curves is central to their practice because it affects light’s two primary influences: tones and contrast. If you use Curves tool for editing pictures: image->adjustment->curves.

#2: Hue and Saturation and Brightness

After using Levels or Curves, you move into Hue and Saturation by clicking image->adjustment->hue and saturation. Hue, saturation, and brightness are aspects of color in the red, green, and blue scheme.fotosolution-Tips-3-Easy-Photoshop-Edit-You-Should-Know-02
The Hue slider is used if you want to change the colors in your image to something different. If you leave the box at the top on Master and adjust the Hue slider, all the colors in the image will change, making your image look a little funky and weird, but this could be fun too! The real power of the Hue slide comes into play when you select a color channel from the drop down box. If you click on the arrow next to Master, all the color channels will drop down see screenshot left.

This is really useful if you want all the reds to look a little more orange in your scene.
The second slider is Saturation which affects how rich your colors are in your image. It is an expression for the relative bandwidth of the visible output from a light source. If some of your colors seem too bold, you can select the appropriate color channel and move the Saturation slider to the left. You can select each color individually and make the necessary adjustments.

fotosolution-Tips-3-Easy-Photoshop-Edit-You-Should-Know-06

                                                                                                         Image after Hue and Saturation adjustments have been made
The last slider is brightness. It is a relative expression of the intensity of the energy output of a visible light source. It can be expressed as a total energy value, or as the amplitude at the wavelength where the intensity is greatest. Normally, almost photographer use Hue and Saturation instead of brightness because Hue and Saturation are closer to the user.

#3: Brightness and Contrast

When you have made your color adjustments using Hue and Saturation, you might need to boost the brightness a little. If you use the Brightness and Contrast tool, you need to go: image->adjustment->brightness and contrast. There is no keyboard shortcut to this one should be used sparingly, do not make big adjustments using it.

fotosolution-Tips-3-Easy-Photoshop-Edit-You-Should-Know-03
The Brightness/Contrast adjustment lets you make simple adjustments to the tonal range of an image. Moving the brightness slider to the right increases tonal values and expands image highlights, to the left decreases values and expands shadows. The contrast slider expands or shrinks the overall range of tonal values in the image.
Using brightness and contrast, you can also choose:
Layer > New Adjustment Layer > Brightness/Contrast. Click OK in the New Layer dialog box.
With these Photoshop edit tips will help you edit quickly photos. However these cannot replace a good workflow and a good understanding of what is possible in Photoshop. These three tools will give you the ability to quickly edit your images and get them into a print-ready state really quickly.

Follow guide video below and check it

We hope that you will find many useful things for your work. Do you have other methods for better editing photography?. Please share your experiences in the comment below.

Categories
Support Tips & Tricks

Tips: 4 Tips For Better Real Estate Photography Using Natural Light

A best product photograph need to use many different elements and natural lighting is one of essential factors to create the success of product photograph. If you love photograph and are photographer, have you ever used natural light for your photograph?. Below is some useful tips what help you learn how to use natural light for better real estate photography.
You see, interior photography is a skill. It’s as much science as it is artistic. Both sides need to be studied, practiced and mastered if you’re to succeed in this saturated and competitive field of photography.
The following will give you a basic understanding of equipment needs, how to manage contrast and mixed lighting in a room.

#1: Using sunlight on the exterior

A sunny day is the best canvas for your exterior shots. As you know, the light changes from hour to hour and day to day. To create natural lighting for your own photos, you should shoot your photos at the brightest time of day. You can work in late morning and early afternoon. The times of beautiful sunlight and these gives sufficient lighting near windows or in the shade. In general, morning light is bright and has less color, while afternoon and evening light often has a warm undertone and brings out greater contrast in your images.

fotosolution-4-Tips-For-Better-Real-Estate-Photography-Using-Natural-Light-02
So, let’s try to schedule your shoot during a time of day when the sun will be shining on the front of the house. The light pours over surfaces, metal fixtures gleam, wood detail shines, and the edges of furniture upholstery glows. Especially, natural shadows produced by different objects convey a sense of depth.

#2: Select camera position within a room

Choosing the camera angle is a important parts when you take the product photos with natural light. When photographing with window light at low ISOs your exposure can be upwards of several seconds, depending on your aperture. For the natural light photographer, finding that spot depends on two things: available space, and window brightness.
Most importantly, you need to pick a space you can physically occupy. For smaller houses and rooms, quite often your only choice is the doorway, as it is likely to be the only spot where you can fit behind the tripod. Capturing three walls in your shot will give the viewer a better idea of the size and space of the room.
Pick a spot in which extremely bright windows are angled more than 45 degrees away from center of your lens’ field of view. In addition, you should use ISO 100 to keep the noise levels down.

#3: Choose the appropriate Angle

First, to capture and shoot the natural light for real estate photography, you should choose the appropriate angle where have much light in a room. Let’s set up objects near window. Then, taking a photo with your camera set to expose for the room you’re in will leave the windows over-exposed as a mass of over-powering white light. High-end interior photography involves balancing the light coming through the windows with the light inside the room. Doing this correctly enables you to see the view outside the windows.
Don’t forget that you can weaken the light source by covering the window with a thin, solid curtain or various types of paper.

#4: Mixed lighting insidefotosolution-4-Tips-For-Better-Real-Estate-Photography-Using-Natural-Light-03

One of the difficulties of working with natural light, is dealing with mixed lighting situations. You can choose to leave interior lights off, resulting in a single daylight color temperature throughout the image. However, if light is too weak, not enough to shoot the reality image, this is a problem for photographers.
If the room isn’t bathed in sunlight, or contains light fixtures like pendants or chandeliers that should be on display, make sure to turn them on. Mixed lighting in real estate photographer will help them become warmer looking spaces.

fotosolution-4-Tips-For-Better-Real-Estate-Photography-Using-Natural-Light-04
Natural light is one of the important elements that help photographer make beautiful real estate photography. Here are 4 basic tips for better interior photos by using natural light. We hope that you will find it interesting. Do you have other methods for better real estate photography by using photography?. Please share your experiences in the comment below.
Thanks for watching!.

Categories
Support Tips & Tricks

3 Ways for Converting to Black and White Using Photoshop

Colors are one of the most important factors what affect direly the quality of images and effective way to make your images become more nominate. If you own your online store, the first important factors what will attract your customer is product image or apparel product photography. High quality product photography is essential for apparel ecommerce. And main color will necessary elements what contribute to the success of the pictures.

If you are a huge fan of color. You like bold colors to create a mood in your images, and often use the meaning behind colors to reinforce the message you want to convey. Sometimes though, you want to get rid of the colors to draw the viewer’s attention to your compositional lines, to textures, or to make a contrast. To do so, you may want to turn a color picture to black and white, in order to see what works best.

Black and white background are the standard backdrop that is commonly used in product photography. It creates a high energy, happy, and distraction free scene, perfect for pictures of your friends and family. These are because black and white background makes the product more visible and clear than any other color.

If you’re looking for premium quality Photoshop Photo Effects or Photoshop Actions, then choose from our collection of creative options. You can also get color images converted to black and white on our website.

Converting to black and white digitally has a number of advantages. With film, the black and white conversion essentially happened at the time of shooting. If you wanted to change the nature of the black and white conversion, you could only do it by placing a colored filter on the lens. For instance, you can make blue skies much darker by using Photoshop. Here are that we will start with a color photo and converting it to black and white in Photoshop, you have complete control over the conversion.

Way #1: Channel mixer adjustment layer

First, you can go to your layer panel and click on Channel mixer or you can also go to Layer -> New Adjustment Layer -> Channel Mixer

fotosolution-3-Ways-for-Converting-to-Black-and-White-Using-Photoshop-06

Why do you choose channel mixer?. Because simply, using channel mixer you can do more than just saturation your colors. You can get great results sorting by color channel. This will modify your input and output levels.

fotosolution-3-Ways-for-Converting-to-Black-and-White-Using-Photoshop-08

Converting black and white background, you can get lighter or darker tones, you can also play with your constant overall tone. You can choose and use each channel and see what you like the most. For example, you can play with green channel in a natural picture, therefore highlighting your subject.

Way #2: Using Black and White Adjustment Layer

When working with black and white you cannot see different adjustments at once. To keep several adjustments visible, you can create a door layer or a separate layer on which the adjustment has been applied directly to the image. It is simply, you can press Shift + Option + CMD + E, and the door layer appears. This will combine all visible layers into one.

You can then combine with a black and white adjustment layer. First, you go to Layer > New Adjustment layer > Black and white. Then, choose the different values for each color to adjust the tones as you wish in your image.fotosolution-3-Ways-for-Converting-to-Black-and-White-Using-Photoshop-07

Secondly, let’s add a layer mask to each one, and paint on the mask or the part of picture that you want to hide by using black, this will help you reveal the layer underneath. Paint with white or layer mask is white by default to reveal the selected areas of the top layer.

Or the different way is that you create only two types of black and white and make it easier to apply selectively the different effects. At the end, you have a mix of different contrasts in your image, and can apply those contrasts as they best suit each area where you want to drawing the viewers’ attention. There are so many ways to create a black and white images in Photoshop.

Way #3: Use the Hue and Saturation Tool

This method gives exactly the same result as converting to black and white. The only advantage is that it’s available as an adjustment layer, and can be used as part of a non-destructive editing process.

To make this, you can use Photoshop CS 3 and Photoshop Elements:

You go to Layer > New Adjustment Layer > Hue or Saturation, click “ok” and move the saturation slider all the way to the left (-100) and press ‘OK’

Advantage: Quick and easy and can be applied as an adjustment layer in both Photoshop CS 3 and Photoshop element.

fotosolution-3-Ways-for-Converting-to-Black-and-White-Using-Photoshop-12

Below are tutorial video that help you review easily. Check it out and have amazing experiences!

There are many ways to convert black and white. To have many interesting experiences, you can spent much times to experiment with these different methods when deciding how to approach black and white conversion. Do you have other methods to convert to black and white using Photoshop?. Please share your experiences in the comment below.

Thanks for watching!.

Categories
Support Tips & Tricks

3 Mistakes to Avoid When Shooting on a White Background For Beginner

Choosing the ubiquitous for shooting is a thing that is not too difficult for photographers even for beginner. Simply, most of people always choose white background portrait because they think it’s easy to achieve. Simply you put your subject in front of the camera against a white background, preferably with a flash or strobe, and take the picture.

Unfortunately that thought is completely wrong. The best possible result would be an off-white background after you have done some edits. That’s not the only issue though because you’d be dismayed to see unwanted shadows everywhere too. To understand more these wrong for shooting, here are 3 basic mistakes to avoid when trying to achieve a 100% pure white background for beginners.

Mistake #1 The background is not lit properly

The first thing that we need to interest in is the background. The background must be lit with approximately two stops more light, than the amount of falling on the subject. For example, if you want to photograph your subject at f/8, set your background lights to two stops brighter, so the meter would read f/16 on the background.

Note: You need to meter both background lights separately, so that when metering for the main light, you would turn the background lights off, and vice versa.

mistake for shooting white backgroung_fotosolution

Your camera settings for all the shots in this setup were: ISO 250, 1/160th of a second, shot at f/8 for Sven, (the background read f/16). The speedlights were set to 1/16th power. If you are using the SB900 Nikon, firing at 1/1 power, not only does it drain the batteries very quickly, but also makes the flash overheat. If you don’t like using Nikon for digital photos, you can use two SB910s and one SB900 were used for this setup. This is great suggestion for your choice.

Mistake #2 Not enough subject background separation

You need to separate them from the main subject because the background lights are brighter than usual. There are two key ways of doing this: flagging and distance

mistake for shooting white backgroung_fotosolution

Flagging

You can use anything block to flag your lights; the black side of a reflector, black cardboard sheets, black foam core. Black does not let light in, instead it absorbs light rather than bounces it. It also blocks light from seeping through to places where you do not want it. If you don’t flag or block your background lights, your subject will get a halo effect and look very backlit.

Distance

Once you have flagged your lights, you need to distance your subject far enough away the background and background light so that any spills won’t touch your subject. This depends on your personal preference and creativity. For example, you  may want some spill on your subject for a certain look or effect, or you may not.

If you do want some spill on your subject, make sure to run a few tests with various lenses, as chromatic aberration tends to occur around the edges due to the abundance of light. Some lenses are prone to chromatic aberration irrespective of aperture, while others can handle it very well even at wide apertures, where it is most commonly observed. Besides, be careful with the amount of spill you allow so as not to chop off parts of your subject from the spill overexposure.

Mistake #3 The subject is floating

If you do not include some floor shadows, your subjects will look like they are floating on white air, or cut out and pasted on a white sheet of paper.

The best suggest for avoiding floating subjects is to use a reflective surface like translucent white Plexiglas, or white tile sheet, this will help you avoid the bad thing and not affect the result . You can adjust the opacity of this reflection in Photoshop during post-processing, but having the reflection shows that your subject is planted firmly on solid ground.

These some simple guide will get you well on your way to creating professional and consistent images that really make an impression with prospective customers. Hope that they will be useful for you especially for beginners.

Thanks for watching!.

Categories
Support Tips & Tricks

What do you choice: Natural Light v.s Artificial Light?

A best product photograph need to use many different elements and lighting is one of essential factors to create the success of product photograph. There are two kind of lighting that photographers use to capture beautiful photos: natural light and artificial light. When you use an artificial light source, these can affect directly your product’s color, while using natural lighting for product photos preserves the natural color of the product. And a important question in photography: it is better natural light and artificial light. Each has its respective pros and cons, but many photographers might feel uneasy when trying to replace natural lighting with a strobe.

What is natural light and artificial light?. Natural light is extremely straightforward: it’s daylight. You can work in late morning and early afternoon – the times of beautiful sunlight and these gives sufficient lighting near windows or in the shade.  Artificial light generally creates various types of color heat signatures. And the biggest aspect of artificial light is that you can control it inside of your studio. You can control its angle, intensity, distance and hardness while natural light is much harder to control and is affected by numerous factors, to boot.

To understand more about the two kind of lighting, we will discover the advantages and the disadvantages of natural light and artificial light.

The advantages of natural light and artificial light:

Artificial light is constantly available throughout the day and night, thus allowing you to skip planning your shoot around factors like the time of day and the weather has no effect on you. Based on the specific type of artificial light you select, you can even mimic sunlight or moonlight in your shots, giving the impression that you worked with natural light when you really didn’t.

In fact, there are cheaper options available in addition to the more expensive, professional strobe lights. While some artificial lights can be a bit difficult to set up, a lot more are quite easy to use.

In addition, if you want a particular look or mood, all that you have to do is set up the lights, and take photos until you have your results. There’s no worry that a cloud will move in and block your light. This a huge advantage over the fast changing conditions of natural light.

fotosolution-What-do-you-choice-Natural-Light-Artificial-Light-02

As you know, the light changes from hour to hour and day to day. To create natural lighting for your own photos, you should shoot your photos at the brightest time of day. You can work in late morning and early afternoon – the times of beautiful sunlight and these gives sufficient lighting near windows or in the shade.

In general, morning light is bright and has less color, while afternoon and evening light often has a warm undertone and brings out greater contrast in your images. You can always neutralize the image and make it cooler in post-production if want a cool, dark image.

In addition, natural light costs nothing to make use of; there are plenty of gadgets and accessories available, such as reflectors and diffusers, that do help to maximize results, but even without them, it is easy enough to get beautiful results using natural light, without spending any money.

The disadvantage of natural light and artificial light

Avoid reflecting of your shadow fall because this shadow will hide some details of your product and lost some of it sparkles. Avoid spending times to take your photos in sunset. Sunset is considered as golden hour to make a beautiful photos but use too much, it can create harsh shadows or be too warm for a simple product photo. If you’re shooting indoors, you should put your item in place where has lots of windows. Don’t forget that you can weaken the light source by covering the window with a thin, solid curtain or various types of paper. Be careful!.fotosolution-What-do-you-choice-Natural-Light-Artificial-Light-01

Remember that you need to focus on the product – it is the most important things to decide your best photos. Producing a nicely arranged photo of your product in use can be really effective and natural lighting can often produce beautiful effects but you must guarantee the quality of product. In addition, the effects of weather and other people are gone, this solution is not without its own limitations. Window light, while often beautiful for photography, can be quite dim and may require slower shutter speeds than you might like for portrait photography. A lack of space is also a common problem when shooting indoors.

If you use the artificial light, you’ll make a bigger investment in terms of money, time and planning from the very start. Another initial disadvantage of studio lighting is the amount of knowledge you have to gain, in order to start using it. It’s very possible to accidentally take a beautifully lit photo in natural light. With artificial light, that’s next to impossible. To get good results, you have to spend an enormous amount of time reading and practicing. This involves things like new aspects of aperture and shutter speed in relation to flash, qualities of light, effects of modifiers and the dreaded inverse square law.

So, natural light and artificial light, what is the better?. It is difficult to choose and answer correctly this question. In my opinion, neither and both are better. Both are just tools to be used at each photographer’s discretion. Each method is capable of stunning results and you would rather have a full toolkit to use for every opportunity, than miss out on something because you restricted yourself from using the right tool for the job.

Here are some our experiences about natural light and artificial light that we want to share. We hope that you will find it interesting. If you should our support, please do not hesitate to contact us. If you have any opinions as well as any questions concerned about this subject, let me know in the comment below.