Categories
Support Tips & Tricks

Tips: How to use Clipping Paths

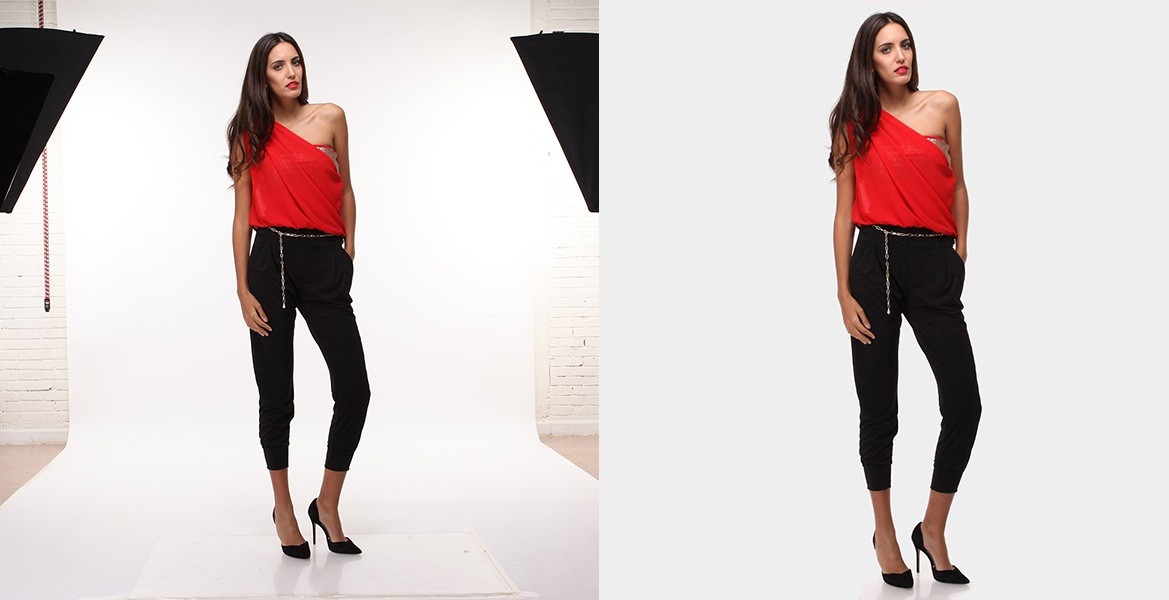
In graphic design there several ways to achieve good quality image cutouts and today we will present readers way to use clipping paths to make beautiful images.

So, what is clipping paths?. If you want to create a beautiful image that transfers well to other application for text wrapping, you can create a clipping paths. A clipping mask is an object whose shape masks other artwork so that only areas that lie within the shape are visible in effect, clipping the artwork to the shape of the mask. Once the path is created, clipping path is then applied on it so that anything outside the path will be omitted when you place the file into Illustrator. You can make a clipping set from a selection of two or more objects or from all objects in a group or layer.

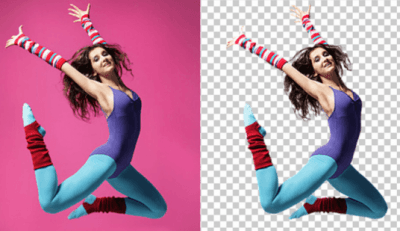
Clipping Paths will become a useful and necessary tool when we use any photo or photograph or image to prepare a design, such as brochure design, magazine design, web design, leaflet and many more. For example, if you have a photograph with background color gray and need to be used in the front page of your catalogue. You must remove the background of that particular image since your catalogue color is green and have some other design.

Today, we will guide you how to do clipping paths. Creating a clipping path is easy when you have a good path. You can use the Pen tool to create a path around the image area that will become the silhouette.

In the Paths panel, choose Save Path from the panel menu (click the triangle in the upper right corner of the panel) and then name the path. If save Path is not visible, your path has already been saved. Open an image in Photoshop you want to use for your clipping path tutorial (go to the file menu in Photoshop and select open, from the open dialogue box choose the file you want to use and then click open.

Now, make sure that you have selected “Paths” from the pen tool menu bar which is located underneath of the main Menu bar.

fotosolution-Tips-How-to-do-Clipping-Paths-02

Next, you can click on the image edge and drag the mouse pointer towards the next step and release the mouse. After an appropriate distance, again click on the image edge and continue in the same manner until you have completed moving around the image and finally see this “o” symbol. This “O” symbol means you are going to close the path. Click on it starting point in order to close the path.

After you have completed the paths around the image and its closed properly, go to path palette by opening the window menu and select “Paths”. Let’s double click on the “work path” and press enter to save the path and the path name will be changed with new name” work path”.

fotosolution-Tips-How-to-do-Clipping-Paths-03

If you want to test the precision of your path, click the “Load Path as a Selection” button from the bottom of the Paths palette. Next, you can invest your selection with (CMD-Shift-i) (CNTRL-Shift-i) and fill the selection with a color on a new layer and click” ok” and save the file. Let’s take your file into In Design and use the path for text wrapping, layering, and drop shadows.

Photoshop clipping paths are great for creating cutout images. You can refer in our lesson. It is considered as the best way to create image cutouts. We hope that you will find it interesting. If you’d prefer upload them to your favorite photo sharing site and leave the link to them. Show me your best images in this post below. We welcome your suggestions for titles to add to our collection.

Categories
Support Tips & Tricks

Tips: How to Crop Effectively The Images

If you are professional photographer, a beautiful pictures requires the good techniques as well as ensure the quality of images. If  you feel not satisfied with your pictures, you must find the cause of problem, and cropping photos is one of the effectively solution for digital photography. Thus, what and how to crop effectively the images?

First, you can know and understand what are cropping photography?. Crop the images is just as simple as cutting it down to the size you need for your print layout, then you’re missing out on all that the crop tool has to offer. Using cropping a photo will help you have a drastic impact on the visuals and can even manipulate the way the audience engages with it emotionally. This is usually done in photo editing software, most cameras come with software that will enable this but these days many cameras can also do it within the camera itself.

Crop the images give you a great chance to frame your images and can be used in some of the following ways.

You have to consider some crucial things when cropping:

– You should duplicate your images first. This will help you keep an original that you can go back to later to find a different way to crop.

– You need to take your time when cropping. There are almost unlimited ways to crop an image and it’s worth trying a few of them before settling on one.

– If you want to change the shape of your image this could make printing more difficult, especially you should attend the important thing that is shapes and sizes.

Cropping works best when you’re starting with a fairly large image. When you crop an image and then try to view it at the same size as it was before you cropped you’ll notice that the pixels are large. If you’re using small images keep this in mind or you’ll notice the quality of your images can decrease to an unusable level.

For this reason the ideal is to use cropping as a fine tuning of a well framed picture.

In addition, below we will give you some great suggests for cropping images.

Covering Framing Mistakes

One common problem that face digital photographers are shots that have one side of your subject very close to the edge of the frame, or even have it chopped off by the frame. This can become effects that make reader’s eyes feel quite cramped and not complete. For example when taking a portrait:

While you can never really add to the photograph to put more space around your subject, cropping the image even tighter can take the focus away from the clipped part of your subject and make the image quite dynamic.

Remove unnecessary details

It will get messy if you take out any of the unnecessary details for images that might distract from the story or subject you’re trying to tell. You don’t want your photograph to end up in a lattice of funniest photo bombs, so remove unnecessary the background for anything that affects to the content of your pictures and you might draw focus away from your subject. Let’s pay close attention to the edges of the photo and the areas furthest away from the subject are the areas that the photographer are most likely to have neglected.

fotosolution-Tips-How to-Crop-Effectively-The-Images-03

People always like adding the cumbersome details to decorate their photos and think that it is beautiful but they do not think that the cumbersome details make the biggest distractions and the eyes are naturally drawn to faces in photographs. Anything that breaks the flow of the photograph or draws attention away from the subject should be on the chopping block.

Don’t be afraid to experiment

Sometimes you need to break the rules to make a bold statement, so don’t be afraid to play around with the crop tool and experiment with different techniques before settling on one design. You can crop the same photo with many different ways and give drastically different results. It will become useful ways that you can experience and find the most effective ways for your photos.

Try cropping at different angles and rotating the picture to compensate, creating a dynamic composition effect. If you try to crop faces in half, this help you create a sense of mystery. Maybe leave in an odd background detail to create contrast with your subject. Don’t be afraid to go off the beaten path and new experiences so long as you keep a backup of the original photo, you can always try again if your experiments fail.

Cropping with different shapes

The advantage of the crop tool is that it allows you to turn a landscape photo into a portrait or vice versa. Changing the size and shape of your cropping field can have a drastic effect on the nature of the photo itself, especially when you play against the orientation of the original photo or you can create many different photos in different shapes. This will help create the variety for your photos and help you can choose the most beautiful shapes for your images before posting.

fotosolution-Tips-How to-Crop-Effectively-The-Images-04

Using a golden rectangle for images is a often a good choice, but you don’t even have to keep your photos a rectangular shape at all, especially when you’re using them for a print design. Your photos could be circular, hexagonal, heart-shaped whatever works for your design.

Avoid focusing too to your subject

Unless the photo you’re cropping is a portrait, there’s not always a need to make the subject completely centered in the shot. You have to use small details to decorate your photos as well as well your subject. This will help you subject become more special more harmonious before the viewer’s eyes. Let’s remember that the rule of thirds still applies when you’re cropping a photograph, so make sure you frame your subject in the areas that are going to draw the most attention.

There are some basic way to prove the effective usage of cropping the images. Let’s think of the crop tool as an invisible frame that draws the eye towards the most important aspects of your photo. Making the right cuts in your photo can have a drastic impact on the visuals and can transformer your artwork become more perfect before viewer’s eyes.

Fotosolution – our team do cropping, positioning and file size optimization for nearly all the images that we process. By carrying out these processes in a line after isolating and any additional editing), the images are 100% ready for final use. If you should our support, please do not hesitate to contact us. If you have any opinions as well as any questions concerned about this subject, let me know in the comment below.

Categories
Support Tips & Tricks

WooCommerce: How To Add Colors And Sizes with Multiple Options ( Variations)

If you own a online shopping, you have various product and you want to present them to customers. With the technological era, the online selling become a popular and useful methods for sales. To create a website is not too difficult and you can display your products on page, customers can view and update as well as buy easily product online. But if you have many products with various colors and different sizes, if you perform your products follow the usual way, you will waste lots of times. Instead of spending too much time for its, you can do others things to improve the sales by using multiple options or variations.

So, what is multiple options or variations?. Various products is are a product type in WooCommerce that lets you offer a set of variations on a product, with control over prices, stock, image and more for each variation. This can be done several different ways, either using native options in WooCommerce, or via plug-in or premium extensions. Here are we will show of using product type in Woocommerce – this methods allows you to create multiples style and manage the product sales more easily. For example, a dress is available in a variety of sizes and colors.

fotosolution-Tips-How-To-Add Colors And Sizes with-Multiple-Options-Variations-03

How to use or setup Variations?

– You need to edit and create a new product, an example below of a various products is a dress.

– You must select Variable Product from the dropdown at the top next to Product Data

– You can see under Attributes and click on Add

– You can add a Name and Value(s) for each Attribute. The Name corresponds to the drop-down menu that will appear in the product page, and the Values are what can be selected in that menu.

fotosolution-Woocommerce-How-To-Add Colors And Sizes with-Multiple-Options-Variations-08

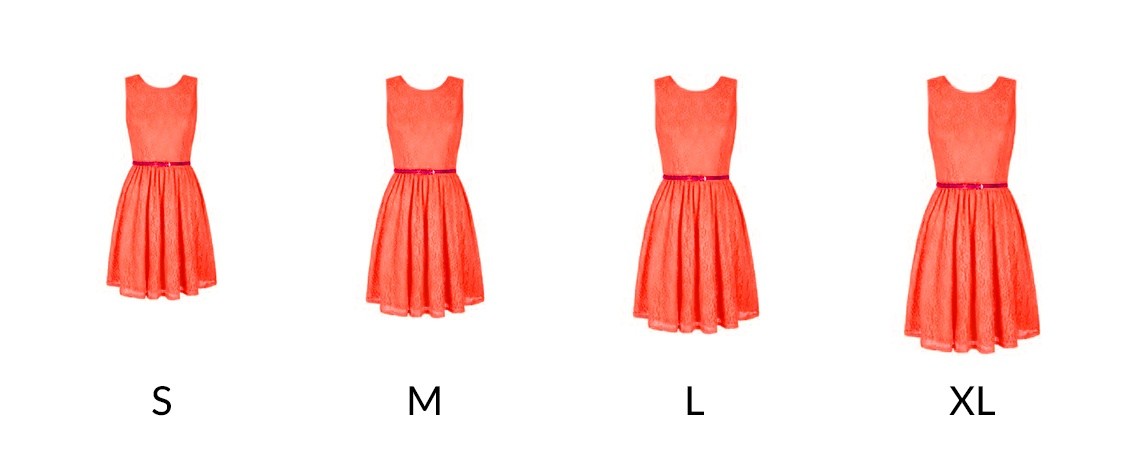
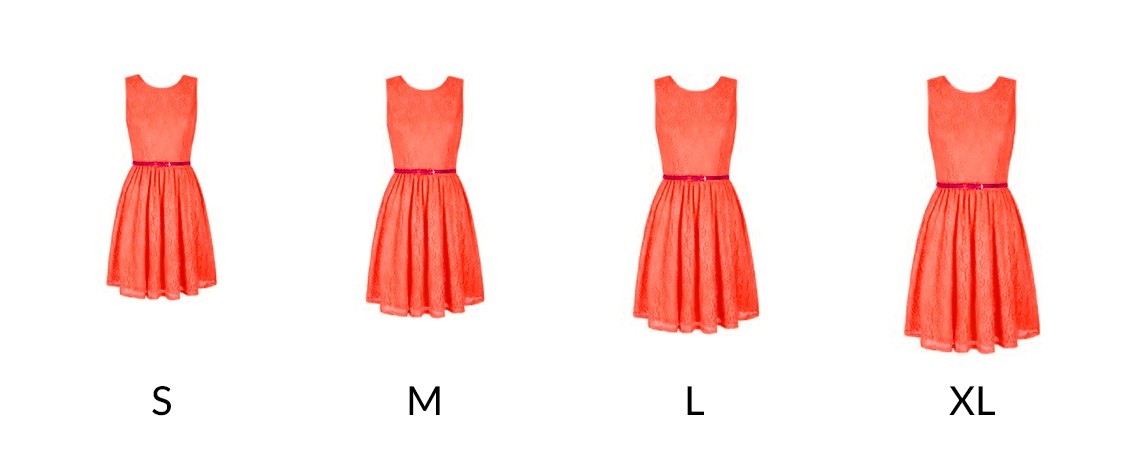
-The following example shows how two attributes look for a dress with different sizes.

Size is one of the most common variations you encounter for a product, including small, medium, large and XL customers can choose. First, we will guide you how to add a product in WooCommerce that has different sizes:

– After opening up the Attributes menu, you can add Name of products and here we will add Sizes.

Notes: When you give the name of product, you have the option to have a custom order or to order alphabetically by name or ID. If you choose Sizes, we can order it Small, Medium, Large, X-Large instead of alphabetically. And you have added size, let’s configure the terms of this attribute.

– Start adding your sizes. Depending on your theme and your product, the description may or may not show. For instant, your product you choose, including 3 sizes: Small ( S), Large ( L) or X- Large(Xl) or 4 sizes: S, M, L, XL,…

fotosolution-Woocommerce-How-To-Add Colors And Sizes with-Multiple-Options-Variations-09

– Let’s set the default sort order to ‘Custom Ordering’. This will allow you to drag and drop to rearrange the order of the sizes easily. This way help you can see in picture above, it is just sorted with the most recently added term at the top. You should remember that the order of these terms is how they will appear on the product page. Let’s rearrange them by simply dragging the size to the desired position.

– Now the size attribute will be available to you when adding a variable product. Now we will cover how to add a variable product.

You can apply to color of product. Next step, let’s check Visible on the product page and Used for variations, and then click Save Attributes. Under Variations, click Link All Variations, then click OK on the confirmation messages.

fotosolution-Tips-How-To-Add Colors And Sizes with-Multiple-Options-Variations-01

If you want to change images of product or continue digital colors and sizes when a visitor selects one of your variation combos, you can click the thumbnail button in the variation and upload the variation image, or select it from your media library. However, you keep in mind that this function only works if your product post is displaying the single featured image. Finally, we have various products with different colors and sizes and especially we can save times for other things.

Fotosolution team – we provide image processing services from an image, we can helps you to create many different colors for their products. Instead of taking much time with each color separately, you can create a products entry for multiples style with our support.

To receive free test sample or products with various colors and size without spending too much times, details of our quotation or any further information, please do not hesitate to contact us.

Categories
Support Tips & Tricks

How to make the color correction in Photoshop

Color correction is one of the important factors affect directly the result of images. If we have two pictures: white and black pictures and pictures with prominent color, which one do you prefer?. Beautiful images with stunning color will surely be a wonderful choice. So, color correction an image is one of the most common uses of Photoshop. How to make the color correction in Photoshop. If you don’t know the way about the color correction in Photoshop,  here some quick tips show you different ways on how to color correct on image. Let’s get started.

Color Balance Adjustment Layer

To get started, you should open an image that you think has a color board. After, you choose layer-> new adjustment layer-> color balance, this gives you information about the pixels in your image. Using the adjustment layer is the best way that it can either remove adjustment or edit the adjustment at the later time.

You will see the appearance of color board to choose, then, color balance box will appear to support your work. Before applying the color balance adjustment layer, I think that you should make a copy of the background layer, then turn off the background. Then, choose the Color Balance adjustment layer option in the Adjustments panel.

Color Balance Adjustment Layer

Selecting the slider that has the tint color and move it away from the tint color. For example, since the image has a yellow, you want to move the cyan or yellow slide towards cyan to remove the yellow tint. You may also want to adjust the other two sliders to get the color you want for the image. Let’s click on double right arrow at the top right of the panel to finish with the adjustment.

If you want to change the different color, you can always go back in and make adjustment to the color balance properties by clicking on the layer thumbnail. Besides, you can use Gradient adjustment layer to make prominent color.

Curves

With some photographers, curves in an image will an intimidation factor, it will affect directly the quality of image. Don’t worry about this, we will help you adjust the curves. To adjust the curves, you have to click on the Curves Adjustment layer in the Adjustment Layers panel. You will see the appearance of  Curves Proprieties Layer.

fotosolution-How-to-make-the-color-correction-in-Photoshop-03

Notice the drop down option next to the RGB channel. Not only can you change all channels at one time (your image is a combination of red (R), green (G) and blue (B) channels), you can also change the individual channels. If you reviewed the Color Balance Adjustment Layers above, you are also aware of the ‘opposite’ colors of each of these individual channels. The original curve is a diagonal line from bottom left to top right. If you want to effect the reds in the darker areas, I adjust the line towards the bottom left. If you want to effect the red in the lighter areas, you can adjust the line towards the top right.

If you want to remove some of the cyan introduced when we adjusted the Red channel, select the blue channel and drag the middle of that line down slightly. You can continue to adjust the curves in the various channels till you have the color you desire.

Increase Contrast

Using increase Contrast technique will a perfect choice that help your image more prominent. To crease contrast an image, you can use Levels Adjustment Layer. First, choose layer-> new adjustment layer->levels.

fotosolution-How-to-make-the-color-correction-in-Photoshop-05

The Levels properties panel shows a histogram. This is a quick visual that shows the range of tones in the image. This particular histogram shows a lack of light or white areas. The data on the histogram doesn’t extend all the way to the right, nor is it all the way to the left.

Click and drag the white arrow adjusts the light or whites area of image to the left until it under the right edge of data of the histogram see setting in above image. Click and drag that black arrow adjusts the darks or blacks to the right until it is just under the left edge of data of the histogram.

Auto Color

Auto color is considered as the quickest way to color correct an image, if you need to something quick, use auto color to solve all problems.

Choose Image->Auto color from the main menu, this technique will determine what needs to be adjusted and perform the color correction for you. However, this technique have also some disadvantages and one of them is that you are depending on Photoshop to determine the best color adjustment.

Here are four tips to color correct in Photoshop. We hope you found it interesting. Do you believe that If you have any questions or concerns, please do not hesitate to contact us and comment below this post.

Thanks for reading!

Categories
Support Tips & Tricks

DIY Product Photography: How to change the colors dress by Replace Color Tool

Sometimes in post production you want change some things of an objects in your photos such as: lighting, remove white background, size or change the colors. When editing images, there will be a time that you will need to change the color of something in the image. Colors is one of important factors to decide the success and the prominent beauty of photos. Each people or customers have a different hobbies and how to choose colors. For example, someone wear a red skirt but other people really prefer it if they were wearing a yellow skirt, so it is so hard to find the best favorite colors for all customers. Whatever the reason, you will need know how to change the colors in Photoshop. Luckily, this process is not as difficult as it may seem!. Today, Fotosolution will help you learn how to change the colors in Photoshop and save your time as well as your budget.

Normally, when you want to present your product, you always prepare a big studio, series of your product and models.

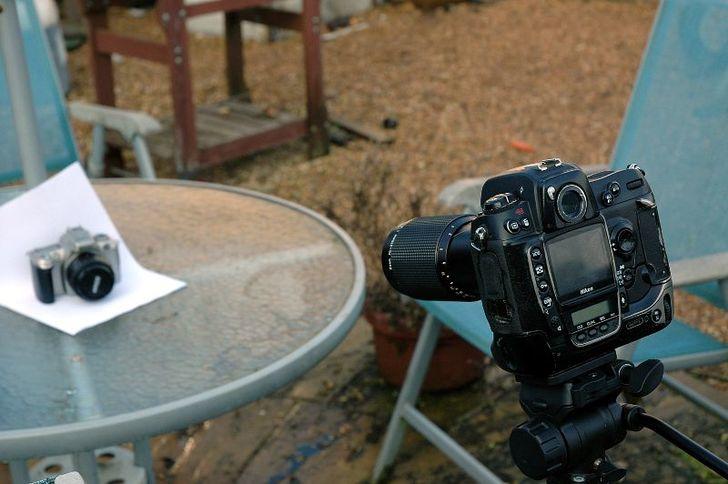
First, you will need to set up your studio for the photo shoot. Your setup can depend on the space and materials you have available. If you shoot product in indoor space, you can attend to use suitable spaces. This spaces need to have many lights, you should put your product in position where are many window or near to window. Besides, you can use light tents for small product photography. It is useful solution for the photo shoot.

fotosolution-DIY-Product-Photography- How to change-the-olors-dress-by-Replace-Color-Tool-01

You should not forget that set up the camera on the tripod exactly in line with where your product will be placed. Background is one of essential elements what help your product become more prominent. In generally, photographer choose white background for shooting.

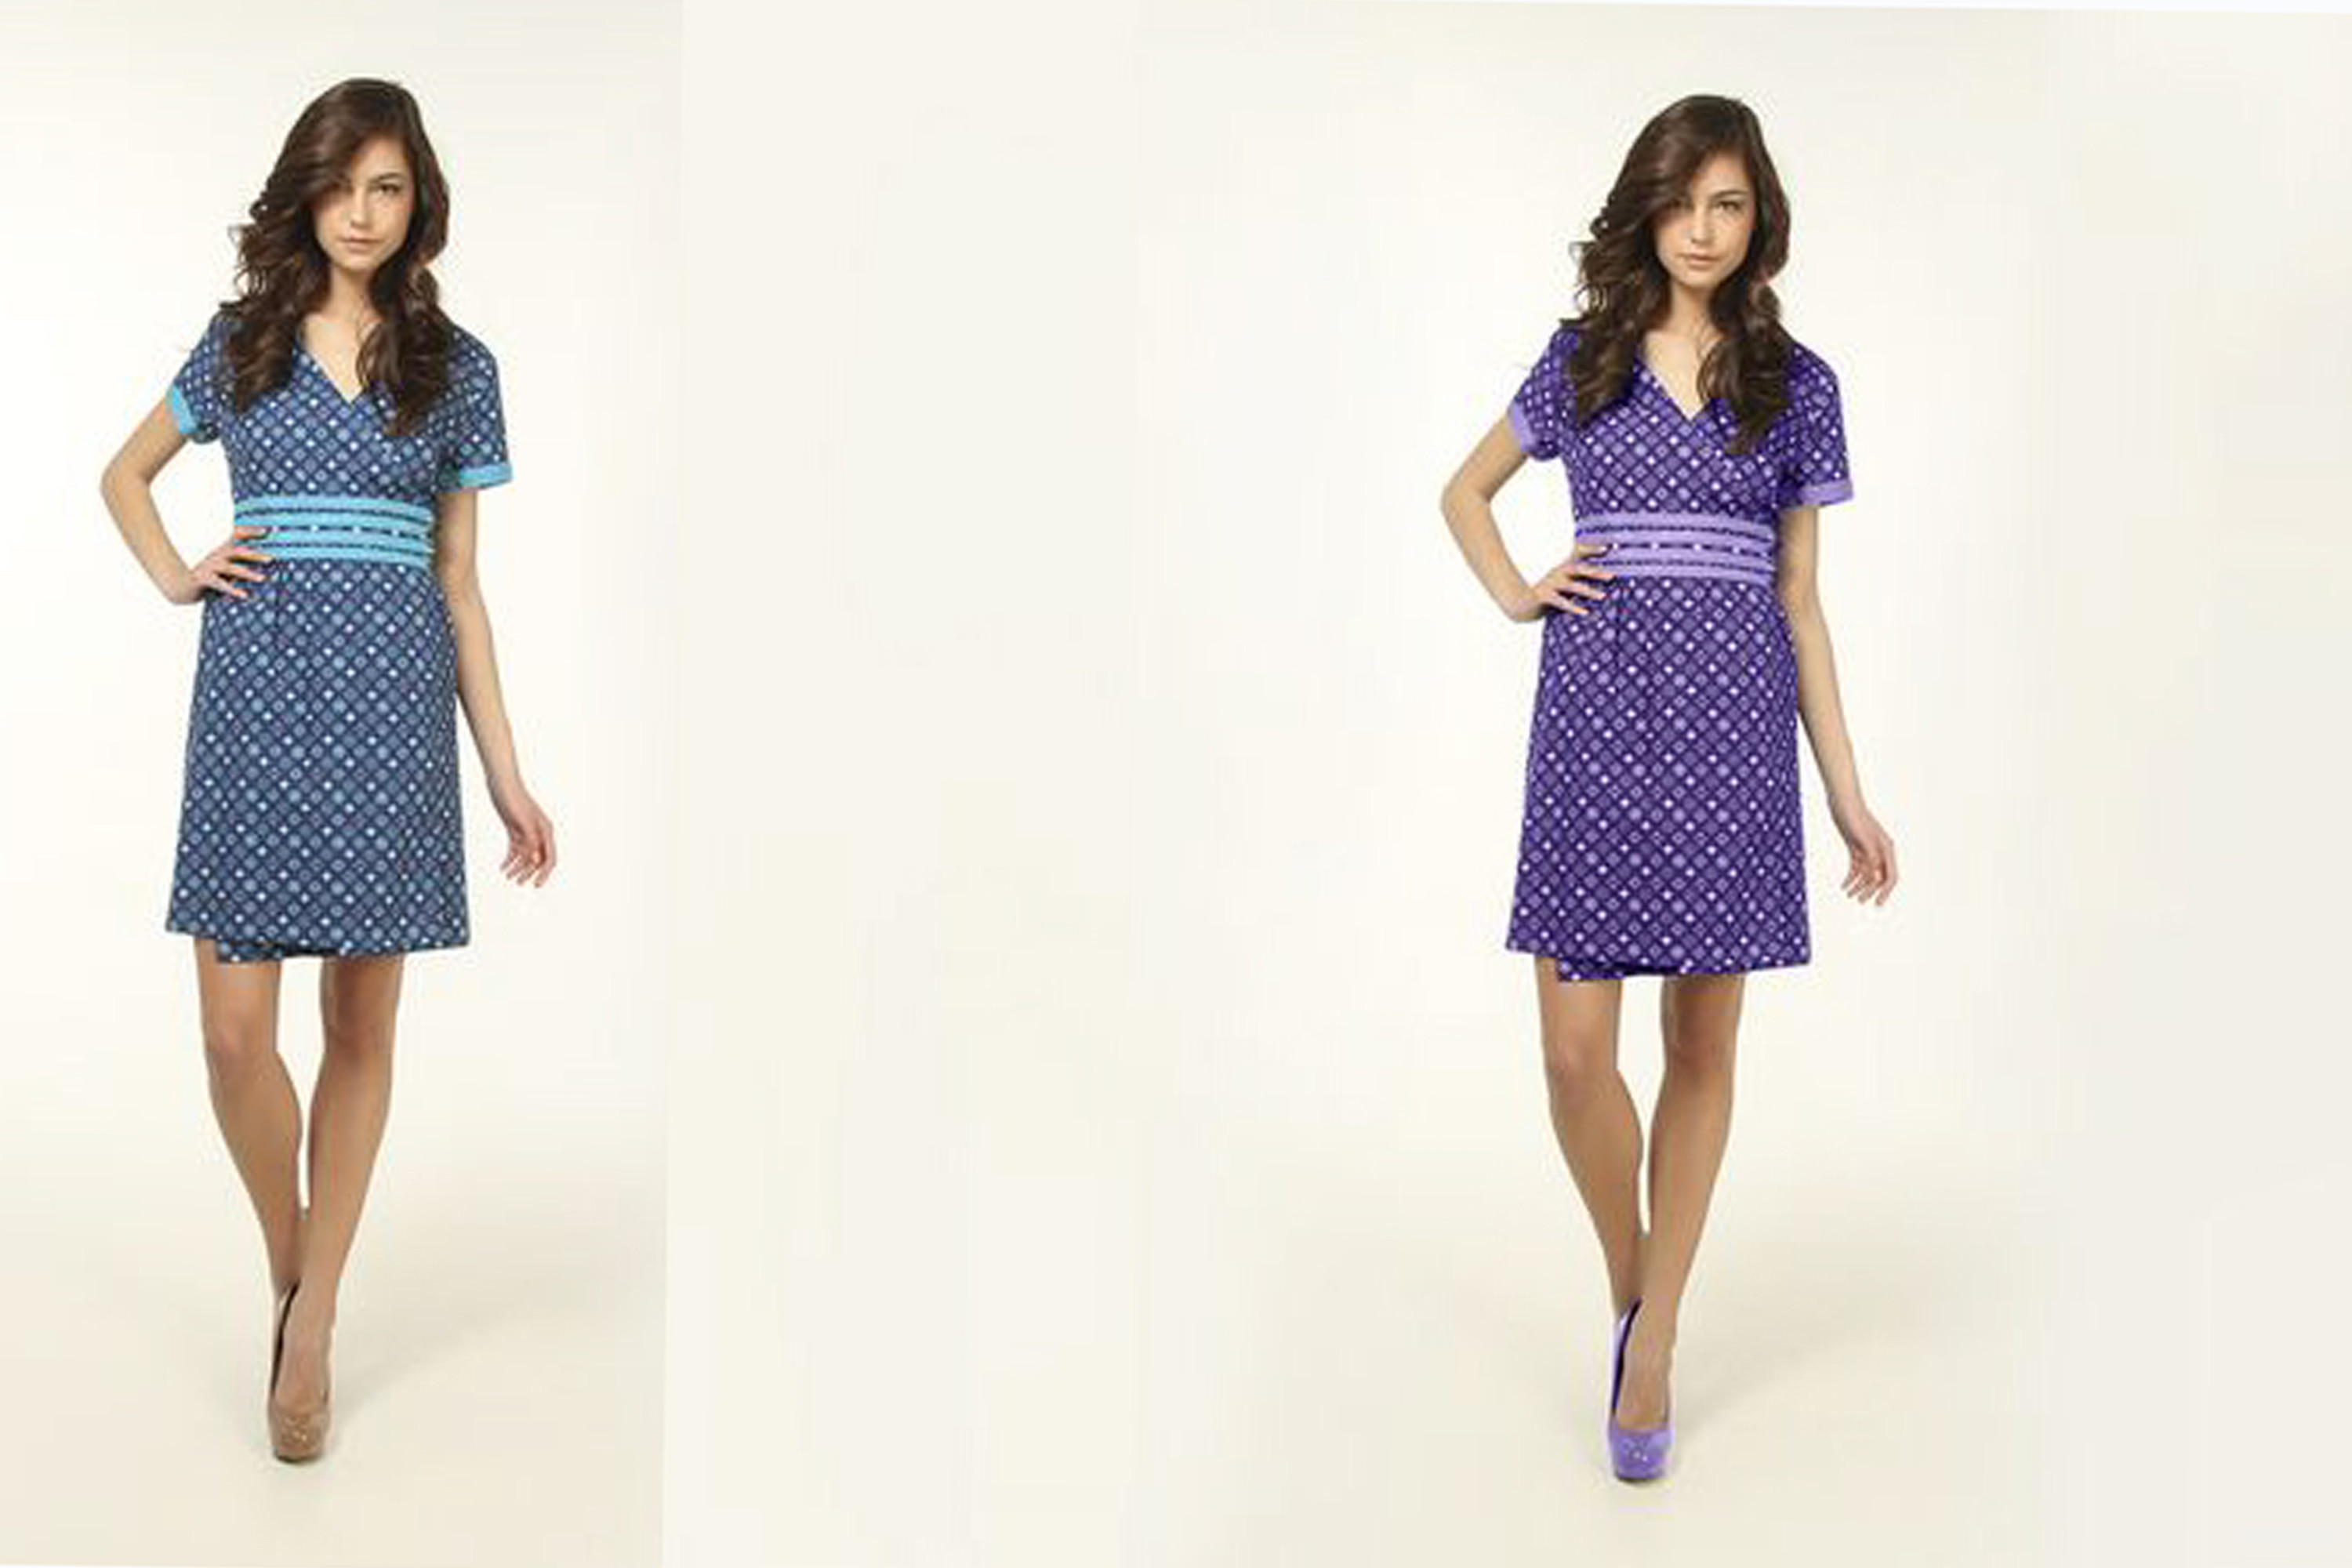
Second, if you use a model, it need to be big enough to cover at least the model’s top half. But models are very expensive and can distract from your product. If models are not in budget, you can use mannequin are an excellent alternative. But the problems here is change color dress, it waste many times for your shooting. For example, you want to present your new dress with five or six different colors such as: white, black, pink, yellow, red,…You do not know what colors attract customers to your website or how do colors affect your purchases?. You have to wait a model who wear your product with different colors to shoot. This will make you as well as your work lost many times. Using and change your product for mannequin also waste your valuable times. To solve this problems, Fotosolution teams will guide you and help you dispose your photos by changing colors dress through only representing models.

fotosolution-DIY-Product-Photography- How to change-the-olors-dress-by-Replace-Color-Tool-03

You can learn three simple ways to change the hues of an object in Photoshop. You should familiar with three basic tools such as: The Color Replacement Tool, Selective Color, and Replace Color. And today, Fotosolution teams will guide you learn about replace color.

The Replace color tool is one of useful tools to change the hues. To start your work by using Replace color tool, you can choose Image->Adjustment->Replace colors. The replace colors tools is helpful tools that help photographer get rid of hues such as: light and dark, dim and deep,.. and change colors. This tool must be applied as an adjustment and cannot be used as an adjustment layer, so, apply to it duplicate of the background layer.fotosolution-DIY-Product-Photography- How to change-the-olors-dress-by-Replace-Color-Tool-04

After choosing replace colors tools, you will see this box pop up with many different choices. This tools is going to be used to tell Photoshop  what color you want to replace in your image. Let’s click selection with” localized color cluster”, then click the add to Sample eyedropper and then click to select more of the color to change. Color board will appear before your eyes, you can choose right hues through product samples what are available. And then I clicked in the little icon of my image right on the dress. By setting that, it will only change the color you selected. Now, you just play around with the hue, saturation and lightness sliders until you reach your desired result.

There are many ways to change the colors dress like: The Color Replacement Tool, Selective Color, and Replace Color and this post today is that use replace color. Selecting the exact part of the image that you want to replace the color of will make the process much easier. If you have a difficult in use this way, we will continue to show two tools: the color replacement tool and selective color in the next topic. Hope that you as well as readers will support this useful lesson.

If you have any questions or concerns, please do not hesitate to contact us and comment below this post.

Thanks for reading!

Categories
Support Tips & Tricks

Simple and Easy Tools To Remove White Background

White background is the standard backdrop that is commonly used in product photography. It creates a high energy, happy, and distraction free scene, perfect for pictures of your friends and family. White background makes the product more visible and clear than any other color. It is also easier to remove during post processing process using Adobe Photoshop.
If you want to remove a white background from an image you’re working on, there are many ways to do this by using Photoshop. Here are some simple and easy tools that you can use to remove white background from your image in no time.

Simple and Easy Tools To Remove White Background

There are 2 mains tools that help you remove white background.

  1. Selection Tools
  2. Eraser Tools

Selection Tools:

These are a set of tools that helps you in making a selection, which can be modified later. The selection tools are not only useful for removing backgrounds but also for many other purposes such as changing color, resizing and doing other sorts of modifications. They are Lasso Tool, Polygonal Lasso Tool, Magnetic Lasso Tool, Quick Selection Tool and Magic Wand Tool.

Magnetic Lasso Tool

Magnetic Lasso tool is a very simple and easy-to-use tool available in the Lasso category.  First, you take an image with white background. The magnetic lasso tool detects and snaps to the edge of an object as you to trace along its outline. The Magnetic lasso tool options used for this image are shown to the right. The lasso width controls how close the edge you need to stay as you trace the image. Frequency controls how often points are laid down, and edge contrast helps you fine tune the edge detection. Then, select the Magnetic Lasso tool under the Lasso tools icon from the toolbar. Click anywhere on the edge of the subject and drag your mouse pointer along the border. You can create a selection around the subject and complete it by clicking the starting point of the selection. Now, let’s right click on the selection, choose ‘reverse selection’ and hit delete to remove white background.

Quick Selection Tool

The Quick Selection Tool is very useful to select pixels of same color. First, you  need to select the tool from the toolbar and you can see your mouse pointer turned into a circle shaped brush. Its size can be changed in the options bar according to the need and necessity. Once the tool is selected, let’s start painting on the white background and watch the selection grow without disturbing the subject. This is a quick and convenient way for selecting background.

Magic Wand Tool

Simple and Easy Tools To Remove White Background

The Magic Wand Tool works just like the Quick Selection Tool by selecting a group of pixels sharing same color. This is the easiest way to make a selection, but is only effective if the background you are selecting is one solid colour. So I recommend this method if your image is a solid object on a blank background, like a product shot. First, let’s make sure your image is in a layer, just right click on the Background layer, and choose ‘Layer from Background’. Now you simply choose the Magic Wand tool, and click on the background. With the background selected, you can now delete it and place your new background beneath the object’s layer.

Eraser Tools

Unlike selection tools, the eraser tools will directly delete the layer without making any selection area. They are typically made for background removal and deleting unwanted pixels from an image. Tools that are available are Eraser Tool, Background Eraser Tool and Magic Eraser Tool.

Simple and Easy Tools To Remove White Background

Background Eraser Tool:

As the name says, it is a great tool present in Adobe Photoshop for removing simple and complicated backgrounds. The tool samples a pixel and removes every other pixel with the same color within the brush diameter. By doing so, the foreground (i.e. the subject) is left undisturbed. Brush size can be increased to get the work quickly. It also has tolerance setting, which acts the same way it acted in Magic Wand tool.

Magic Eraser Tool:

The Magic Eraser Tool works the same way the Magic Wand tool worked. Only difference between these two tools it that Magic Wand makes a selection while Magic Eraser directly removes without creating a selection area. You can use the Magic Eraser tool you simply click on the background somewhere and it will vanish. If you only have one layer open, when you click to remove the background the pixels will be turned into a transparency, in other words there will be nothing there so you’ll just see a chequered pattern. How much of it is erased in one click will change depending on a few of the tool’s settings which you can alter in the tool bar found towards the top of the window. This tool is much faster than the Background Eraser tool, as it removes white background with a single click. However, when it comes to complicated backgrounds, you will have to be careful with the Magic Eraser tool.

These are some of the quick and easy tools that can be used to remove white background using Photoshop. However, as you happen to have lots of images to process and you don’t have time to do, we are happy to work for you. Thanks for watching!

Categories
Support Tips & Tricks

Learn How To Remove Background From Images

You know what one of the most important photo design is?. When you shot product photos, you want to upload it on your online shopping or your personality pages, you need to ensure that the quality of images is completely good especially background removal. As we know when you are trying to shot something , some unwanted elements may be present in the background you’re using . Sometimes, the images may have reflections or shadows that you don’t want. That’s  reason why you should remove the background to enhance its quality. Also a clear background will highlight the details of your image. So, wondering how to remove background from images? Looking to cut out the background from an image, but aren’t quite sure how to do it? Well, no matter if you have Photoshop or not, you’ve come to the right place. Below is some guide what help you learn about background removal.

How To Remove Background From Images

Using Photoshop Elements 12

Some of the tools using photoshop element 12 are background eraser tool, magnetic lasso, selection brush, and magnetic eraser tool.  You can use one of them to remove background from images. Firstly,  you will open the image in Photoshop, create a duplicate layer of the background to be on the safe side. After, you use the “Layers” panel to select the layer within which you wish to erase the background. Then select the Background Eraser Tool from the Toolbox and Tool Options Bar. You can use “Brush Settings” button in the Tool Options Bar to set your brush tip options as needed. In the Tool Options Bar, you can set the “Limits:” option to the preferred setting: “Discontiguous,” which erases the sampled color anywhere it appears within the brush, or “Contiguous,” which erases areas that contain the sampled color and are connected.

For the “Tolerance” setting in the Tool Options Bar, set a lower number to limit the erased color to only pixels similar to the selected ones, or a higher number to erase a broader range of similar colors. Once you have the settings on this tool set as needed, just click and drag in the image or layer to remove the background pixels.

Remove Background from Pictures using Corel Photo-Paint

Another photo editing software you can use to remove background from your product images is Corel Photo-Paint 9. You can use one of four tools of Corel Photo – Paint 9 for background removal, including: transparent color selection tool, path tool, channel mask,  scissors tool.

Transparent Color Selection Tool

It is similar to the background eraser tool found on Photoshop. This tool is very easy to use. The transparent color selection tool samples a color and replaces it with transparency anywhere it appears in your image. It differs from Photoshop’s background eraser in that you need only click once and the color is removed everywhere in the image. You do not need to click and drag with the tool, but you can click multiple times to remove several colors. When the transparent color selection tool is active, you can adjust the tool options from the property bar. In addition, you can use the transparent background image when you’re uploading product photos on to your online store. On the other hand, you can also replace the transparent background with another custom background of your choice.

Path Tool

Path Tool is Corel’s response to Photoshop’s pen tool. You can use this tool to manually trace the product’s outline to clip it out of the background.

Channel Mask

This background removal technique can be used with other methods for refined results. Before you use this technique to remove backgrounds from the picture, you should breakup the image into different color channels. You can easily do it using the split channels to RGB option available on the menu. The image is split into 3 color channels – red, blue and green. Use the channel that contains the highest details as the image mask to remove the background.

Scissors Tool

Like as the magnetic lasso tool on Photoshop, the scissors tool help you cut out the product image from the background. This technique will prove to be more effective, if the product photo has a regular outline. If you’re not very experienced in using either of the photo editing software, then you can rely on online background removal tools.

Combinations of these tools and techniques already offer users a wide range of easy, precise, and serviceable ways to remove backgrounds and isolate objects. You can use all upper tools to create perfect product photography. Now, let’s get started.

Check the tutorial video to have amazing experiences!

Thanks for watching!.