Categories
Support Tips & Tricks

Do Unprofessional Real Estate Photos May Harm Your Business

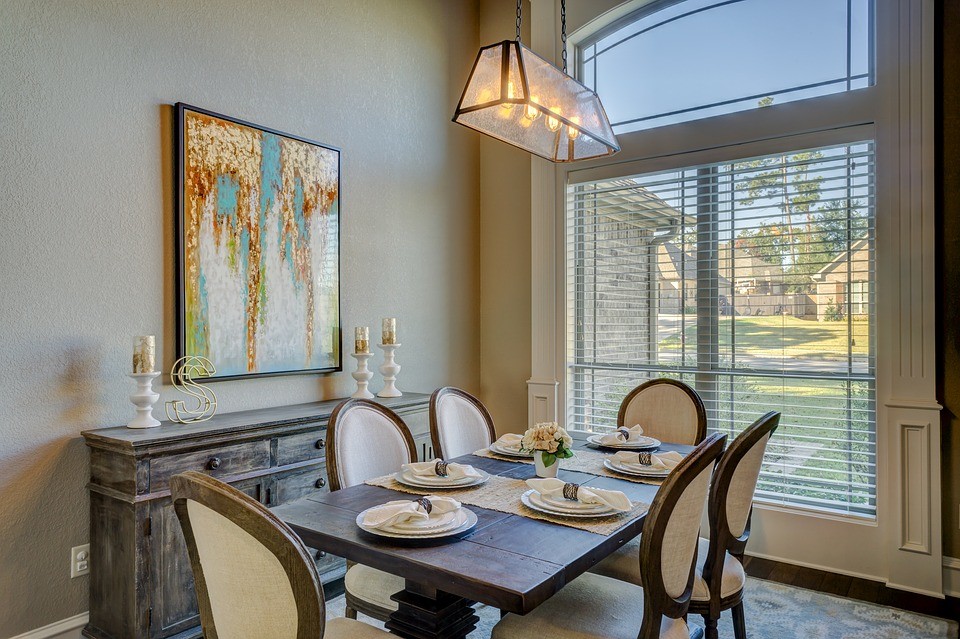
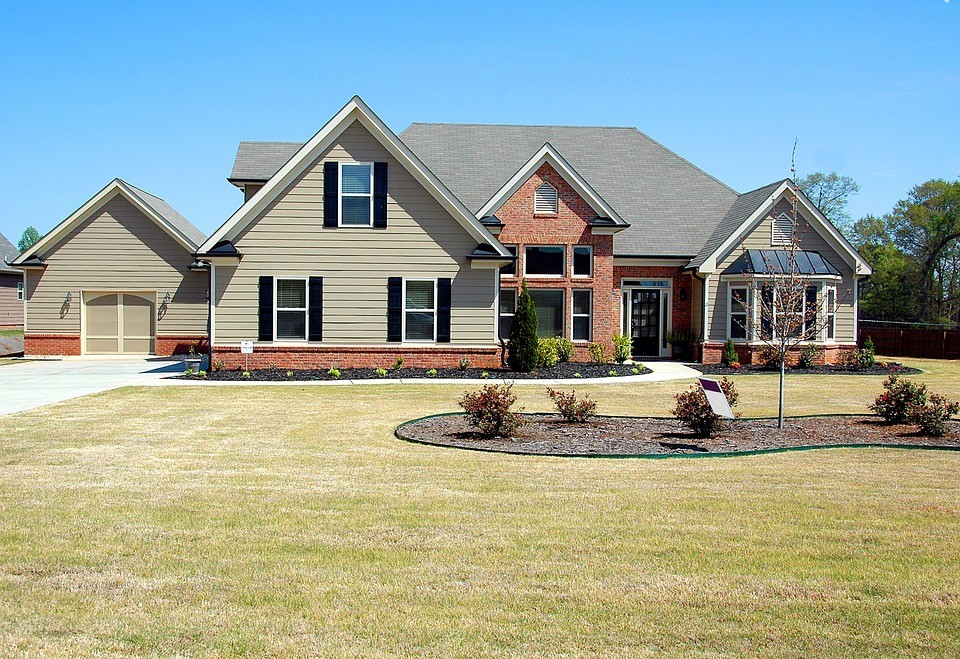
Professional real estate photography is not just a necessary element of real estate marketing. It is a useful tool to improve and increase your sales. If you are real estate agency or person who trying to shoot best real estate photos, having a real estate photos can make big difference. You are able to professional real estate photographers with high – quality photos. The photos you use can make a big difference in the impression that people have of the property. They can have a strong impression in the brand that you are creating for yourself.

Also, if having unprofessional real estate photos, how unprofessional real estate photos may harm your business?.

Why Real Estate Agents Should Work With a Professional Real Estate Photographer

As a real estate agent, it may be tempting to save a little bit of money by snapping a few photos with your camera phone. But those unprofessional photos can have a negative impact on the brand that you are creating for yourself. Especially, in a technology advanced, an awful or interesting real estate photos will crucial factors to create good impression and keep the customers. In the other words, their first impression will be decided based on the real estate listing of each property that they view.

fotosolution-Do-Unprofessional-Real-Estate-Photos-May-Harm-Your-Business-01

Furthermore, professional photos will leave your clients feeling as though they didn’t get the best service possible. The unprofessional real estate photos will likely slow down the process of selling the home.

These professional real estate photos can make a difference in the impression that your clients have regarding the service that you offered, which can in turn lead to referrals to help grow your business even more. First, showcasing their home with professional real estate photos can help you to stand out from the other real estate agents. Seconds, it will help your clients to be more satisfied with the service that you provided to them.

Why Real Estate Agency and real estate photographers Need Professional Real Estate Photos

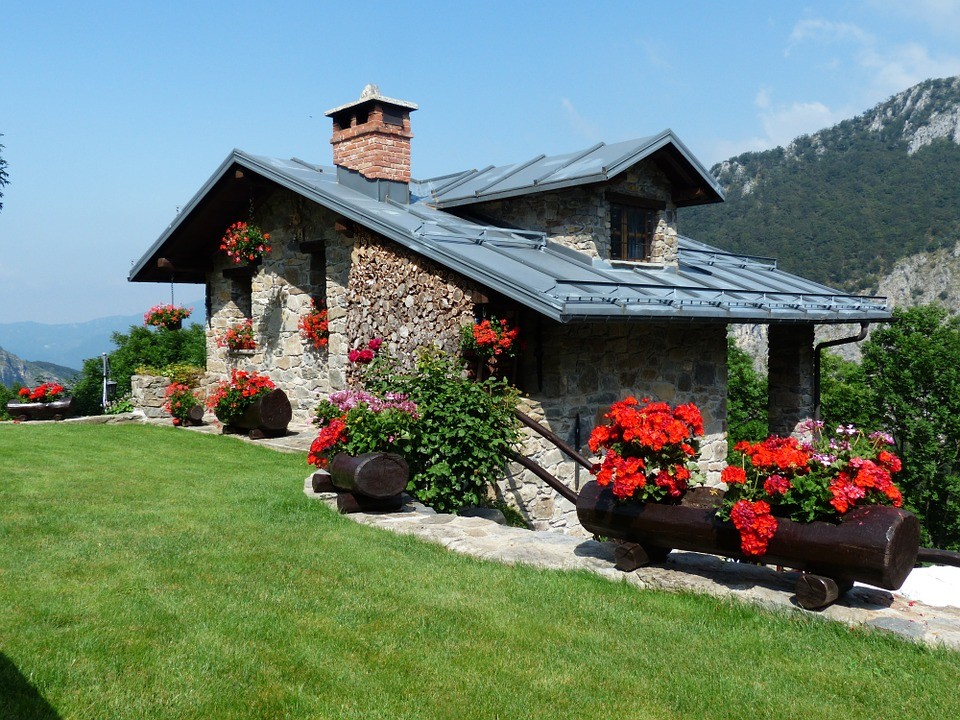
Owning and posting unprofessional pictures of your property can have a negative impact on the way potential buyers view your home. When a potential buyer sees the unprofessional photos, then they are less likely to be interested in touring the property. It will decrease the number of people who are actually interested in your home.

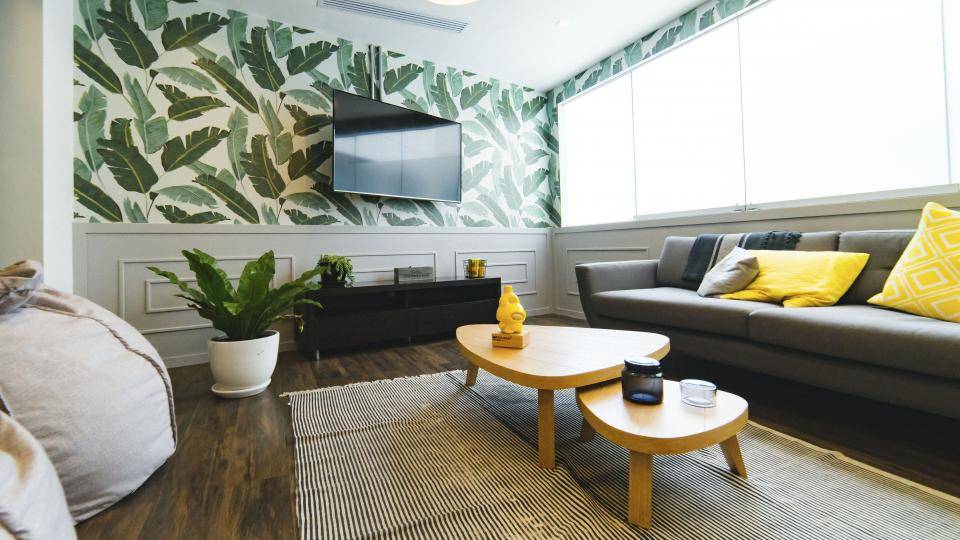
Working with a professional real estate photographer can help you to convey the beauty and benefits of your property through the photos. It can help to catch the eye of potential buyers. Your professional real estate photos will literally set the brand that you want to convey. They can impact the type of buyer who makes an offer on the property.

fotosolution-Do-Unprofessional-Real-Estate-Photos-May-Harm-Your-Business-03

Also, what should real estate agency and real estate photographer do?. You can choose real estate editing services. This is one a great choice to save your time and low cost. There are many real estate editing services company that help you all things what you need.

Below are some sharing related to the value of real estate photos to professional photographer and  agency . If you have questions or concerns, please do not hesitate to contact us today for a free consultation. Or, even you need product images cleaning up, an update of the company logo, or any of the other examples given above contact with our team can ensure you get the perfect results at great cost.

Categories
Support Tips & Tricks

5 Creative Ways to Help Make You A Better Photographer

Let’s create new ideas for your subject as shooting. It’s not difficult if you practise very hard. Here we’re gathered a few tricks that seem to consistently help you refine your skills. Let’s talk about exercises you can do every day to make you a better photographer.

Find a new Subject

Subject is one of the most important and indispensable things for photographers. Every photographer has a favorite subject. However, they always want to find a new subject for their artwork. This will help them keep the viewer enjoy their artwork.

Also, the first challenge is to find a new subject. It should be something that you haven’t photographed before. Even better if it helps you learn new photography techniques.

fotosolution-5-Creative-Ways-to Help Make-You-A-Better-Photographer-04

It’s a new things and have small difficult for photographer because the new subject is not main subject what they always shoot.

For example, are you a landscape photographer who has never taken photos at night? Then set yourself the challenge of taking some great photos of the night sky. This challenge will allow photographer know and learn new photography techniques as well as new performance.

Shoot Daily

fotosolution-5-Creative-Ways-to Help Make-You-A-Better-Photographer-02

Practice every day are the best way to help you become a better photographer. Photography requires regular practice to keep both your creative and technical sides in top order. Don’t hesitant!. Let’s put a camera on your neck for at least a half-hour a day and shoot amazing images what you like. You’ll find this keeps your mind viewing the world from a photographic perspective and will expand your horizons as unforeseen opportunities pop up throughout the day.

fotosolution-5-Creative-Ways-to Help Make-You-A-Better-Photographer-03

Restrict yourself

If you want to become a good photographer, not only need to try but also restrict yourself. Sometimes, having a lot of options is a bad thing. It can be overwhelming and leave you unsure of where to start. Imposing restrictions on yourself is a great way to overcome this, as well as an excellent method to hone in on and develop specific skill sets. In addition, restrict yourself  will force you to think in new ways creatively, which you can then draw upon in future endeavors.

Use A Wrong Lens

The earlier exercise of picking your images from the previous 12 months should highlight the lens you prefer to use for your favourite subject.

fotosolution-5-Creative-Ways-to Help Make-You-A-Better-Photographer-01

The idea here is to use the wrong lens for the job. For landscape photography, most people say that you use a wide lens, while the 50mm is considered by some to be the portrait lens.

So when you’re out making photographs, make a practice of choosing the “wrong” focal length. For example, use a telephoto lens for landscapes, a wide lens for wildlife, or a fisheye for portraits. Using a non-conventional lens helps you see your subject from a different perspective, which pushes your visual imagination and creativity.

Look at your previous work

Time give you perspective. Also, you should look at your previous work. This will allow you get best result. You’ll notice habits, ideas and technical facet that you tended toward that may well inform your work in the present.

Finally, we hope that these lessons will help you become a better photographer. Feel free to adapt and combine them. Try these exercises and let us know how they’ve helped you. Also, if you have any exercises of your own, leave a comment detailing how you develop your skills. Moreover, if you have any opinions as well as any questions concerned about this subject, let me know in the comment below.

Categories
Support Tips & Tricks

DIY Product Photography Tips: How to set ISO, Aperture and Shutter Speed

As far as we know, ISO, aperture and shutter speed are important three factors to set up cameras for product photography. Shooting in manual mode is a crucial step for DIY product photography. Let your camera automatically handle important setting such as: ISO, aperture and shutter speed. However, make sure to take control, this will help you get best product photography.

If you want to shoot high-quality images, you need to set up ISO, aperture and shutter speed for DIY product photos. ISO sets sensitivity to light, aperture controls how much light gets through, and shutter speed is how long your sensor is exposed to light.

Also, we need to focus on question: “ How to set ISO, aperture and shutter speed” to own beautiful images.

ISO

ISO is the level of sensitivity of your camera to available light. It is typically measured in number, the lower the number, the less sensitive and higher numbers mean more sensitivity. You can increase ISO to capture images in lower light. You should use the lower ISO to keep noise to a minimum. If you choose higher ISO, this maybe lead to grainy or noisy images.

fotosolution-DIY-Product-Photography Tips--How-to-set-ISO-Aperture-and-Shutter-Speed-01

ISO measurements generally range from 100-3200. Normally, a high ISO such as ISO 1,600 will produce a brighter picture than a lower ISO such as ISO 100. The drawback to increasing the ISO is that it makes the picture noisier.

Let’s shoot your camera on a tripod and take a look at your product after your lighting is set. Choosing the lowest possible ISO and gradually increase it until best appropriate images for your product.

Aperture

Aperture is a hole within a lens, through which light travels into the camera body. Aperture also controls the depth of field, which is the portion of a scene that appears to be sharp. If the aperture is very small, the depth of field is large, while if the aperture is large, the depth of field is small.

fotosolution-DIY-Product-Photography Tips--How-to-set-ISO-Aperture-and-Shutter-Speed-02

Aperture generally ranges from F1 to F22 and captured by F-stops system. You should use lower F-stops because this allows you to focus on specific details while focus falls off and blurs around your focal point.

Shutter Speed

Shutter speed is the length of time that a camera shutter is open to expose light into the camera sensor. It is typically measured in fractions of a second.

As setting up shutter speed for DIY product photography, you should use slow shutter speed. This will allow more light into the camera sensor and are used for low-light and night photography. And if you choose fast shutter speed, this will support you to freeze motion.

fotosolution-DIY-Product-Photography Tips--How-to-set-ISO-Aperture-and-Shutter-Speed-03

Shutter speed is extremely important as shooting landscape, nature or sport photography. One of big reason of these types of photography are that contain moving subjects. This requires correct shutter speed setting.

However, if you set up shutter speed for DIY product photography, it’s easier because you don’t need to move. So it’s possible to use a low shutter speed to create extremely sharp images.

Especially, if you’re taking a picture an it is too dark, a slower shutter speed will allow the camera to gather more light. The shutter speed is also principally responsible for controlling the amount of blur in a picture.

So, let’s choose best suitable shutter speed setting to help your product photography more attractive.

Here are some basic shared experiences about how to set up ISO, aperture and shutter speed for DIY product photography. Do you have questions about ISO, aperture and shutter speeds?. Let’s us know your thought as well as your experiences in the comment below!.

Categories
Support Tips & Tricks

Small Business Marketing Tools Boots Your Sales

For small or big businesses, creating brand, designing your store and building your community of customers are neccessary challenges that improve and boots your sales. These challenges to make your first eCommerce doesn’t help and become crucial pressure for your business.

Let’s push these issues out of your mind because small business marketing tools out there – optimize solution for all challenges as well as the trick is knowing which ones to start with.

Here we would like to share a list of favourite  small business marketing tools help you improve your eCommerce sale including: social media marketing, email marketing, content writing with Google Keyword Planner.

Social media marketing

Social media marketing is best optimized tool that allows you to create customer accquisition and to build community of customer around your brand. In order to do this, you need to be writing and sharing your useful subjects that help your customers know about you across a number of platforms.

fotosolution-Small-Business-Marketing-Tools-Boots-Your-Sales-01

Buffer will one of great tools to support your issue. It makes creating social media images convenient – fast and easy to use. Also, don’t hesitant!. Let’s connect all your social media account to your Buffer account and post within one platform. One of the best special point of using Buffer are that you can automatically connect with different social media channel and choose appropriate time by schedule post.

With access to over 600000 free images, basic photo effects and the ability to add text and tools to easily size for a variety social networks, this will support your product as well as the content subject of you. This will help you promote and create your attention to customers.

Email marketing

Using email marketing is one of popular activity that many business trust and choose as the first choice. Here, we will com up with one of email marketing tool list: MailChimp.  Main missions of MailChimp are that design and send emails, auto-messages and targeted campains to subcribers or imported list and check the result.

fotosolution-Small-Business-Marketing-Tools-Boots-Your-Sales-04

With more 10 million customers access and send more than 600 million email a day, Mailchimp will completly great compagnion for all businesses. Especially, using Mailchimp, you can schedule emails ahead of time so you can plan and create your content in advance. Then, you can take some time to check the analytics. The analytic will help you graps the data as well as show the best time to reach your customers.

Content writing with Google Keyword Planner

Seo isn’t an easy task. To pass perfect Seo content, it requires many factors and Google Keyword Planner is supported tools for your content. As far as we know, writing a blog is great way to optimize your eCommerce store for search engines. You can use it to get keyword ideas and traffic forecast by looking at the search volume of different term, as well as the better ranking alternatives for those terms.

fotosolution-Small-Business-Marketing-Tools-Boots-Your-Sales-03

Especially, you can filter keywords based on many ways such as: Average CPC, Estimated Search Volume, Keyword Competition, Filter by Keywords,…

The Keyword Planner tool supports various workflows for building ad groups and campaigns either starting from scratch, or based on your existing lists. It provides more cohesive user experience by integrating the keyword selection, grouping, analysis and filtering aspects of the keyword selection workflow.

There are 3 small business marketing tools to increase your sales. Do you have other business marketing tools?. Let’share your though and experiences in the comment below.

Categories
Support Tips & Tricks

3 Impressive Benefits of Real Estate Photography

Professional real estate photography is not just a necessary element of real estate marketing, it is golden key to improve and boot the sales result.

As far as we know, many homebuyers use the internet to find approriate property especially in the technique advanced. So, an awful or interesting real estate photos will crucial factors to create good impression and keep the customers. In the other words, their first impression will be decided based on the real estate listing of each property that they view. There are several ways that the photos can be benefits to help you sell your home.

Choosing best cameras with various features is considers as the first choice of the real estate agency. However, due to having limitations, these cameras are often incapable to capturing the true nature of property. For example, spacious house become small and dull, beautiful living-room with more light become dark and colder. These will make your real estate photography worse and decrease the customer’s attention.

Hiring a professional real estate photographer will a great choice for home agency. They have the skill to showcase the property at its very best. When you own a photographer who have many experiences in real estate, they will have a unique way of viewing and shooting the home. Because they can tap into their past experiences in order to know what looks good.

Therefore, we can affirm that real estate photography is really very important. Here are 3 impressive benefits of real estate photography.

Generate Quality Leads

fotosolution-3-Impressive-Benefits-of-Real-Estate-Photography-01

It is estimated that professional online real estate photography generate an average of more than 60% pageviews than their point and click countertops. This is great result for boosting your sales.

Sell More

As their listing feature professional real estate photography, the price of the home can sell for anywhere from $3,000 to $11,000 more than their list prices. These numbers are based on homes that are listed between $200,000 – $1,000,000, which covers a large percentage of the properties that are on the market.

fotosolution-3-Impressive-Benefits-of-Real-Estate-Photography-02

Impressive Your Current Clients

Your clients want to know their listing is in great hands. Best real estate photography shows them you’re committed to an exceptional presentation of their property. In addition, using professional photos, you can help your buyers focus to be on the benefits of the home.

fotosolution-How-to-improve-real-estate-website-lead-01

If you have any opinions as well as any questions concerned about this subject, let me know in the comment below.

Categories
Support Tips & Tricks

How to shoot better architecture photography

Today we will show how to improve the skill as shooting architecture photography. These are great experiences that help you own best architecture photos. Hopefully, these tips will allow you to capture something a little better than just a snap.

fotosolution-How-to-shoot-better-architecture-photography-04

Shoot Low ISO

Let’s minimize noise by shooting at a low ISO. As you’re going to have a stable camera, you’re not going to have any issuesgetting enough light into your camera.

Focus Length

fotosolution-How-to-shoot-better-architecture-photography-01

Focus length or wide angle lens is great ideas for this genre as its enables photographers to frame the entire building within its environment. You can setup wide angle lens under 35mm on a full frame sensor. However, this depends on how close and far away you are from your subject. In such cases, you are probably going to want wide angles anyaway from 12mm to 35mm. For example, when you find appropriate position where you can get a great shot of a building from a long distance away, then longer focal length will be effective.

Close the Aperture

Close the aperture is one of great ideals that help you capture the best angles for amazing architecture photography. Shooting at smaller aperture allows you to minimize any lens errors too. In different cases, you shoot at wider aperture, it can be good for artistic effects. Normally, professional architectural photographer will want a greater depth of field which means f8 or above in most architectural situations.

fotosolution-How-to-shoot-better-architecture-photography-02

Camera Position

If you position a camera with a wide angle lens close to a building, then the effect can be quite dramatic in emphasizing the size of objects in the foreground compared to objects in the background. If your location is already chosen beforehand, then be sure you are prepared for that particular location. Find right location will allow photographers to choose best angles as shooting building. Moreover, it will help you determinate perfect camera postion.

Shoot in Different Weather Conditions

The weather is crucial point in shooting process of photographers. Especially, as they choose subject in outdoor shooting. So, let’s pay attention to the weather report that is a great way to ensure the perfect shot. Normally, early morning with beautiful lighting is considered as great choice to capture best moment.

However, this will absolutely a big mistake if you give up different weather conditions. Because in fact, you may be suprised to find that the best photos are taken when a storm is brewing overhead or the sky is overcast. It’s a great idea to return to a location several times during different weather conditions to enhance adn create special thing for your pictures.

Instead of capturing popular and familiar spaces for architecture photographer, let’s try to renew them with different space.

Use a tripod at night

Architecture subject go through a visual change once the sun has set, and it often feels like you are looking at two different places. They light up and show a different kind of beauty. This make photographer difficulty to capture best angles as well as moment during the day.

fotosolution-How-to-shoot-better-architecture-photography-03

Therefore, the best way to properly photograph them at night is to use a tripod. In a cases, you shoot with long exposures, a tripod will a best companion for your project.

Don’t forget post-processing

Post-processing is an important and unnecessary mission for photographer. So, avoid the happened mistake, let’s check all steps before posting including: color correction, sharpness, contrast,…

Besides, you could also use PTLens, which works to provide not only corrections to lens distortion, but also to chromatic aberration, vignetting, and perspective.

Here are 6 basic tips that help you own best architecture photography. Do you like to photography building?. Hopefully that these tips will help you achieve beautiful architecture images. Let’s share your experiences as well as your architecture pictures in the comment below. It’s pround that if we have received very positive feedback from readers as well as customers.

Categories
Support Tips & Tricks

3 Main Reasons To Use Natural Lighting For Headshot Photography

Natural lighting is one of useful and important tool that support for photographer’s project. In addition, this source of light is completely free and natural. Understanding the feaures and the advantages of natural lighting allow photographers to improve the quality of images and save time as well as save their budget. Today, we will show take advantages of natural lighting in shooting headshot photography.

Headshot photography is a photographic technique where the focus of photograph is a person’s face. Do you owner best headshot photography?. If you are professional photographer, you should know how to get someone relax in the front of camera, evoke the best poses to capture amazing photography with the aim of natural lighting.

Below are 3 main reasons to use natural lighting for headshot photography. Hopefully, you will find it interesting.

Natural Lighting is cheap

If you are beginner, you can’t affort to hire modern equipement for shooting project. In other words, you can creat a beautiful headshot photography without fancy studio equipement.

Think ing about your own product and how being a natural light photographer may be a way to capture attention from potential clients. In addition, you should understand and take advantage of natural lighting. The time of the day is also known as golden hours because of the tone of the lighting. For example, morning light is softer light, mid-day light is harsh and night-day is the weakest lighting. Knowing the natural of light will allow you to plan the timing of the shoot.

fotosolution-3-Main-Reasons-To-Use-Natural-Lighting-For-Headshot-Photography-01

Natural lighting highlights every skin tone

Natural lighting is one of perfect choices that help you highlights every skin tone. From pale or white skin to dark chocolate brown, natural light makes everyone look beautiful. Natural light will make skin tone or facial features brighter. If you shoot headshot photos at midday – the harshest time of day, you should set up objects to limite the harsh lighting. For example, you can use the side of a building or under a tree.

fotosolution-3-Main-Reasons-To-Use-Natural-Lighting-For-Headshot-Photography-03

Simply, you just know and understant the time of natural lighting, just be creative in how you use it, you will capture best headshot photography.

Shooting outdoors is more effective

Every location has its own particular feature that can give an image something unique. The location doesn’t have to dictate the type of shot you take but certain places will enhance your vision. Getting your subjects to interact with the surroundings not only makes for a more interesting shot, but adds a bit of fun for everyone involved. Also, shooting outdoors will best way that allow your clients to access to environment and to feel relax as well as more comfortable.

fotosolution-3-Main-Reasons-To-Use-Natural-Lighting-For-Headshot-Photography-02

Now, the mission of photographer are that help clients know how to get relax in the front of camera. It gives you a chance to take some of pressure off them. This is best opportunity that help you capture best moment of clients as well as have better look of the headshot.

Here are 3 main reasons to do headshot with natural lighting we wanna share with readers. What other reasons do you know? Share your questions and experiences with us below.

Categories
Support Tips & Tricks

Tips For Best Quality Real Estate Photography

Best quality real Estate Photography should be an essential component of your marketing strategy especially for real estate photographer and real estate agency. A picture might be worth a thousand words, but in the case of your home’s listing photos, pictures can be worth thousands of dollars. Also, if you want to create great impression for your customers, what should you do? – owing best quality photos.

In addition, interior photography is a skill. These need to be studied, practiced and mastered if you’re to succeed in this saturated and competitive field of photography. Understand the difficult of real estate agency or property photographer, here are some tips for better Quality Real Estate Photography.

Use the correct equipment

Before shooting real estate photography, the first thing you should do: choosing and using the correct equipment. Therefore, how to use the correct equipment?. You need to take care of 3 main elements including: wide lens, flash and tripod.

Wide angle camera lens will give each room in the home a true sense of depth. Additionally, wide lenses are an incredible way to display the whole room or exterior so that one can clearly see how it looks in detail. Furthermore, using wide angle camera allows you avoid unrealistic images, and at the same time, allows to zoom out and make a space look larger and more spacious.

fotosolution-Tips-For-Best-Quality-Real-Estate-Photography-01

Let’s get yourself at least one good-quality flash. In the other words, flash is one of your most important tools in real-estate photography. Let’s use your flash away from your camera without any restrictions.

Tripod is an essential tools to support your project. Hand-holding your camera with interior photography not only looks unprofessional, but it will result in blurred shots every time. Arm yourself with a tripod and a remote shutter release to eliminate the risk of camera shake when taking a shot.

Prepare the room

Before a Real Estate Photography project is started, you should prepare and decorate all things in the room to turn into perfect room. This helps make rooms look inviting and warmer and allows real estate photographer to improve your creative. Keep in mind that flowers and books are always a great idea. If you are going to take photos of closets, make sure everything is hung tightly and not overcrowded. Turn on all the lights to make rooms warm and inviting.

fotosolution-Tips-For-Best-Quality-Real-Estate-Photography-02

Focus on a few choice parts of your home

While you may love your three freshly painted bathrooms, make sure to photograph the spaces you think will hook a potential buyer  and leave out the rest. For instance, if you have an brilliant living-room, use an image of that to put viewers in a relaxed mindset, luxury and warm as opposed to overwhelming them with multiple shots of similar spaces.

fotosolution-Tips-For-Best-Quality-Real-Estate-Photography-03

Control Ambien Light and Flash Light

When photographing a room during daylight hours, the light inside a room is an important elements that have strong point or weak point for your real estate photography. Taking a photo with your camera set to expose for the room you’re in will leave the windows over-exposed as a mass of over-powering white light. High-end interior photography involves balancing the light coming through the windows with the light inside the room.

Learning how your camera’s shutter speed only affects the ambient light while aperture and ISO affect both ambient and flash power, is a key skill in balancing the two sources of light and creating striking images. This is the best way to get best quality real estate photography.

In addition, you can use natural light to make your room warmer and more natural. So, let’s try to schedule picture taking on sunny days, which will highlight your home

Avoid shooting blurry images

This sounds obvious, but first impressions are everything. Consider investing in a tripod to hold your camera steady so that you can get the best shot of the room. Check each image after a shot to be sure you got at least one or two crystal-clear images.

Here are some tips to help you own best quality real estate photography. We hope that these tips help you work more efficiently with your clients and produce better-quality images. If you found this article useful, share them and your though in the comments below. If you looking for useful real estate photography, make sure to follow our blog: http://admin.admin.admin.admin.admin.admin.fotosolution.com/real-estate-graphic-services/.

Categories
Support Tips & Tricks

Photoshop Tutorial: How to replace the sky in Photoshop

Today, we’re going to show you Photoshop Tutorial: how to replace the sky in Photoshop. Shooting images in daylight are always brilliant inspiration to create art for photographer. Taking the advantage of natural light are crucial point in shooting process. However, one of the disappointing things can happen to photographers is to have the weather let you down. “A good or a bad weather” are at the heart of what most photographer interest in. It’s great when we have bright blue skies in the background of photos but bad days are inevitables.

To adress this issue, we are going to learn a simple techniques to replace the sky in Photoshop.

Photoshop Tutorial: How to replace the sky in Photoshop

You can change the sky in an image in a number of ways. Here we will present you how to replace the sky in an image by using Magic Wand. The Magic Wand would be good choice for selecting the sky.

fotosolution-Photoshop-Tutorial- How to-replace-the-sky-in-Photoshop-01

First of all we need to find the suitable background. You can build up the collection of sky by shooting them or finding from image source in social media channel. These will help you own many choices to find a good placement.

Note that once the sky is cut out, it is important to choose the right sky. You should make sure that both of the photos are the same size as well, which may mean you’ll need to resize one before moving on to fit your scene.

fotosolution-Photoshop-Tutorial- How to-replace-the-sky-in-Photoshop-02

Seconds, using the Magic wand tool are next step you can realize. This tool will allow you to hide the sky layer. It is very convienient as you use image with the sky that have all the same color. You need to choose the whole of current sky section and create a new layer and filled the section with a solid colour.

Thirds, you create Clipping mask by pressing Layer-> Create Clipping mask layer ( the shortcut CMD/CTRL, Shilf+G). With Clipping mask will help you place your sky layer inside of the solid filled layer. Let’s move it until you feel pleasure.

fotosolution-Photoshop-Tutorial- How to-replace-the-sky-in-Photoshop-04

Then, you choose the solod filled layer and hold down CMD/CTRL and click on the layer review to refine the edges. Use the marquee tool to soften the edges slightly.

Next, you have to fill the gaps. To begin with simply create a duplicate sky layer, then hide it. In this step we are going to fill in the gaps. To do this, go Select > Colour Range. You can choose appropriate color to fill the gaps until you feel the most comfortable.

fotosolution-Photoshop-Tutorial- How to-replace-the-sky-in-Photoshop-05

Creating the Mask layer is next choice. After Select->Colour Range->OK. You can select the duplicated sky layer. Then at the bottom of the layers panel, you will find a small square box with a circle inside. This button is the add layer mask tool. This works similar to the clipping mask layer. It will show the areas of the cloud layer through the mask.

Photoshop adds a new layer mask to Layer 1, and if we look at the mask’s preview thumbnail in the Layers panel, we see that the area we selected is filled with white, which means it should still be visible in the document, while the area that was not selected is filled with black and should now be hidden.

fotosolution-Photoshop-Tutorial- How to-replace-the-sky-in-Photoshop-06

fotosolution-Photoshop-Tutorial- How to-replace-the-sky-in-Photoshop-07

fotosolution-Photoshop-Tutorial- How to-replace-the-sky-in-Photoshop-10And if we look at the image in the document window, sure enough, that’s exactly what we see. The area I selected is still visible, while the area above it is now hidden, revealing the sky photo on the Background layer below it. We’ve replaced the sky in the original photo.

Adjusting and tidy the image up are important and indispensable steps. Using the vector mask will allow you to select in your colour range selection. After selecting the layer mask, let’s use a black brush to paint over the areas you don’t want in the image. If you want to replace areas simply change the colour to white.

Finally, keep in mind that you check all the mistakes before saving them. Besides, you can add some adjustments to make your images more stunning if you wanna.

fotosolution-Photoshop-Tutorial- How to-replace-the-sky-in-Photoshop-03

So, anyway we hope that you will enjoy this sky replacement tutorial. Check out all out other free tutorial here!. Do you have other methods to replace the sky in Photoshop?. Please share your experiences in the comment below. It’s greate to see you here at the Fotosolution.

Categories
Support Tips & Tricks

How to improve real estate website lead

Real estate website is considered as a representative face to describe and provide best real estate photos and services.  It is also the powerful left arm for real estate agents. Therefore, what do you need to do to make your real estate website generate even more leads and climb to the top of the search engines?.

In other words, which is a great first step into branding yourself and your business and generating more leads?. Below are some useful tips that help your business improve real estate website lead.

Determinate main customers who are interested in the service of your business

It’ll be rather unfavorable to generate high-quality real estate leads from your website if you don’t know who will buy and be interested in your products. So, what should you do to address this issue?. First, let’ determinate main customers who use surely your services. Then, develop buyer personas for each type of home buyer or seller. Next, you should research many elements around your customers including: their demographics, their interests,..  So you can create content that strikes a chord with them.

Calls to Action

Let’s give your visitors plenty of chances to supply you with their contact details so they can become official leads. Nowadays, there are many amazing tools as well as actions to support your business. In fact, whether customers come upon your website, they can’t read your mind. You need to come out and tell them what to do.

Don’t hesitate, a call to action to provide contact information of your business. Provide them with buying and selling guides including: testimonial, contest, survey email,… This will encourage them who provide the contact information in exchange for these free resources.

Page Titles

It’s important to have effective page titles. Page titles can improve your search engine results. Page titles should be unique for each page on your real estate website and should reflect the overall content for that page.

fotosolution-How-to-improve-real-estate-website-lead-02

Building Link

The more websites that link to your real estate website, the higher your search engine rank will be. Reach out to businesses with websites that are related to real estate or your community and simply ask them for a link to your website. Make sure that this is not your competitors. Remember that the more quality content you have on your real estate website, the more willing others will be to link to it.

fotosolution-How-to-improve-real-estate-website-lead-03

Building new lead for your website

An old website with simply and vintage layer will become disadvantage things for your website. These will make the volume of customer decrease and limited. The best way is that generate new lead. Hences, let’s change the theme or navigation, updating your lead capture forms, or creating more targeted content for your audience. This will an interesting methods to enhance your site visitors stick around and keep comming back.

fotosolution-How-to-improve-real-estate-website-lead-01

Finally, please make the most out of the real estate website. Do you know what others methods do your business improve real estate website lead?. Let’s share your experiences in the comment below. It’s pround that if we have received very positive feedback from readers as well as customers.