Categories
Support Tips & Tricks

Beautiful Real Estate Photography Listings

Real estate photography appears more and more popularly in many places around the world. With the competition in marketing, real estate photos are considered as useful tool to boost the sales of some amazing and cozy houses. Great real estate photos don’t simply require an attention behind the lens to make house more brilliant. A good real estate photos should meet and strike a chord of buyers to arouse the customer’s purchase.

Taking photos for real estate listings on your own is certainly a viable option if you’re comfortable doing so. So, how do you make a good impression with real estate photography?. Here are some examples of listing photos that help you learn how to get best real estate photography.

Home with natural lighting

The sun is your best friend when shooting photos including real estate listing. Prove that any professional photographer will confirm you that nothing is better than natural sunlight. This natural lighting provides ample opportunities to capture every corner of a home’s interior and exterior. The most important thing that you should choose the most approriate moment to capture natural lighting source for shooting photos.

fotosolution-Beautiful-Real-Estate-Photography-Listings-01

According to experiences of almost photographers, the late morning and early afternoon when the sun is generally shining brightest, are two best time to get beautiful real estate photos. In addition, let’s open the curtains and turn on all the lights to make a room look bright. Beyond, you should also avoid taking photos on rainy days or at night, as this will produce gloomy photos.

Home with artifical lighting

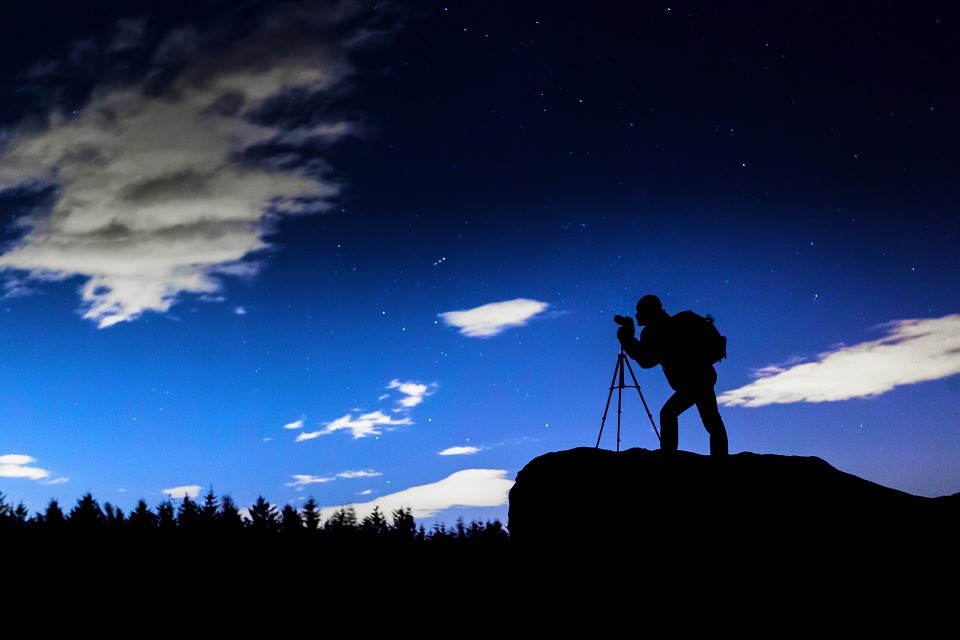
Daytime is an optimal period to secure the best real estate photos. However, can’t make sure that the climate is beautiful enough to take best photos. Especially, when shooting in the bad day or at night, it’s difficult to own best real estate photos. Also, use artifical lighting is the second choice to take advantage of lighting.

fotosolution-Beautiful-Real-Estate-Photography-Listings-02

Let’s open many lamps in room to create light for home’s interior. Besides, use artifical lighting is the best way for photographers who perfer to work during night-hour and this would not be possible without artifical lighting.  Moreover, be it interior and exterior design, different sort of ligh is used as decorative tool that help to create pleasant and cozy atsmosphere and illuminate particular part of house.

Luxury real estate photos

If you own great luxury real estate photos, you should capture good portion of your real estate photography.

fotosolution-Beautiful-Real-Estate-Photography-Listings-03

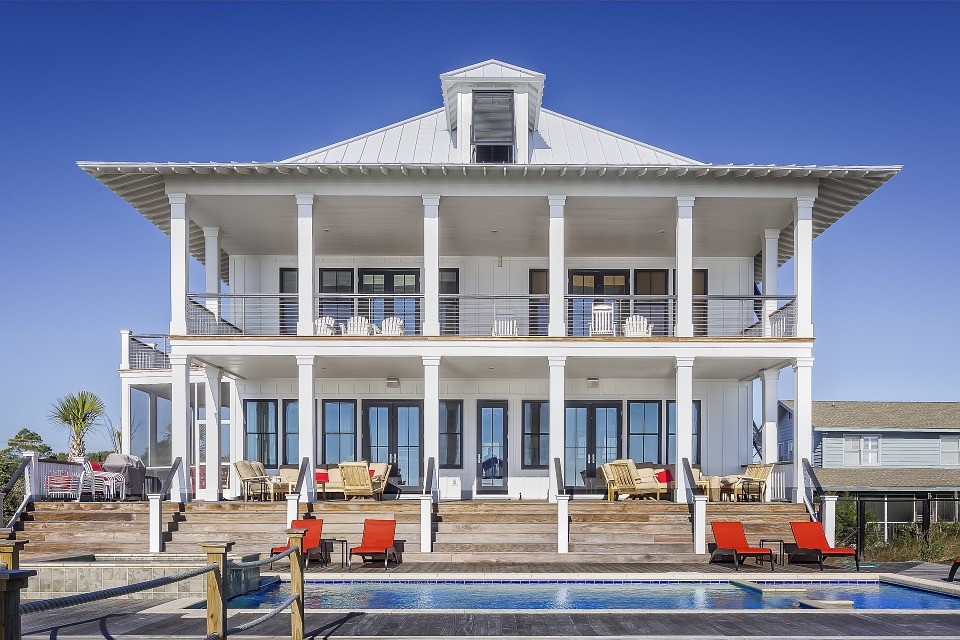
High-end properties with beautiful amenities, spacious rooms, and lots of modern tools make your sales job much easier … but that doesn’t mean you’re guaranteed to get the best real estate photos. This will help you grab customer’s attention. Keep in mind that you should choose some of special items as: a pool, a deck, a garden,.. items to distingue between luxury real estate and home.

An effective way to show of the size of house including the size of yard, of rooms, of kitchen,….is to get pictures from a high point in the home.

Urban properties image

Does it have a great view of city skyline?. It is great spaces to help you exhibit the city skyline’s beauty in real estate photography. If you own urban properities, this can be totally appeared. Urban properities come in all shapes and sizes and offer resident an array of different retail, restaurant, room,…

fotosolution-Beautiful-Real-Estate-Photography-Listings-09

Who say you need to be outdoors to exhibit the city skyline in real estate photography?. Note that when shooting real estate, you should show off the comfortable rooms as: living-room, kitchen, bedroom,.. but also manages to take advantage of the stunning view outside the window. Because they are strong points to attract buyers.

Suburban properties image

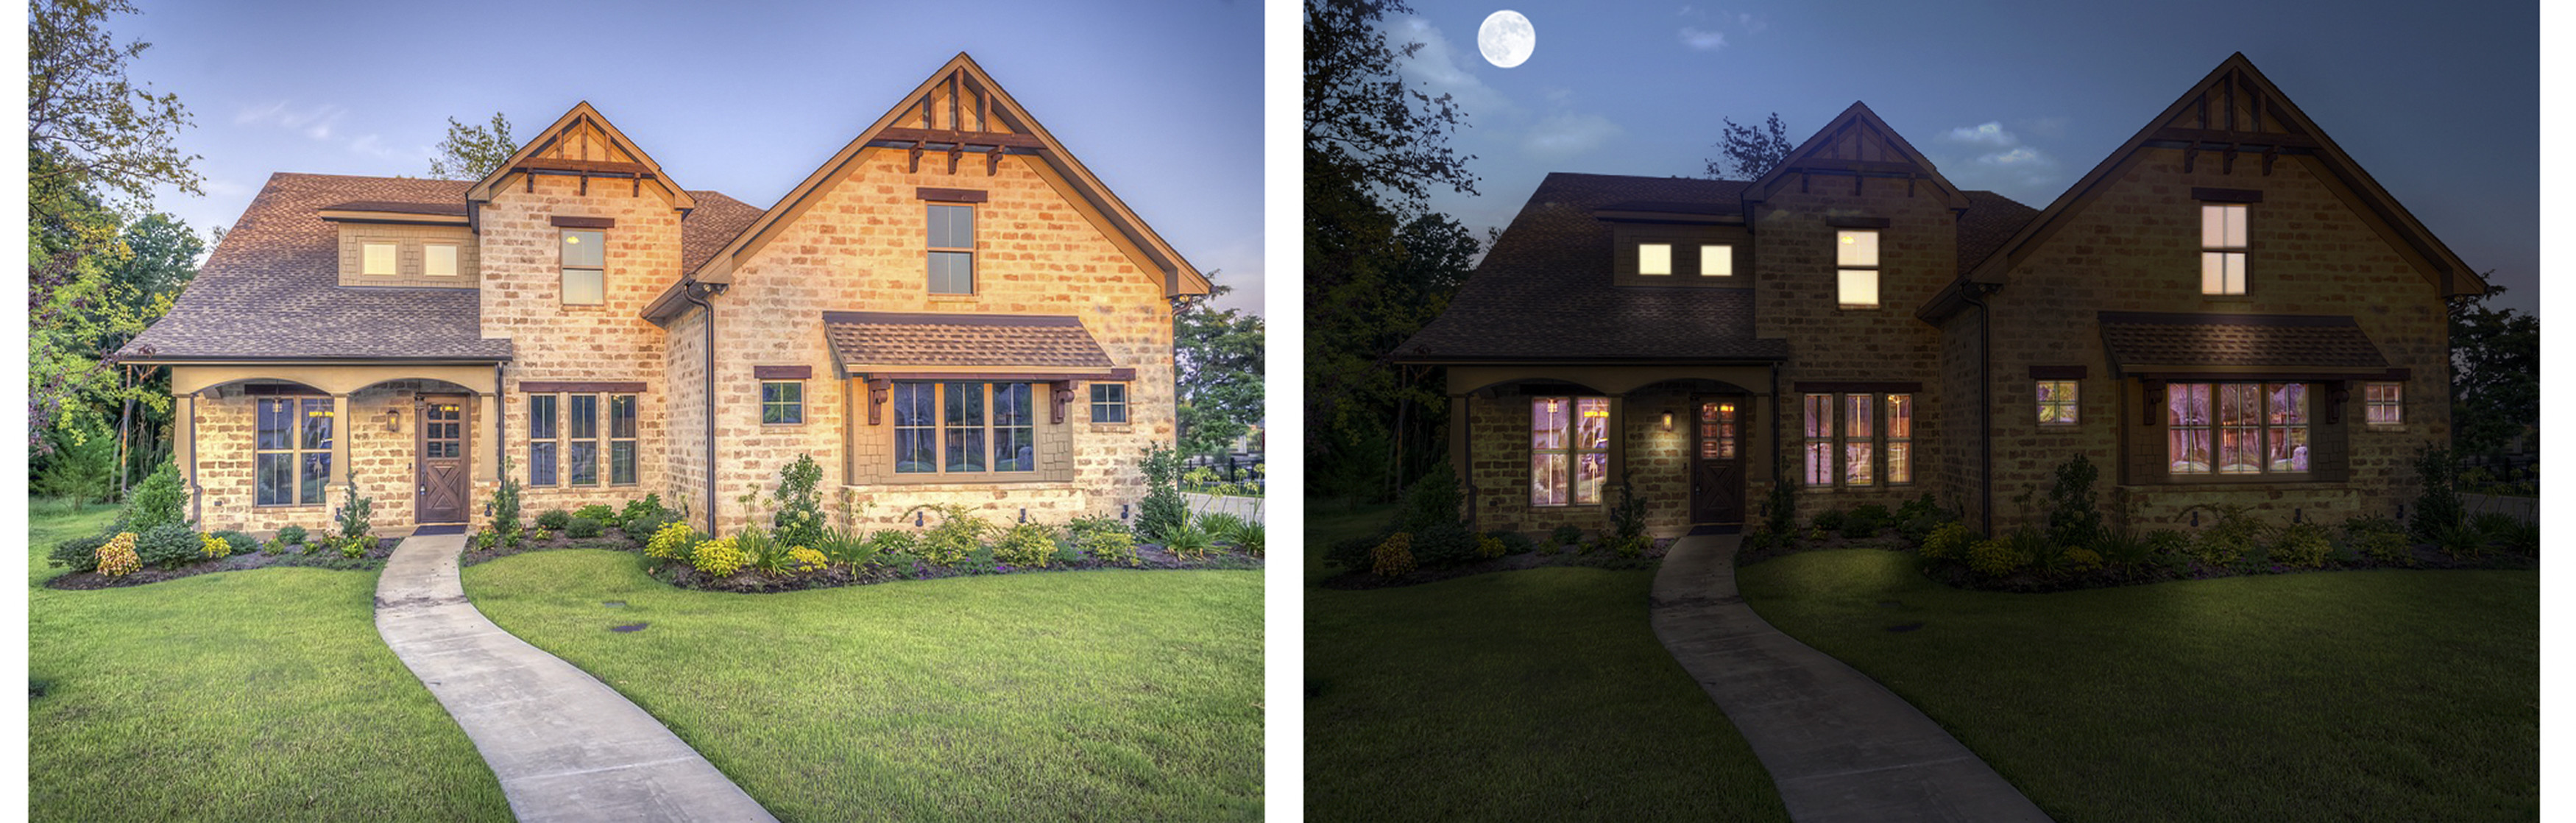
Choosing urban properities with noisy and dusk atmosphers are not the only selection of customers now. Do you believe that this beautiful and modern real estate in campain will totally win and evoke comfortable feeling for customers. The most necessity thing that you should know and capture the special characteristic of surban properities to high light.

fotosolution-Beautiful-Real-Estate-Photography-Listings-06

The patented real estate picture to secure for listings in suburban communities is the full-facing shot of the entire front of the home. Notice the green grass, the finely pruned bushes, and the overall cleanness of the scene. It’s best to get pictures of the exterior at multiple points throughout the day such as dawn, afternoon, dusk, late night — to give prospective buyers a full glimpse of the home’s aesthetic at varying times and show off its interior and exterior lighting.

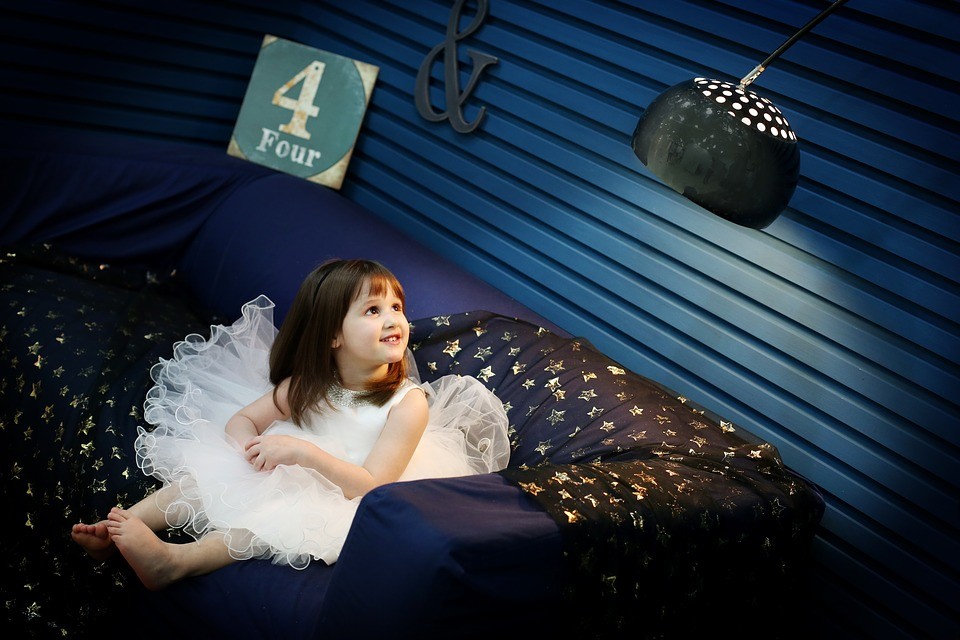
Residential Interiors photos

fotosolution-Beautiful-Real-Estate-Photography-Listings-08

Staging is the key element to interior real estate photography success. And residential interior is one of best part to make spaces perfect. A symmetrical shot of the living space that highlights the neutral color scheme, the matching loveseats, the coffee table, and the unique decor and accessories are golden key for photographers. Let’s create stylish and organized spaces that evoke pleasant and warm feeling for customer, will be a top goal when shooting.

Residential Exteriors photos

Residential exteriors are big point that contribute to turn your real estate into more perfect in eyes’customers. Buyers take the quality of homes near listings into great consideration when narrowing their home search down to a few possibles, both in terms of home values and design. So, showing that your listing strong points in well style-wise with nearby properties is a big plus.

fotosolution-Beautiful-Real-Estate-Photography-Listings-04

Here are some of real estate listing photos for your choices. Perfer to shoot your own real estate listing photos?. Do you have or add real estate photos for listing?. Please share them in the comment below. If  you have questions or concerns, please do not hesitate to contact us today for a free consultation. Interested in hear your thoughts in the comment below.

Categories
Support Tips & Tricks

4 Crucial Elements of Modern Real Estate Marketing

Modern real estate marketing means useful tool that help you connect your customers as fast as improve the interation between them and your brand. Leveraging morden and developed technology to keep potential clients and interact with them constantly is now a crucial element of success for your business. Are you ready to build real –time marketing plan?. If you have never prepared real-time marketing plan, now it’s time to start-up. Let’s keep up with the constant changes taking place within your marketing funnel.

In order to compete, you need to consistently share content that works on various platforms and devices, reply to leads as soon as possible, and manage clients from anywhere. So, where do we start?.

Below we show 4 crucial elements of modern real estate marketing that supply you helpful experiences for your project.

Build a real estate foundation before you focus on managing your marketing on the go

You would like own and master modern real estate marketing everywhere even you go out the office. It’s not difficult as you learn how to build a real estate foundation for your brands. Master great real estate foundation will a good start up step that help you attract customers and get found search engine result pages, earn your site clicks your prospects, turn those visitors into brand new leads.

4 Crucial Elements of Modern Real Estate Marketing

Let’s create systems for promotion and advertisements including: establish your content creation such as: buyers, blog, seller resource,…to get your message to the right leads.

Nurture and Take care of leads with personalized communication

Nurture and take care of leads are the next plan to develop modern real estate marketing. The best way to connect and access customers are indirectly communication with them. Thus, email to your leads and customers need to be carefully crafted. Using development of technology, it’s main your phones that suppy you to approach to clients.

Automated and manual email can be send from your phones. Add your newest leads to automated drip emails using modern email marketing software, and send manual, personalized emails to the best prospects. The best part is that you’ll reaching them at the highest level of interest. It is considered as golden key in real estate marketing.

Conduct real-time marketing activities through your devices

fotosolution-4-Crucial-Elements of Modern-Real-Estate-Marketing-02

Real-time marketing means mobile content creation, like videos. You can shoot clips of your open houses, conversations with clients, tours around town, and other aspects of your local market, all with the device that’s in your hand throughout the day. Thus, your mission are build great plan with amazing scripted content to improve information related to real estate for buyers.

Find the right real estate lead management app for your phone

Sending emails to your prospects on the go is great. However, to manage effectively your work, you should find the right real estate lead management app for your phone. This will help you save times and can manage leads and clients everywhere.

Nowadays, there are convient and interesting apps for your lead management. These apps have the ability to see every detail, request, and preference associated with their prospects, and makes it simple to organize, prioritize, and nurture the best ones. Research the market to find the right solution that can do this for your business, especially when you get out of the office.

What kinds of modern, real-time marketing tactics and techniques do you use for your real estate business today?. We hope that this article will help you find and have great solution for your project. Let’s us know your thought in the comment below!.

Categories
Support Tips & Tricks

Tips for shooting night photography

Shooting night photography is great artwork and intelligent and best tips will allow photographer to own perfect night photography. The main challenge when photographing at night is getting a proper exposure. If you want to own and shoot great night photography, here we will show tips for night photos we’ve learned with you and hear your thoughts on this diverse and fascinating style of photography.

Get high quality night shoot

fotosolution-Tips-for-shooting-night-photography-04

If you want to have the best night shots you need to take a best image quality and it means that you need to determine RAW format. By shooting in Raw, your picture will retain the best information, this will allow you to adjust your images in Adobe Camera Raw and other raw-processing software. In additional, Raw is useful tools that has special advantages when shooting night. Because it make you clear-headed if you want to change things such as colour temperature or white balance, accurately increase or decrease your exposures.

Use the tripod for sharp images

fotosolution-Tips-for-shooting-night-photography-02

Take a picture at night is surely less light and therefore slow shutter speeds. From 1 to 30 seconds are long time that help you retain your cameras by hand. So, you need to bring a tripod if you want to own sharp images. Let’s make sure your tripod is set up correctly and rock solid and it is easy to end up with soft images because you haven’t double-checked. Remember that don’t retain the tripod when you’re shooting with slow shutter speeds because any slight movement can mean blurred photos.

Choose approriate photography locations

fotosolution-Tips-for-shooting-night-photography-03

If you want to save time for shooting images, you need to choose approriate photography locations instead of finding locations as it’s time to shooting. Thus, Choosing the best place where have many lighting and the best amazing architecture. For example, if you’re looking to shoot traffic light trails, check which roads are busiest, when is the best time for traffic and it is best location to capture images.

Use best apertures of the lens

Use the sweet spot range of apertures for your lens – always are between F/8 and F/16 but try to shoot to find and check this aperture. By using apertures in the middle of the available range you’ll increase your chances of capturing the sharpest shots with your lens.

Night photography setting

To take control your exposure and it’s best to shoot in Manual mode, you can choose the best narrow aperture and slow shutter speed for night photography. Begin by composing and focusing your shot, set a narrow aperture around F/16 then dial in the right shutter speed until the exposure level mark is in the middle of the exposure level indicator. You can try to shoot some images and check them on your LCD.

Don’t touch cameras

As you shoot your exposures at night, even touching your cameras to press the shutter button can create the movement. This will make your images blurred. To avoid your problems, let’s use and set up time mode to shoot automatically.

Here are some tips for shooting night photography we want to share with readers. The practice of night photography is rich with community engagement. Let’s take your time, applying these tips to own best night photography. Got any of your own favorite photo tips to share with friends ? We’d love to hear about them in the comments section below.

Categories
Support Tips & Tricks

Photoshop Tutorial: How to turn day into night

Sometimes you happen to come across a special place that looks beautiful but do you know what would you look like at night. Normally, photographers always shoot great pictures with brilliant inspiration source by natural light. In other way, they take the advantage of daylight to sketch their project. Let’s try to change and shoot your images at night.

fotosolution-Photoshop-Tutorial-How-to-turn-day-into-night-14

Below are we will show how to turn average daytime shot into an impressive nighttime one using Photoshop tutorial.

Step 1: Create a Curves adjustment layer.

First, choose one images from bracketed photos to turn day into night in Photoshop. Let’s darken the image with curves. Add a Curves adjustment layer by pressing Layer->New Adjustment layer->Curves and adjust the sliders. Then, you need to drag the curve down darkens the image.

fotosolution-Photoshop-Tutorial-How-to-turn-day-into-night-04

Using Curves tool will allow you to adjust the relative levels of these points to create a cooler light.

Step 2: Create new layer

After creating Curves adjustment layer, let’s create new layer by click

fotosolution-Photoshop-Tutorial-How-to-turn-day-into-night-05

Ctrl->Shift-> Alt->N and fill image with black or dark. Press D for default color and Alt->Backspace to fill the layer with the foreground color. You can custom the appropriate level of opacity. According to experiences, you can set up the opacity of the layer from 44% to 50%. This will make your image darker.

Step 3: Setting up Hue and Saturation

At night the colors are more desaturated compared to daylight. Hue or Saturation Adjustment Layer will help you do this. Now, let’s create Hue/Saturation adjustment layer by pressing Layer->New Adjustment layer->Hue/Saturation. Then, you need to drag the Saturation layer to the right to decrease the saturation and after that adjust the level of opacity. One useful advice for beginer are that set up the opacity of the layer to 46%.

Step 4: Creat Color Balance Adjustment Layer

Color element are indispensable part to sketch your image. Normally, photographer always choose dark and cold color to apply for night photos. You can use some colors such as: bluish, cyan, grey,…So, are you ready to put into color in night photos. Click Layer->New Adjustment Layer->Color Balance. Then, you can add a little dark color like cyan or bluish.

Step 5 Add the moon

Night is not night without the moon. Now, let’s add the moon for your image to own great night photos.

Choose Select->Color Range and click once anywhere on the black background. Then, press Ok to complete a selection. To invert it, let’s press Ctrl->Shift->I. Pressing Ctr C to copy the selection and Ctr V to paste.

In addition, you can add a little clounds to make your image more perfect.

fotosolution-Photoshop-Tutorial-How-to-turn-day-into-night-02

Have any of you tried doing something like this in post production before?. We will feel happy as giving and admiting your product image through the comment below after researching and following our tutorial. If  you have questions or concerns, please do not hesitate to contact us today for a free consultation.

Categories
Support Tips & Tricks

5 Basic Types For Portrait Photography Lighting

Finding 5 basic types for portrait photography lighting. First, light is one of the important elements in all photos. Whether a grand landscape or an intimate portrait, light always play the essential role to make the success or to break your images. So, it is important you should know that understand the different types of lighting and how to make the most out of each. Here we will show you 5 basic types for portrait photography lighting. Hope that you find it interesting.

Split lighting

First, we will present readers split lighting. What is the split lighting?. Like its name, split lighting splits the face exactly into equal halves with one side being in the light, the other in shadow. Basically, this light is often used to create dramatic images for things such as a portrait of a musician or an artist. However, it tends to be a more masculine pattern so, it is usually more appropriate on man than for women. Using split lighting for your artwork, you should put the light source 90 degree to the right or the left of subject or possibly slightly behind the subject. Hence, this will depend on the face of subject in picture.

fotosolution-5-Basic-Types-For-Portrait-Photography-Lighting-01

Let’s check how the light falls on them and adjust correctly. Besides, you should note that if place the light too close, then you’ll end up losing the side lighting effect. Or, if you can’t adjust the light source, you can adjust the direction that turn of the object.

Loop Lighting

Loop lighting is made by creating a small shadow of the subjects noses on their cheeks. In addition, it is one of the most used lighting set up for portrait photography. Creating loop lighting, the light source must be slightly higher than eye level and about 30-45 degrees from the camera.

fotosolution-5-Basic-Types-For-Portrait-Photography-Lighting-02

Rembrandt Lighting

Rembrandt lighting is named after Rembrandt , the well-known Dutch painter. He was famous for his low key and high contrast lighting style. It is identified by the triangle of light on the cheek. Unlike loop lighting where the shadow of the nose and cheek do not touch, in Rembrandt lighting they do meet which, creates that trapped little triangle of light in the middle.

fotosolution-5-Basic-Types-For-Portrait-Photography-Lighting-03

To set up a Rembrandt lighting set up, first place a key light at about 45 degrees from your subject and slightly above the subject’s head. As the subject faces the camera, you need to make out position the light:the right or the left angle. Thus, this will allow you to see the small triangle of light on the opposite side of the subject’s face.

Butterfly lighting

Butterfly lighting is  named for the butterfly shaped shadow that is created under the nose by placing the main light source above and directly behind the camera. It is most often used for glamour style shots and to create shadows under the cheeks and chin. Moreover, it is appropriate to older subject because it help photographer blur the wrinkles of object.

fotosolution-5-Basic-Types-For-Portrait-Photography-Lighting-04

To create this lighting, you should set up light that is positioned right in front the subject but at a steep angle facing down, therefore creating a shadow right underneath the subject’s nose that resembles a butterfly.

Broad Light

Broad lighting is when the subject’s face is slightly turned away from centre, the side of the face which is toward the camera that is in the light. This type of lighting makes a person’s face look broader or wider. This can be used on someone with a very slim face to widen it.

fotosolution-5-Basic-Types-For-Portrait-Photography-Lighting-05

All you need to do is to have your subject face away from the light, which most of the times is positioned at 45 degrees from the subject. Or in other words, you should put broad lighting illuminates the largest part of the face showing.

Here are 5 basic types for portrait photography lighting that give photographer many choices. Let’s try them out on different subjects and choice one of them that is appropriate to your style. Got any of your own favorite portrait photo tips to share with other readers? We’d love to hear about them in the comments section below.

Categories
Support Tips & Tricks

6 Tips For Best Portrait Photography

Portrait photography is one of popular subject that all people are interested in. The subject may be our friend, family member, a model, or a perfect stranger. You always own good portrait images, so, do you have great tips for better portrait photography?. Here we will show 6 tips for best portrait pictures.

Lighting

fotosolution-6-Tips-For-Best-Portrait-Photography-01

Lighting is one of useful effects to create best and real images especially portrait photography. If you take the portrait in natural light, you have the best chance of getting a great look with the natural colors and skin tones. However, you shouldn’t abuse the benefit of natural light because it maybe also become a weak point to break your images. For instant, if you take a pictures in the harsh light like direct sunlight, can be unflattering for a portrait. So, how you can avoid this?. Great advice is that you can use reflectors or an external flash to light up some parts of the face. If you are shooting indoors, make sure that you use a soft, evenly distributed light source to light up the subject.

Background

fotosolution-6-Tips-For-Best-Portrait-Photography-02

Background plays a vital role to a portrait photography. It is considered as talented supporting characters for portrait photography. Choosing asimpler and less cluttered background works better for portraits. You should avoid choosing complicated background or more detailed. Let’s shoot images with large aperture, this will help the subject in pictures stand out and make background be overshadowed.

Angle and Pose

Pose and the angle of the body and face play a key role. Looking straight at the camera with motionless expression can be boring. Try to flare up your portraits with some twist. Maybe it is an inviting smile, a sexy expression, a flamboyant look, tilting the chin down or up, turning the head back while walking forward, or sitting and looking up will are great ways to create portrait photography.

Avoid using the on-camera flash

On-camera flash gives great ideas look to even the most beautiful subject.  Because the light is perfectly in line with the lens, the light hits the subject squarely and creates a flat light that is far from flattering.  If you choose to use a flash, it’s truly necessary to get an external flash that can be mounted to the side of the photographer.

Choose Clothing

fotosolution-6-Tips-For-Best-Portrait-Photography-03

Those colors undoubtedly catch the viewer’s attention. You should choose great and appropriate clothing for yourself, this suits will make you more attractive and more stunning. In addition, the color of clothes also fit for color of background.

Make up

Makeup is an essential element for most portrait photography. Makeup not only covers up blemishes, it may also makes a face glow and look even. Some creative makeup also can be done to give your model a sophisticated or trendy or different type of look based on her personality. It may also make your model feel more confident.

Here are 6 basic tips for better portrait photography that allow photographer to have basic look about it. There are many interesting tips to own great portrait photography we should learn. If you have amazing sharing about this subject or have any questions or concerns, please do not hesitate to contact us and comment or share your experiences below this post.

Categories
Support Tips & Tricks

6 Tips to Take Best Shots of Apparel For Your Store Online

Best shots of apparel are important elements that help your product attract the customer’s attraction in the first time. So, how to own best shots of apparel for your store online?. This subject’s today will show reader 6 tips to take best apparel photos for your store online.

You are planning on building your own store online, you want to make all things what appear in your online shopping or your personality page more perfectly before the viewer’s eyes. Beautiful and sharp-looking product shots or best shots are a sure way to garner consumer confidence. Besides, this has a significant effect on your overall drive sales.

The first important factors what your customers always buy fashion ecommerce, will attract is apparel product photography. Taking professional photos of your apparel so as to improve the look and performance of your online shop involves simple tips and tricks as highlighted below. Incorporate them in your clothing photography for the best results.

Show off the Details

If you compared between the jewelry photos and the garment photos , you will shows details on apparels isn’t all that tricky. Preparing garments to be photographed is a crucial starting point for photographing apparel. Yet many photographers skip this step and rely on Photoshop to fix wrinkles, stains, and other visible defects. You should complete your product with some close-ups of the feature you wish to emphasize on. Tags, patterns, buttons, stitching— any detail you think makes your garment to stand out, focus on it.

Use props

Props and tools are a great way to ensure your ecommerce fashion product fits the model or dummy much better. Don’t be afraid to use props and tools to help you make the product fit the mannequin or model better. If the clothing available is larger than your model or mannequin, pin the loose portions at the back using a laundry clip.

  • Use magic tape and transparent tape to fix loose portions at the side. You can also tape any tags if they’re visible.
  • If the dummy has a small bust, insert a padded bra inside the apparel to enhance it.
  • You want a dress or skirt to look ‘flowy’, let the model wear a petticoat inside the clothing.
  • When you want to add some movement to the garment, use a fan on a low setting but from a distance.
  • Use an iron to get rid of any wrinkles before you shoot. A steam iron will give you the best results, but you can also use a regular flat iron.

Use a Model

fotosolution-6-Tips-to-Take-Best Shots-of-Apparel-For-Your-Store-Online-01

Photographing a garment on a mannequin or a model is the best way to demonstrate shape and fit, while also encouraging customers to visualize themselves wearing it. Using models make clothing come to life. Professionals are extremely expensive and you’ll have to mutually agree on a more convenient time, which sometimes isn’t easy. But the best thing about models is that they can strike any pose or even work with any given angle that accentuates your piece, helping you create the most amazing in-context shot or best shots for your apparel.

Tips: You should choose models who represent and can resonate well with their target customer.

Use a mannequin

fotosolution-6-Tips-to-Take-Best Shots-of-Apparel-For-Your-Store-Online-02
                                                                                                                          Dressing closet with yellow clothes arranged on hangers and an outfit on a mannequin

When you hire a model for store online, you will lost much money but using a mannequin, this will help your budget can save much better. As we know, when it comes to fashion ecommerce, displaying your clothing in a more realistic form is of more importance to your target customers. Since your customers can’t try on your apparels, and naturally they are more hesitant. If they can’t see picture how the piece will look on them. Using mannequins are an affordable alternative for best shots and easy to work with. Take time to style your product on the mannequin. If your garment looks too big, try fitting it closer to your mannequin by pinning it and tucking it until it fits properly. And you’re concerned a mannequin may be distracting or cheapen your product, you can use the invisible mannequin technique in post-production processing. A few additional shots of each product will allow you to remove the mannequin from your product images and present a 3D image that demonstrates shape and fit.

Create a Ghost Mannequin

fotosolution-6-Tips-to-Take-Best Shots-of-Apparel-For-Your-Store-Online-02

Using mannequins for your product images is an efficient and cost-effective way to promote your products. However, mannequins can be distracting, so a great alternative is to create a ghost mannequin effect for your product images. In order to create the “ghost mannequin” illusion, you will need to first photograph your product being worn by a model or a mannequin from multiple angles. The plus side to this is that you will be able to use these images in your product galleries alongside any “ghost” images that you create. By displaying a few sections of the inside of your attire, your product will achieve a three-dimensional human form. Though the process of creating a ghost mannequin can be difficult, the end result is certainly worth it and it help you save your budget instead of hiring models.

Steps to Creating a Ghost Mannequin

Take a best shots of the product from the front. Then take a photo from the back, but turn the product inside out. You should use a tripod for this and avoid changing the amount you zoom. A good idea is to also mark a spot on the floor for your mannequin so it’s in the same spot for both photos. The next step involves background removal, as the background needs to be visible from the front. Using the pen tool will give you the best results, but it does take a bit of practice to learn how it works or using Photoshop to place the front on top of the back; this should be easy especially if both photos are taken from the same angle and distance. This process requires some skill and also takes some time. If you ever need help fixing this, remove background can professionally create for you the final ghost images.

Now you can take photos of your apparel!

Here are some tips useful sharing for your store online, we hope that you will find its interesting. What other tips to own best photography have you known?. Let’s add to the list? Leave one in the comments below!.

Categories
Support Tips & Tricks

5 Better Ideas For Holiday Photograph This Christmas

The Christmas holiday make for amazing Christmas photography opportunities. Even the least photographically inclined reach for camera to create beautiful collection.

It’s just a few weeks until Christmas so we thought a quick tutorial on the topic of Christmas photography might be appropriate. Do you have good ideas for this Christmas photography?. Here are 5 better ideas for holiday photograph this Christmas. Hopefully that these will give you some good Christmas photograph ideas and have the best Christmas collection.

Test Shot

Test shot is one of important the preparation step before shooting. Before you start to shoot your collection, let’s take a few shots of the ambient light to check cameras as well as background. This will allow you determine the best aperture, ISO, and shutter speed settings for your images.

fotosolution-5-Better-Ideas-For Holiday-Photograph-This-Christmas-2

Lighting

Lighting is probably one of the most important part of good pictures and can make or break them. Especially, let’s pay attention to the color present in the space and use different setting to try and capture them.

fotosolution-5-Better-Ideas-For Holiday-Photograph-This-Christmas-1

In Christmas night, lighting will cover and present more stunning. This is one of advantages to capture lighting. Is there warm light coming from the light bulbs, lamps, or Christmas ornaments?. All will make fantastic Christmas photos.

Shooting the objects that use to decorate

Families come together at holidays, but not just for the main event, they come to help decorate… and these are exciting, fun-filled moments so they are great opportunities to record the sweet moment.

Normally, we are familiar with Christmas photos that include: Christmas tree and bokeh, these bulbs into the circle of other shapes,.. Instead of shooting popular images, we can try to shoot new things. Maybe the shots before the event starts properly are often great because they show everything at it’s best before everyone descends on your party zone. Some suggestions for object that you can shoot are: food preparation, wrapping gifts, setting the table, …

Fresh Group Photos

One of the most common types of shots at Christmas is the ‘group photo’. It’s usually taken at the end of the evening or day when everyone is looking at their worst. For a ‘fresher’ shot take it once everyone has arrived. Also think before hand about how you might pose everyone and where you might take the shot.

fotosolution-5-Better-Ideas-For Holiday-Photograph-This-Christmas-5

Focus on the Eyes

All pictures of people soar when you focus in on your subject’s eyes, and that’s no different with Christmastime photos. It’s critical to compose the image with as little headroom and dead space on the sides as possible, so the image is more about the faces and the eyes than anything else. You can use a flash with most indoor Christmas photos, but use a detachable flash or an angled flash and bounce the light off the ceiling. Remember, the ambient light levels will be raised by the Christmas lights.

In conclusion, the preparation  is just as important as the finished product when it comes to Christmas. Here are 5 better tips for holiday photograph this Christmas that will give you interesting things. Got any of your own favorite photo tips to share with other readers? We’d love to hear about them in the comments section below.

Categories
Support Tips & Tricks

5 Pro Tips To Shoot Great Home Photography

The housing demand is a crucial issue that many people are interested. So how do you make a good impression with your real estate photos or great home photography?. As a professional interior photographer for magazines, we will share reader some experiences to help you take better photographs of your home’s interior or design project. You can use some basic ways related to shooting home photography. Using a tripod, shooting from straight on and avoiding wide-angle lenses can take you a long way toward standard practices. Many professional photographers use them every day.
With useful tips, we hope that you’ll find special ideas that offer inspiration for your own home photography.
fotosolution-5-Pro-Tips-To-Shoot-Great-Home-Photography-1
Categories
Support Tips & Tricks

Why should you choose black and white photography

Black and white photography will allow photographer to create the great photos that own the same tones of color. This will help them focus on structure, layer and the body of subject.

As far as we know, black and white photos are very permanent or in other words, these photos always exist with times. These photos will increase the depth of subject and expand photographers creative ideas.

Here are a few of reasons that help readers answer the question: Why should you choose black and white photography?.

Focus on subject

One of the important and necessary elements for photographer is that focus on subject. Why should we say that?. A basic reason is that clothing, color temperature differences in ambient light sources, cars and colorful background distractions have stopped being an issue. These elements can be terribly distracting in some images and can take the focus away from your subjects. However, if you use black and white, it will help you limite your risk. Black and white allows you to focus on think about these key elements such as lighting, composition, element in and out of the frame.

In addition, it help emphasize emotion. For example, when we look at someone’s face, or into their eyes, without the distraction of color can provide a stronger emotional connection to your subject. This will help your artwork transmit message to readers and make your artwork more realistic.

The Timeless Quality from Black and White

fotosolution-Why-should-you-choose-black-and-white-photography-1

Black and white colors remind the past and the classic moment for viewers. Especially, black and white photos will allow photographer to keep the quality of images according to the change of time. And it is one of the most common reasons people especially photographers want to shoot in black and white.

Highlighting the beauty and skin tones of model

Black and white photography provides wonderful tonal range between the deepest blacks and the whitest whites. Pigments, discoloration and distracting elements of the skin can become less obvious. The colorful makeup for model would be distracting the strong point of subject. Using black and white colors will help your artwork avoid this mistake and highlight the beauty and skin tones.

fotosolution-Why-should-you-choose-black-and-white-photography-2

Moreover, black and white also support photographer to shape it into a myriad of shapes. And black and white images can be strong, high contrast and powerful – or they can be so soft, gentle and subtle.

Have you ever taken black and white photography?. Do you like black and white photos?. We hope that you will find some reasons in this article interesting. Let’s have experiences with black and white photography now. If  you have questions or concerns, please do not hesitate to contact us today for a free consultation. Interested in hear your thoughts in the comment below.