Categories
Support Tips & Tricks

How To Take Camera Setting for Brilliant Product Images

How to take camera setting for brilliant product images are hot subject that anybody are interested in. If there’s one thing that’s true when it comes to ecommerce, it’s that the perceived value of your products and the trustworthiness of your business is often judged by the quality of your web design. And a big part of having an attractive website these days also means having high-quality, beautiful product photography. Sure thing; using epic images to showcase your products can make the difference between your conversions and no sales at all. So, you want to take camera setting that perfect product photography—sharply focused and perfectly lit so as to attract the attention of customers? Below is some tips to make brilliant product images.

Let’s check them out…

Camera mode

fotosolution-how-to-take-camera-setting-for-brilliant-product-images-1

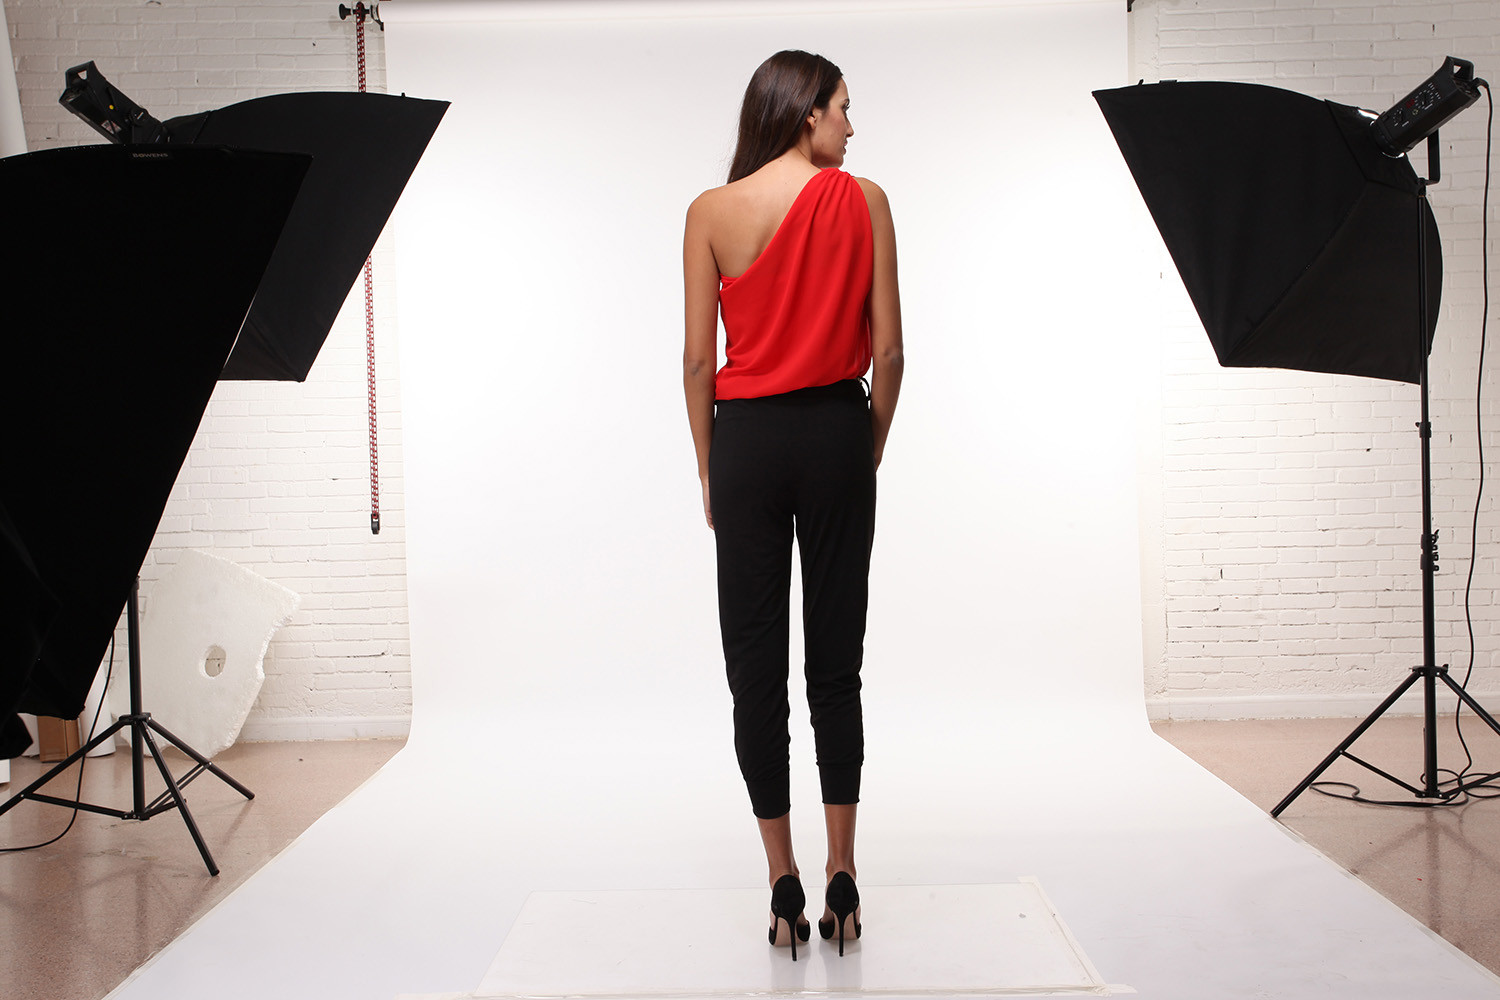
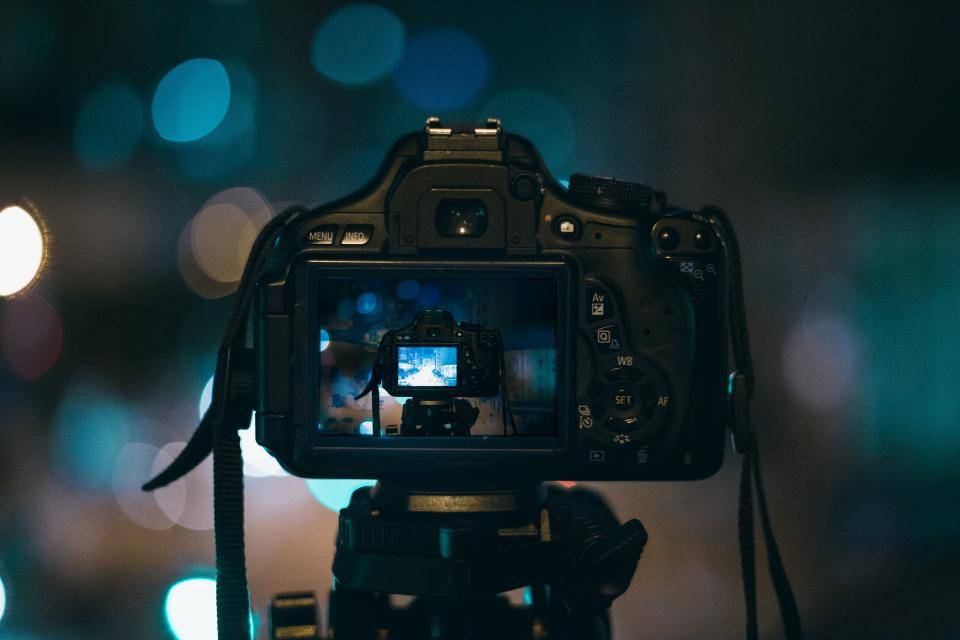
Once you have your camera, tripod and product in place, you can start by selecting your camera mode. Most cameras offer a variety of settings but I usually stick to using three modes: Manual, Aperture priority and Automatic. As you can see, image taken with my manual mode looks much more pleasing to the eye. This is simply because you can be able to control all your image settings without worrying about the camera using the wrong automatic settings like aperture, flash, shutter speed etc.

ISO Settings

ISO Setting is one of the important factors to perfect product images. Now, let’s select our ISO setting based on the light in our studio. As a general rule, the better the light in the room, the lower your ISO value needs to be. By adjusting your ISO setting just right, you will be able to produce crisp and clean photos.

I would recommend first setting your ISO at 200 and using the viewfinder to evaluate its effect on the product image. If the image appears too dark, increase the ISO value to a setting that is more suitable. If your studio or space is too dark for shooting, raise the ISO value to a range between 600-1400.

ISO measures the sensitivity of the image sensor which takes your image. The lower the number the less sensitive your camera is to light and the finer the grain in your images. This means your image will have less grainy ‘noise’ or what I like to call speckles! Higher ISOs are generally needed in darker situations unless you are using a tripod.

Images Format

As we will be reviewing the manual mode in this post, let’s start by choosing our image format. If you have the option to choose your images as RAW, absolutely do so. You will have more flexibility afterwards in post production. If you do not have the RAW option, then we suggest that choose the largest image size & format that your camera will allow you to select, which in most cases will be a JPEG.

Aperture

fotosolution-how-to-take-camera-setting-for-brilliant-product-images-1

When you choose aperture, you’ll be putting up your exposure settings. For a home studio, F16 is considered ideal as you’ll need to have the whole product in focus so as to shoot clearer photos for your customers

The rule of thumb recommends the use of Aperture settings of more than F11 to ensure nearly (if not the whole) product is in focus. In essence, the higher your aperture gets the better for your images. If for some reason your camera will not reach as high, the highest aperture your camera will allow is perfect or you can even try the auto settings!

Light meter

Finally, ensure your camera automatically focuses on your product images. This allows your digital camera’s light meter to detect the amount of light reaching the product. This will help the camera’s internal light meter defect how much light is falling on the product. We can then adjust our settings (aperture & shutter speed) according to the light meter reading on the camera. Since we know we want to have a higher aperture like F16, set it to that. By using the light meter in your camera, this will then help you adjust your shutter speed.

There are lots of techniques for shooting successful product photography, we hope that some useful tips help you take perfect camera setting for brilliant product images. If you love images and a peson who photographs products everyday, this tutorial has been specifically crafted for business owners on a budget, and it’s been designed to be simple while producing excellent high quality results with most product types.

Thanks for watching!
Categories
Support Tips & Tricks

Color correction in Photoshop

Color correction is one of the important factors affect directly the result of images. If we have two pictures: white and black pictures and pictures with prominent color, which one do you prefer?. Beautiful images with stunning color will surely be a wonderful choice. So, color correction an image is one of the most common uses of Photoshop. If you don’t know the way about them in Photoshop,  here are guide video show you different ways on how to color correct on image.

In this video we’ll also take the time to talk about how color works in Photoshop. This is a complicated topic but I’ll try to simplify it so it’s easy to understand and able to color correction on your images. In addition, in this tutorial, we also show you how you can use Curves to color match an image to create a realistic composition.

You are interested in: http://bit.ly/2fpzBZk

Let’s download this video to find the best answer for your issues and free to express your thought  in the comment below. If you have questions or concerns, please do not hesitate to contact us today for a free consultation.

Color correction

Color correction in Photoshop from VRaySchool on Vimeo.

Categories
Support Tips & Tricks

Best Way to Photograph Glass Products For eCommerce

We shared an article about Mistakes Of DIY Footwear Product Photography to good experience. Today, we continue to show and make a new topic: a classy way to photograph glass products for eCommerce. To shoot reflective products like glass is notoriously challenging for DIY product photography. Your first attempts may result in images with your own reflection staring back at you, poorly defined edges, and invisible details.

However, don’t worry because this article will guide you best way to photography glass products for eCommerce. We believe that taking good quality pictures of glass or translucent objects can seem a great deal of fun for you.

Lighting

A best product photograph need to use many different elements and natural lighting is one of essential factors to create the success of glass product photograph. If you learn how to control light, you’ll be able to create beautiful images under almost any circumstances. There are two kind of lighting that photographers use to capture beautiful photos: natural light and artificial light. When you use an artificial light source, these can affect directly your product’s color. While using natural lighting for product photos preserves the natural color of the product.

fotosolution-best-way-to-photograph-glass-products-for-ecommerce-1

Topic’s today is for glass, metal, and jewelry especially glass products. Let’s make use of the benefit of lighting to turn into glass product become more attractive. There are three proven effective lighting setups for photographing reflective products. They are back lighting, side lighting, and double overhead lighting.

fotosolution-best-way-to-photograph-glass-products-for-ecommerce-2

If you’re not too familiar with lighting in product photography, you should read and review: the advantage and disavantage of lighting. It will help you find the right equipment for your shoot and avoid basic mistakes.

Camera Setting

A big part of having an attractive website these days also means having high-quality, beautiful product photography. Sure thing, using epic images to showcase your products can make the difference between your conversions and no sales at all. So, you want to take camera setting to attract the attention of customers?.

A great answer to adjust camera setting, you need to interest in: aperture, ISO, and white balance. They will provide the most detailed shots possible.

fotosolution-best-way-to-photograph-glass-products-for-ecommerce-3

ISO Setting is one of the important factors to perfect product images. As a general rule, the better the light in the room, the lower your ISO value needs to be. By adjusting your ISO setting just right, you will be able to produce crisp and clean photos. ISO measures the sensitivity of the image sensor which takes your image. The lower the number the less sensitive your camera is to light and the finer the grain in your images.

For adjusting your white balance to your light source. You can usually trust your auto white balance as you don’t feel comfortable setting it manually. Focus your camera on a clearly defined area, like details or the outer edges.

For aperture, as you choose aperture, you’ll be putting up your exposure settings. For a home studio, f16 is considered ideal as you’ll need to have the whole product in focus so as to shoot clearer photos for your customers

The rule of thumb recommends the use of Aperture settings of more than f11 to ensure nearly product is in focus. In essence, the higher your aperture gets the better for your images. If for some reason your camera will not reach as high, the highest aperture your camera will allow is perfect or you can even try the auto settings!.

Post – production processing

If you’re listing your product in multiple places, note that check out this product image for common eCommerce platform image requirements. You should understand that no matter how careful you are, sometimes smudges, reflections, and other flaws make their way into your image. You can remove them in post-production processing and perform other image edits to optimize your product images for the web.

fotosolution-best-way-to-photograph-glass-products-for-ecommerce-6

Nowadays, there are useful tools to support your post – production processing. Adobe Lightroom and Photoshop are two of many tools that can help streamline your workflow and perform image edits both in bulk. In addition, using Adobe lightroom, you will satisfied with your artwork. Adobe lightroom provides user friendly tools to perform common edits quickly and in bulk. It also has super helpful organizational features. You will completely feel safe and pleasure for your project with the big aim of Photoshop.

If you are interested in Photoshop tool, you can read and review this article. You don’t have the time, money, or desire to edit product images yourself. Let’s search google and find outsourcing service. Fotosolution provides powerful yet intuitive tools for defining order specifications for edited images.

So, if you don’t know how do you shoot photography glass products?. Or if you have useful tips or any difficulty, please do not hesitate to contact us today for a free consultation.

Categories
Support Tips & Tricks

How to Set Up Smart Object in Photoshop

Smart object is one of essential tools that always use to create Mock-up product and edit image for photographers. It is considers as a work that is indispensable in the process of their working. However, we do not always feel happy about this work or even, sometimes we have all felt the frustration of editing an image with many problems like either in Light-room or Adobe Camera Raw (ACR), only to remember that we forgot to adjust the white balance, or tweak the sharpening after we’ve spent hours of editing the image in Photoshop. So, today, we will bring to readers some basic tips: how to set up smart object in Photoshop, it help you improve these difficulties in your work.

With the recent introduction of Linked Smart Objects in Photoshop CC, Smart Objects have become much more powerful, and useful. This give you greater flexibility in your editing workflow inside Photoshop. In addition, the big reason for converting to smart objects is that you’re able to retain the original size of the image. If you don’t convert to a smart object, pixels will be lost when scaling up and down. Using or set up Smart objects is not too difficult because simply, you can create a Smart Object when opening your image from Lightroom or ACR into Photoshop, and you can also create Smart Objects later on in your editing process, which can be very helpful – especially when you are applying a sharpening or other filter. Below are some basic tips help you know how to create Smart object in Photoshop.

Smart Objects can be created in a number of ways, and typically, the type of Smart Object you create depends heavily on how and where you create them. Normally, the easiest way to create a smart object, right click on the layer and select “Convert to Smart Object.”

How to set up Smart Objects_admin.admin.admin.admin.admin.admin.fotosolution.com

Creating Smart Objects in Lightroom

Adobe Photoshop Light-room (Lr or LR) is a photo processor and image organizer developed by Adobe Systems for Windows. It allows viewing, organizing and retouching large numbers of digital images. Light-room’s edits are non-destructive. So, how to create Smart Objects in Light-room?.

First, let’s open Light-room and choose an image that you want to edit. Then, you go to the top menu and click: Photo > Edit In > Open as Smart Object in Photoshop…or you also click on the image you want to open in Photoshop. Then select Edit In > Open as Smart Object in Photoshop…

Linked Objects

Linked objects can be extremely useful tool for when you need to reference and update multiple documents at once. If a change is made on the original document, it will be applied to all of the linked documents when saved. All you have to do is go to File – Place Linked. Choose the file you’d like to use, and hit place. And the results is that your original image’s changes will appear on all of the linked files. That’s simple and helpful for your work.

A few notes with Smart objects

Creating a Smart Object in Photoshop, you have to open the image in Photoshop as a Smart Object, this will hep you have the same editing abilities in Photoshop.

If you have made adjustment layers with masks applied to them, we would suggest that you do not crop the image through the Smart Object. We think that you should crop all images before opening in Photoshop, or after you are finished in Photoshop.

Check out this video guide related subject: How to setup Smart Objects in Photoshop!

Smart Objects is one of the tool that is easy to make, and offer a massive amount of flexibility. If you are a person who always use Smart objects or need to Smart objects for your work, welcome to visit our site. This page will help you more understand about Smart Objects as well as it is useful lesson to improve and apply for your effective work. Or, if you have other way to create Smart Objects in Photoshop, let’s share with us in the comment below.

Thanks for watching!.

Categories
Support Tips & Tricks

Shadows and basic things you should know

Shadows are one of the necessary factors that make photos more soulful. A professional photographer or some viewer understand the important subtle details that can create the product photos you need. Adding shadows to product images is one of the greatest examples what help you can do to achieve great results. So, why is the shadows important?. How many shadows are photographers or designers use?.

Next step we will present the values or the important of adding shadows to make best product images.

When we take a  product photography, we need to appreciate truely the value of detailes what make perfect product. Adding shadows to product images is an excellent example of what you can research and learn. When we add the shadow in product photograph, this will create a powerhouse effect. That’s a reason why would we say that?. Simply, shadows can obscure a beautiful product and make product photography look unprofessional. However, we should know the difference of shadows on a product and shadows cast by a product. Product image editing lets you use shadows to your advantage. There are three types of shadow that you can refer and learn:

  • – Natural shadows
  • – Reflection shadows
  • – Drop shadows

Each types have the outstanding advantages what build the success of product photographs. Below is some guides that you can learn about each of them.

Natural Shadowsshadow-graffiti-03

Nothing will look more realistic than your product’s real shadow, it is called Natural shadow. When we take natural shadow during the shooting process is almost always best, but we has not to be confirmed that all things is easy if we have never do it. The shape of your product and the challenge of lighting it properly may prevent you from capturing a perfect natural shadow, but one can still be added in post-production.

The best way to create natural looking shadows is to use a light source while shooting the product. Make sure that the light source, whether daylight or artificial, is positioned to the side of your subject. This factor enables it to cast the shadow at an angle from your product and give it a more three dimensional look. You should combine natural light with a white background, it will help you make the natural shadow look nice

To understand more about natural shadows, then here’s some tips what help you learn how to add the natural shadow.

  • Open your photo what you’re preparing in Photoshop, then you need to create a new layer with the white fill-in background, which is underneath the product image layer. Choosing a white area around the image to mask out your product from its background. Don’t forget to refine the edges so it establish smooth transitions.
  • Select the areas under the toe and behind the heel to create a curved layer mask.  Feather the curved mask
  • You should use the adjustment or the curve tool to create curves layer mask. This way make the simulation shadow even more effective.
  • Carefully brush out areas of your shadow layer manually to achieve the desired look. To achieve translucency, you may need to focus on certain areas over others. This make it look more realistic.
  • Finally, tweak your images layer mask by reducing its opacity a little so it doesn’t look so harsh against your shadow. This helps your product images to soften the created shadows against the real ones.

How To Apply Reflection Shadows

Reflection shadows are great ideas to make your product look nice if  was photographed on a reflective surface. It can make your product images more visually appealing and create a sense of environment, so they don’t look like they’re floating in space. It’s particularly effective with products what is combined with bright lights and reflective surfaces. Jewelry and sunglasses is good examples for combination.Reflection-Shadow

However, to creat perfect reflection shadows and to know how to manage light to eliminate reflections are not simple. Light spots can also be a problem.

If you want to know more about reflection shadows , here are some basic steps for you:

  • You need to create a new layer and fill it by using a white background.
  • Then you move your newly created white layer to the bottom of your layer stack.
  • You should create 2 product layers by duplicating the product layer
  • Create a tight selection around your product, and then efine your selection’s edges to make it less harsh.
  • Rotate your duplicate product layer 180 degrees with different angles, then you need to create two products between your two layers: one right side up and one upside down.
  • Align the bottom of your product together, which will make the upside down product looks like a reflection of the other pair.
  • Then adding a mask to the upside down images layer with the gradient tool
  • Add a mask to the upside down sunglasses layer and use the gradient tool until you get the desired look. You’ll want the opaque portion to be nearest to the eye frames of the glasses that are right-side-up. This will help to create a perfect natural reflection to get away from your subject
  • You have your sides and top brushed out around the reflected images’ base. You also need to continue to brush out or add your reflection to make your photos look natural
  • Have the layers flattened.

How To Apply Drop Shadows

Drop shadows like natural shadow or reflection shadow help the impression of sunlight coming from above. The usage of drop shadows is popular and effective with a wide variety of products. Below is some useful ways about adding drop shadow for your photograph.

You need to choice the white background of your chair image by using selection tool. then, you can refine the edge of your selection by smoothing out your transition.

  • Make a layer mask on your image layer and invert your selection, so you will just see photograph and no background.
  • Make a new layer, fill with white, and placing it as the background layer behind the image layer.
  • Adjust your chair to center it and allow for room for your shadowing. Have anything else in the background masked out.
  • You can duplicate this image layer with your new mask selection.
  • Have your bottom image layer with mask, transformed through vertical flipping. It should now look upside down.
  • Transforming and turning your product photos to make the back angles line up to its matching one.
  • Using your gradient tool, you’ll begin tapering the angles from more distinctive to less visible. You can continue with it to  find the right opacity and gradient.
  • Using your brush to tweak out your mask and brush out all of the other angles and needless items in your frame, other than that one angle.
  • Play with the opacity and brushing out to make it seem more natural..
  • You should duplicate this layer before moving it to your other back angle of your photos
  • Using your straight selection tool to create a diamond shape under your chair between the angles’ points..
  • Lots of feathering along the edge of your product will create a nice gradient. Brushing in some of your sides to allow for a nice fall off under your photos
  • Make a slim V-shaped selection on your front two angles, and then refine the edge to begin feathering your selection
  • You can create a curves layer and darken it so it looks like a shadow. This should be done for both legs at the front.
  • Flatten your layers and create your new file and save.

As you can see, shadows in product photos is a useful and convenient tool. After learning how to apply shadow in product photos with many different ways, how do you feel about it?. Which one is right for you? This depends on your product and your photography setup.  We hope that you will choose the most effective types to make your perfect product photos.

Categories
Support Tips & Tricks

How to make Beauty Retouching Photoshop Tutorials

Beauty retouching is one of the most popular application  areas in which Adobe Photoshop that contribute to make beautiful images. The basic problem with most of the Photoshop techniques we’ve experimented with over the years (burning & dodging individual pores, Surface Blur filter, Dust and Scratches filter, etc.) is they waste times but the effect of images is not good like they expected.

In this article we are going to show you a beauty retouching techniques we regularly use that results in beautiful, smooth skin that still looks totally real. Beauty-retouching is a quite deceptive art. This will help your image become more stunning but no less real photos.

Let’s challenge yourself with beauty retouching application now and below are How to make beauty retouching Photoshop tutorials attached video tutorials.

Beauty Retouch

Beauty Retouch from Lindsay Adler on Vimeo.

  • Step 1: Choose one favourite photos that make beauty retouching. You should use a high – quality image and especially a close up face photography.
  • Step 2: First, we can begin with the basic skin retouch by using Spot Healing and Patch tool. The first step is that click double Ctr+J and give the name for two new layer with name “ Blur” and “ Texture”.
  • Step 3: Starting with “Blur” layer by choosing Filter-> Blur-> Gaussian blur and choose approriate number for Radius. Next, press “ Texture” layer and choose Filter->Other-> High Pass and click “ Ok”.  Then pressing “ Normal” and click “ Liner Light” that is one of important elements for beautiful images. We’re now set to smooth tones in the skin and start removing blemishes.
  • Step 4: Press “ Image” -> Apply Image, this box will be appeared including necessary information. Choosing Layer “Blur”,  Blending “ Subtract”, Scare “ 2” and Offset “158”, then click “ Ok”.
  • Step 5: Smoothing Skin for image by using Lasso Tool to delineate the points on the skin to edit. You can use Zoom tool to avoid omission of limited points.
  • Step 6: Now is time for final skin color. Edit and improve the colors on your image as much as you can with curves and hue/saturation corrections tools.

This tutorial is all about beauty retouching and how to use adjustment layers, lighting, dodging and burning, and frequency separation to create stunning skin tones and textures for a true beauty photography retouch. We hope that this article will a great lesson for your Photoshop learning. Let’s post an image of your setup and a final image so everyone can see what you did. We would be really grateful if you upload and share your photos in comment below.

Categories
Support Tips & Tricks

Mock-Up Technique and Basic Things You Should Know

Mock-up technique and use Mock-up for photographers, designer as well as business become popular methods. Today, we will show mock-ups technique again and basic things of its you should know. Hopefully, this article will bring to reader a clear and deeper look about using mock-up.

As far as we know, mock-up is a scale or full-size model of a design or device. Especially, it is used for teaching, demonstration, design evaluation, promotion, and other purposes.

Software UI mock-up allow users to range from very simple hand drawn screen layouts, through realistic bitmaps, to semi functional user interfaces developed in a software development tool. Normally, we always use this technique to create devices mock – up and items mock-up. Using mock-up technique is a great opportunity to present your product. In other words, you can present your brand, badge or logo design as well as features of your product in a photo-realistic way.

A successful and selling product on the market requires many elements including images and quality of products, and one of the basic elements is presentation. Good presentation is a half success for your product. Moreover, Mock – up technique will help you achieve this target. These mock-up is a great way to show your client what their future product will look like. In addition, they help you save time and make your brand look like eye candy and more professional.

There are many ways to create mock-ups like: create mock-up from scratch, use Smart Object, Photoshop Action,…. Thus, this article will show brieftly about using Smart Object to create mock-up.

How to create mock-up

  • Step 1: Open Photoshop software and choose image file and create new layers
  • Step 2: Use rectangle tool to draw on the screen of devices or items what you wanna choose.
  • Step 3: Click right mouse and press ” Convert to Smart Objects” on Layers Pannel

How to use mock-up

  • Step 1: Open the other layers with images was taken or available.
  • Step 2: Paste that images into Smart Object when you open new layers, save layers and you have mock – up product.

Besides, you can easily change label and colors to make it your own when using mock-up technique.

Below are video that guide specific how to create product mock-up you can refer.

It’s simple and easy to create and use mock-up technique. Let’s post an image of your setup and a final image so everyone can see what you did. Or if you have any questions or concerns, please do not hesitate to contact us today for a free consultation.

Categories
Support Tips & Tricks

The Importance of Clipping Path You Should Know

Clipping Path is a famous aspect of graphic design and as well as an essential part of Photoshop. Nowadays, images of the product online is a major advantage in the outcome of the revenues company markes, these images need to be edited before they can be uploaded on main website. And it is one of important elements to edit beautiful images.

It is a closed vector path that is selected with the Photoshop pen tool and removed from the background. Keep in mind that shooting these images, there are number of editorial tasks that you need to know and realise. There are 5 uses of clipping paths including: remove background, image manipulation, color correction, devide products and recreate graphics and logos.

Using this technique is to offer high quality images for presentation purposes. First, when you remove background of image, this will help you create a better visual experience of the customers of your sites. Good images will support your customers focus more on the product that you want to present and sell. This postive point will contribute to increase your sales.

Clipping Path

Seconds, using clipping path for colour mask and colour correction will help your images become more attractive and more stunning before eyes’s customers. When photos are shot, the camera’s flash will not distribute light equally around the pictures, this can make your pictures crude, less attractive.

Using clipping path, separate colours and portions of an image or product can be adjusted to match the preferred colour or brightness of other parts of the image or product easily. This will help you balance the brightness and contrast adjustment levels, carves level, colour balance.

Thirds, when you need to manipulate image, clipping path is a great ideal. Simply, when you take your product with mannequin or a model who wear your product. You want to remove mannequin or model because they are not suitable for your image or are not beautiful.

Summary

It is easy to manipulate image with clipping path. We will make it beautiful for matching with the product image. Removing mannequin from the image will help visitores have a special and sympathy look for your online product.

Here are brief presentation about clipping path technique that allow reader to have basic look about it. There are many interesting things related to clipping path we need to interest in. If you have amazing sharing about clipping path or have questions or concerns, please do not hesitate to contact us today for a free consultation.

Categories
Support Tips & Tricks

Benefits of Using Photoshop Actions to Improve Productivity

Photoshop Actions are a set of recorded steps which can be replayed in the actions palette. It is perceived as useful tool in Photoshop that help photographer save time for the photo editing process. Besides, it also achieves effects that you don’t know how to accomplish from scratch. Using Photoshop allow you convert photos to black and white, resize them, create different effects, combine sophisticated techniques and many others.
So, beside saving time, Photoshop Action also bring to many benefits to improve directly productivity. If you don’t know the magic of Photoshop Action, here are benefits of using Photoshop Action to increase productivity that will help you answer all problems.

Simple and Easy to Use

With simple features and easy to use, Photoshop Action will one of perfect tools for beginner. It is easy to learn and know how to create a great photos with Photoshop Action. If you feel worry about your Photoshop skill or you feel too difficulty to turn your photos into attractive photos, Photoshop Action are willing to remove your solicitude because you don’t need coaching to do it despite of the lack of Photoshop skill.

Learning Photoshop indirectly through Photoshop action

Photoshop is a free photo editing web based editor, it is simple to use and have lots of features that support for the artwork of photographers. However, to learn Photoshop program require many times and perseverance. If you are interested in Photoshop but don’t time to learn and practice it, simply, using Photoshop Action will useful method that help you learn indirectly Photoshop. Prove that if you use actions made by others, do not merely use it but also try to look into the steps and study what he used in creating it. This way, you will know which tool and effect is used to give a good result. This will help you accumulate your own Photoshop experiences.

Save the work process from repeating steps

How do you feel if you have to edit more hundred photos everyday. It is too tired and boring, you don’t have private time to relax and for your family and friend. Photoshop Action will a great companion help you share your difficult and save the work process from repeating steps. Using Photoshop Action allow you record your steps in Actions and it will do the same to the rest.

Apply various effects easily

There are many creative effects in Photoshop Action such as: unspoken action, purple contrast, light leak flow, soft colors,… These effects will support for creating and editing your photos. Beside you have saved yourself from editing and applying some effects.

Increase the work efficiency

Instead of behind of my computer to edit thousands of photos, it is too bored work, you will have more time to relax. Actions will do the job for you by speeding up work and focus on other works and specially increase the work efficiency.

Get better results

Photoshop Actions allow you repeat steps for each photos that you would like to edit, the results will surely be consistent. Think simply that if you edit all photos yourself, are you sure that all results of images will be consistent?. With Photoshop Action, you can feel comfortable and confident your results of each photos.

Save money

When you are too tired with thousands of photos to edit, you will find way to solve that situation, maybe hiring experts to help you save time and focus on main work. However, you will take less money to pay experts but Photoshop Actions, you will save a lot of money and you can also learn while you work. Photoshop actions can truly help you a lot for it can give you the effects.
Here are some benefits of using Photoshop Action you can refer. Let’s start to learn and use Photoshop Action now to discover and have a great experiences. If you liked this article, then please Like and Share them to your friends as well as your partners. If you have any difficulty, please do not hesitate to contact us today for a free consultation.

Categories
Support Tips & Tricks

Outsourcing – advantages for photography business

          “Outsourcing – new media bring many advantages for photography business.”
As far as we know, as more and more outsourcing companies appear in the market, the competition between companies are more and more fierce, the amount of their work is more increasing. Leaving a career in management consulting of each business wasn’t easy. Delegating work can be difficult for entrepreneurs, no matter if the actual work takes place on or off the premises. Lack of delegation can negatively affect your business, especially if you spend your time on tedious administrative tasks instead of proactively adding value to your business.
So, large corporations have been doing it for years and now smaller businesses are taking advantage of the new trend that is called: outsourcing.
You will ask yourself: why photography business choose outsourcing for their work? or what are the advantages of outsourcing?. Below are some amazing sharing that help you find the answer.
Outsourcing certain functions of your business can make your day-to-day operations significantly more efficient. But what functions should be outsourced?.

Saving the Time

fotosolution-the-advantages-of-outsourcing-for-your-photography-business-01

Firstly, we can confirm that the best advantages of outsourcing for photography business is time. Your time as a business owner is invaluable. When the amount of their work are too much, you need to have many time even more than 24h per days to complete all work. How do you feel? – too tired and even you are going crazy. You had no time to spend with her friends. You didn’t have time to keep up with client emails and requests. These can be affected directly the end of your work.
Time is very important for business. If you’re not using it to make money, you have to start re-thinking what you’re doing. For example, imagine you have to edit 1000 product images for your website. Each image will take you roughly 10 minutes to edit, depending on the product and complexity. It is meaning that you will spend around 166 hours editing images (1000 images / 6 images/hour). So, instead of wasting their invaluable times, you can hire an graphic designer to do the editing for you or in other words, you can use Outsourcing.

Low Cost

fotosolution-the-advantages-of-outsourcing-for-your-photography-business-03

The cost to hire an graphic designer or to use outsourcing is one of the question that all business as well as photography business are interested in. A example below will prove that outsourcing owner low cost and completely satisfied with your needs.
For instants, if you have to edit 1000 product images for your website, you will spend around 166 hours editing images (average: 6 images in hour). In while, if you can hire a graphic designer or editing company with 1000 images in 24 hours or less, you can save about 86% time. In terms of costs, outsourcing this work would cost $1450. This means, that not only would you save yourself 166 hours of work. You would also save more than $3000, a huge 68% reduction in costs.
These will prove the advantage of outsourcing for your photography business: get your new products online weeks earlier. It is meaning you would also benefit from increased sales during that period.

Diverse Choice

Normally, there are reasons why people don’t outsource as: the problem of the cost, the effect of work,… We always think that no one can edit, design an album or blog,etc… like we can!. These things are both true if you live in the past era when technology has not ever developed as now. Today, there are diverse choices about outsourcing for photography business. Just talked about editing, but you can actually outsource more than that. Album design, retouching, search engine optimization, blogging, and even things that aren’t related to photography directly like administrative assistance and customer support.

fotosolution-the-advantages-of-outsourcing-for-your-photography-business-04
If you want to outsource retouching, album design, and editing, you probably want to look for a company or individual that does all of these things. Why? Simply for ease of use – it’s easier to keep all of your work with one service provider, so you don’t have to go back and forth delivering items to different companies for different things. A lot of post-production companies can totally meet all your needs.
In addition, you can do more more networking, this will help you get in touch with other industry professionals and form professional relationships. Outsourcing should make your life easier and help your business run smoother. We hope that this article will help you answers your existent questions.
If you have any questions or concerns, please do not hesitate to contact us and comment or share your experiences below this post.