Categories
Support Tips & Tricks

How to retouch and airbrush skin effetely in Photoshop

Digital airbrushing is a useful technique applied to portrait photos using image editing programs in Photoshop. Airbrush skin will help you hide skin blemishes and imperfections. And  if you are a photographer, you will familiar with using this technique to make your shots look glamorous and professional. There are many ways to achieve this look using airbrushing in Photoshop that allow you to create beautiful artwork. Next, retouch Skin is one of the useful tools that used in digital photos with the special features. It helps your photos become more prominent and more stunning before the reader’s eyes. Retouch Skin is used primarily for Food and Non-food. Packaging should, in fact, always be airbrushed because it is never perfect  including damaged, printing errors, etc, and never evenly colored due to lighting. So, what is retouch skin and why or how to retouch skin effetely in Photoshop.

First, we can know what is airbrushing?. Airbrushing is a painting technique using a tool which sprays a liquid medium onto a surface. They have been used to create artwork, illustrations, murals, paintings on vehicles, temporary tattoos, apply makeup, fake tans and even nail art. Airbrush skin like a pro. In this Photoshop retouching tutorial, you will learn how to retouch skin like the professionals.

Retouch skin is the act of using an airbrush tool to mix air and paint to create a fine mist that can be applied to nearly any surface. A compressor or can of air is needed to create enough force to push the air through the airbrush and thus mixing with the paint. Besides, retouch skin can be used for applying a background or base coat, painting fine detail, and achieving smooth gradations in colors. We often use airbrushing to even out colored surfaces. After the background has been removed, surfaces are selected from the object and cleaned or evened out per colored surface.

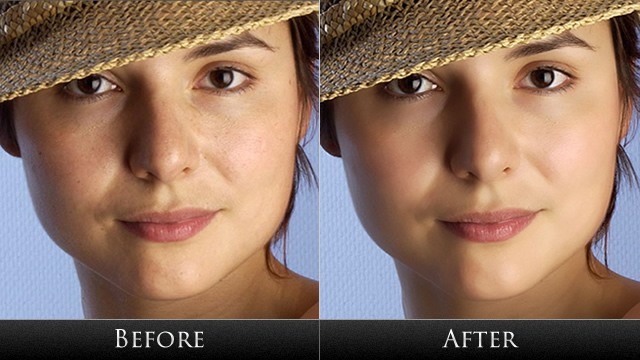
If you use retouch skin tools to edit photos, airbrushing refers to any retouching done to a photo that changes the reality of the photo. With retouch skin tool, you can remove excessive images, the dirty, the acne erased, or body shapes altered. So, would you like to learn to create amazing artworks independently at home and edit your photos by using airbrushing tool?. Recently, here we will guide you some basic tips to retouch and airbrush skin photos.fotosolution-Tips-How-to-retouch-skin-effetely-in-Photoshop-03

The first step to learning to retouch skin is to structure your skills of airbrushing in your mind in a systematic and measurable way. Next, the second step is to learn to break down photos or drawings into these measurable structures, so that you need to master step to step of process.

Step 1:

You need to open Photoshop and go to File-> Open to select a photo in your collection you want to modify. Make sure the photo is high-resolution, good quality so you can see the finer details of the photos

Step 2:

Now, to enhance the feel and look of the objects we are going to need to open two duplicate layers to compare and feel them correctly. Using Layers in Photoshop, we can edit a layer, remove it and have the original image. It allows us to modify certain parts of an image without making permanent changes or don’t loss the original photos. Photoshop is a perfect tool to make any customization necessary to a photo or an image and transform them become special.

So, the first things that you need to go to your layer panel and select duplicate layer. The layer panel can be found on the bottom right of your screen. You can see it by pressing F7 and it will appear in the bottom right hand corner. To create a duplicate you can either, right click on the layer containing your image and select duplicate layer, or clicking CTRL+J. With two steps below, you should now have three layers in your layer panel including the original and the duplicates.

Step 3:

After creating the layers, we want to start working with the filters. Highlight the low layer by clicking on it. Go to the top of your screen and select Filter->Blur Menu and choose the surface blur option. This step helps blur the pixels in the image that make it look smoother without affecting the edges. You can choose between 2 options from: radius and threshold. Using the radius allow you indicates the size and strength of the blur and threshold lets you define the area you want to blur.

Step 4:

It’s time to get airbrushing or airbrush skin in Photoshop. With the Surface Blur box open, adjust the Threshold and the Radius until the image is blurry. After moving the sliders around until you have a good blur going on. Now, lower the Threshold slider until you have definition back in the image. You should notice the quality of photos become smoother.

Step 5:

If we see our photos what are still bumps or pores visible in the image, we should use Linear Light tools to eliminate them. Linear Light tools is one of the useful tools to edit photos and called the different name as: the blending methods. In your layer panel where it says normal, click on it and choose the Linear Light option.

fotosolution-Tips-How-to-retouch-skin-effetely-in-Photoshop-01

Step 6:

We need to create a layer mask. To do this, look on the bottom of your layer panel and find the grey box with a white circle in it. Click this button. Now you will see a white layer added to the high layer.

Step 7:

It’s time to choose the image you want to edit by going to Image>Apply Image at the top of your screen. Select layer 0 from the drop down list where it says merged. Click OK to complete.

Step 8:

You should see a black and white version of your image next to the thumbnail for the high layer in your layers panel. Now click on the colored thumbnail so we can do some fine tuning. You should zoom in a lot on the areas that need work by pushing CTRL+. To adjust the radius and help your photos become more natural, you can click on Filter->Other->High Pass, you will see a dialog box will pop up and give you the option to adjust the radius. Click OK when you’ve done.

Step 9:

Go to Image->Adjustments->Brightness/Contrast  to increase the contrast and adjust the brightness to make the bumps on the objects in photos less visible on the dark areas and more visible on the bright areas.

Step 10

We’re done smoothing the skin but you’ll notice that the whole picture is blurry now. In order to isolate the skin from the background we need to combine the low and high layers into a group and then painting the layer mask over the skin. So first, highlight both the low and high layers by holding down CTRL and clicking on each of them. Now push CTRL+G to create a group. You should now see a little folder icon with Group 1 written next to it. If you click on this you will see both the layers in the group. Now we need to get rid of the layer mask by going to Layer->Layer Mask>Hide All. You should see a black thumbnail next to the group layer.

Step 11

Going ahead and create a new layer above the low layer by clicking on the icon at the bottom of your layers panel. You want to fill this layer with color you want,  so you can see where you are painting. Go to Edit->Fill and select color from the drop down menu. Select colors and click OK to complete.

Step 12

It’s time to paint! Click on the black thumbnail on the group layer. You need to get your brush tool so hit B to activate it. Now go to your picture and paint over the areas you want to airbrush. It will look color when you choose this old step, but this is just so you can see where you are painting. Adjust the brush size as necessary on the top left hand side of your screen

Once you are done coloring in the desired areas, go back to your layers panel and delete the red layer mask. You have an airbrushed face or airbrush skin. Here are some basic tips about using the airbrushing tool in Photoshop that help you learn how to retouch and airbrush skin in Photoshop. We hope that you will feel it interesting. If you have some images product, you need to support and help, don’t hesitant, contact us. We will help you solve all difficulties.

How to airbrush skin effetely in Photoshop

Below are video that guide specific how to retouch and airbrush skin in Photoshop. If you have any questions or concerns, please do not hesitate to contact us and comment below this post.

Retouch and Airbrush Skin Professionally in Photoshop – YouTube from Dean Wendt on Vimeo.

Let’s post an image of your setup and a final image so everyone can see what you did. We look forward to seeing your results.
Categories
Support Tips & Tricks

7 Basic Mistakes Of DIY Footwear Product Photography

Do you ever ask yourself that you owner beautiful and quality product but the decrease number of customers who visit or come back your online store?. What’s happened to your product or do you have basic mistakes?. Let’s experiment this article below with main topic: “7 Basic Mistakes Of DIY Footwear Product Photography”. It is maybe useful key help you unlock this question.
Quality product photography is one of necessary and crucial factors that help business create a great impression on customers and keep them come back. Poor product images quality will likely scare customers away.

If you add sharpness, appropriate lighting, and a few other necessary elements, do you believe that the result will very surprise for your sales. So, how you style your product or how you turn into your product?. It’s depend on lighting, your camera setting, the angles you shoot,…
With 7 basic mistakes of DIY footwear product photography below will a great topics that help you answer all questions and avoid the same mistakes.
Preparing the product before shooting
Before shooting your footwear product photography, they are many things you should do, but one of these preparations are the position of product in photography especially small spared details.

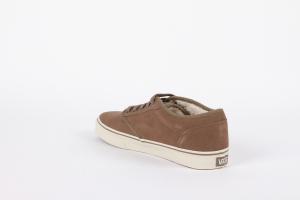
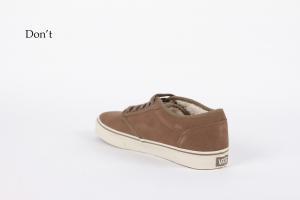
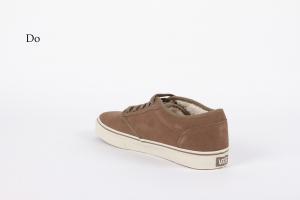
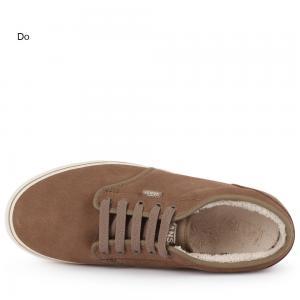
Avoid putting footwear droop

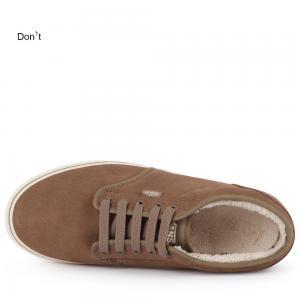
The faces of footwear product appear on website that is very important. If you choose limp, lifeless footwear to shooting – product are unflattering and conveys little accurate information to the customer. It is perceived as big mistakes that affect directly to the quality of your product and your sales. Let’s choose the simple and clear faces of footwear product and help footwear stand, this make it easy for your customers to visualize wearing your footwear.

Advise : You should make sure that every piece of footwear looks its best by creating the illusion that the shoe is being worn. This shows both the item’s true shape and allows your customer to envision themselves wearing it.

Background

First, background is one of the necessary parts that contributes to create a good pictures. So, you should choose available background to turn into your product become special in photography. Don’t clutter the frame. Simply, a busy background will distract your customer from what you actually want them to look at. To solve this question, the best way for your product photography is that use a clear white background.

Lighting

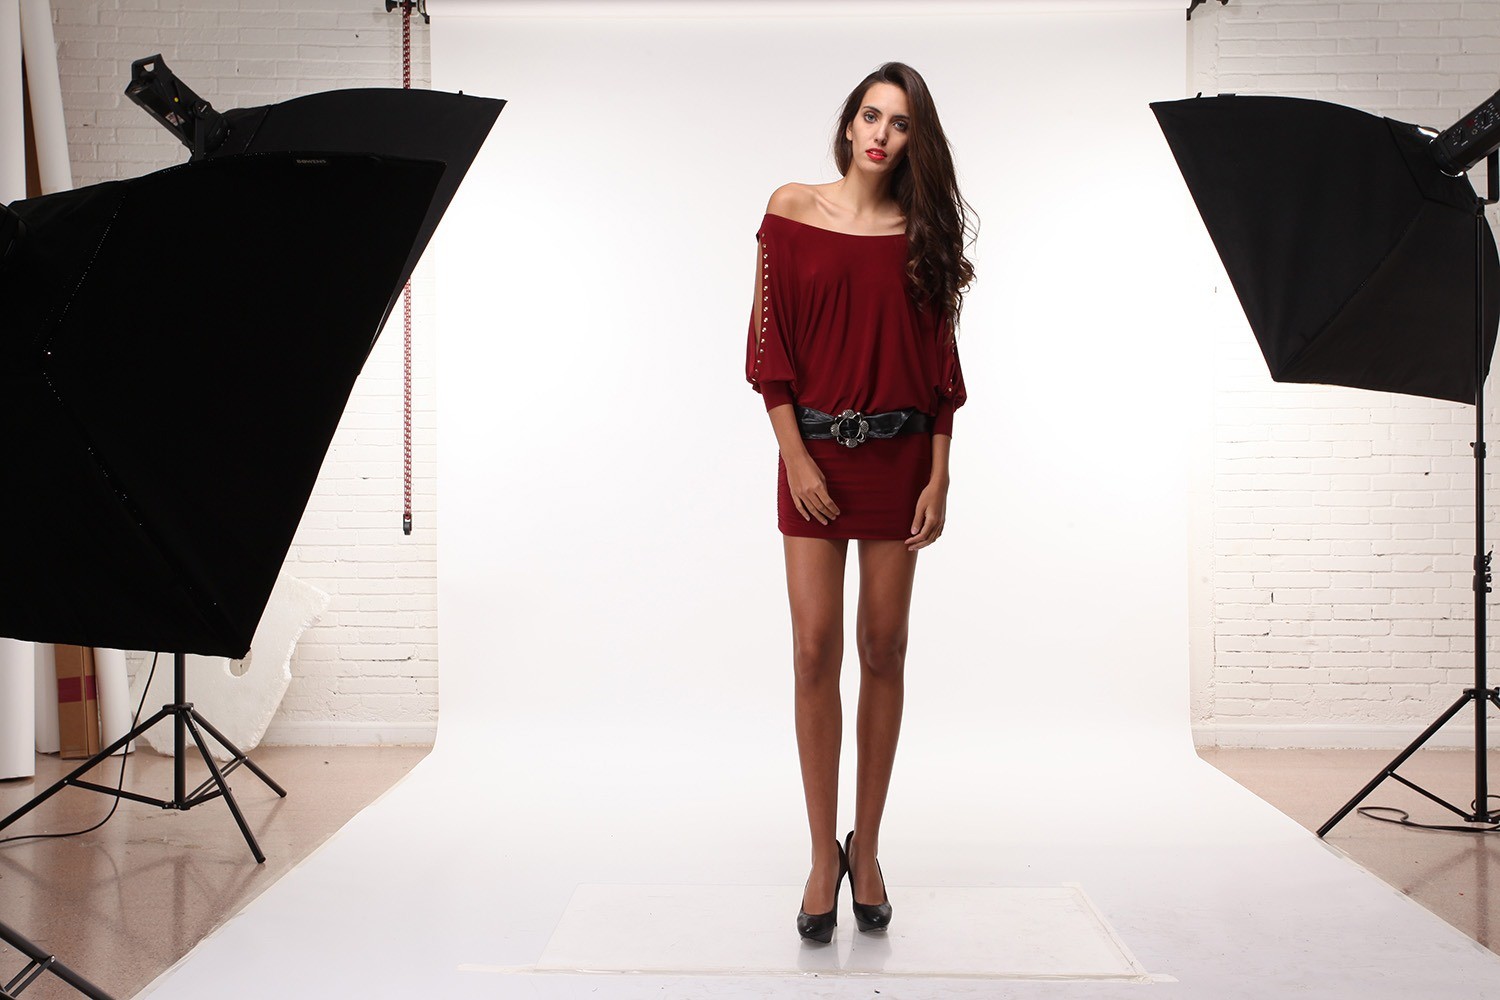
Lighting is one of, if not the most, important parts of product photography. You absolutely need the appropriate type of lighting or your product will not look appealing to your customers. Harsh, direct lighting that casts deep shadows is the worst type of lighting for product photography.
Normally, photographer always use natural lighting because it one of the best and cheapest options available. You can choose and take your photos inside next to a large window where have many lights or use studio if you’d like to go the artificial lighting route.

Focus

You can focus your product what will appear in photography. Besides, Avoid using too redundant details in product footwear photography, this will make your customers distracted. The more your image is out of focus, the less your customer will see of your product.

Let’s use a higher aperture like f/11 on your DSLR camera to get every aspect of your footwear in focus. In addition, be sure to use a tripod; this will minimize camera shake and give your images maximum crispness.

Cropping

Cropping is one of popular ways of digital photos that customers can be easy to find the error if you make a mistakes especially inconsistent cropping in photography.Your customers will notice if some of your footwear images are more zoomed in than others, and they will notice if products the same distance away from the camera are higher or lower than each other.

To avoid making this mistake, you should keep your images consistent from frame to frame. Abiding by a template will speed your shooting and post production workflow and enhance the professional appearance of your website by supplying you with a consistent portfolio of product images that all seem to belong together.

Angles

One of the biggest mistakes in product photography is displaying very few angles of the product on the listing. Let’s try to shooting your footwear product photography in many different angles. These will help your customers feel confident as well as have a holistic and integrated view of your footwear product.

fotosolution-7-Basic-Mistakes-Of DIY Footwear-Product-Photography
Take straight-on side shots, shots from the front, shots from the back, the top view, angled side shots, detail shots and all variations of those suggestions.

Shadows

Do you know that footwear images in particular benefit greatly from a little bit of natural shadow?. It’s standard best practice in eCommerce to place products on a pure white background in post-production. Let’s retain the natural shadow in post-production processing grounds the item in the frame and creates a much more professional result.
Referring and sharing these basic principles in your footwear product photography will dramatically improve the quality appeal of your online product. If you style your footwear, use a clean, uncluttered white background, soft lighting, full focus, multiple angles, and consistent post-production processing, please do not hesitate to share your experiences and contact us.
Now go experiment and show me what you can make!.

Categories
Support Tips & Tricks

How to change my life with outsourcing services?

If you’re looking for detailed documents about outsourcing services here and there, this is not an essay for you. Simply, it just a blog entry where I share my experience – it changed my life.
I am a content editor who is responsible for the writing compilation and revision of content, images for website. However, it is sad thing that I am not good at editing photos or in the other word, I use Photoshop software quite bad.

However, I work with the same clients as well as readers, this allows me to learn their editing style and the things they are interested in. Not using Photoshop software well, this make me waste lots of time to edit images. The bigger problem was that as I got busier, I found myself spending my whole working week retouching.

In while, I feel crazy because I need to build new ideas for my essay with edit photos for hours. I wanna spend more time with my friend and my family instead of behind of my computer, it is too bored.
I always thought I can edit photos myself and the idea of someone else retouching my work scared me! Were they as good at retouching as me?. Would they over retouch and ruin my images?. How would they know what my original vision was for the images as I was taking them?. However, if the image are not attractive, this can be affected directly my posts.
But as my focus became worse and worse, I don’t have time enough to complete everything. My boss always urges me with new ideas, new topic to post on website while I keep on struggling with piles of editing photos. Finally, I decided to find and choose outsourcing.
When I finally let go and handed my images over to outsourcing service it was one of the best business decisions I ever made. Prove that I sent them some files from my past photos collection. Specifically, I chose images which had subtle issues, or which could not be edited well and my special request. Thus, when they send me back the edited photos, I feel surprise and happy with their results.
Outsourcing services

Removing creases and folds is combined with shadow correction

Multiple File delivery

Outsourcing service makes post production for me-content editor simple and easy. In addition, they help me improve my turn around time and increase my customer as well as my readers satisfaction. Especially, I can focus on my mainly job with interesting ideas for my article.
For me, the outsourcing help my job, there are:
+ Focus on my job
+ Do more network: get in touch with other industry professionals and form professional relationships.
+ Make more money and subscribe: attract readers who are interested in my articles.
To summary, everybody’s business as well as everybody’s job are different, so to really understand the value of outsourcing services you need to figure out how much time you’d get back in your life.
Here are my interesting sharing about outsourcing services that changed my life. Have you ever used outsourcing for your business?. See that share your story and let us know in the comment below!.

Categories
Support Tips & Tricks

How to Optimize Your Images To Boost eCommerce SEO

Boost eCommerce SEO is one of the top criteria that all businesses are always aiming. So, if you want to improve or more of this traffic, you need to learn and know how to optimize your images on website. In other word, we need to understand the importance of Images Optimization.

Nowadays, eCommerce SEO is more and more popular in modern social network. eCommerce product photography is one of the aspects of web design that enhances the value and raise the effective sales. In addition, optimizing your product images for search engines is another way to gain interested customers for your eCommerce store. In the early days of the web images were typically small and of low quality. Many websites do not focus on the role of images and not optimize to take advantage. However, as users have moved from dial-up to broadband connections, the number, size and quality of images on the web has increased significantly. So, to optimize your images for eCommerce SEO, what should we do?

Today, we present some of the easiest ways to optimize your images for search engine visibility.

fotosolution-How-to-Optimize-Your-Images-To-Boost-eCommerce-SEO-06

Images Files Name

When naming image files, use words that describe the image accurately and clearly. It makes sense for most eCommerce retailers to name their images with a product number. So, this helps them to quickly present images to their respective products. The name of the image file with help search engines determine what the picture is of. We should include a keyword that you are trying to rank for when writing the image file name. However, avoid making long file names and keyword stuffing because this could have a negative impact on ranking. We should use dashes to separate words instead of underscores, avoid to using excess keywords such as: “ the” or “a”.

If you want eliminate stop words and low value keywords and replace the spaces with a delimiter. And if you want to choose effective keywords, you can use some useful tools such as Google and the other search engines. They have gotten better at working with different characters as delimiters.

Image File Types

fotosolution-how-to-optimize-your-images-to-boost-ecommerce-seo-01

With some regular sitemaps, images give the search engine additional information to use when crawling a website. The user experience should be considered before eCommerce SEO. Utilizing some of these strategies can help your produce images achieve a higher ranking on search engines, leading to more sales. You want to use the file type that gives you the best trade-off between image quality and file size. A great suggestion for you, choose image file types with file extension like: “.jpg”, “.gif” and “.png”. Besides, you can use Google and the other search engines what can help you realize and optimize your images and here are image file types.

Image Files Size

A important part of image optimization concerns the pixel size. You want to make sure your images are a common size or have a common ratio of height to width. Square image sizes are the safest as search engines understand these the best. Make sure you save the image in a web-optimized format. Because these are very useful for your website. Keep file sizes as small as possible. Because good pictures are integral to making online sales, you can provide an option to view a larger pop-up or viewing on a separate page.

Tips: As a rule, you should set up file sizes under 70 KB. It is considered as the standard size for optimized pages.

Alt Tags

Alt text is provided as an alternative when websites can’t express the concrete images. Alt text also describes the image to search engines so they can understand them. You should use at least one keyword in the alt text, should not choose too much. Only use words relevant to the content of the image, these keyword will help viewer find your product images and your product in the easier way.

Tips: As a rule, you should describe the image by using from 3 – 5  words. In case, you have too many keywords what want to use to express your images, besides, find correct answers for your choice by search engines, Google Analytics is typical example.

Summary

Finally, you know some toolbar related to social media such as: Facebook, Twitter, Blog, Pinterest,.. what will help you speed up the process SEO and increase the number viewers.

Setting up Facebook, Twitter, Pinterest,..button in your website. In this example the social media buttons only appear when the user hovers their mouse over the thumbnail in the search results. We can choose Facebook for a typical example to confirm the effectiveness of social media. As far as we know, Facebook is one of the faster social medias now. People access to Facebook everyday, so create the login and make friends on Facebook is the most intelligent way what help you present your product to customers. So, install Facebook button is one of the intelligent and effective ways. Why can we confirm about these?.

In facts, when a user clicks a Facebook  like button, Facebook downloads a copy of the image, your customers can easily like your images. As a result that you can see the number of people approaching is high percentage. You can apply to different tools such as: Pinterest button, Twitter button,…

To help you make your store website even more visible in search engines, we have shown useful lesson related to optimize your images for you. You’ll find there tips on how to optimize your image for Ecommerce SEO. If you have useful tips or any difficulty, please do not hesitate to contact us today for a free consultation.

Thanks for reading!

Categories
Support Tips & Tricks

How To Shoot High Quality Product Photos From Smartphone

Are you looking for a cost effective way of adding beautiful and high quality product photos to your website? So what is this mysterious method?. Today, we will give a great suggestion for you: it’s smartphone or in other words, shoot high quality product photos from Smartphone. As we know, smartphone has become a very important part of our daily lives. It is very difficult to imagine our live without a smartphone as most of our work is done using smartphones.

So, what’s the advantage of shooting with your smartphone? In short, it’s a time-saver: you can shoot, edit, and list your photos in one go. And you won’t get caught up in cords to transfer photos from your phone to a computer. Secondly, if you don’t have a DSLR or a point-and-shoot, photography will help you save money. We surely believe that you can create truly beautiful images from your smartphone. Because your smartphone camera is one of the easiest to use and cost-effective solution to taking awesome photos.

Yes, using the camera you always carry around in the name of a smartphone may sound a bit crazy but hey, today’s phones are highly sophisticated and create sharper, clearer and amazing photos with stunning colors. Combined with photo apps and tripod, the advanced smartphone camera features, you’ll have fun shooting, editing and uploading great product images to your online store.

Smartphone photography is convenient, as well as user and budget-friendly. Getting ready to use your phone as a camera.

To get started, you must have a smartphone and understand how to operate its camera application. Most smartphones in today’s market come equipped with great cameras. If you’re one of the many consumers who have purchased one of these devices, then you have a high quality DSLR alternative right at your fingertips!. You must carefully study and understand the various capabilities and settings of the newly installed app in order to capture amazing pictures using the manual settings on your camera application. Below are a few smartphones that have great camera features

Smartphone Camera Features

Apple iPhone 5S

fotosolution-How-To-Shoot-High-Quality-Product-Photos-From-Smartphone

Camera Specs

  • Autofocus
  • LED flash
  • 8-megapixel iSight camera
  • Image stabilization
  • Video Recording HD (1080) @ 30 frames per second with audio

Samsung Galaxy S5

fotosolution-How-To-Shoot-High-Quality-Product-Photos-From-Smartphone

Camera Settings

  • LED Flash
  • Autofocus
  • 16- Megapixel resolution Camera
  • Video Recording HD (1080) @ 30 frames per second

Regardless of the smartphone you use for your photo shoot, be sure to choose one with an auto focus and the highest number of megapixels. From here, you can then utilize your gadget’s advanced camera features to make money online.

Professional product photography is an easy and affordable gateway to your customer satisfaction. To generate higher traffic and eventually increased profits with your smartphone, below is a list of five things you must remember.

Note: All photos in this post have been captured using a smartphone-iPhone 5S

Go neutral

Make sure you have a well, and evenly lit space to take the pictures in order to avoid shadows and unnatural coloring. This can be accomplished by taking the picture somewhere where there is a lot of natural light – ideally near a large window. You can supplement the natural light with any soft light. Create a neutral background for your product. The easiest way to do this is by using a long roll of paper or a sheet. We would advise setting up your roll so that it goes underneath your product as well, not just behind it. That way your product will appear fully surrounded in the image. For example, white products can be photographed against grey walls (instead of a white background) and black objects can be photographed against grey or white background.

Shoot straight

fotosolution-How-To-Shoot-High-Quality-Product-Photos-From-Smartphone

For shooting, we recommend that you first try to use the default camera app that comes already installed on your smartphone. If you aren’t getting the results that you want, then it’s time to try another application. Using your smartphone, you should ensure that the subjects are straight and cropped or edited according to how you would like them to appear online. With this, you’ll not need to straighten and crop them again in your post. If you choose to use angled camera shots for that dramatic effect, ensure it comes out creatively and not as bad photography.

Provide enough lighting

For your images to be exceptional, they must be bright and well-lit. Poor lighting will make your products look dirty and dingy and this can easily discourage your potential customers from buying from you. So, when it comes to shooting product photos, nothing beats soft or diffused light. It’s less intense, spreads evenly over the product (causing fewer shadows) and better brings out details, making it ideal for putting your products’ best foot forward.

Luckily, soft light is easy to find if you know what to look for. If you’re shooting products in your home or office, set up a shoot near a window on a bright but overcast day to avoid harsh rays. Then, use a piece of white paper or poster board to reflect the light coming in and eliminate any shadows on your product

Create an effective background

An effective background is essential to drawing attention to your products and reinforcing your brand. Many business owners choose a white background for a clean image that showcases their products. Others prefer a black background or even a staged scene. If you’re thinking about introducing colors to your product photo backgrounds, take some time to research color theory so you’ll choose options that’ll make your products pop.

Editing
After all is done and your images are safe in your smartphone’s Camera Roll, you can then open up your best photo editing application, (consider using Photoshop Express) and edit the images you would like to upload to the web. Digital images need some tweaking to achieve that shiny look. To get a head start on getting that perfect product photo, try playing around with these basic settings:

  • Brightness: Increasing the brightness of your image will hide any imperfections and give it an attractive glow.
  • Contrast: Increasing the contrast will help your image pop against the background.
  • White balance: Sometimes your camera doesn’t get the white balance adjustment right. Playing with this scale to get the most natural colors in your image is a quick and easy fix.
  • Sharpness: Increasing the sharpness of your image will help highlight the intricate details of your product and improve image quality.

With effective upper guide, we believe that you will shoot your beautiful product photos from smartphone. How do you feel about smartphone photography?. Let’s get started to take your own best photos and enjoy!. If you have useful tips or any difficulty, please do not hesitate to contact us today for a free consultation.

Categories
Support Tips & Tricks

How to Create a Ghost mannequin effect in Adobe Photoshop

High quality product photography is essential for apparel eCommerce. If you own store online and you try to think what do your customers do when they go to shopping online?. Hi-res product photography will perfect answer for your question. Shooting beautiful images for store online, you can use mannequin or model to showcase the unique shape and fit of each product. However, it isn’t always effective to actually show the model or mannequin. Today, we will show simple start-to-finish guide about how to create a ghost mannequin effect in Adobe Photoshop.

Mannequin or Model

Let’s start learning how to create a ghost mannequin. The first things you are interested in: choose ghost mannequin or model for shooting product photography.

If you use a model, it need to be big enough to cover at least the model’s top half. But models are very expensive and can distract from your product. If models are not in budget, you can use mannequin are an excellent alternative. But the problems here is change color dress, it waste many times for your shooting. For example, you want to present your new dress with five or six different colors such as: white, black, pink, yellow, red,… You do not know what colors attract customers to your website or how do colors affect your purchases?. You have to wait a model who wear your product with different colors to shoot. This will make you as well as your work lost many times. Using and change your product for mannequin also waste your valuable times.
If you choose mannequin to take a photos, depending on your needs, you may choose to purchase a mannequin with or without arms, hands, or legs. To summary, let’s make sure that your product fits your mannequin or model by using the right size or tailoring the garment to fit correctly.

Set up your studio

Let’s choose white background for product photography. It will turn into your product become more specific in pictures. Especially, the white will reflect light back onto your image and keep your camera’s white balance calibration accurate.

fotosolution-ghost-mannequin-02
Using a tripop to position your camera is one of the neccessary elements to decide the sharpness of the image. Ideally, you want the camera positioned so the entire frame is filled by the white backdrop and the product.
You also need to interest in lighting. If you choose the natural light, you may be read: How to Use Natural Lighting for Best Product Photograph. We should mention our main character: mannequin. When you wear clothes for mannequin, you should check for creases, smudges and stains of product. Moreover, let’s try to have an extra pair of hands when dressing the mannequin. This will help you adjust the arms and clothes while holding it up can be challenging.

Take your photos

One of the biggest mistakes in product photography is displaying very few angles of the product on the listing. Let’s try to shooting your product in many different angles. These will help your customers feel confident. It has a holistic and intergrated view of your product.
So, you also need to shoot mannequin with your product in many different angles. Firstly, let’s take a picture of the front of the garment, with the front of the mannequin facing the camera. Take off the garment, turn your mannequin around so that the back of it is facing the camera. Then dress the mannequin again, but this time the garment needs to be inside out. The reason you’re doing this is so you can get a clear view of the behind the neck or waist.

Next, it is more complex, so require that you need to have high-precision shooting. Say that take a photo of the back of the mannequin with the product the right way around, and the front of the mannequin with the product inside out. These will help your customers have object view about your product.
After taking your product photos, let’s check it out and edit to create a ghost mannequin effect before releasing product on website. Keep in mind that avoid any small error on the final product because of existing small weakness.
Below are the tutorial video for step-by-step guide to the process. Don’t forget that this effect on your product images will not only make your products look more attractive and perfect. It will also bring the look of your online store to a highly professional level as well as boost your sales.
If you have any questions or concerns, please do not hesitate to contact us today for a free consultation.

Categories
Support Tips & Tricks

DIY Guide to Beautiful Product Photography

Do you know how to shoot a beautiful product photography?. how do you feel about perfect product photography?. If you want to refer to reach to product photography, let’s discover this article: DIY guide to beautiful product photography.
A beautiful product photography may be worth a thousand words. It is sure to improve your customers’s shopping experience and increase your eCommerce sales. In fact, Showcasing your products with high-quality images will help you gain the best result for your business project. And a big part of having an attractive website these days also means having high-quality, beautiful product photography.
Before you give up on your product images, refer some guides to awesome product photography for your eCommerce store.

White Background

fotosolution-diy-guide-to-beautiful-product-photography-01

Background is one of important factors in an image and choosing suitable background is a deciding element to make beautiful photos. Moreover, the background is of fundamental importance in the composition of the image emphasizing the subject, improving the photography. If not adequate, it may cause irreparable damage to the image, making it chaotic.

For great photos, you need to create what’s known as beautiful and clear background. Simply, this is a white backdrop that sweeps from the vertical to the horizontal surface. Using white background, you don’t need to make any brightness and contrast adjustments. Because the sweep will reflect white light onto your product. Dark colors absorb light, so shooting against a dark backdrop will not give you a well-lit product image.

Or if you choose to remove the background, it’ll be a lot easier to do if the product is on a plain, white background. Let’s choose white background to make your product become more striking in photography.

Using Photography Equipment

Photography equipment is one of important and necessary parts to make beautiful product photography. The first equipment you are interested in that is camera. There are many kinds of cameras that help you shoot great photography, and DSLR camera is one of great choice for photographer.

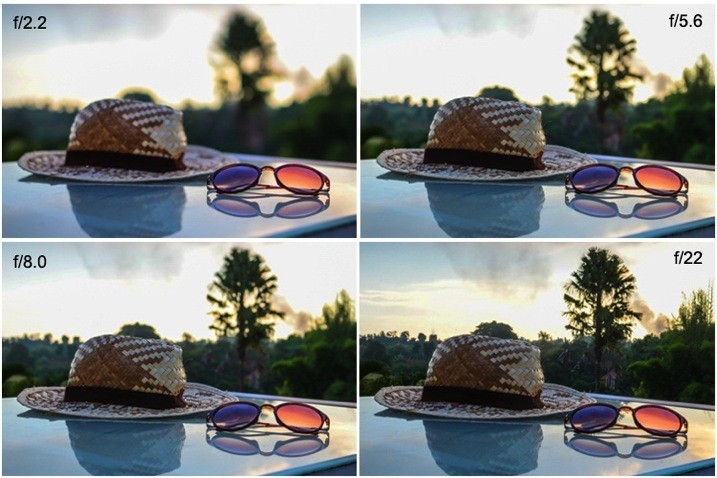
With DSLR camera, you can use the right aperture for the right shot. A wide aperture like F2.8 or F4.5 will narrow your depth of field, leaving parts of your product out of focus. A small aperture like F8 or F11 will give you a wider depth of field, keeping your entire product crisp and in focus.

In addition, keep in mind that don’t use a wide angle lens. You will distort your product. Besides, you can use other equipment such as: smartphone – is one of useful devices for your project.
You are interested in: “How To Take Camera Setting for Brilliant Product Images“.

fotosolution-diy-guide-to-beautiful-product-photography-03

Tripod

The quality of image can be affected by your tripod. Why are tripod?. When a camera has a slow shutter, you can’t hand hold it or the subject will be blurry. Tripod is mainly answer for you. When you take a photos, you’re going to set your camera to a very small aperture so that you can have the most depth of field your camera is capable of.

Thus,you’ll need to use a tripod to stabilize your camera and easily duplicate the same shot for each of your products.

Lighting

The key to amazing product images is your lighting. If you don’t have great lighting, you won’t have great photos. There are two kind of lighting that photographers use to capture beautiful photos: natural light and artificial light. When you use an artificial light source, these can affect directly your product’s color, while using natural lighting for product photos preserves the natural color of the product.

fotosolution-diy-guide-to-beautiful-product-photography-02
An useful advice for you: Say to turn of your camera’s in-built flash because if you are not a person who have the photography skills to manipulate the flash. You’re not going to get great results using it. So, what are the advantages of natural light and artificial light?.

As far as we know, artificial light is constantly available throughout the day and night. This allows  you to skip planning your shoot around factors like the time of day and the weather has no effect on you. Based on the specific type of artificial light you select, you can even mimic sunlight or moonlight in your shots.

Natural lighting is easy and cheap. A set-up near a window is your best option, because you need to use the sun as an indirect light source. In general, morning light is bright and has less color, while afternoon and evening light often has a warm undertone. In addtion, it brings out greater contrast in your images. You can always neutralize the image and make it cooler in post-production if want a cool, dark image.

You are interested in: ” What do you choice: Natural Light v.s Artificial Light?
Below are video that guide specific how to create a beautiful product photography.

Great Product Photos from Etsy on Vimeo.

Closely, it is easy to take your own products with 4 guides how to create a beautiful product photography. Let’s post an image of your setup and a final image so everyone can see what you did. If you have any questions or concerns, please do not hesitate to contact us today for a free consultation.

Categories
Support Tips & Tricks

Product photography: In – house or Outsource? Which one would you choose?

When you want to build a web page to sell online, one of the key considerations to make relates to the product photography and whether you should undertake the project in-house or outsource.
Here we will discuss and examine some elements related to using in – house or outsource in product photography. We hope that this topic will help you find the best choice for your business.

fotosolution-in-house-or-outsource-which-one-would-you-choose-15

The Cost

Image you choose the project in – house, the first thing to remember is that you will need the space to set up a studio for the product photography. You should prepare many instruments such as: a good quality digital camera, light diffuses, lenses and tripod,…. Especially you will need a staff member who is skilled and experienced in such programmer. You need to have many times as well as the cost to finish everything. In addition, if your product requires the large number of assistant instruments, shipping a bulk quantity of products to a studio can be costly, time-consuming and risky. These are added burdens affecting your bottom line. When you outsource, you don’t have to worry about these expenses at all.

If you use outsourcing services, this service will help you save the cost. We will prove that outsourcing owner low cost and completely satisfied with your needs. For example, say you outsource 4 hours-worth of editing, and it costs you $150. You spent $150 on the outsourcing, but gained $500 on the sale, giving you a net of $350. So, you use that 4 hours you would have spent editing or blogging or whatever doing in-person sales instead, and you make a $500 sale.

Times and Experiences

If your company needs large volume photography, then outsourcing is the way to go. Because outsourcing will help you finish the large number of your photos and save times for your project. As far as we know, outsourcing is perceived as a team of experts that specialize in shooting products. In addition, they will have many experiences of knowing what works across a multitude of markets and catch up the newest trend in markets. These are crucial things to allow you to owner best pictures quality.

Moreover, the photography project will take many times, while your staff need to have many time to complete their main work or are regularly distracted by other priorities. If the employees that you redistribute to the project are not skilled or experienced in the area in which you have placed them. This will also slow down productivity and may cause errors which are time-consuming to fix. Time is very important for business. If you’re not using it to make money, you have to start re-thinking what you’re doing.
In most cases, an outsourced, professional product photographer is always the best choice. If you have any questions or concerns, please do not hesitate to contact us today for a free consultation.

Categories
Support Tips & Tricks

7 Best Free eCommerce Themes Furniture Store

If you are going to start your Magento eCommerce business online, this article below will one of useful lesson for your business ideas. Today, we will show you 7 best free eCommerce themes furniture store. We hope that these ideas below will useful and available for your project.
In facts that trends keep changing and these days modern sites should have a striking look. However a lot of current online stores all look the same. What you can do to highlight your website?. These clean Magento themes with a neat clean on part of background is perfectly tailored for promoting products of interior furniture companies.
Starting for your business ideas, let’s get your furniture business online with customization best Magento Themes for Furniture Store.

Furniture – Responsive Magento Theme

fotosolution-7-best-free-ecommerce-themes-furniture-store-03
Furniture House is one of amazing and premium Magento themes or eCommerce Themes Furniture Store, available for all product selling websites. Using Furniture house allow you choose unlimited color and different homepage layouts. This will boost your business with unique style. This theme is very great for for business owners, webmaster or customer who are interested in furniture topic.

Download/Demo
Kitchen Tools Magento Theme

fotosolution-7-best-free-ecommerce-themes-furniture-store-04
Kitchen Tools Magento Theme belongs to eCommerce Themes Furniture Store, is great choice for business owners or customer especially housewives who are interested in kitchen furniture.
It is made in soft pastel colors, and its minimalist vintage looking logo and menu are stripe-shaped to add a hue of festivity and luxury. This theme is designed on modern and familiar space and it creates a feel of coziness to your potential customers. This theme allows you to focus the attention of your visitors on your products completely.

Download/Demo
TV Surgo – Multipurpose Responsive Magento Theme

fotosolution-7-best-free-ecommerce-themes-furniture-store-07
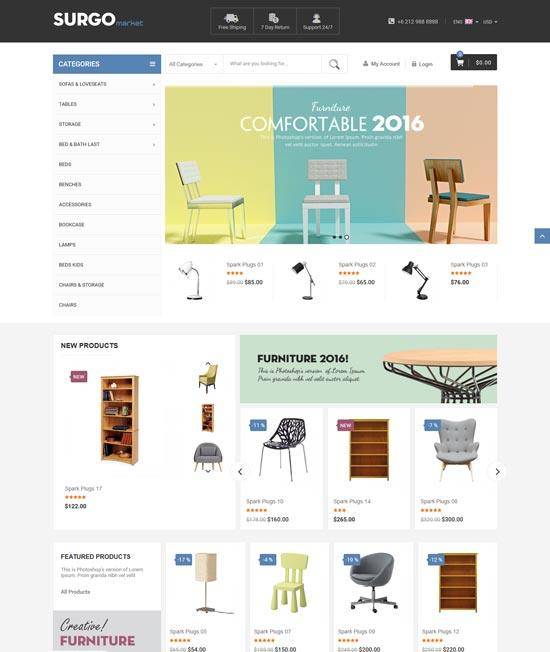
TV Surgo – Multipurpose Responsive Magento Theme is a the best design magento 2015 with perfect layout including: 3 store homepage, HTML5, CSS3, a Bootstrap framework, a popup newsletter subscription form, and more.
The Responsive Magento theme crafted for selling digital, technology, computer, technology, accessories, hi-tech products or any other products. If you want to have a very unique and attractive design and trying to make your way among numerous store owners, TV Surgo is a great starting point for you.

Download/Demo
Supershop Magento Theme

fotosolution-7-best-free-ecommerce-themes-furniture-store-06
SuperShop is the newest design from 7Up, has been created as a Mega store Magento e-commerce solution for furniture online shopping. SuperShop is very easy to customize, it has many page templates with many different layouts for home page. It is designed on all types of devices including smartphone, Ipad and these will help your customer can visit site whenever and wherever they want.

Download/Demo
SNS Simen – Responsive Magento Theme

fotosolution-7-best-free-ecommerce-themes-furniture-store-05
If you want to have a very perfect and attractive design, SNS Simen – responsive Magento Theme is crucial key for your starting point. With powerful features, easy to customize, power admin, cool effect, this theme is perfectly attractive for your customers.

Download/Demo
Arise – Magento Responsive Theme

fotosolution-7-best-free-ecommerce-themes-furniture-store-01
Arise Magento Responsive Theme one of interesting eCommerce Themes Furniture Store, is designed for business owners, webmaster or customer who are interested in fashion, furniture, wine, food, jeweler, beauty store, watches and cosmetic stores. This theme is available in six different layout and colors combination. Everything is customized easily especially modern designs will give you more choice for your store.

Download/Demo
Cendo – Responsive Magento Furniture Theme

fotosolution-7-best-free-ecommerce-themes-furniture-store-02
The beautiful and user friendly Home page with logical structure, clean and clear arrangement, Cendo – responsive magento furniture theme is great starting point for you. You can change the photos and customize the wordings, which is great for promotional purposes.
This theme have clear and modern design with many features that easy to use. Especially, with the search box interface allows searching products in entire the site. In the blog page, you can see many posts, comments, feedback related to your store. It is designed on all types of devices including smartphone, Ipad and these will help your customer can visit site whenever and wherever they want.

Download/Demo

Categories
Support Tips & Tricks

Using a Poor Photos Losing Your Sales?

” I don’t care how the quality of your product are?, are your product good or bad?, but simply that If they don’t look good and don’t attract to me, I won’t choose and buy it”.
A poor photos will affect directly to the quality of product event to losing your sales, have you ever posed this question when your sales showing signs of decline. Or how does it affect your sales?. Let’s find the best correct answer for this problem. In modern times, owning a website sometimes proves to be vital to a business. Your products are good. But they just won’t sell well online if your photographs don’t do them justice. From multinational corporations to local shops, having a good photography is a must if you want to ensure that your products reach the customers.

As far as we know, customers aren’t able to touch whatever you’re selling, good photos will a crucial key to retain and attract customers. It helps also you increase your sales. That’s exactly why product photography is so important in swaying a potential buyers purchase decision. Your images need to give them an experience as close to “real life” as possible.
In this article below, we show you 5 simple tips to improve your eCommerce product photography.

Use an Interesting Background

fotosolution-using-a-poor-photos-losing-your-sales-02

You don’t have to stick to the plain background rule to direct the focus to the product. The background should not compete with the product. Choosing background with clean, simple layout and it’s also easy to maintain consistency. Or you can stage unique props and background with your main product in the foreground.

Lighting

fotosolution-using-a-poor-photos-losing-your-sales-03

Lighting is one of important factors that contribute to the success of your photography – good or bad. It contains nature light and artificial light. Natural light can be the best choice for some products. It’s soft and imparts color in a way that artificial lighting doesn’t. This is without a doubt the toughest challenge in making good product shots. However, don’t worry, you don’t need to outfit your house with an elaborate studio of flashes and reflective screens. It doesn’t have to be expensive or difficult to get great results. Because for some products, simply using natural light may be a better option.

Color

Using color for product photography is one of the most important factors to make a great picture. Beautiful and eye – catching color will attract and seduce viewer’s eyes from the first moment. Every product will have a color subject to help your product become more nominal.
You can refer: The Best Colors For Food Photography with food – main topic.

fotosolution-using-a-poor-photos-losing-your-sales-04

Attention to Detail

An essential starting point for any product photograph is that the subject itself should be clear and sharp even the smallest detail is very important. Firstly, you can express clear idea of what you’re selling, secondly, you also prove with your customer that you have nothing to hide. With clothing in particular, it’s important to show high-res images to emphasize you’re products are made properly and of good quality. Let’s observe carefully to ensure your product photography that is the best.

Quality photography and Show


fotosolution-using-a-poor-photos-losing-your-sales-05

Are you so keen on trying to capture the whole product that the most important aspect of it gets lost in the image?. For example, if your product is too small in the photograph or the quality of photography is not good, these will affect directly to your sales. Be-sure that your camera and lens allow you to get close enough to the product and ensure that the finally image quality is the best.
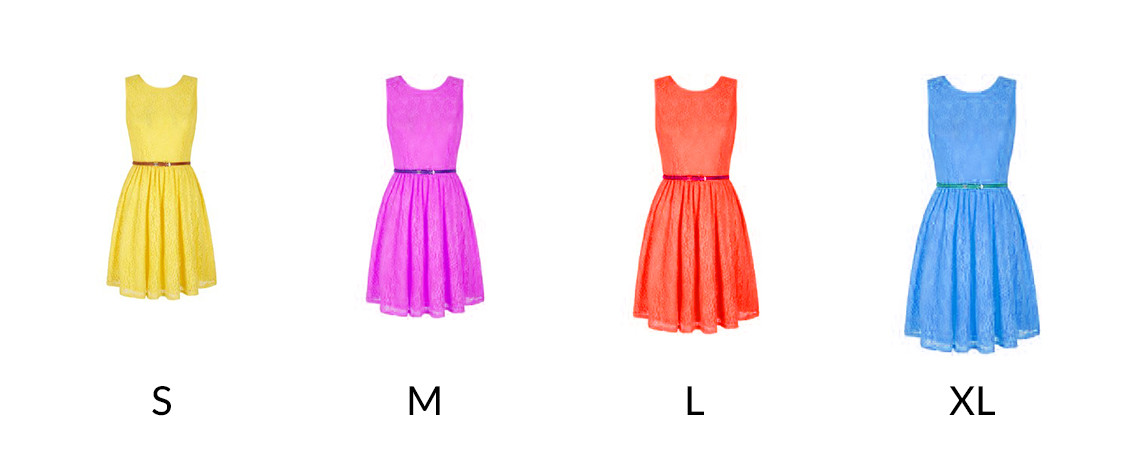
When you show your product on website, make sure that you show anything you mention in a tag line or the product description. The best way is that show your product in many colors and have multiple shots of the product in use. The customer gets a good sense of what it looks like in a variety of situations.
Product photography is not easy. You should spend many times and resources to do it well, but all the time you’re making do with poor quality images, you’re losing sales. Many small business believe that professionally created images are beyond their budget. Here are 5 basic tips to help business improve the quality of product photography.

If you feel worry about this problem or have any questions or concerns, please do not hesitate to contact us and comment below this post. Share this article to your friends especially who are interested in photography.