Categories
Tips & Tricks

Attention: 7 Basic Mistakes in Product Photograph You Should Avoid

Product photography or apparel photograph is one of the most important factors to improve the sales online and keep the customers. High quality product photography is essential for apparel ecommerce. For many customers, your product images will determine whether or not they buy your product?. So, we will discuss the most common mistakes in product photograph to help you improve your apparel photograph and avoid them to create stunning inventory images!.

Miss 1: Not Utilizing A Mannequin or Live Model

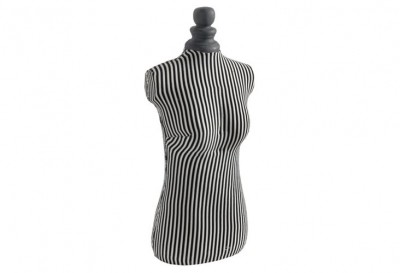
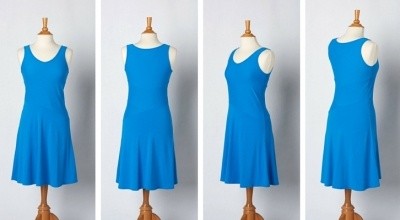
Many apparel photographers shoot product photograph by using mannequins or live models. Choosing mannequin or live models who wear your garments – your product is the intelligent way to present product to customers the most authentic way. Normally, they simply lay clothing flat or photograph it on hangers. But they never know and understand that it is big mistake what can be affected directly to the results of sales. Photographing a garment on a mannequin or a model is the best way to demonstrate shape and fit, while also encouraging customers to visualize themselves wearing it.

fotosolution-Attention-7-Basic Mistakes in Product Photograph-You-Should-Avoid-04


If you hire a model for store online, you will lost much money but using a mannequin, you can save much better. As we know, when it comes to fashion ecommerce, displaying your clothing in a more realistic form is of more importance to your target customers. Since your customers can’t try on your apparels, and naturally they are more hesitant if they can’t picture how the piece will look on them. Using mannequins are an affordable alternative and easy to work with. Take time to style your product on the mannequin; if your garment looks too big, try fitting it closer to your mannequin by pinning it and tucking it until it fits properly. Present your products by using mannequins will allows you the opportunity to create a classy post production technique called the ghost mannequin effect and display it in the most realistic form.

Miss 2: Not Utilizing Enough Light

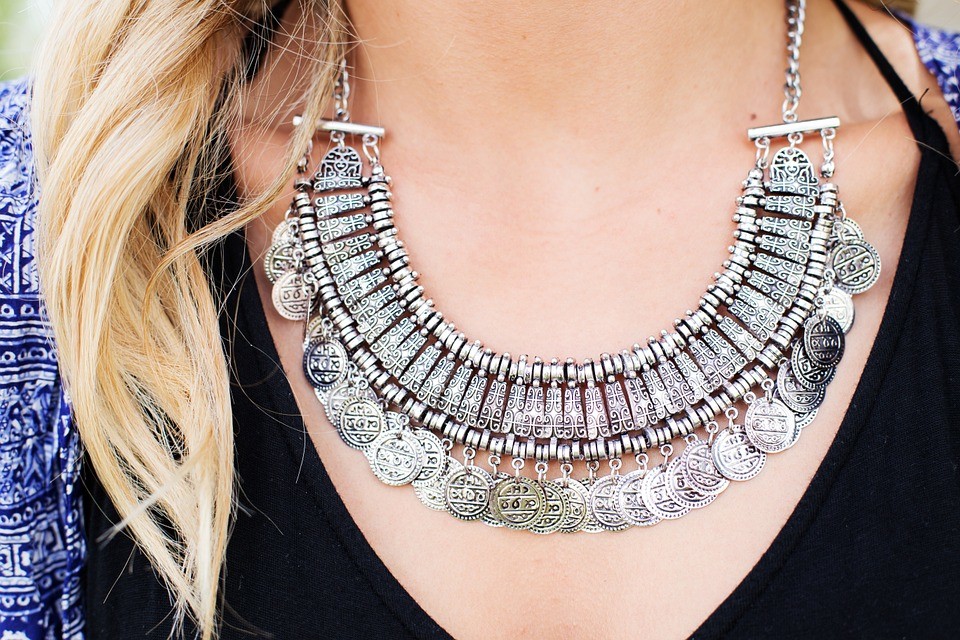
You should avoid to making product images look dingy and underexposed. One of your biggest with an online apparel retailer is bright lighting . Great apparel images are produced when lighting flatters your product. Shiny products like jewel, glass or metal can be tricky to photograph owing to their highly reflective nature. All your product is different and having the right lighting will allow customers to appreciate the unique facets of your garments. The darker the lighting situation, the poorer the image quality—and poor image quality will not flatter your products and vice versa.

Suggestion: You should put your item in place where has lots of windows and a reflector panel made from foam board.

Miss 3: Not Preparing the Garment Carefully

fotosolution-Attention-7-Basic Mistakes in Product Photograph-You-Should-Avoid-02


Preparing garments to be photographed is a crucial starting point for photographing apparel, yet many photographers skip this step and rely on Photoshop to fix wrinkles, stains, and other visible defects.You should complete your product with some close-ups of the feature you wish to emphasize on. Tags, patterns, buttons, stitching— any detail you think makes your garment to stand out, focus on it. So, you can check and prepare the garment carefully to ensure the quality of images as well as the effect of your product.

Miss 4: Not Using Suitable Color

Color is an essential feature of post processing careful attention to white balance, some colors—like neons, reds, and pinks—are difficult to photograph correctly in camera and often need to be tweaked in Photoshop. Let’s ensure that the colors of your garments are accurate. The bottom line is that you want the customer to see exactly what they will receive in the mail should they order your product. There are a number of ways to tweak colors, so get to know Photoshop’s offerings and choose your favorite tool. After you have fixed the colors, make sure to convert your images into SRGB format to make sure that different browsers, computer screens, and websites won’t change the accurate colors that you worked so hard to create for your customers.

Miss 5: Not Ensure The Number of Image

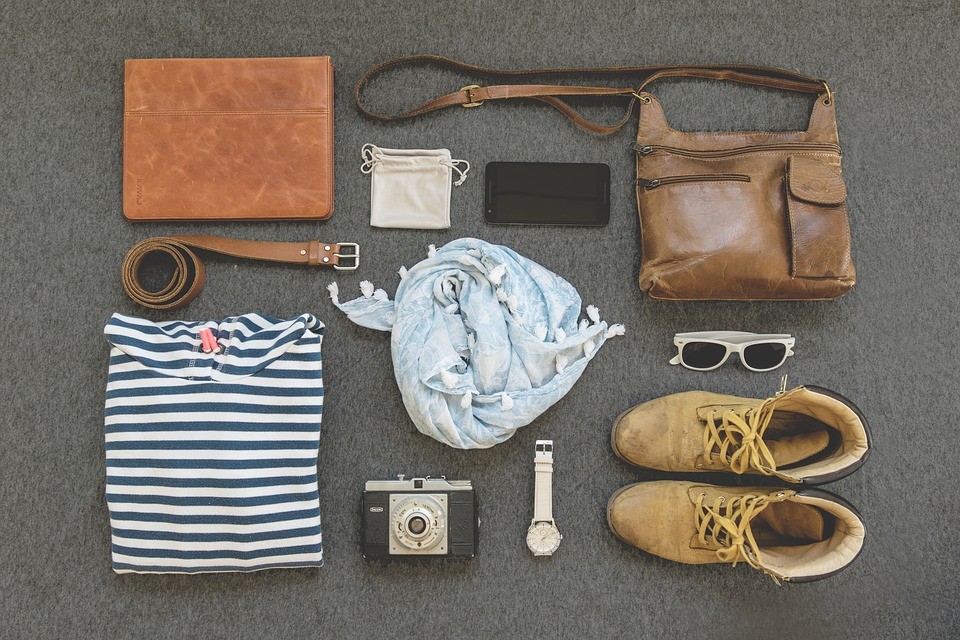
As you know, when you go to shopping or purchase product? You can look at the outfit’s colour, feel its fabric, checkout its prints and styles and then try out if it fits you after choosing product. If you buy the product online, image factors is one of the first elements to keep your’s leg. Beautiful quality image can be decided the big success for sales but having a small thing what we always forget, is the number image that you update your shopping online. If we just update one or two images of each product is simply but these are not enough to give customers an accurate feel for the cost-effectiveness and quality of your inventory. Therefore, it’s important to give customers as much information as possible about each product by uploading at least 3 images per product—and preferably 5-10. You should shoot photograph with many angles of your products as possible. The more images of your product that you upload, the more the customer will come to understand about the product.

Miss 6: Not Using Correct Cameras Setting

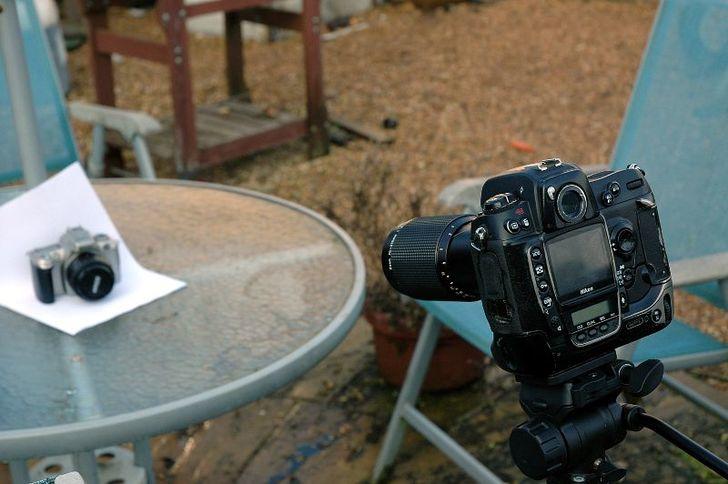
Using epic images to showcase your products can make the difference the quality of product. So, you want to take camera setting that perfect product photography—sharply focused and perfectly lit so as to attract the attention of customers. Because it is simple thing that if you choose wrong camera settings and these can drastically reduce that quality. You should check and use correct cameras setting.

Camera mode

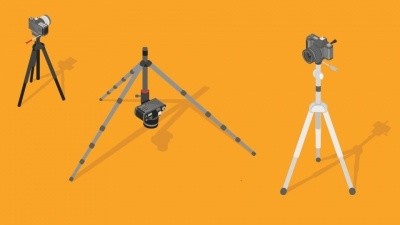
Once you have your camera, tripod and product in place, you can start by selecting your camera mode.  Most cameras offer a variety of settings but I usually stick to using three modes: Manual, Aperture priority and Automatic. As you can see, image taken with my manual mode looks much more pleasing to the eye. This is simply because you can be able to control all your image settings without worrying about the camera using the wrong automatic settings like aperture, flash, shutter speed etc.

ISO Settings

ISO Setting is one of the important factors to perfect product images. Now, let’s select our ISO setting based on the light in our studio.  As a general rule, the better the light in the room, the lower your ISO value needs to be.  By adjusting your ISO setting just right, you will be able to produce crisp and clean photos.

fotosolution-Attention-7-Basic Mistakes in Product Photograph-You-Should-Avoid-03


I would recommend first setting your ISO at 200 and using the viewfinder to evaluate its effect on the product image. If the image appears too dark, increase the ISO value to a setting that is more suitable. If your studio or space is too dark for shooting, raise the ISO value to a range between 600-1400.

ISO measures the sensitivity of the image sensor which takes your image. The lower the number the less sensitive your camera is to light and the finer the grain in your images. This means your image will have less grainy ‘noise’ or what I like to call speckles!  Higher ISOs are generally needed in darker situations unless you are using a tripod.

Aperture

When you choose aperture, you’ll be putting up your exposure settings. For a home studio, f16 is considered ideal as you’ll need to have the whole product in focus so as to shoot clearer photos for your customers. The rule of thumb recommends the use of Aperture settings of more than f11 to ensure nearly (if not the whole) product is in focus. In essence, the higher your aperture gets the better for your images. If for some reason your camera will not reach as high, the highest aperture your camera will allow is perfect or you can even try the auto settings!.

White balance

It is a vital element of outstanding product photography. Be sure to adjust the white balance settings on your camera. Although many cameras will come with pre-program options or presets you need at least one custom white balance option. This means that the camera can “read” and self-adjust itself to be able to take pictures under many light conditions. This feature is very important. White balance means that the camera needs to adjust itself to the ambience light you are using, to give you accurate and true colors of the items being photograph. There are many different types of light sources, but the most common are tungsten, fluorescent, LED, and natural sunlight. Let’s choose suitable white balance to make your perfect product.

Miss 7: Not Editing Properly

After all is done and your images are safe in your website or your shopping online, you can edit the images you would like to upload to the web. To keep all images consistent in relation to one another and cut back your post-processing time, make sure to develop a standard set of specifications for both shooting and editing. You can check all acrops, alignments, colors, cropping and backgrounds identical from image to image in your inventory.

Finally, we have shown 7 most common mistakes in apparel photography, you have the opportunity to correct your workflow and get back on track to creating wonderful product images for your customers. Hope that you have valuable lesson after reading this post and good luck!.

Categories
Tips & Tricks

Using 3D Effect For Ghost Mannequin Photograph To Improve Sales

If you own store online and you try to think what do your customers do when they go to shopping online or purchase product online?.  Surely, they will attract is product image or apparel product photography what is considered as the first factor. High quality product photography is essential for apparel ecommerce. For many customers, your product images will determine whether or not they buy your product?.And to shoot beautiful images for your store online, you always use mannequin or model to showcase the unique shape and fit of each product. However, it isn’t always effective to actually show the model or mannequin in every image. So, you can shoot photographs flat or drape them over a mannequin to give a 3D effect.

Today, we will use the mannequin to showcase product. Using mannequins for your product images is an efficient and cost-effective way to promote your products. However, mannequins can be distracting, so a great alternative is to create a ghost mannequin effect for your product images. To shoot beautiful mannequin images, small tips for you: using 3D effect to sell more. So, how to create 3D image with the ghost mannequin technique?.

Firstly, you need to capture a front and back view of your product being worn by your mannequin or model. After that, you should style and hang your product on a piece of white foam board and photograph both the front and back. To create perfect 3D effect, you should create a ghost mannequin effect what is actually quite simple given that you own the proper post-production software and that your products have been photographed correctly. You can also outsource this editing work to professional editors and get back your ghost mannequin images in 24 hours, ready to sell. Below are these basic tips to create 3D effect for ghost mannequin.

Step 1: Open your files in Photoshop and create layers

First, you will need to open the mannequin image and the top-down image in Photoshop. Choosing your mannequin image and create a new background layer. Fill that layer in with white; it will help you complete overall background  It’s also helpful to label your layers.

Step 2: Use a Selection Tool to Select the Product in the Mannequin Image

fotosolution-Using-3D-Effect-For Ghost Mannequin-Photograph-To-Improve-Sales-02


After, choosing the product in your mannequin image. You need to zoom in tight and choose your favorite tool. There are 3 simple tool: quick selection, lasso or magic wand what help you accomplish your desired selection. Remember that, in most cases, when you shoot, you can remove the mannequin easily by using a white background because of the color separation between the product and the background.

Step 3: Refine and place your mask

If you have selected the entire product, refine your mask so that it is nice and tight, eliminating all of the background and mannequin by using the Refine Edge tool in the Select menu. Click OK in the Refine Edge dialogue box and place a mask on your shirt layer. The result is good and you can see your product floating freely on the white background that you created in the beginning.

Step 4: Rinse and repeat previous steps with the top-down image

Next, it’s time to switch gears and repeat Steps One, Two and Three on your top-down product image. You can feel bored when do these step again, but these is very important for your work; photographing the product inside-out will allow you to show the inside back of the dress, completing the mannequin illusion. Create a new layer, select out the product, and create and refine your mask.

Step 5: Combine the images

Cleaning masks and dragging the mask from your top-down image over to the image of your ghost mannequin product image. Organize the layers so that the top-down image is lower than the mannequin image. Then, adjust the positioning of the top-down layer and adjust its perfect proportions behind the mannequin layer.

Step 6: Remove unnecessary parts of the top-down layer

At this point, it’s a good idea to “hide” your mannequin layer and brush out the unneeded parts of the top-down layer. It’s important to remember to remove that piece in the top-down image because it’s already in place in the mannequin shot. Once you’ve done this, double check that your layers are clean and that nothing is out of alignment.

Step 7:  Add Shadow and Save

Finally, add a shadow between the two layers to create the product some depth, and save a copy of the Photoshop file with all of the orginal layers. When you’ve saved the layer file, flatten or merge all of the layers together and save the image again as a different file. These will help you can make image look professional and realistic. If the editing job is done well, you will end up with an amazing 3D effect, these will improve your product presentation and help you increase sales for your online store.

With 7 basic steps you can see how to create your beautiful images with 3D effect. Using 3D effect for ghost mannequin photograph will help you improve product presentation and help you increase sales on your online store!.

Categories
Tips & Tricks

6 Creative Ways To improve Your Digital Photography

As we know, digital photography play an important role to create the success of your sites or your shopping online. Why is digital photography important and how to revamp your digital photography?. Try to think that if you shoot a normal picture not digital photograph, it is not difficult to make that picture become more special before the eyes’s customers. But if you use the diverse photo effects and next gen tools, you can transform your pictures into stunning pieces of digital art.

Think about it. What are your photos really telling viewers? What is photo clarity and revamping and how do you achieve it?. How has the evolving digital world changed things for photographers?. Welcome to our site – it is great choice to answer every questions.

Create the light your photos by using the sun

sunlight-in-your-home

A best product photograph need to use many differents elements and natural lighting is one of essential factors to creat the success of product photograph. When you use an artificial light source, these can affect directly your product’s colour, while using natural lighting for product photos preserves the natural colour of the product. So, natural lighting complements products photos really well. Using the sun for photograph is considered as the most truely natural lighting for your product. It is one of the best lightings for great shots with fine details and splendid colors. However, the light changes from hour to hour and day to day. You can choice the suitable light for your product.

Choosing camera position

TStripod2

Choosing the camera angle is a important parts when you take the product photos with natural light. A photo can look much better just by approaching it in a different angle. Move your camera in relation to the subject and zoom in or out to change the composition.

Using watercolor effects

Colors is one of essential factors to make the paintings stand out. Watercolor effects is useful way what painters choose for their artwork. Photos can be revamped or recreated into luminous and soft watercolor digital photography. With various tools to choose from, you can easily create a watercolor effect to create photos that are uniquely yours..

Using the flash effect

The flash is a great tool to improve your digital photography. But how to use the effective flash is not simple. You need to keep a right distance when using the tool. It can’t be too near or too far. Often, a digital camera flash has a range of about 3 meters. If the flash is too far, your photos will be too dark. But if your flash are too close, your product photograph may be affected.

Use a Coloring Book Effect

This is an extremely fun and creative way to revamp your overall imagery. The best thing about photo editing and retouching tools is that you can use it on multiple images, allowing you to create a cool coloring book effect that helps reduce your photo to a simple but unique photography.

Make Your Photo a Digital Painting

You can use the scale space algorithm to reduce details excess in your photo or image and this will help your product photograph become more realistic. You can also break the basic preset rules by customizing various features to suit your taste when turning your photos into digital photography.

These amazing suggestions help you improve and revamp your digital photograph. 6 creative ways  remove image backgrounds to create digital artwork by allowing users to edit and cull their photos with a digital revamp. So, you are sure to incorporate layer masking techniques and blending modes to achieve a great effect. We hope that they will satisfy for your product photograph. Let’s share your experiences with us by comments in our site.

Categories
Tips & Tricks

The Important of Background To Make Beautiful Photos

Background is one of important factors in an image and choosing suitable background is a deciding element to make beautiful photos. The background is of fundamental importance in the composition of the image emphasizing the subject, improving the photography, or if not adequate, it may cause irreparable damage to the image, making it chaotic.

Most beginning photographers know to watch out for lamps or other objects seeming to grow out of people’s heads, but there is more to good captures than just avoiding the basic traps. Here are some ideas for interesting background ideas, help you make amazing photos.

Bokeh technique

Bokeh is a popular photography technique with photographer. It help you create an in-focus subject and a blurry background, and it is very easy to realize. It is used frequently for close-ups of flowers, or really anything small and detailed. You need many digital point and shoot cameras what have a Portrait setting. You will need to make sure there is space behind your subject and if the background is too close, it will still be in focus.

Acess to your subject, or you can also use the zoom button. Don’t forget to focus  your subject, and that there isn’t anything else between you and the subject (grass, sticks, etc.). if you do not pay attention, your intended subject will become the background and get the bokeh. Then take the photo, and checks at different angles to be safe. It’s not hard, and you’ll get the hang of it if you practiced hard.

Colours

Eye – Catching colours is an effective way to help your product photograph become more perminant. You can impale the backdrop with natural materials or with some coloured netting, and thus are able to choose a colour to work well with the colours your subject. It is not too hard but it requires a lot of effort and especially those looking for a “studio” style wildlife photo, it can look very nice. Sometimes it occurs naturally, and you simply need to try and post yourself so that a natural patch of colour appears behind your subject. Such colours could be created by flowers, bushes or trees. Any large patch of colour that is very out of focus will merge into one nice blend of colour.

Sometimes you can get the same effect from an extreme close. Use the MF setting and turn off the flash. You will get as close as possible to your subject. The less flat your subject the better, so you can get some parts in focus, with others blurred. Using a flash too close will excess the subject, but if you have enough ambient light it will be more effect.

The most important thing is to always be looking for something different. Don’t be hesitant to try different angles or lighting to make perfect background for your photograph.

Categories
Tips & Tricks

3 Basic Steps To Have Beautiful Jewelry Images

As we know, photographing jewelry products is one of the most complex tasks entailed in eCommerce. Sellers are artisans not professional photographers who can effortlessly draw buyers into the images through their seamless photography skills. So, if you are a photographer who always shoot jewelry product photography or you have a jewelry online shopping, you want to have the most perfect jewelry images. Today, we will show you three 3 basic steps what help you create beautiful jewelry images.

fotosolution-3-Basic-Steps-To-Have-Beautiful-Jewelry-Images-02

Choose the correct Path

To start having beautiful jewelry images, first you must choose the correct path. Why should you use path for jewelry photos. Using Path the item by straightening and aligning it will help your pieces become center and balance. These make the image as symmetrical as possible by liquefying and editing any portions that stick out so that they line up with their counterpart.

When you do what you love, your imagination activates and you give birth to a purpose. The pursuit of this purpose creates a positive feedback loop, filling you with passion. So you are willing to let go of choosing the right path?.

Remove the Background

Next is to remove the background of the image. And there are many ways to help you clean up details excess in jewelry photos such as: magic eraser, eraser tool, lasso tool and mask, quick selection tool, pen tool and mask. This will make your products look clean and consistent. Tidy up by removing hairs, fibers, dust and scratches as well as glue or wax if there is any and you will have a perfect jewelry photos.

Choose suitable colors and editing

fotosolution-3-Basic-Steps-To-Have-Beautiful-Jewelry-Images-01

To capture the correct lighting for jewelry is not easy, that’s reason why retouching is so important. You should put polish metals in the correct places where it may be shine  or remove detail excess or correct discoloration for suitable photos. You should blend or remove reflections and shadows if the jewelry or polish metals product is still the star seeds.

With three basic step, you can make beautiful jewelry images. Are you ready?. Do you believe that little things like these are very important and will bring a lot more visitor to your site or store. Good luck!.

Thanks for watching!.

Categories
Tips & Tricks

Useful Tips To Boost Your Business With Hight Quality Images

We completely agree that the appearance or the outer beauty always attract the attraction of all people in the first eyes. Prove that the first image is one of very important things to decide all things. It is not only important in everyday life, but it also is part of a decisive success for online shopping sites. If you own a small online store, you would probably wonder how to get a loyal stream of customers and earn much money. Before getting into special offers and free shipping, there is one very important part you need to work on. It is getting high-quality images for your products. Using the right images can boost your site’s conversions and get you to connect better with your target audience.

boost-your-business

However, you still find many websites unaware of the importance of images when it comes to getting the most out of existing traffic. Below are some proven tips to help you boost your business.

You may wonder why images are that important in customer retention strategies. People hardly buy anything without seeing it.  For example, let’s take a shopping or online shopping . What is the first thing you do? Of course you will judge the product with your eyes. People trust what they see. This is why it is important to use quality images in your site.

First things first, in order to get a high – quality photo you will need a professional photographer for that job. Using a high megapixel camera and right equipment can be expensive but it is worth the money. As soon as the shooting process is complete, doing a post-processing can make it attractive and bring the photograph to the web standards.

Using a well-processed image can result in:

  • Making the page more attractive
  • Getting a loyal stream of customers
  • Saving customers’ time

Attractivenessshipping-software-boosts-business

Images draw a lot of attention, and if you’re not using them correctly, you’re just wasting prime real estate on your site. As we know,  the main purpose of a product image is to describe the goods to the customers, it also acts as a piece of art that decorates your page. By adding eye-catching colors with magic light to blogs of texts, you can absolutely make your site more attractive and more effective in the sales. Customers are most likely to visit pages that contain images than pages that have boring paragraphs of plain texts. So, we confirm that an attractive and beautiful image increases and improves the number of visits.

Getting a loyal stream:

A seller will give the great impression to all customers by using the high – quality images. By expressing yourself as a well-established vendor, visitors will automatically trust you and become your loyal stream of customers. It can only be affected by consistency and quality of the images you use.

Another factor that a good image influences is breaking the touch barrier with customers. It is a disadvantage that online shopping holds with dense content. It is too boring. Despite of product quality, your site don’t appreciated. These lead to the discrease the effective sales and your income. So, using a well – processed image is very indispensable for onlie shopping sites and we can almost give the customers that experience by using quality images.

Time Saving:

People now-a-days is very busy and they don’t have much time to attract or interest of all things what happens every day. A scientific study shows that human’s attention has decreased than a goldfish’s attention span. Instead of reading the description blog in the boring way, people will prefer some visual aid that explains the product than paragraphs.

Secondly, we will show you some tips for breaking the touch-and-feel barrier. You may ask why we have to break the touch barrier. Breaking the touch barrier can rapidly increase the relationship between your sites and the customer.

Providing Maximum Zooming Capacity

Some materials like textiles and timbers needs to be examined closely to understand the advantages and effects. Some people would like to know the knit and weave of a fabric more than just reading about it. It may be impossible to make your customers feel your products but thanks to the technology it is always easy to show them. By providing the extreme zooming capacity, your customers can view the fabric construction closely as if they are purchased in a shop.

Offering A Realistic Experience

Instead of giving a single image with multiple color and fabric options, it will be much better if customers can view individual images for each color and fabric combo. With the technology of the present age, anything is possible. If the image changes according to the option selected, your customers will get an exact estimate of the product’s look they are about to purchase.

These are the few good ways to break the “touch-and-feel barrier” in an online shopping store. There are many way to capture the interest of a customer. Some are attracted by price, some by feature and some by function. But there is always only one way to steal a customer’s first look and that is a good product image. If you understand the importance of an image in your online store, then it is without any doubt that you will do well in online sales and e-commerce store management.

Categories
Tips & Tricks

How To Prepare For A Perfect Product Photoshoot

You are planning on taking your own product photoshoot, you want to make all things what appear in your online shopping or your personality page perfectly before the viewer’s eyes. Having a beautiful product photoshoot, you spend hours, days, weeks, months or years to develop product and to prepare all things in the studio. So, what will you do to have a perfect product photoshoot?. Here are some tips to help make sure you’re fully prepared.

Gather Inspiration

Inspiration is one of the most important factors to create product. Firstly, you have to know product  photoshoot what you need to make or do some research online to start pulling together images, which are along the lines of what you want to achieve. Obviously you don’t want to rip anyone off (please don’t just copy an image exactly!), but it’s a useful place to start. Think about backgrounds, props, layouts and combinations of products.

fotosolution-Tips-To-Create-Perfect-Apparel-Product-Photography-03


Create a shot list

Normally, you think that create a shot list is unnessary element but if you make this, it will be useful for your job. A shot list will help photographer note down the products you need to photograph and make sure to include any details if there’s certain parts of your product you really want to show off. You could even sketch out some of the shots if you have a specific idea in mind. Think about where the images will be used and what for, including group shots, and images for your social media profiles.

Background

Choose suitable background options they already have, or order specific coloured paper or textured surfaces ahead of your shoot. Think about what you want to use as a base or background for your shot, or try incorporating your brand colours. As long as it doesn’t distract the eye from your product, it can really help to create the feel for the shot and echo what your product is all about.

Choose Kind of Products

Garment or Apparel

fotosolution-How-To-Prepare-For A-Perfect-Product-Photoshoot-01


Your products should look their absolute best in your images. It’s an unfortunate fact of life that clothing can become wrinkled, creased, and begin to look worn from storage and transport. Preparing garments to be photographed is a crucial starting point for photographing apparel, yet many photographers skip this step and rely on Photoshop to fix wrinkles, stains, and other visible defects. Apparel should be shot on a model or mannequin to demonstrate shape. Use clips and pins to create a flattering fit. In addition, you should create a 3D effect known as the “invisible mannequin.”

This allows you to display your product with its natural shape and fit, while avoiding the distraction of a mannequin.

Jeweleryproductphotography31

If you’re shooting jewelry, polish and renew it. Style your product in a manner that is both useful and appealing to customers. You don’t overcomplicate with props; many products look their best on a plain white background, and using unnecessary props will distract customers.

Footwear

Like as shooting jewelry, you should spend time to clear and polish footwear before shooting. Check laces and straps for damage, and replace if necessary. Fix anything you can fix.

Create the illusion that footwear is being worn. Communicate shape and help boots stand alone by stuffing them with tissue paper or crumpled paper, or tie dental floss to shoe straps to hold them up in the frame.

Furniture

Clean and polish your items with multipurpose cleaner or furniture polish. If it’s secondhand, repair any damages – but be honest in your product listing. Find a spacious area with ample light and either a white or neutral background. Instead of wasting time adding props to style your product, you should focus on taking quality shots from multiple angles of the product itself.

Gather Prop

In the process of shooting product, you have to choose the right props for your photographs can be tricky, but consider including items that help tell a story, or ones that inject a pop of colour. The more props you have to choose from during your photoshoot, the better.

Times

Time spent on preparing your product will save you time in DIY post-production processing, as well as increase the overall quality of your product photography. If you want to save even more time and money.

Do you choose your own beautiful product you believe in. Lets spend a litte times to read upper guides and prepare your products with care. We believe that everyone else will see what you see.

Thanks for attention!

Categories
Tips & Tricks

Improve E-commerce Websites With Photo Editing

In this era of technological development, almost people are using mobile phones and tablets than desktops to surf the web and relish the attributes of online stores. These will help people save much time and can use and check web at everywhere instead of buying the real shopping. That’s reason why online shopping become more and more popular. Whether it’s picking great deals on Black Friday or shopping for gifts for Valentine’s day, Christmas’s day or Birthdays and almost people are logging on to e-commerce platforms to choose and buy the best product for themselves. It is not only convenient to shop online, but also a very affordable and time-saving option for scores of people around the world. The market works on demand and supply. The demand for online stores in on the rise, and proportionally the number of online stores has also increased. So, if you run a business you will probably own and run an online website and in that case, that is most likely where you’ll be at least partly selling and advertising your products. To successfully market your products and attract plenty of customers, you’ll certainly need to use high-quality images which show-off your products best features. For this, you may be advised to use an expert Photoshop Editor or service in order to make your products appealing, unique and of a good enough quality, consequently making more money for your business. Today, we will show you some ideas of how you can make it stand apart from the thousands of other websites in the virtual world?.

Woman-shopping-at-home-us-008

To prove and explain why is Photo editing essential for e – commerce website, we can give some special examples. Firstly, according to recent survey carried out by Internet Retail Conference & Exhibition, 75% of respondents chose the most important feature of shopping online to be the quality of the products images. Let’s check out websites of the National winners for 2014 Australian Web Awards. Just in Time Gourmet grabbed the winning place in the e-commerce category. What first captures your attention? The simple, yet catchy layout, bright and clear pictures and the tempting callouts!. In the commercial category of the 2014 Australian Web Awards, Human grabbed the award the second time. Though it isn’t an e-commerce platform, there are loads we can learn from this two-time winner. Images make your website more interesting and interactive. They encourage your website visitor to navigate to different pages in the website and explore your store more.

These real-life examples portray the importance of uploading clear images on your website. They tell you that good pictures are a great way to attract more customers and get more return on your investment.

When there is a choice between text to read and images to look at, the customer will usually look at the image first to decide whether or not they like a product. This is why it’s so important if you can to use a Photoshop Editor to produce high quality images to advertise your products. Using images is much more effective than simply writing product descriptions, especially if you vary the angles to capture the products best features.

As the saying goes, a picture is worth a thousand words. This idea that images sell products more successfully than text is extremely important in ecommerce. The photos are captured in the studio, and may have distractions in the background. Moreover, the lighting conditions while photographing will result in shadows and reflections. You should go for reliable photo editing services to remove these unwanted elements to enhance your picture quality. The background should be removed from the picture and replaced with a transparent one that will blend in your website’s layout. Moreover, a white or clear background will create a better backdrop for your product image. Images help customers to understand your product better. They can preview the colour, the approximate size and shape, and texture of the product before buying. This will avoid any unnecessary disappointment or bad reviews from the customer upon receiving the product.

To optimise their effective images, it is essential that you understand the importance of editing photos for an ecommerce website. You can’t just use any old photos of your products to advertise products. The images must be of a high quality and have a sufficient level of clarity. Usually, images are not suitable for ecommerce in their original format. For example, most will have bad lighting, unflattering backgrounds or distractive shadows which detract from the product. It is surprising comparing the huge difference between edited and unedited photos and, more so, the impact they have on the buyer.

photoshop-image-editing-do-it-yourself

To persuade your customers to buy from your website, product photography should be done properly or else you are at a risk of losing sales. To get the best out of your products, they should always be shot against a white background. This ensures that the focus is entirely on the product. You need to highlight your products best features and create the correct impression, which admittedly can be difficult with images.

Morever, more people are using their mobile devices to browse shopping sites and make their purchases even when they’re on the go. Another reason to ensure your website has plenty of interactive photographs and need to edit photographs.

All these suggestions or reasons below that advanced techniques should be used to edit photographers to match different requirements and hosting platforms. Images should be properly resized without loss of picture quality, so they appear stunning whether seen on the desktop or a Smartphone.

In order to meet the high quality standards of the industry and the increasing levels of competition, e-commerce platforms should equip themselves with the best features to win the race. Carve a niche for yourself on the virtual world and create a name for yourself by populating your website with expertly edited photographs.

We can confirm that photos need to be of an excellent quality and why image editing or clipping services are essential for the success of your business.

Categories
Support Tips & Tricks

Simple and Easy Tools To Remove White Background

White background is the standard backdrop that is commonly used in product photography. It creates a high energy, happy, and distraction free scene, perfect for pictures of your friends and family. White background makes the product more visible and clear than any other color. It is also easier to remove during post processing process using Adobe Photoshop.
If you want to remove a white background from an image you’re working on, there are many ways to do this by using Photoshop. Here are some simple and easy tools that you can use to remove white background from your image in no time.

Simple and Easy Tools To Remove White Background

There are 2 mains tools that help you remove white background.

  1. Selection Tools
  2. Eraser Tools

Selection Tools:

These are a set of tools that helps you in making a selection, which can be modified later. The selection tools are not only useful for removing backgrounds but also for many other purposes such as changing color, resizing and doing other sorts of modifications. They are Lasso Tool, Polygonal Lasso Tool, Magnetic Lasso Tool, Quick Selection Tool and Magic Wand Tool.

Magnetic Lasso Tool

Magnetic Lasso tool is a very simple and easy-to-use tool available in the Lasso category.  First, you take an image with white background. The magnetic lasso tool detects and snaps to the edge of an object as you to trace along its outline. The Magnetic lasso tool options used for this image are shown to the right. The lasso width controls how close the edge you need to stay as you trace the image. Frequency controls how often points are laid down, and edge contrast helps you fine tune the edge detection. Then, select the Magnetic Lasso tool under the Lasso tools icon from the toolbar. Click anywhere on the edge of the subject and drag your mouse pointer along the border. You can create a selection around the subject and complete it by clicking the starting point of the selection. Now, let’s right click on the selection, choose ‘reverse selection’ and hit delete to remove white background.

Quick Selection Tool

The Quick Selection Tool is very useful to select pixels of same color. First, you  need to select the tool from the toolbar and you can see your mouse pointer turned into a circle shaped brush. Its size can be changed in the options bar according to the need and necessity. Once the tool is selected, let’s start painting on the white background and watch the selection grow without disturbing the subject. This is a quick and convenient way for selecting background.

Magic Wand Tool

Simple and Easy Tools To Remove White Background

The Magic Wand Tool works just like the Quick Selection Tool by selecting a group of pixels sharing same color. This is the easiest way to make a selection, but is only effective if the background you are selecting is one solid colour. So I recommend this method if your image is a solid object on a blank background, like a product shot. First, let’s make sure your image is in a layer, just right click on the Background layer, and choose ‘Layer from Background’. Now you simply choose the Magic Wand tool, and click on the background. With the background selected, you can now delete it and place your new background beneath the object’s layer.

Eraser Tools

Unlike selection tools, the eraser tools will directly delete the layer without making any selection area. They are typically made for background removal and deleting unwanted pixels from an image. Tools that are available are Eraser Tool, Background Eraser Tool and Magic Eraser Tool.

Simple and Easy Tools To Remove White Background

Background Eraser Tool:

As the name says, it is a great tool present in Adobe Photoshop for removing simple and complicated backgrounds. The tool samples a pixel and removes every other pixel with the same color within the brush diameter. By doing so, the foreground (i.e. the subject) is left undisturbed. Brush size can be increased to get the work quickly. It also has tolerance setting, which acts the same way it acted in Magic Wand tool.

Magic Eraser Tool:

The Magic Eraser Tool works the same way the Magic Wand tool worked. Only difference between these two tools it that Magic Wand makes a selection while Magic Eraser directly removes without creating a selection area. You can use the Magic Eraser tool you simply click on the background somewhere and it will vanish. If you only have one layer open, when you click to remove the background the pixels will be turned into a transparency, in other words there will be nothing there so you’ll just see a chequered pattern. How much of it is erased in one click will change depending on a few of the tool’s settings which you can alter in the tool bar found towards the top of the window. This tool is much faster than the Background Eraser tool, as it removes white background with a single click. However, when it comes to complicated backgrounds, you will have to be careful with the Magic Eraser tool.

These are some of the quick and easy tools that can be used to remove white background using Photoshop. However, as you happen to have lots of images to process and you don’t have time to do, we are happy to work for you. Thanks for watching!

Categories
Tips & Tricks

Tips To Create Perfect Apparel Product Photography

What do you do when you go to shopping or purchase product? Look at the outfit’s colour, feel its fabric, checkout its prints and styles and then try out if it fits you? But if your customers visit your online store, they will not be able to do all this, so what will they do before buying your product. The first important factors what your customers will attract is product image or apparel product photography. High quality product photography is essential for apparel ecommerce. For many customers, your product images will determine whether or not they buy your product?.

One effective technique is by posting attractive apparel photographs on your online store. From product photography of the apparel to removing the background from the apparel photograph, there are loads of things you should do to enhance your quality product photograph.

You can shoot photographs flat or drape them over a mannequin to give a 3D effect. Many online apparel stores display their outfits flat. While this look is great for tees, baby outfits and lingerie, this technique may not be very effective when you’re displaying dresses or gowns. That’s reason why your products should look their absolute best in your images. It’s an unfortunate fact of life that clothing can become wrinkled, creased, and begin to look worn from storage and transport. Clothing samples face a particularly rough time of it, as they often cover a lot of miles and may not have been perfectly constructed to begin with. Besides, you can always use post processing techniques to remove the creases and the other elements, for best results remove those annoying creases even before you photograph the clothing product.

Choose accordant garment to be photographed. It is a crucial starting point for photographing apparel, yet many photographers skip this step and rely on Photoshop to fix wrinkles, stains, and other visible defects. Don’t do that. Photoshop isn’t magic: it takes time and expertise to master advanced editing techniques, and excessive editing risks compromising image quality.

Try to capture your garment in a state as close to perfect as possible and use Photoshop only to add final touches and color correction. Avoid harsh backlighting and other setups that cast shadows on the surface of the object. Keep the lights on the same side of the object as your camera, or slightly off to one side. In addion, during photograph accordant garment, we should pay attention to the light conditions. Flash or bright light can create a glare on the product, and the original colour of the apparel will not be clearly visible. Use soft boxes and umbrellas to diffuse light and soften it. Set the umbrella at around 45 degrees, so the light falls on the shoulder and spreads down the model enhancing the aspects of the apparel.

fotosolution-Tips-To-Create-Perfect-Apparel-Product-Photography-03


Now that you’ve got the outfit ready and the lighting setup, check out the background. Ensure the background is plain and clear, so your outfit is clearly displayed. In our opinion, you should use a white background, which is a recommended practice and even required by some marketplaces. You can take it a step further and completely eliminate possible distractions by removing the background. Removing the background will allow you more flexibility in web design and modestly decrease file size.

Preferably use a wide angle lens, which will allow you to cover more space. Set the camera high using a tripod for best results. The stability will eliminate camera shake and ensure your shots are consistent, while also freeing you to use your hands on other tasks. You don’t need to spend a lot of money on a tripod, but it’s essential that you use one. Morever, you should shoot the outfit from multiple angles, so you can show different views of the product on the webpage. Alternatively, while post processing, these multiple views can be stitched together to create a 360 degree view, an option that most online stores are going for now. Customers will be able to trust their impressions of the product if it’s backed up in multiple photographs from multiple angles.

After you’ve shot as many pictures of the clothing product you want, it’s time to place it under the editing scanner.This photo editing tool offers plenty of options to edit photographs before you post them online.

Color is an essential feature of post processing. careful attention to white balance, some colors—like neons, reds, and pinks—are difficult to photograph correctly in camera and often need to be tweaked in Photoshop. Let’s ensure that the colors of your garments are accurate. The bottom line is that you want the customer to see exactly what they will receive in the mail should they order your product. There are a number of ways to tweak colors, so get to know Photoshop’s offerings and choose your favorite tool. After you have fixed the colors, make sure to convert your images into SRGB format to make sure that different browsers, computer screens, and websites won’t change the accurate colors that you worked so hard to create for your customers.

Images have to be resized before they’re posted on the website. You can blow up the picture or reduce its size to create a thumbnail image. If you’re preparing a product catalog, then all the images should be cropped to the same size. Each ecommerce site has its own clothing optimal image size. If you’re planning to showcase your apparels on these marketplaces, then you should ensure that the apparel product image meets those specifications.

Mannequin or invisible man effect is another technique that a lot of online stores are using to display apparel. When you photograph clothing, you can use a mannequin or choose  a model who wear accordant product and help your product become more prominent.

Good apparel photographs will give your online store customer a great feel of the apparel, so they will be convinced of the quality and apparel style. Attract more customers to your online outlet with effective apparel photography and image editing. These some simple guide will get you well on your way to creating professional and consistent images that really make an impression with prospective customers. Hope that they will be useful for you.

Thanks for watching!.