Categories
Support Tips & Tricks

10 Best Photoshop Resouces

Are you interested in Photoshop resources?. Do you want to improve Photoshop as well as your image editing skill?.

As far as we know, Photo editing software Photoshop is great part of choice for many designer and artists. Photoshop can be used for almost every little task that involves graphic design and your web design company, regardless of who it is, uses it for at least some of their processes. There are many Photoshop resources that help you refer and grips with the image editing software.
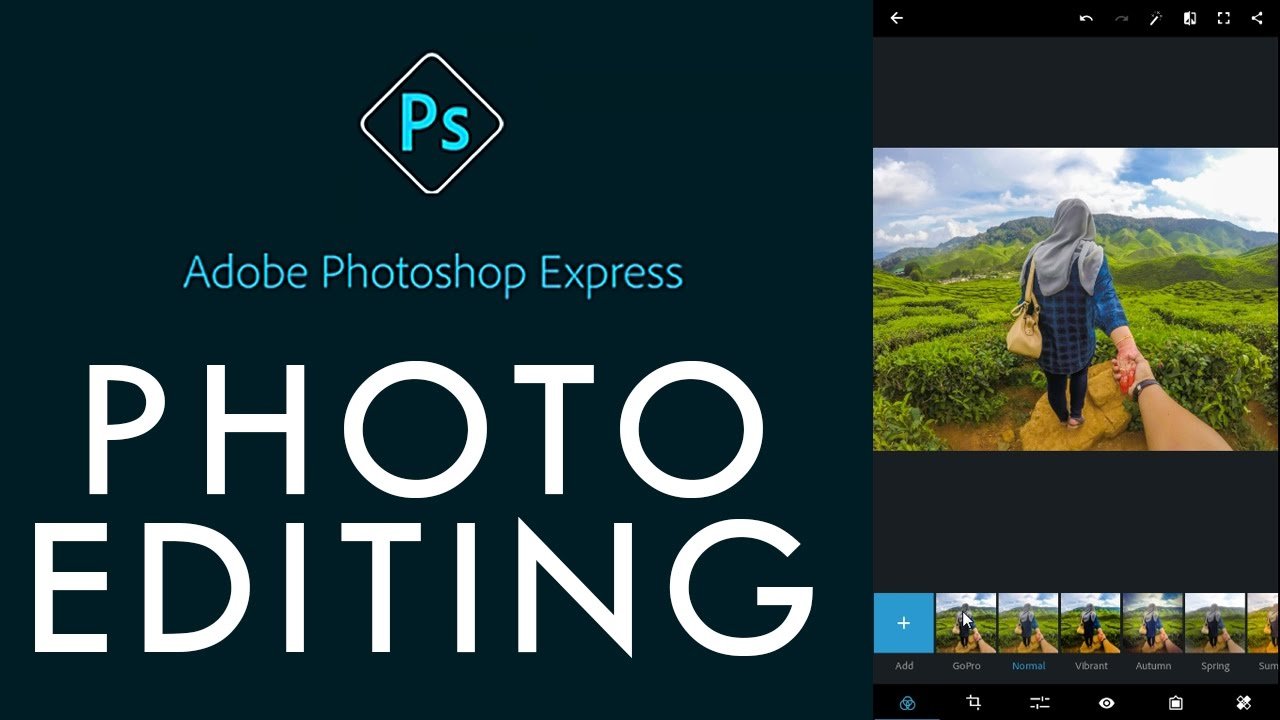
Adobe

Adobe is a great tool of choice for many designer especially for beginner. It provide many tutorials and excellent videos for beginner. It will help you learn basic lesson related to image editing software.

fotosolution-10-Best-Photoshop-Resouces-01

Pixel2Life

Pixel2Liffe is a giant tutorial search engine on the internet, which is intended for graphic designers and programmers. It has an immense choice on Photoshop training with literally hundred of tutorials to choose from. The site also features a really useful sidebar of sub-categories. It will support you to look for lessons in the effects you want to wind up.

fotosolution-10-Best-Photoshop-Resouces-02

PhLearn

PhLearn is an amazing and free online Photoshop resource. It provides various high quality photography and Photoshop instruction. One of impressive thing as use PhLearn is some image and joke that come on the screen. The special thing will help keep the viewer’s attention. Do great informative and flexible entertaining attract you?.

fotosolution-10-Best-Photoshop-Resouces-03

Envatotuts+

Envatotuts+is a useful blog that offers some of the best Photoshop tutorials. The site has a large collection of tutorials covering many different areas, including 3D, illustration and text effects to name but a few.

fotosolution-10-Best-Photoshop-Resouces-12

Photoshop tutorials on DeviantArt

There’s a excellent range of Photoshop tutorials on online art community DeviantArt. They are seven different categories, including a beginner and web design company. It’s considered as special thing that help you find the specific tutorials you’re interested in. This Photoshop resource provide not only useful and interesting lessons for beginner but also tutorial system that you can submit. Let’s check the site for terms and conditions.

fotosolution-10-Best-Photoshop-Resouces-05

Photoshop Roadmap

Photoshop Roadmap is also flexible site what shares tutorials on Photoshop, as well as Photoshop brushes and plugins. These Photoshop tutorials are attached to categories like Animation and Interactivity and Photo retouching.

fotosolution-10-Best-Photoshop-Resouces-06

PSD Vault

PSD Vault is a greate Photoshop tutorial site – best suggestion for designer and web design company. It focus on writing about things such as designing a floating Eiffel Tower in Photoshop and creating a vintage car poster. They also regularly give away design-related freebies.

fotosolution-10-Best-Photoshop-Resouces-07

Photoshop Essentials

If you’re a newbie who familiar with Photoshop lessons especially Photoshop Essentials, which has easy to follow, step-by-step style training. It offers lessons on everything related to Photoshop from basics to intermediate including photo editing and retouching, text effects and more. The site is clean, innovative and easy to use. It also has helpful sidebars highlighting the latest and most popular tutorials.

fotosolution-10-Best-Photoshop-Resouces-08

Pluralsight

Pluralsight has an immense range of tutorials that help you learn, master and discover the creative lessons of Photoshop. To register Pluralsight site that you need to access the majority of the training. However you can also sign up for a free demo account, where you’ll find a list of free Photoshop tutorials at your choice.

fotosolution-10-Best-Photoshop-Resouces-09

Tutorial9

Tutorial9 is an amazing resource for Photoshop tutorials, all of which are entirely free. It contains 30 pages of training available so you are easy to look for something of interest. There is also a search option. You can filter your options to find the newest tutorials submitted by either Tutorial9 itself or submitted by other users.

fotosolution-10-Best-Photoshop-Resouces-11
Do you have other Photoshop resource that could improve and enhance your image editing skill?. If you have questions or know other best Photoshop resource, let’s share your experiences in the comment below.

Categories
Support Tips & Tricks

How to use Patch Tool in Photoshop

If you are photographer, designer who always use Photoshop technique to create best photos, certainly, you don’t feel of unfamiliarity with Patch tool. Patch tool is one of the best tools Photoshop has to offer. It is popular and nice tool, so, why should you use and choose Patch tool in Photoshop.

This tool is easy to use and with each version of Photoshop, it has gotten ever better. As far as we know, Patch tool is part of the headling brush set of tools. The Patch tool is used to repair larger area of an image or get rid of any distractions and blemishes. In addition, you can also use it to duplicate parts of your photos. Using the Patch tool, you can save your time when trying to make some adjustment to your image.

The Patch Tool was introduced into Photoshop at the same time as the Healing Brush. Like that Healing Brush, it matches the texture, lighting and shading of the sampled pixel to the source area. But instead of brushing like Healing Brush, it is used to choose defined areas. Therefore, the Path Tool will help you create a photos more natural than the other tools.

In today’s subject, we will show you:

How to use an amazing Patch Tool in Photoshop.

  • Step 1: Choose your image what you need to the aim of Patch Tool: Open-> Image File.
  • Step 2: Select The Patch Tool and draw an area around your selection. After dragging mouse over to better skin and let’s go.
  • Step 3: Move the cursor over the selected area and drag it to the left, right or in any direction. If you don’t feel happy with your previous done step, you can use Ctrl+Z or use Layer Mask to hidden them.
  • Step 4: Reduce circles under eyes

Having shadows round one’s eyes is one of basic disadvantages that have directly affected to the result of images.  To fix this issue, you can choose area – the circles under eyes and replace it with beautiful skin area.

However, you should use Fade patch tool to increase the effect of image, this will make your photos more natural and more truly.

Click Edit-> Fade patch selection. This window will pop up and move the slider to fade the patch selection. Let’s press Ok when you research your desired result.

  • Step 5: Keep your eyes bright

After removing the circles under eyes, you can keep your eyes bright to make your photos more stunning. First, let’s create a new layer and add Layer Mask. Then, choosing Dodge tool and make sure your exposure that is set between 30-35%. Then, take a large brush and sweep over the eyes just, including the brow area. In other words, if you want to duplicate your layer, it’s simply that add a layer mask in case you want to tweak your dodging.

In the case, the part of eyes or eyebrow are too bright, you can adjust them by using Layer opacity or Layer mask to balance.

  • Step 6: Check out and layer transplant

You should check out your images after finishing. If you want to add the other details for image, you can create back-up layer by click History->Layer Palette and create a new snapshot for your images. After, you can join layer in the effective way.

You are interested in: Fotosolution.com/How to use the Patch Tool in Photoshop

How to Use the Patch Tool in Photoshop – Video Tutorial from Yanik Chauvin on Vimeo.

Finally, The Patch tool is one of the perfect tool in Photoshop. It support your digital image in the most amazing way.  We hope you found this article useful. Do you use the Patch Tool in Photoshop?. Please let me know in the comments below.

Categories
Support Tips & Tricks

How to remove background with Adobe Photoshop Tools and Techniques

Remove the background from an image can be a really complex task but it is effective way to boots your sales. Did you know that a photography or a picture would be so much more attractive, look sharper on your website if one could simply remove the unwanted  background from the image. Using background removal not only brings the focus on the subjects but also follows you to easily post the image anywhere on your page.

Here, high-end photo editing tools and techniques has a number of useful tips to remove background from an image. One of the most popular photo editing tool are Adobe Photoshop. It is easy to use and understand. Today, we take you through the process of removing the background from an image using Photoshop to help you overcome the challege as well as own high- quality image product.

fotosolution-How-to-remove-background-with-Adobe-Photoshop-Tools-and-Techniques-05

Magic Wand Tool

The Magic Wand Tool is considered as best tool as you want to cut out the background and leave the image. So, how to use magic wand tool for background removal?. It’s simply that all you need to do is click on the Magic Wand Tool and based on the differences between the subjects and the background, this tool will automatically select areas for removing background. Especially, after cutting out the background, you can add any background color you like behind a picture. This will help you enhance the images and look flawless.

fotosolution-How-to-remove-background-with-Adobe-Photoshop-Tools-and-Techniques-01

Eraser Tool

Background Eraser Tool will one of great choices if you have tricky task for your images with complex background. This tool samples the color at the center of the brush and then deletes pixels of a similar color as you paint. This tool allows you to remove the original background from a photo and turn it transparent so you can place your photo on a new background, or place it into an altogether new photo. Besides, it help you change the color you like. Below are some illustrations to support you on removing background.

fotosolution-How-to-remove-background-with-Adobe-Photoshop-Tools-and-Techniques-03

Magic Lasso Tool

Magnetic Lasso tool is a very simple and easy-to-use tool available in the Lasso category. This tool will help you manually select certain parts of the image by drawing a rough outline around it. Besides, you can create a selection around the subject and complete it by clicking the starting point of the selection.

fotosolution-How-to-remove-background-with-Adobe-Photoshop-Tools-and-Techniques-03

Pen Tool

One of the most commonly used methods to remove background is with the Pen tool.

fotosolution-How-to-remove-background-with-Adobe-Photoshop-Tools-and-Techniques-04

This one of the easiest and simplest way to generate a high quality finished edge of a product. You will be surprised how easy it is to remove the background from image by using this technique. This tool not only help you remove background from the image, but also support you to add any background you wish.

Removing backgrounds in Photoshop can be quite difficult, and it completely depends on the image. However, with the aim of Photoshop tool, these will help you edit photographs and easily remove the background. If you don’t have the time or inclination to manually edit photographs, you can always make use of online background removal service providers.

Let’s share your experiences and your thought in the comment below.

Categories
Support Tips & Tricks

How to Color Correction Product Photography in Adobe Lightroom

As far as we know, Adobe Photoshop Lightroom is a gold key for your product photography. It has some quick and powerful tools for color correcting your images. Have you ever used Adobe Lightroom tool for color correction product photography?. Below are some tips to help you change colore correction product image in Adobe Lightroom.

There are five steps to color correction including: organize image, import, adjust, sync adjustment to image and export.

fotosolution-How-to-Color-Correction-Product-Photography-in-Adobe-Lightroom

Organize Image

The first thing to note before anything else is that you should be shooting in raw. One of the most fundamental benefits of raw is the ability to adjust white balance after capture with no penalty on image quality.

Import Image

Next, you should import image in a folder. Below are some basic steps to help you import image.

  • Choose “File” > “Import Photos And Video”
  • Use the “Source” panel to find the image folder
  • Make sure the “Add” button is selected
  • Choose the “Select All” button
  • Click “Import” and “Adjust”

Adjust Image

After importing image into a folder, you should choose an image from the folder. Because we’ll use this single image to perform adjustments. Then we’ll apply those adjustments to all other images.

Adjusting image you should carry out 3 steps including: White balance, Exposure and Contract tools.

fotosolution-How-to-Color-Correction-Product-Photography-in-Adobe-Lightroom-01

White Balance

Click the dropper tool up in the top left of the “Basics” tab, and drag it over the image to a spot that should be grey. Click that spot and Lightroom will automatically white balance your image.

Exposure

You can use this tool to brighten or darken your image. Don’t feel obligated to use it just because it’s there. If the quality of your image is very well, you should not waste time to adjust.

Contrast

Contrast is the go-to tool for making details stand out. Adjust it to help you accentuate light and dark.

Sync Adjustment to all image

It’s time to apply those adjustments to all of your other images from the shoot:

  1. Select the rest of your images.
  2. Click the “sync” button at the bottom right of the “tools” panel.
  3. From the popup window, choose the adjustments you want to apply to the rest of your images.
  4. Click “synchronize”

Export Image

Finally, you should only export image and save file. You should create a new folder within the same folder that contains your RAW images and name it something descriptive, like “Color Corrected” or “Final.” Then, you carry out file naming and save. Your images have been color corrected.

fotosolution-How-to-Color-Correction-Product-Photography-in-Adobe-Lightroom

Here are tips to color correction product photography in Adobe Lightroom. Do you have any color correction tips or challenges? Do you use different software to perform batch processing and color grading?. If you have not known about Adobe Lightroom for color correction, let’s refer this article here.

If you have any opinions as well as any questions concerned about this subject, let me know your though in the comment below.

Categories
Support Tips & Tricks

Product Photography Tips: Jewelry photography tips

When it comes to jewelry photos, details are main key that you are interested in. Beautiful, high quality photos to showcase these details are essential for a professional, consistent and reputable site. Accurate information of your product is key, because customers need to be able to understand as much about your product as they possibly can before they can make a decision about should or should not purchase it.

Jewelry photography tips is not necessarily an easier task if we have digital cameras. In addition, I think that all the tiny scratches, dust and grain are main factors you should control. Therefore, my task is that you have to know how you can make it work with you to get the best images possible.

In fact, photograph jewelry you do not need use a lot of equipment. Morever, a sheet of white paper and some window light and reflectors will do at a basic level. Even a compact camera with a macro or close up function will do the job, as long as it also lets you control the exposure.

Choosing a best location

There are many locations and scenes that help you take best jewelry photography. For example, you can use a tabletop studio with different colored backgrounds. However, if you want to save your budget, you can use simple location such as: a bed sheet or some butcher paper.

fotosolution-Product-Photography Tips-Jewelry-post-processing-tips-02

A good suggestion for your plan is that let’s create a story about jewelry by making it a habit to collect materials you can use as props and or background.

For example, let’s find a window at home that offers good light you can control, set a table there and your studio is almost in working order. A white foam board can be your working base, then add a few homemade reflectors, maybe some small mirrors. Just remember that light has color, and that light changes. Especially, as you’re using window light, turn off all the other lights in the room. You can use flash, tungsten lights, fluorescent, but do not use them together.

You are interested in: 3 Basic Steps To Have Beautiful Jewelry Images

Choosing a camera

fotosolution-Product-Photography Tips-Jewelry-post-processing-tips-03

Camera is one of important elements to build the quality of jewelry photography. Modern compact cameras will a great choice for your plan if you can manually adjust your exposure settings. This task is easier on a DSLR, but most for most jewelry, you’ll need a macro lens. A macro lens is a great investment, but they don’t come cheap.

Choosing a Macro Lens

You can use two macro lenses, 60mm and 100mm, with an APS-C body. There are two lenses lets you choose to work closer or further away from the subject. What is the different between 60mm and 100mm?. The 60mm can be problematic for some of the sets with very small object. The 100mm is more versatile in that sense. When choosing a macro lens, you should understand what you’re going to use it for and how close you actually want to be to your subject.

fotosolution-Product-Photography Tips-Jewelry-post-processing-tips-04

Use a tripod

A tripod is nice to have for this work. You can work with the camera in your hand, especially if you are using flash. Still, a tripod will help you to keep a subject framed the same way, which will allow you to precisely adjust your focus.

Flashes, Diffusers and Reflectors

A flash and a single reflector from commercial brands to a white piece of paper, foam, or cardboard will offer you multiple options. Keep in mind that your flash must “off camera” for professional results. You can use cables or radio triggers to place you flash off to the side of the scene.

Flashes offer consistent light that can be positioned exactly. By using manual mode, you can control the exact output, even if you change backgrounds or colors in your setup.

With some basic step, you can make beautiful jewelry images. Are you ready?. Do you believe that little things like these are very important and will bring a lot more visitor to your site or store?.

If you have any opinions as well as any questions concerned about this subject, let me know your though in the comment below.

You are interested in: 3 Basic Steps To Have Beautiful Jewelry Images

Categories
Support Tips & Tricks

Top 5 Best Free Apps For Product Photography

Product photography is very important to convince customer’s choice before buying your product. There are many product photography tips to increase the effect of your services as well as your product. Keep in mind that you use not only digital cameras but also smartphones especially in advanced technology era. Today, with the help of growing technology, you can find several smartphones which have better lenses then many semi-professional cameras. In addition, using modern smartphones will help you save your budget in stead of buying expensive professional cameras. Capturing the demande of customer, today there are a lot of best free apps that can help you take photos, edit them via your phone. Below are top 5 best free apps for product photography.

Photoshop Express

  • Available platforms: iOS, Android and Windows devices
  • Cost: Free

If you are interested in photography, most probably you are familiar with Adobe Photoshop. Photoshop Express will a great choice for your plan. This free app gives you robust photo editing tools right in the palm of your hand. You can import images from your phone or take photos right in the app. Especially, the interface of the app lets you to change the hue, brightness, exposure and contrast values.

fotosolution-Top-5-Best-Free-App-For-Product-Photography-01

Although the app is free to use, if you want use additional specific features, you can purchase more to use free. However, if you have an Adobe account, you can use all features without any additional cost by logging account. Photoshop Express have 20 “looks” which is same with filters. You can apply those filters to get better results

Aviary Photo Editor

fotosolution-Top-5-Best-Free-App-For-Product-Photography-04

  • Available platforms: iOS and Android devices
  • Cost: Free

Aviary is a good post-production photo editor. Aviary Photo Editor does not provide professional features as exposure and ISO adjustment tools like the other apps. However, the suite of filters is very nice and perfect. Aviary has various editing and image adjustment tools. The easy to use interface lets you to make adjustments on the images very quickly.

The filters of Aviary is totally free to use, however to use all nice filters you can invest your budget to have fully experiences.

VSCO Cam

  • fotosolution-Top-5-Best-Free-App-For-Product-Photography-03Available platforms: iOS and Android devices
  • Cost: Free

VSCO Cam is another free to use tool for iOS and Android devices. It has the usual editing tools like exposure, contrast, and color balance. Taking about VSCO Cam apps, we need to know take advantage of VSCO’s filters. With simple clicks you are able to enhance your photos. By that way, you will have product images with artistic look.

In addition, VSCO Grid is a publishing and curation platform that lets users share their images, is integrated into the app. You can also send your product images via email and share them on social networks.

PicMonkey

fotosolution-Top-5-Best-Free-App-For-Product-Photography-06

  • Available platforms: iOS and Android devices
  • Cost: Free

PicMonkey is another great online photo editor. One of the best features of PicMonkey is Collage. You can take various photos and arrange them together. Especially, if you have a lot of photos, you can collage them together as perhaps a banner image for your store or your email.

Fotor

fotosolution-Top-5-Best-Free-App-For-Product-Photography-05

  • Available platforms: iOS and Android devices
  • Cost: Free

Fotor is other professional free apps are mostly not user friendly. It offers editing and beauty retouching. It also has HDR image support so you can turn your product images into HDR ones. You can make photo cards within the app. Moreover, it owner special feature: High Dynamic Range feature. You can take three photos with different exposures to combine them into a single image, with the best light and tone from each of the separate photos.

Smartphone cameras are becoming an increasingly good choice for creating high-quality product photography. Also there are some brands providing you built-in photo editing software, there are better ones in the market. In this article, we provide 5 best free apps for product photography that help you improve the quality of image, Besides, you don’t need to pay anything for good looking product images.

Do you have a favorite tool for editing your photos? Share it as well as your thought below.

Categories
Support Tips & Tricks

What is Adobe Photoshop Lightroom?

Have you ever heard about Adobe Photoshop Lightroom?. As far as we know, product photography begins under the cameras but it only finished after post – processing step. And Adobe Photoshop Lightroom is a gold key for your product photography.

fotosolution-What-is-Adobe-Photoshop-Lightroom-01

Adobe Lightroom is the DIY or budget-conscious product photographer’s best friend. It can be used to both streamline your workflow during the shoot, and to quickly edit images in bulk afterwards. In addition, Photoshop Lightroom helps you import, organize, management and find your images. Especially, it is photo management and photo editing, combined into a single tool.

In fact, Adobe Lightroom retains your original images and keeps a record of your edits, then applies them when you export your images. You can come back minutes, hours, days, months, or years later and reverse the edits.

When should you use lightroom?

First, you take photo a raw photos and import your photo in Adobe Lightroom. Keep in mind that adobe lightroom is a raw file editor so you don’t need Adobe Camera Raw.

Using Adobe Photoshop Lightroom will a perfect choice that help you carry out basic photo editing. Lightroom’s task is that cropping, white balance, exposure, histogram adjustments, tonal curves, black and white conversion, spot removal, red eye corrections, gradients, local adjustments, sharpening, noise reduction, lens profile corrections, vibrance, and saturation.

fotosolution-What-is-Adobe-Photoshop-Lightroom-02

If you’re a beginning photographer, you’ll most likely be satisfied with these features. Because it is also much easier to use than Photoshop.

In fact, Photoshop and Lightroom are great software packages that have the ability to bring out your post processing creativity. Especially, as you are getting started with photography, Lightroom is the best way to begin.

Do you prefer using Photoshop or Adobe Lightroom?. Here are some interesting sharing about Lightroom that help reader have best look. Finally, just choose the right tool for your photographic needs on a project.

If you have any opinions as well as any questions concerned about this subject, let me know your though in the comment below.

Categories
Support Tips & Tricks

Augmented Reality for Ecommerce

E-commerce is the best growing retail market. This will help all customers facilitate to shopping. As consumers feel more comfortable shopping online, retailers and brands are being forced to investigate ever more innovative ways to get their attention.

The digital age has led to an abundance of new merchants who thrive on selling online, directly to the consumer. As retailers begin to focus on creating a cohesive experience both online and offline, technology has been vital in attracting online shoppers. Using the special feature of eCommerce technology brings to opportunities that help retailers catch customer’s eyes.

fotosolution-Augmented-Reality-for-Ecommerce-03

Augmente reality

Augmente reality are offering an entirely new shopping experience that is gradually beginning to grab the attention of consumers and brands alike. In addition, augmented reality are proving effective in allowing consumers to engage with brands and interact with products like never before.

If you are interesting in augmente reality, now it’s time to discuss how augmented reality have impacted online shopping.

fotosolution-Augmented-Reality-for-Ecommerce-02

Online shopping is more and more popular in the consumer market. However, one of disadvantages of online shopping are that customers can’t directly see and touch the product.

Based on the reputation of the retailer and the product’s reviews, consumers trust that the shipped product is exactly how they saw it. No wonder reviews and return policies are so important in the era of eCommerce!.

The growth of Augmented Reality is presenting a different kind of experience. AR takes the idea of an immersive experience.

Innovation in retail seeks to provide value to both brands and retailers alike but none have been as impactful throughout the buyer’s journey like augmented reality. AR is positioned to increase sales by allowing customers to try before buying. It also reduce by removing the initial guesswork. Customers want to know what they’re purchasing. AR is helping customers become more confident in their buying decisions while providing quantifiable differences for online merchants.

Besides, augmented reality is also proving beneficial in the business-to-business sector. For example, in Germany, Coca Cola has equipped its sales staff with iPads that use AR technology to place vending machines within shop spaces. This allow potential customers to preview how the product will look in their store and plan for new layout options.

fotosolution-Augmented-Reality-for-Ecommerce-01

Brand manufacturers will indeed have a huge stake in the future of augmented commerce. As eCommerce evolves, so will consumer expectations. Product descriptions and 360 photos will no longer suffice. Mobile shoppers will want and expect the ability to test products at home before buying through augmented reality.

So is it time to embrace AR in your own company?. If you run an augmented reality application for retailers and are interested in integrating your solution with shopping carts, you can check AR technology to enhance your brand now.

Categories
Support Tips & Tricks

Real Estate Photography Tips To Catch Your Customer’s Eyes

The market of real estate is more and more developed and popular also, selling your property is truly fierce competition. Therefore, how to help you as your real estate product have successful position in the market?. Taking better photos isn’t the only way you can improve visibility, but your potential customers will want to see the product. A picture really is worth a thousand words. The more high-quality images the more attraction’s customers, you can completely do it.

Below are some real estate photography tips to catch your customer’s eyes in the first time.

Use the correct equipment

Before shooting real estate photography, the first tphotos tips you should do: choosing and using the correct equipment. Therefore, how to use the correct equipment?. You need to take care of 3 main elements including: wide lens, flash and tripod.

fotosolution-Real-Estate-Photography-Tips-To-Catch-Your-Customers-Eyes-01

Wide angle camera lens will give each room in the home a true sense of depth. Additionally, wide lenses are an incredible way to display the whole room or exterior so that one can clearly see how it looks in detail. Furthermore, using wide angle camera allows you avoid unrealistic images and at the same time, allows to zoom out and make a space look larger and more spacious.

For using tripod, you have on a tripod allows you to keep the camera and be more deliberate in making your composition. With a digital camera, you can take a quick test shot and review it to make adjustments for the final shot. First, you can adjust the overall composition and what is in the frame by moving the camera or changing the lens. It really helps if your camera is on a tripod. Then, make the next adjustments by moving the furnishings and objects in the room. So they are most pleasing in the photo.

Taking unique photos

Interior Photography

fotosolution-Real-Estate-Photography-Tips-To-Catch-Your-Customers-Eyes-02

Homes come in all shapes, sizes, styles, and conditions. Here we send them a task list with our suggestions on prepping the home prior to the photo session. Once inside, you should set out to photograph the main rooms: the living room, kitchen, dining area, master bedroom, master bath, are all ‘must shoot’ rooms. There could also be a library, office, large walk-in closet, and more. The client can often tell you what they deem important. Next, seek to the best perspective for each room.

Exterior Photos

Shoot from a low angle to create a very unique perspective for the exposure. You can choose the approriate times to shooting photos. The best time of day to take photos of any outdoor object is the early morning where natural light is crisp and clear, or the early evening. In both instances, the light should come in from the side which highlights the house.

fotosolution-Real-Estate-Photography-Tips-To-Catch-Your-Customers-Eyes-03

Avoid using the Flash

Even basic point-and-shoot cameras are getting better at low-light situations and your camera’s flash will never be able to light a room well. With your camera on a steady tripod, you can have a long exposure and a natural-light feeling to the photo without getting a blurry shot. If you do not want the photo to be blurry during the long exposure, put the self-timer on and let the camera settle.

fotosolution-Real-Estate-Photography-Tips-To-Catch-Your-Customers-Eyes-04

Shot straight on without a flash, this photo feels warm and inviting. Keep in mind that the longer your lens’s focal length, the more camera shake will occur. Mount your camera on a tripod and use the camera’s timer to create the sharpest shots.

Improve Your Final Photos

Enhance your photos. A basic understanding of good photo-editing software can go a long way toward improving your final image. Enhance the colors and the main look of the photo. Make your photos look attractive, clean and professional by removing unnecessary objects.

Here are some useful tips before shooting property photography we wanna share with readers.  Four of those ways that help you catch your customer’s eyes and win their budget. What other real estate photography tips and tricks do you want to learn? Share your questions and comments with us below.

Categories
Support Tips & Tricks

Tips for Owning Best Product Photography

Best product photography entails taking photos of a product on its own and with a clear background to remove any unexpected and make you capture the viewers’ attention. Whether you have your eCommerce site, product photography is always the best option to use and help you close to your customers. A good product image will enhance your listing more effective and will also increase your sales. Product photography will with no doubt help your eCommerce site thrive. Practicing product photography may seem simple but without the proper knowledge can prove to be hard. Below are tips to help you practice and improve product photography easily and perfectly.

Gets lots of light

This is the most important tip of all. Having enough light ensure the product photo is clear and appears as the original item. Whatever you are photographing, whatever shooting indoor and outdoor, lighting is a key to capturing a great photo. Having good use of lighting, you need to take advantage of natural light and artificial light.

fotosolution-Tips-for-Owning-Best-Product-Photography-01

Especially, natural light is the best and works best for all photo types. It is thus prudent to shoot photos during the day.

In this case, if shooting in indoor or in studio, you need to use take advantage of artificial light. This may require that you set up lighting, or manipulate the available light using things like reflectors or a flash. Certainly, use the artificial light will have cost more than natural light.

Use a tripod and a timer

When taking a photo even the slightest vibration can cause blur in the photo. You should also keep in mind that the closer you move to an object the more you’ll cause blur on the objects photo. Tripod is an essential tools to support your project. Hand-holding your camera with interior photography not only looks unprofessional, but it will result in blurred shots every time. Arm yourself with a tripod and a remote shutter release to eliminate the risk of camera shake when taking a shot.

fotosolution-Tips-for-Owning-Best-Product-Photography-02

You can use the cameras in built timer to ensure you minimize vibration while maximizing sharpness.

Edit the photos

Taking photos is always the beginning next comes editing. Edit the photos will an important step to check the comprehensive process before uploading your website. First, while preparing to put the photos on your site you should know the size of photos required. Re-size the product photos you’ve taken so that they can fit in your site. Editing also involves removing any bad sections that may have appeared in the photo. For best results, let’s ensure you use the best photo editing service.

fotosolution-Tips-for-Owning-Best-Product-Photography-03

Lastly always remember that captivating photos are the key to bringing and keeping traffic in your site. They are also the key to increasing sales. If you have any opinions as well as any questions concerned about this subject, let me know your though in the comment below.