Categories
Support Tips & Tricks

The Importance of Clipping Path You Should Know

Clipping Path is a famous aspect of graphic design and as well as an essential part of Photoshop. Nowadays, images of the product online is a major advantage in the outcome of the revenues company markes, these images need to be edited before they can be uploaded on main website. And it is one of important elements to edit beautiful images.

It is a closed vector path that is selected with the Photoshop pen tool and removed from the background. Keep in mind that shooting these images, there are number of editorial tasks that you need to know and realise. There are 5 uses of clipping paths including: remove background, image manipulation, color correction, devide products and recreate graphics and logos.

Using this technique is to offer high quality images for presentation purposes. First, when you remove background of image, this will help you create a better visual experience of the customers of your sites. Good images will support your customers focus more on the product that you want to present and sell. This postive point will contribute to increase your sales.

Clipping Path

Seconds, using clipping path for colour mask and colour correction will help your images become more attractive and more stunning before eyes’s customers. When photos are shot, the camera’s flash will not distribute light equally around the pictures, this can make your pictures crude, less attractive.

Using clipping path, separate colours and portions of an image or product can be adjusted to match the preferred colour or brightness of other parts of the image or product easily. This will help you balance the brightness and contrast adjustment levels, carves level, colour balance.

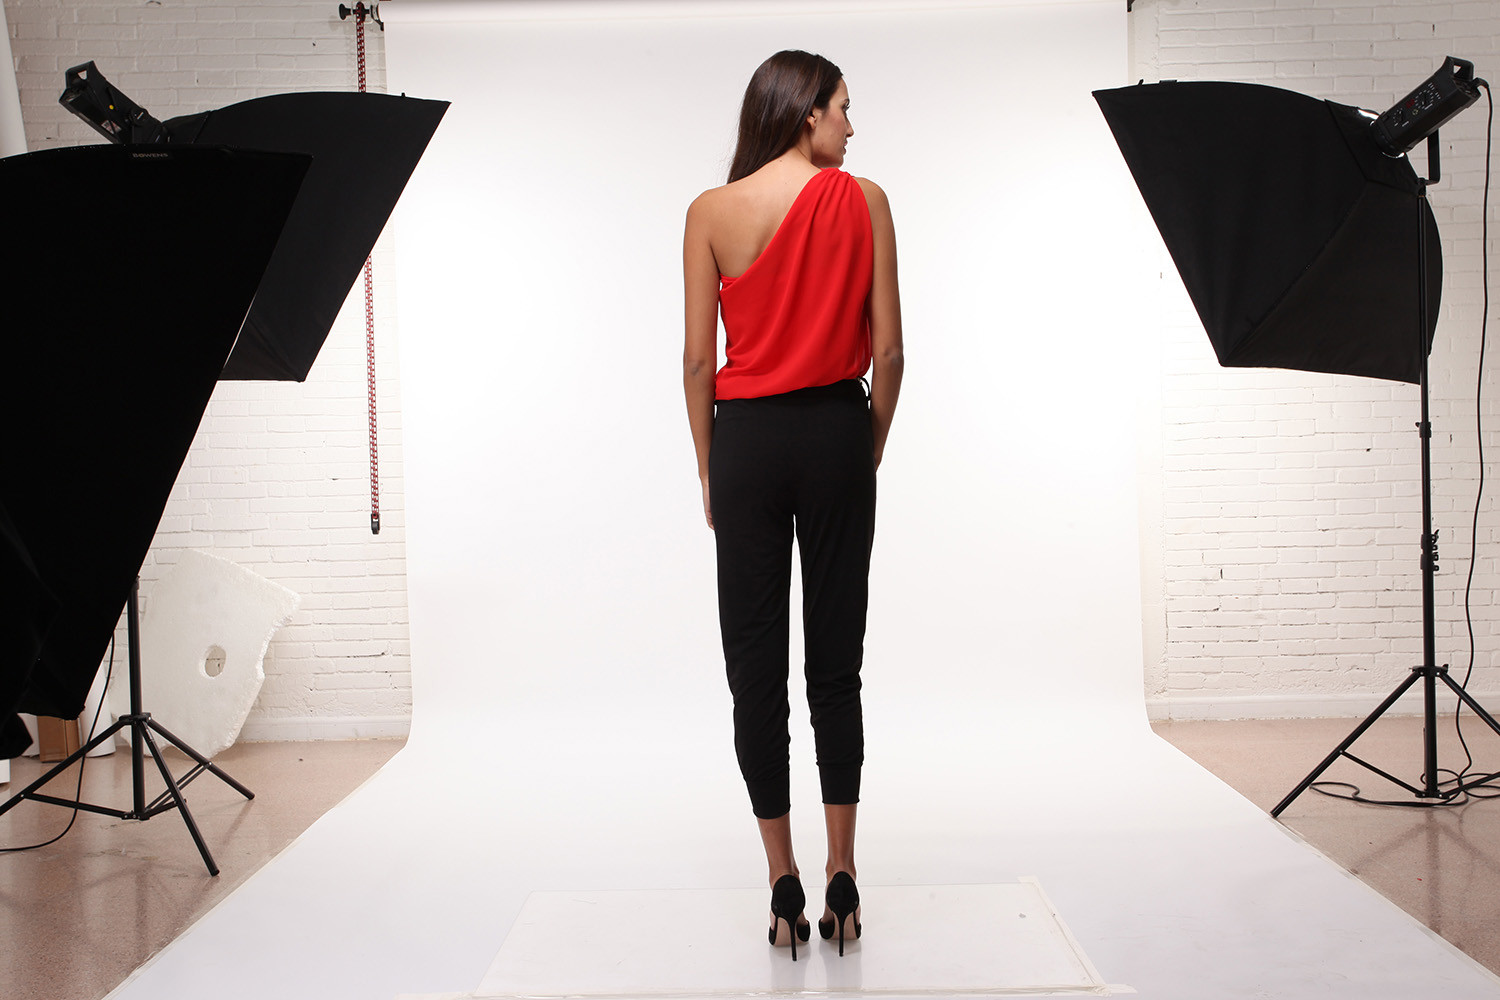
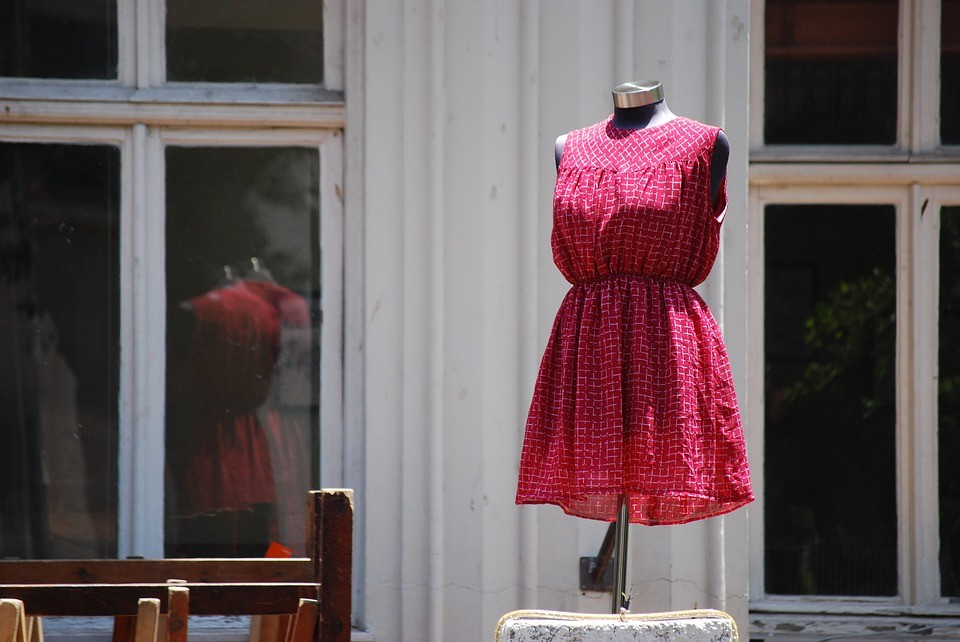
Thirds, when you need to manipulate image, clipping path is a great ideal. Simply, when you take your product with mannequin or a model who wear your product. You want to remove mannequin or model because they are not suitable for your image or are not beautiful.

Summary

It is easy to manipulate image with clipping path. We will make it beautiful for matching with the product image. Removing mannequin from the image will help visitores have a special and sympathy look for your online product.

Here are brief presentation about clipping path technique that allow reader to have basic look about it. There are many interesting things related to clipping path we need to interest in. If you have amazing sharing about clipping path or have questions or concerns, please do not hesitate to contact us today for a free consultation.

Categories
Support Tips & Tricks

Benefits of Using Photoshop Actions to Improve Productivity

Photoshop Actions are a set of recorded steps which can be replayed in the actions palette. It is perceived as useful tool in Photoshop that help photographer save time for the photo editing process. Besides, it also achieves effects that you don’t know how to accomplish from scratch. Using Photoshop allow you convert photos to black and white, resize them, create different effects, combine sophisticated techniques and many others.
So, beside saving time, Photoshop Action also bring to many benefits to improve directly productivity. If you don’t know the magic of Photoshop Action, here are benefits of using Photoshop Action to increase productivity that will help you answer all problems.

Simple and Easy to Use

With simple features and easy to use, Photoshop Action will one of perfect tools for beginner. It is easy to learn and know how to create a great photos with Photoshop Action. If you feel worry about your Photoshop skill or you feel too difficulty to turn your photos into attractive photos, Photoshop Action are willing to remove your solicitude because you don’t need coaching to do it despite of the lack of Photoshop skill.

Learning Photoshop indirectly through Photoshop action

Photoshop is a free photo editing web based editor, it is simple to use and have lots of features that support for the artwork of photographers. However, to learn Photoshop program require many times and perseverance. If you are interested in Photoshop but don’t time to learn and practice it, simply, using Photoshop Action will useful method that help you learn indirectly Photoshop. Prove that if you use actions made by others, do not merely use it but also try to look into the steps and study what he used in creating it. This way, you will know which tool and effect is used to give a good result. This will help you accumulate your own Photoshop experiences.

Save the work process from repeating steps

How do you feel if you have to edit more hundred photos everyday. It is too tired and boring, you don’t have private time to relax and for your family and friend. Photoshop Action will a great companion help you share your difficult and save the work process from repeating steps. Using Photoshop Action allow you record your steps in Actions and it will do the same to the rest.

Apply various effects easily

There are many creative effects in Photoshop Action such as: unspoken action, purple contrast, light leak flow, soft colors,… These effects will support for creating and editing your photos. Beside you have saved yourself from editing and applying some effects.

Increase the work efficiency

Instead of behind of my computer to edit thousands of photos, it is too bored work, you will have more time to relax. Actions will do the job for you by speeding up work and focus on other works and specially increase the work efficiency.

Get better results

Photoshop Actions allow you repeat steps for each photos that you would like to edit, the results will surely be consistent. Think simply that if you edit all photos yourself, are you sure that all results of images will be consistent?. With Photoshop Action, you can feel comfortable and confident your results of each photos.

Save money

When you are too tired with thousands of photos to edit, you will find way to solve that situation, maybe hiring experts to help you save time and focus on main work. However, you will take less money to pay experts but Photoshop Actions, you will save a lot of money and you can also learn while you work. Photoshop actions can truly help you a lot for it can give you the effects.
Here are some benefits of using Photoshop Action you can refer. Let’s start to learn and use Photoshop Action now to discover and have a great experiences. If you liked this article, then please Like and Share them to your friends as well as your partners. If you have any difficulty, please do not hesitate to contact us today for a free consultation.

Categories
Support Tips & Tricks

Outsourcing – advantages for photography business

          “Outsourcing – new media bring many advantages for photography business.”
As far as we know, as more and more outsourcing companies appear in the market, the competition between companies are more and more fierce, the amount of their work is more increasing. Leaving a career in management consulting of each business wasn’t easy. Delegating work can be difficult for entrepreneurs, no matter if the actual work takes place on or off the premises. Lack of delegation can negatively affect your business, especially if you spend your time on tedious administrative tasks instead of proactively adding value to your business.
So, large corporations have been doing it for years and now smaller businesses are taking advantage of the new trend that is called: outsourcing.
You will ask yourself: why photography business choose outsourcing for their work? or what are the advantages of outsourcing?. Below are some amazing sharing that help you find the answer.
Outsourcing certain functions of your business can make your day-to-day operations significantly more efficient. But what functions should be outsourced?.

Saving the Time

fotosolution-the-advantages-of-outsourcing-for-your-photography-business-01

Firstly, we can confirm that the best advantages of outsourcing for photography business is time. Your time as a business owner is invaluable. When the amount of their work are too much, you need to have many time even more than 24h per days to complete all work. How do you feel? – too tired and even you are going crazy. You had no time to spend with her friends. You didn’t have time to keep up with client emails and requests. These can be affected directly the end of your work.
Time is very important for business. If you’re not using it to make money, you have to start re-thinking what you’re doing. For example, imagine you have to edit 1000 product images for your website. Each image will take you roughly 10 minutes to edit, depending on the product and complexity. It is meaning that you will spend around 166 hours editing images (1000 images / 6 images/hour). So, instead of wasting their invaluable times, you can hire an graphic designer to do the editing for you or in other words, you can use Outsourcing.

Low Cost

fotosolution-the-advantages-of-outsourcing-for-your-photography-business-03

The cost to hire an graphic designer or to use outsourcing is one of the question that all business as well as photography business are interested in. A example below will prove that outsourcing owner low cost and completely satisfied with your needs.
For instants, if you have to edit 1000 product images for your website, you will spend around 166 hours editing images (average: 6 images in hour). In while, if you can hire a graphic designer or editing company with 1000 images in 24 hours or less, you can save about 86% time. In terms of costs, outsourcing this work would cost $1450. This means, that not only would you save yourself 166 hours of work. You would also save more than $3000, a huge 68% reduction in costs.
These will prove the advantage of outsourcing for your photography business: get your new products online weeks earlier. It is meaning you would also benefit from increased sales during that period.

Diverse Choice

Normally, there are reasons why people don’t outsource as: the problem of the cost, the effect of work,… We always think that no one can edit, design an album or blog,etc… like we can!. These things are both true if you live in the past era when technology has not ever developed as now. Today, there are diverse choices about outsourcing for photography business. Just talked about editing, but you can actually outsource more than that. Album design, retouching, search engine optimization, blogging, and even things that aren’t related to photography directly like administrative assistance and customer support.

fotosolution-the-advantages-of-outsourcing-for-your-photography-business-04
If you want to outsource retouching, album design, and editing, you probably want to look for a company or individual that does all of these things. Why? Simply for ease of use – it’s easier to keep all of your work with one service provider, so you don’t have to go back and forth delivering items to different companies for different things. A lot of post-production companies can totally meet all your needs.
In addition, you can do more more networking, this will help you get in touch with other industry professionals and form professional relationships. Outsourcing should make your life easier and help your business run smoother. We hope that this article will help you answers your existent questions.
If you have any questions or concerns, please do not hesitate to contact us and comment or share your experiences below this post.

Categories
Creative

10 Breathtaking Pinterest Boards All Photographers You Should Know

If you are a photographer or are a person who are interested in photography, you want to share your artwork to all reader. In fact, do you know what are the free resource or how to use the wonderful and free resource?. Almost photographer use social media platform to show and share their artwork. Because social media platforms generally serve two main purposes, to share and promote our photography and to seek new and inspiring ways to improve our shots.

Pinterest

As far as we know, Pinterest is a great resource for photographer. Moreover, it is one of the fastest and the most convenient social media platform. Pinterest can be helpful to those looking for inspiration. For example, if you’re looking for extra traffic to your own photography, can also be useful there. In addition, Pinterest is one of the best way that offers photographer the easiest and fastest way to get your works seen by millions. Using the pinterest will help you can have infinite numbers of boards all with individual themes and share them with friends and the wider world. Nowadays, many websites now have an option to pin articles and photos to Pinterest.
Let’s make yourself known to top Pinners by following and commenting on their Pins. Study their successful boards and pin items when they are likely re-pin. Especially, if they share one of your Pins, this will a great chance to help your Pins to be seen by millions. Recently, here are 10 breathtaking Pinterest Boards that will bring great ideal for all photographer. Now, say that just take a look at the titles and screenshots to find the best board that fulfill your needs.

Architecture and Escape

fotosolution-10-breathtaking-pinterest-boards-all-photographers-you-should-know-12

Download
This boards describe architecture and escapes topic like its names. Besides, this board will give great ideal for travel photographers or person who are interested in architecture and create a big inspiration for them.

Fashion Photography

fotosolution-10-breathtaking-pinterest-boards-all-photographers-you-should-know-08
Download
This board are collection of fashion photography where share the most beautiful and the most modern images related to fashion. A endless inspiration for fashion photographers.

Photography Tips

fotosolution-10-breathtaking-pinterest-boards-all-photographers-you-should-know-03

Download
First, this board are the best choice for photographer. It is great place to show and share the experiences as well as useful knowledge about photography.

Photography Tips and Tricks

fotosolution-10-breathtaking-pinterest-boards-all-photographers-you-should-know-09
Download
Want to know more about photography? These photography tricks and tips are good places to find out fantastic things that you’ve never thought your camera can do, to get professional answers even to the silliest questions you may have, to share your photos and to be paid compliments from other people.

Posing Ideas and Tips

fotosolution-10-breathtaking-pinterest-boards-all-photographers-you-should-know-01
Download
Digital Photography School is one of the famous photography blogs for photographer. In this board a huge amount of posing ideas and tips are featured. It will help you to discover flattering poses for your portrait subjects as well as allow you create the great ideal from this reference resource. Especially, they have several boards dedicated to the different type of people you may photograph.

Photography Website Marketing

fotosolution-10-breathtaking-pinterest-boards-all-photographers-you-should-know-05
Download
This board provide ideas and links to improve sales from a photography website. In addition, they are designed to help photographers expand their presence in the digital scene.

Digital Camera Photography

fotosolution-10-breathtaking-pinterest-boards-all-photographers-you-should-know-04
Download
This board offers product review, features on photography. This digital photography use single lens reflex cameras. Moreover, it presents big ideas on how photographers can create beautiful photography.

Improve Photo

fotosolution-10-breathtaking-pinterest-boards-all-photographers-you-should-know-11
Download
This board shares photography tips from set-up, gear and DIY projects, to posting ideas and lot more.

The Art of Photography

fotosolution-10-breathtaking-pinterest-boards-all-photographers-you-should-know-02
Download
The Art of Photography board is a good source to check out the works of both professional and amateur photographers and get a little day to day inspiration.

Landscape photography

fotosolution-10-breathtaking-pinterest-boards-all-photographers-you-should-know-06Download

Landscape photography is a collection of landscape photography where all photographer share the most beautiful photos with famous places. Thus, these wonderful images are available for travel photographers. Photodoto is great choice for photographers.
Hopefully, 10 breathtaking Pinterest boards will bring to you a myriad of ideas for your project. So, which board do you like most?. Finally, let’s choose one of them and share them to your partners or share the links what your favorite Pinterest boards in the comment below.

Categories
Support Tips & Tricks

How to retouch and airbrush skin effetely in Photoshop

Digital airbrushing is a useful technique applied to portrait photos using image editing programs in Photoshop. Airbrush skin will help you hide skin blemishes and imperfections. And  if you are a photographer, you will familiar with using this technique to make your shots look glamorous and professional. There are many ways to achieve this look using airbrushing in Photoshop that allow you to create beautiful artwork. Next, retouch Skin is one of the useful tools that used in digital photos with the special features. It helps your photos become more prominent and more stunning before the reader’s eyes. Retouch Skin is used primarily for Food and Non-food. Packaging should, in fact, always be airbrushed because it is never perfect  including damaged, printing errors, etc, and never evenly colored due to lighting. So, what is retouch skin and why or how to retouch skin effetely in Photoshop.

First, we can know what is airbrushing?. Airbrushing is a painting technique using a tool which sprays a liquid medium onto a surface. They have been used to create artwork, illustrations, murals, paintings on vehicles, temporary tattoos, apply makeup, fake tans and even nail art. Airbrush skin like a pro. In this Photoshop retouching tutorial, you will learn how to retouch skin like the professionals.

Retouch skin is the act of using an airbrush tool to mix air and paint to create a fine mist that can be applied to nearly any surface. A compressor or can of air is needed to create enough force to push the air through the airbrush and thus mixing with the paint. Besides, retouch skin can be used for applying a background or base coat, painting fine detail, and achieving smooth gradations in colors. We often use airbrushing to even out colored surfaces. After the background has been removed, surfaces are selected from the object and cleaned or evened out per colored surface.

If you use retouch skin tools to edit photos, airbrushing refers to any retouching done to a photo that changes the reality of the photo. With retouch skin tool, you can remove excessive images, the dirty, the acne erased, or body shapes altered. So, would you like to learn to create amazing artworks independently at home and edit your photos by using airbrushing tool?. Recently, here we will guide you some basic tips to retouch and airbrush skin photos.fotosolution-Tips-How-to-retouch-skin-effetely-in-Photoshop-03

The first step to learning to retouch skin is to structure your skills of airbrushing in your mind in a systematic and measurable way. Next, the second step is to learn to break down photos or drawings into these measurable structures, so that you need to master step to step of process.

Step 1:

You need to open Photoshop and go to File-> Open to select a photo in your collection you want to modify. Make sure the photo is high-resolution, good quality so you can see the finer details of the photos

Step 2:

Now, to enhance the feel and look of the objects we are going to need to open two duplicate layers to compare and feel them correctly. Using Layers in Photoshop, we can edit a layer, remove it and have the original image. It allows us to modify certain parts of an image without making permanent changes or don’t loss the original photos. Photoshop is a perfect tool to make any customization necessary to a photo or an image and transform them become special.

So, the first things that you need to go to your layer panel and select duplicate layer. The layer panel can be found on the bottom right of your screen. You can see it by pressing F7 and it will appear in the bottom right hand corner. To create a duplicate you can either, right click on the layer containing your image and select duplicate layer, or clicking CTRL+J. With two steps below, you should now have three layers in your layer panel including the original and the duplicates.

Step 3:

After creating the layers, we want to start working with the filters. Highlight the low layer by clicking on it. Go to the top of your screen and select Filter->Blur Menu and choose the surface blur option. This step helps blur the pixels in the image that make it look smoother without affecting the edges. You can choose between 2 options from: radius and threshold. Using the radius allow you indicates the size and strength of the blur and threshold lets you define the area you want to blur.

Step 4:

It’s time to get airbrushing or airbrush skin in Photoshop. With the Surface Blur box open, adjust the Threshold and the Radius until the image is blurry. After moving the sliders around until you have a good blur going on. Now, lower the Threshold slider until you have definition back in the image. You should notice the quality of photos become smoother.

Step 5:

If we see our photos what are still bumps or pores visible in the image, we should use Linear Light tools to eliminate them. Linear Light tools is one of the useful tools to edit photos and called the different name as: the blending methods. In your layer panel where it says normal, click on it and choose the Linear Light option.

fotosolution-Tips-How-to-retouch-skin-effetely-in-Photoshop-01

Step 6:

We need to create a layer mask. To do this, look on the bottom of your layer panel and find the grey box with a white circle in it. Click this button. Now you will see a white layer added to the high layer.

Step 7:

It’s time to choose the image you want to edit by going to Image>Apply Image at the top of your screen. Select layer 0 from the drop down list where it says merged. Click OK to complete.

Step 8:

You should see a black and white version of your image next to the thumbnail for the high layer in your layers panel. Now click on the colored thumbnail so we can do some fine tuning. You should zoom in a lot on the areas that need work by pushing CTRL+. To adjust the radius and help your photos become more natural, you can click on Filter->Other->High Pass, you will see a dialog box will pop up and give you the option to adjust the radius. Click OK when you’ve done.

Step 9:

Go to Image->Adjustments->Brightness/Contrast  to increase the contrast and adjust the brightness to make the bumps on the objects in photos less visible on the dark areas and more visible on the bright areas.

Step 10

We’re done smoothing the skin but you’ll notice that the whole picture is blurry now. In order to isolate the skin from the background we need to combine the low and high layers into a group and then painting the layer mask over the skin. So first, highlight both the low and high layers by holding down CTRL and clicking on each of them. Now push CTRL+G to create a group. You should now see a little folder icon with Group 1 written next to it. If you click on this you will see both the layers in the group. Now we need to get rid of the layer mask by going to Layer->Layer Mask>Hide All. You should see a black thumbnail next to the group layer.

Step 11

Going ahead and create a new layer above the low layer by clicking on the icon at the bottom of your layers panel. You want to fill this layer with color you want,  so you can see where you are painting. Go to Edit->Fill and select color from the drop down menu. Select colors and click OK to complete.

Step 12

It’s time to paint! Click on the black thumbnail on the group layer. You need to get your brush tool so hit B to activate it. Now go to your picture and paint over the areas you want to airbrush. It will look color when you choose this old step, but this is just so you can see where you are painting. Adjust the brush size as necessary on the top left hand side of your screen

Once you are done coloring in the desired areas, go back to your layers panel and delete the red layer mask. You have an airbrushed face or airbrush skin. Here are some basic tips about using the airbrushing tool in Photoshop that help you learn how to retouch and airbrush skin in Photoshop. We hope that you will feel it interesting. If you have some images product, you need to support and help, don’t hesitant, contact us. We will help you solve all difficulties.

How to airbrush skin effetely in Photoshop

Below are video that guide specific how to retouch and airbrush skin in Photoshop. If you have any questions or concerns, please do not hesitate to contact us and comment below this post.

Retouch and Airbrush Skin Professionally in Photoshop – YouTube from Dean Wendt on Vimeo.

Let’s post an image of your setup and a final image so everyone can see what you did. We look forward to seeing your results.

Categories
Support Tips & Tricks

7 Basic Mistakes Of DIY Footwear Product Photography

Do you ever ask yourself that you owner beautiful and quality product but the decrease number of customers who visit or come back your online store?. What’s happened to your product or do you have basic mistakes?. Let’s experiment this article below with main topic: “7 Basic Mistakes Of DIY Footwear Product Photography”. It is maybe useful key help you unlock this question.
Quality product photography is one of necessary and crucial factors that help business create a great impression on customers and keep them come back. Poor product images quality will likely scare customers away.

If you add sharpness, appropriate lighting, and a few other necessary elements, do you believe that the result will very surprise for your sales. So, how you style your product or how you turn into your product?. It’s depend on lighting, your camera setting, the angles you shoot,…
With 7 basic mistakes of DIY footwear product photography below will a great topics that help you answer all questions and avoid the same mistakes.
Preparing the product before shooting
Before shooting your footwear product photography, they are many things you should do, but one of these preparations are the position of product in photography especially small spared details.

Avoid putting footwear droop

The faces of footwear product appear on website that is very important. If you choose limp, lifeless footwear to shooting – product are unflattering and conveys little accurate information to the customer. It is perceived as big mistakes that affect directly to the quality of your product and your sales. Let’s choose the simple and clear faces of footwear product and help footwear stand, this make it easy for your customers to visualize wearing your footwear.

Advise : You should make sure that every piece of footwear looks its best by creating the illusion that the shoe is being worn. This shows both the item’s true shape and allows your customer to envision themselves wearing it.

Background

First, background is one of the necessary parts that contributes to create a good pictures. So, you should choose available background to turn into your product become special in photography. Don’t clutter the frame. Simply, a busy background will distract your customer from what you actually want them to look at. To solve this question, the best way for your product photography is that use a clear white background.

Lighting

Lighting is one of, if not the most, important parts of product photography. You absolutely need the appropriate type of lighting or your product will not look appealing to your customers. Harsh, direct lighting that casts deep shadows is the worst type of lighting for product photography.
Normally, photographer always use natural lighting because it one of the best and cheapest options available. You can choose and take your photos inside next to a large window where have many lights or use studio if you’d like to go the artificial lighting route.

Focus

You can focus your product what will appear in photography. Besides, Avoid using too redundant details in product footwear photography, this will make your customers distracted. The more your image is out of focus, the less your customer will see of your product.

Let’s use a higher aperture like f/11 on your DSLR camera to get every aspect of your footwear in focus. In addition, be sure to use a tripod; this will minimize camera shake and give your images maximum crispness.

Cropping

Cropping is one of popular ways of digital photos that customers can be easy to find the error if you make a mistakes especially inconsistent cropping in photography.Your customers will notice if some of your footwear images are more zoomed in than others, and they will notice if products the same distance away from the camera are higher or lower than each other.

To avoid making this mistake, you should keep your images consistent from frame to frame. Abiding by a template will speed your shooting and post production workflow and enhance the professional appearance of your website by supplying you with a consistent portfolio of product images that all seem to belong together.

Angles

One of the biggest mistakes in product photography is displaying very few angles of the product on the listing. Let’s try to shooting your footwear product photography in many different angles. These will help your customers feel confident as well as have a holistic and integrated view of your footwear product.

fotosolution-7-Basic-Mistakes-Of DIY Footwear-Product-Photography
Take straight-on side shots, shots from the front, shots from the back, the top view, angled side shots, detail shots and all variations of those suggestions.

Shadows

Do you know that footwear images in particular benefit greatly from a little bit of natural shadow?. It’s standard best practice in eCommerce to place products on a pure white background in post-production. Let’s retain the natural shadow in post-production processing grounds the item in the frame and creates a much more professional result.
Referring and sharing these basic principles in your footwear product photography will dramatically improve the quality appeal of your online product. If you style your footwear, use a clean, uncluttered white background, soft lighting, full focus, multiple angles, and consistent post-production processing, please do not hesitate to share your experiences and contact us.
Now go experiment and show me what you can make!.

Categories
Support Tips & Tricks

How to change my life with outsourcing services?

If you’re looking for detailed documents about outsourcing services here and there, this is not an essay for you. Simply, it just a blog entry where I share my experience – it changed my life.
I am a content editor who is responsible for the writing compilation and revision of content, images for website. However, it is sad thing that I am not good at editing photos or in the other word, I use Photoshop software quite bad.

However, I work with the same clients as well as readers, this allows me to learn their editing style and the things they are interested in. Not using Photoshop software well, this make me waste lots of time to edit images. The bigger problem was that as I got busier, I found myself spending my whole working week retouching.

In while, I feel crazy because I need to build new ideas for my essay with edit photos for hours. I wanna spend more time with my friend and my family instead of behind of my computer, it is too bored.
I always thought I can edit photos myself and the idea of someone else retouching my work scared me! Were they as good at retouching as me?. Would they over retouch and ruin my images?. How would they know what my original vision was for the images as I was taking them?. However, if the image are not attractive, this can be affected directly my posts.
But as my focus became worse and worse, I don’t have time enough to complete everything. My boss always urges me with new ideas, new topic to post on website while I keep on struggling with piles of editing photos. Finally, I decided to find and choose outsourcing.
When I finally let go and handed my images over to outsourcing service it was one of the best business decisions I ever made. Prove that I sent them some files from my past photos collection. Specifically, I chose images which had subtle issues, or which could not be edited well and my special request. Thus, when they send me back the edited photos, I feel surprise and happy with their results.

Outsourcing services

Removing creases and folds is combined with shadow correction

Multiple File delivery

Outsourcing service makes post production for me-content editor simple and easy. In addition, they help me improve my turn around time and increase my customer as well as my readers satisfaction. Especially, I can focus on my mainly job with interesting ideas for my article.
For me, the outsourcing help my job, there are:
+ Focus on my job
+ Do more network: get in touch with other industry professionals and form professional relationships.
+ Make more money and subscribe: attract readers who are interested in my articles.
To summary, everybody’s business as well as everybody’s job are different, so to really understand the value of outsourcing services you need to figure out how much time you’d get back in your life.
Here are my interesting sharing about outsourcing services that changed my life. Have you ever used outsourcing for your business?. See that share your story and let us know in the comment below!.

Categories
Creative

5 Best Responsive Real Estate Themes

Real estate website is a special field in the world of web development. A visually attractive and informative website is a must for being successful in the real estate business. Such a website will help you in showcasing the available properties and the potential clients in finding out what they are looking for.
If you owner real estate website or you are interested in real estate, here are best responsive real estate themes to add great ideal for your project. Best Responsive Real Estate Themes 2016 collection allows to create a dynamic content managed site for use in the real estate business save your time and money. Let’s choose one of them to build amazing ideal for your real estate website.

Realty – Real Estate Theme

fotosolution-best-responsive-real-estate-themes-03Realty empowers everyone to run a professional looking, easy to manage real estate site. If you are interested in real estate topic, Realty is a great choice for your project. Realty will help you create information-rich real estate websites that will be very useful for the visitors with the fantastic design, the rich and various theme and special features. In addition, you can add property video in the slideshow, property listing and property details pages. This element will allow your customers have a reality look about your product as well as your project.

Freehold – Responsive Real Estate Theme

fotosolution-best-responsive-real-estate-themes-01

Displaying your available properties, easy to use and customize and various features, Freehold – responsive real estate themes is completely responsive your all needs. Especially, when you owner this theme, you will receive interesting gift called: Real Estate Property Management and a Fully Responsive Layout. They are detailed help file along with additional features.

Realocation – Modern Real Estate Theme

fotosolution-best-responsive-real-estate-themes-02

Realocation is a perfect theme for creating real estate agents, agencies or company websites. It has many features which helps you to create most advanced websites such as: lots of widgets, custom map markers, map styles,..

Sweethome – Responsive Real Estate Theme

fotosolution-best-responsive-real-estate-themes-04

Sweethome is an attractive responsive real estate theme. The advanced search form will allow the users to find out their desired properties easily. Sweethome is fully responsive real estate for your project.

Zoner – Real Estate themes

fotosolution-best-responsive-real-estate-themes-05

Zoner is a new responsive real estate theme with unique functionality, design and features. It is available for agency owners, personal or standalone real estate agents, who want to receive personal, regional or global Real estate website. With unique functionalities, features and the design, Zoner will completely convince all fastidious customers.
We hope that this article will help you find the best real estate theme for your project. You may also share your favorite real estate themes in the comment below. If you liked this article, then please Like and share them to your friends as well as your partners. If you have any difficulty, please do not hesitate to contact us today for a free consultation. You can find us on Page Facebook or Twitter.

Categories
Support Tips & Tricks

How to Optimize Your Images To Boost eCommerce SEO

Boost eCommerce SEO is one of the top criteria that all businesses are always aiming. So, if you want to improve or more of this traffic, you need to learn and know how to optimize your images on website. In other word, we need to understand the importance of Images Optimization.

Nowadays, eCommerce SEO is more and more popular in modern social network. eCommerce product photography is one of the aspects of web design that enhances the value and raise the effective sales. In addition, optimizing your product images for search engines is another way to gain interested customers for your eCommerce store. In the early days of the web images were typically small and of low quality. Many websites do not focus on the role of images and not optimize to take advantage. However, as users have moved from dial-up to broadband connections, the number, size and quality of images on the web has increased significantly. So, to optimize your images for eCommerce SEO, what should we do?

Today, we present some of the easiest ways to optimize your images for search engine visibility.

fotosolution-How-to-Optimize-Your-Images-To-Boost-eCommerce-SEO-06

Images Files Name

When naming image files, use words that describe the image accurately and clearly. It makes sense for most eCommerce retailers to name their images with a product number. So, this helps them to quickly present images to their respective products. The name of the image file with help search engines determine what the picture is of. We should include a keyword that you are trying to rank for when writing the image file name. However, avoid making long file names and keyword stuffing because this could have a negative impact on ranking. We should use dashes to separate words instead of underscores, avoid to using excess keywords such as: “ the” or “a”.

If you want eliminate stop words and low value keywords and replace the spaces with a delimiter. And if you want to choose effective keywords, you can use some useful tools such as Google and the other search engines. They have gotten better at working with different characters as delimiters.

Image File Types

fotosolution-how-to-optimize-your-images-to-boost-ecommerce-seo-01

With some regular sitemaps, images give the search engine additional information to use when crawling a website. The user experience should be considered before eCommerce SEO. Utilizing some of these strategies can help your produce images achieve a higher ranking on search engines, leading to more sales. You want to use the file type that gives you the best trade-off between image quality and file size. A great suggestion for you, choose image file types with file extension like: “.jpg”, “.gif” and “.png”. Besides, you can use Google and the other search engines what can help you realize and optimize your images and here are image file types.

Image Files Size

A important part of image optimization concerns the pixel size. You want to make sure your images are a common size or have a common ratio of height to width. Square image sizes are the safest as search engines understand these the best. Make sure you save the image in a web-optimized format. Because these are very useful for your website. Keep file sizes as small as possible. Because good pictures are integral to making online sales, you can provide an option to view a larger pop-up or viewing on a separate page.

Tips: As a rule, you should set up file sizes under 70 KB. It is considered as the standard size for optimized pages.

Alt Tags

Alt text is provided as an alternative when websites can’t express the concrete images. Alt text also describes the image to search engines so they can understand them. You should use at least one keyword in the alt text, should not choose too much. Only use words relevant to the content of the image, these keyword will help viewer find your product images and your product in the easier way.

Tips: As a rule, you should describe the image by using from 3 – 5  words. In case, you have too many keywords what want to use to express your images, besides, find correct answers for your choice by search engines, Google Analytics is typical example.

Summary

Finally, you know some toolbar related to social media such as: Facebook, Twitter, Blog, Pinterest,.. what will help you speed up the process SEO and increase the number viewers.

Setting up Facebook, Twitter, Pinterest,..button in your website. In this example the social media buttons only appear when the user hovers their mouse over the thumbnail in the search results. We can choose Facebook for a typical example to confirm the effectiveness of social media. As far as we know, Facebook is one of the faster social medias now. People access to Facebook everyday, so create the login and make friends on Facebook is the most intelligent way what help you present your product to customers. So, install Facebook button is one of the intelligent and effective ways. Why can we confirm about these?.

In facts, when a user clicks a Facebook  like button, Facebook downloads a copy of the image, your customers can easily like your images. As a result that you can see the number of people approaching is high percentage. You can apply to different tools such as: Pinterest button, Twitter button,…

To help you make your store website even more visible in search engines, we have shown useful lesson related to optimize your images for you. You’ll find there tips on how to optimize your image for Ecommerce SEO. If you have useful tips or any difficulty, please do not hesitate to contact us today for a free consultation.

Thanks for reading!

Categories
Support Tips & Tricks

How To Shoot High Quality Product Photos From Smartphone

Are you looking for a cost effective way of adding beautiful and high quality product photos to your website? So what is this mysterious method?. Today, we will give a great suggestion for you: it’s smartphone or in other words, shoot high quality product photos from Smartphone. As we know, smartphone has become a very important part of our daily lives. It is very difficult to imagine our live without a smartphone as most of our work is done using smartphones.

So, what’s the advantage of shooting with your smartphone? In short, it’s a time-saver: you can shoot, edit, and list your photos in one go. And you won’t get caught up in cords to transfer photos from your phone to a computer. Secondly, if you don’t have a DSLR or a point-and-shoot, photography will help you save money. We surely believe that you can create truly beautiful images from your smartphone. Because your smartphone camera is one of the easiest to use and cost-effective solution to taking awesome photos.

Yes, using the camera you always carry around in the name of a smartphone may sound a bit crazy but hey, today’s phones are highly sophisticated and create sharper, clearer and amazing photos with stunning colors. Combined with photo apps and tripod, the advanced smartphone camera features, you’ll have fun shooting, editing and uploading great product images to your online store.

Smartphone photography is convenient, as well as user and budget-friendly. Getting ready to use your phone as a camera.

To get started, you must have a smartphone and understand how to operate its camera application. Most smartphones in today’s market come equipped with great cameras. If you’re one of the many consumers who have purchased one of these devices, then you have a high quality DSLR alternative right at your fingertips!. You must carefully study and understand the various capabilities and settings of the newly installed app in order to capture amazing pictures using the manual settings on your camera application. Below are a few smartphones that have great camera features

Smartphone Camera Features

Apple iPhone 5S

fotosolution-How-To-Shoot-High-Quality-Product-Photos-From-Smartphone

Camera Specs

  • Autofocus
  • LED flash
  • 8-megapixel iSight camera
  • Image stabilization
  • Video Recording HD (1080) @ 30 frames per second with audio

Samsung Galaxy S5

fotosolution-How-To-Shoot-High-Quality-Product-Photos-From-Smartphone

Camera Settings

  • LED Flash
  • Autofocus
  • 16- Megapixel resolution Camera
  • Video Recording HD (1080) @ 30 frames per second

Regardless of the smartphone you use for your photo shoot, be sure to choose one with an auto focus and the highest number of megapixels. From here, you can then utilize your gadget’s advanced camera features to make money online.

Professional product photography is an easy and affordable gateway to your customer satisfaction. To generate higher traffic and eventually increased profits with your smartphone, below is a list of five things you must remember.

Note: All photos in this post have been captured using a smartphone-iPhone 5S

Go neutral

Make sure you have a well, and evenly lit space to take the pictures in order to avoid shadows and unnatural coloring. This can be accomplished by taking the picture somewhere where there is a lot of natural light – ideally near a large window. You can supplement the natural light with any soft light. Create a neutral background for your product. The easiest way to do this is by using a long roll of paper or a sheet. We would advise setting up your roll so that it goes underneath your product as well, not just behind it. That way your product will appear fully surrounded in the image. For example, white products can be photographed against grey walls (instead of a white background) and black objects can be photographed against grey or white background.

Shoot straight

fotosolution-How-To-Shoot-High-Quality-Product-Photos-From-Smartphone

For shooting, we recommend that you first try to use the default camera app that comes already installed on your smartphone. If you aren’t getting the results that you want, then it’s time to try another application. Using your smartphone, you should ensure that the subjects are straight and cropped or edited according to how you would like them to appear online. With this, you’ll not need to straighten and crop them again in your post. If you choose to use angled camera shots for that dramatic effect, ensure it comes out creatively and not as bad photography.

Provide enough lighting

For your images to be exceptional, they must be bright and well-lit. Poor lighting will make your products look dirty and dingy and this can easily discourage your potential customers from buying from you. So, when it comes to shooting product photos, nothing beats soft or diffused light. It’s less intense, spreads evenly over the product (causing fewer shadows) and better brings out details, making it ideal for putting your products’ best foot forward.

Luckily, soft light is easy to find if you know what to look for. If you’re shooting products in your home or office, set up a shoot near a window on a bright but overcast day to avoid harsh rays. Then, use a piece of white paper or poster board to reflect the light coming in and eliminate any shadows on your product

Create an effective background

An effective background is essential to drawing attention to your products and reinforcing your brand. Many business owners choose a white background for a clean image that showcases their products. Others prefer a black background or even a staged scene. If you’re thinking about introducing colors to your product photo backgrounds, take some time to research color theory so you’ll choose options that’ll make your products pop.
Editing
After all is done and your images are safe in your smartphone’s Camera Roll, you can then open up your best photo editing application, (consider using Photoshop Express) and edit the images you would like to upload to the web. Digital images need some tweaking to achieve that shiny look. To get a head start on getting that perfect product photo, try playing around with these basic settings:

  • Brightness: Increasing the brightness of your image will hide any imperfections and give it an attractive glow.
  • Contrast: Increasing the contrast will help your image pop against the background.
  • White balance: Sometimes your camera doesn’t get the white balance adjustment right. Playing with this scale to get the most natural colors in your image is a quick and easy fix.
  • Sharpness: Increasing the sharpness of your image will help highlight the intricate details of your product and improve image quality.

With effective upper guide, we believe that you will shoot your beautiful product photos from smartphone. How do you feel about smartphone photography?. Let’s get started to take your own best photos and enjoy!. If you have useful tips or any difficulty, please do not hesitate to contact us today for a free consultation.