Categories
Support Tips & Tricks

How to Create a Ghost mannequin effect in Adobe Photoshop

High quality product photography is essential for apparel eCommerce. If you own store online and you try to think what do your customers do when they go to shopping online?. Hi-res product photography will perfect answer for your question. Shooting beautiful images for store online, you can use mannequin or model to showcase the unique shape and fit of each product. However, it isn’t always effective to actually show the model or mannequin. Today, we will show simple start-to-finish guide about how to create a ghost mannequin effect in Adobe Photoshop.

Mannequin or Model

Let’s start learning how to create a ghost mannequin. The first things you are interested in: choose ghost mannequin or model for shooting product photography.

If you use a model, it need to be big enough to cover at least the model’s top half. But models are very expensive and can distract from your product. If models are not in budget, you can use mannequin are an excellent alternative. But the problems here is change color dress, it waste many times for your shooting. For example, you want to present your new dress with five or six different colors such as: white, black, pink, yellow, red,… You do not know what colors attract customers to your website or how do colors affect your purchases?. You have to wait a model who wear your product with different colors to shoot. This will make you as well as your work lost many times. Using and change your product for mannequin also waste your valuable times.
If you choose mannequin to take a photos, depending on your needs, you may choose to purchase a mannequin with or without arms, hands, or legs. To summary, let’s make sure that your product fits your mannequin or model by using the right size or tailoring the garment to fit correctly.

Set up your studio

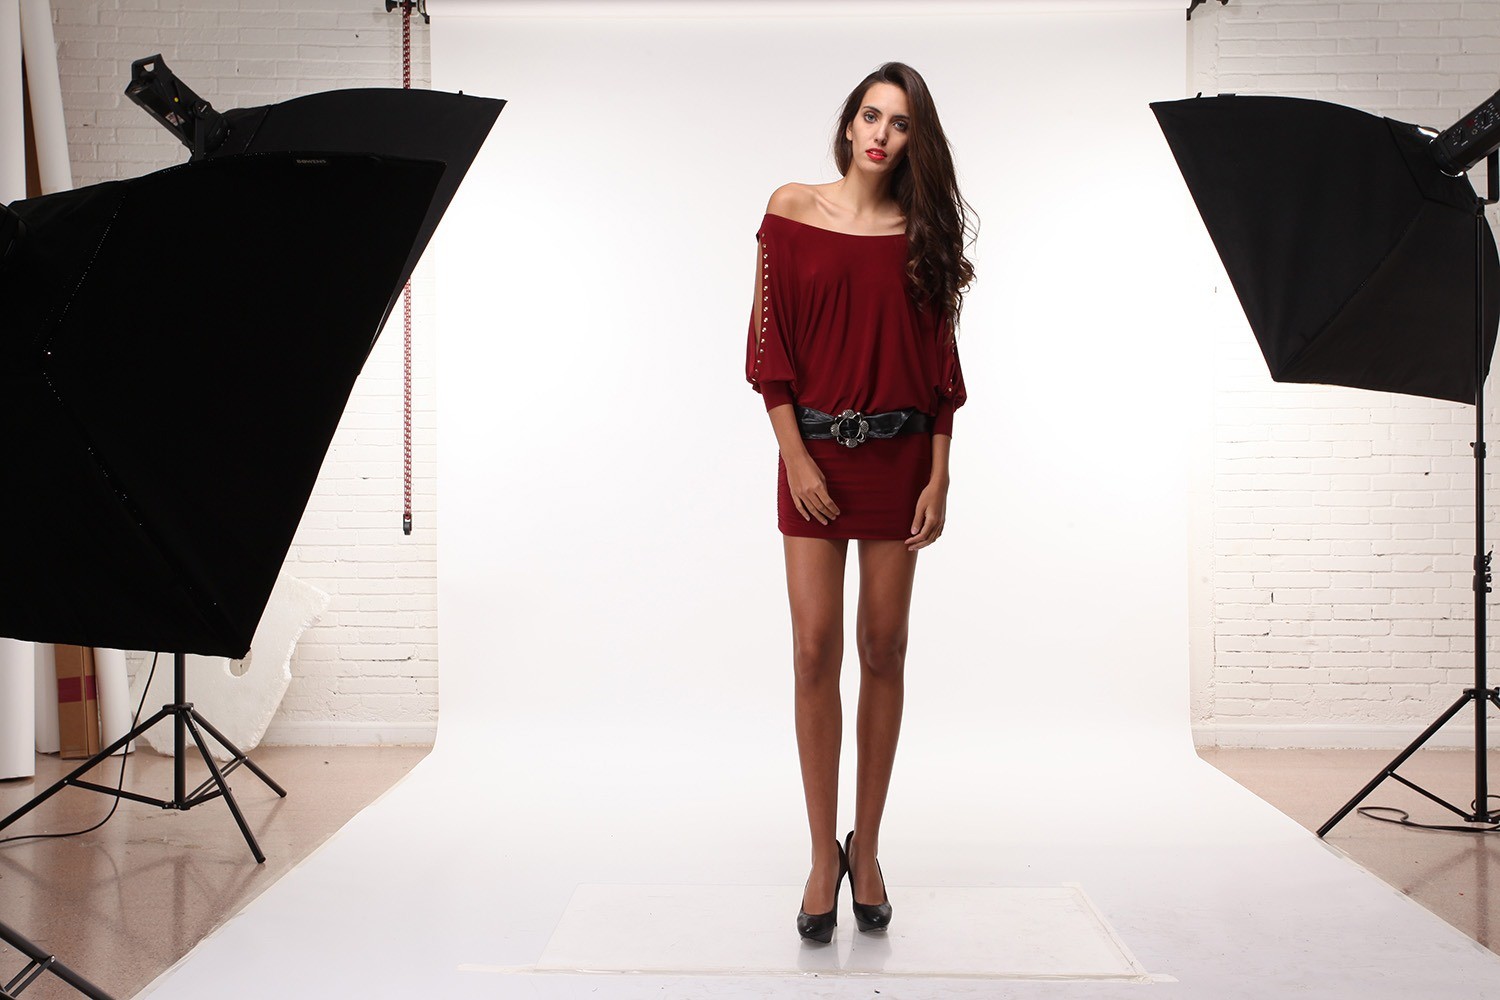
Let’s choose white background for product photography. It will turn into your product become more specific in pictures. Especially, the white will reflect light back onto your image and keep your camera’s white balance calibration accurate.

fotosolution-ghost-mannequin-02
Using a tripop to position your camera is one of the neccessary elements to decide the sharpness of the image. Ideally, you want the camera positioned so the entire frame is filled by the white backdrop and the product.
You also need to interest in lighting. If you choose the natural light, you may be read: How to Use Natural Lighting for Best Product Photograph. We should mention our main character: mannequin. When you wear clothes for mannequin, you should check for creases, smudges and stains of product. Moreover, let’s try to have an extra pair of hands when dressing the mannequin. This will help you adjust the arms and clothes while holding it up can be challenging.

Take your photos

One of the biggest mistakes in product photography is displaying very few angles of the product on the listing. Let’s try to shooting your product in many different angles. These will help your customers feel confident. It has a holistic and intergrated view of your product.
So, you also need to shoot mannequin with your product in many different angles. Firstly, let’s take a picture of the front of the garment, with the front of the mannequin facing the camera. Take off the garment, turn your mannequin around so that the back of it is facing the camera. Then dress the mannequin again, but this time the garment needs to be inside out. The reason you’re doing this is so you can get a clear view of the behind the neck or waist.

Next, it is more complex, so require that you need to have high-precision shooting. Say that take a photo of the back of the mannequin with the product the right way around, and the front of the mannequin with the product inside out. These will help your customers have object view about your product.
After taking your product photos, let’s check it out and edit to create a ghost mannequin effect before releasing product on website. Keep in mind that avoid any small error on the final product because of existing small weakness.
Below are the tutorial video for step-by-step guide to the process. Don’t forget that this effect on your product images will not only make your products look more attractive and perfect. It will also bring the look of your online store to a highly professional level as well as boost your sales.
If you have any questions or concerns, please do not hesitate to contact us today for a free consultation.

Categories
Support Using Guide

Review & Payment Methods

Review your order

After completing above step, our system will calculate total cost and expected delivery time for your order. Then you can review your order on summarized screen.

You can review: How to create a Order


  • In this step, you can add comments for your order, we will pay our attention on that while processing your orders.
  • In addition, you can add more images for order by clicking on “Add images”, after images are added, your order total will be re-calculated.


Payment methods

fotosolution_pay now

After reviewing, you can make payment to complete your order. At this time, we accept PayPal as default payment method. You can use credit card ( Visa, Master, Amex ) via PayPal or pay with your PayPal account.

Note: New FTPReady FTPZip FTP: These items contain image link in FTP server. Let’s copy this link in FilleZella to download.

When we received your payment, our system will send an email to your registered email address and your order on our system will be marked as “New”. Our staff will start your order shortly.

Next, you may be interested in: How to get completed files

Categories
Support Using Guide

How to get completed files

You will get notice for completed order by an email from our system when files are delivered. By logging in our Order Management System (OMS) you can view completed package, download or ask for revisions.

You can review: Review & Payment Methods

Download files

To get download files, please browse “Order menu”, you can see your order marked “ready for download” and “Download Now” button appear on order detail. Please click on it to see download instructions.

fotosolution_How_to_get_completed_files

We offer two methods to get your files :

  • Download via browser ( recommended for small amount of files ), you files are compressed in a zip package, and please click on “OR DOWNLOAD ZIP FILE HERE” button at the bottom of instruction popup to download.

orderfotosolution-download-file

  • Download file using FTP (better use for large number of files), please use FTP client like Transmit, Filezilla or Fetch … use URL as your host and use your username and password ( credential you used for our Order Management System)

Ask for revision

If you are not satisfy with any of completed files, please ask for modification. On order details screen (only completed order or ready for download ), you could see “Before/After” button, you can see your completed pictures with before and after box, you could check every completed photo by download each to your computer to review.

[fusion_builder_container hundred_percent=”yes” overflow=”visible”][fusion_builder_row][fusion_builder_column type=”1_1″ background_position=”left top” background_color=”” border_size=”” border_color=”” border_style=”solid” spacing=”yes” background_image=”” background_repeat=”no-repeat” padding=”” margin_top=”0px” margin_bottom=”0px” class=”” id=”” animation_type=”” animation_speed=”0.3″ animation_direction=”left” hide_on_mobile=”no” center_content=”no” min_height=”none”]

To ask for modification for the photos just click on “Reject image”, on new screen, please use our maker tool to draw or mark area which should adjust. Also please add your comment which let our staff known how to handle with error. If everything is done, just click on “Reject Image” to return your photo to our production department.

After we complete modification job, we will return adjusted files and you can get your photos by browse “Reject Images” menu.

You may be interested: How to change your setting[/fusion_builder_column][/fusion_builder_row][/fusion_builder_container]

Categories
Support Using Guide

How to create a support ticket

The feel free to contact us if there are any questions or comments. Our staffs are online 24/7 to support to you.

On the way to create a support ticket, please take a quick look on our support zone (http://admin.admin.admin.admin.admin.admin.fotosolution.com/support/) to make sure that there is no answer for your question. If you could not find your answer with our knowledge base, you could choose one of Skype or email to send your question. Just click on one of two icon at the footer ( bottom ) of Order Management System’s screen.

You can review: How to change your setting

orderfotosolution-support

Next, you may be interested: How to ask refund for reject photos

Categories
Support Using Guide

How to ask for refund?

We try to provide best service, then of course you could ask for refund if :

  • If you believe your order made with some mistakes, you can ask for refund any time. We will send all of paid amount to your Paypal account.
  • We offer 3 revisions for each completed photos, that mean you can reject 3 times. If the result still does not meet the expectations, please ask for partial refund.

Please send us a support ticket for refund if having question ( after checking carefully your problems with confirmation, we will refund for rejected photos within 3 working days.)

Find out: How to create a support ticket 

Categories
Support Using Guide

How to change your setting

You can change or custom your personal details by logging in our system, then browse menu setting. At this time, we only allow to change the password, please make sure that you remember your old password before making change.

You can review: How to get completed files

orderfotosolution-setting

orderfotosolution-setting-2

You may be interested: How to create a support ticket

Categories
Support Using Guide

How to create a Order

It is required to have an account to create new order on our system. You can create more order for each type of service or each specification.

(see more : How to create a Order Account)

orderfotosolution-create-a-order

Upload your images

orders ( file -orrder-review)


fotosolution_upload images


Let’s drag and drop file here or browse photo files on your computer. Please select photos with same requirement for each order. After choosing images, click “Continue” to fill in requirement (specification) for your order.

  • If you are new customer or have not created any specification yet . Our system will ask to create “New Specification” for your order, you can use created one for others order.

fotosolution_create a order


  • If you already create an order specification, you can select a suitable one for your new order.

orderfotosolution-create-new-specification

Create new order specification

Order specifications are requirements which you need to apply for your images, base on each specification, order quote will be calculated and applied for your order. To create new specification, please follow these step :

Step 1 : Select service types

We offer 3 types of services : Image Editing, Real Estate Photo Retouching, Edit images for BnB Host. Each service includes difference built-in specification ( add-on )

orderfotosolution-select-services

Step 2 : Enter specification details

Every specification requires “Specification Name”, without Specification Name you could not create or save your specification details.

  • Image Editing : please select correct requirements for your specification

fotosolution_specification image editing


Basic specification including:

  • Background : you can select white, transparent or custom background color. Please enter color hex value if you use custom background. As you click each section appeared illustration. This illustration help you see the demo of production after finishing.

fotosolution_background specification


  • File format : we support 3 file format types on delivery, all of these type included clipping marks.

fotosolution_file format specification


  • Margin : you can keep original margin (we do not add margin) or adding margin value in pixel (px) or percent. As you click each section appeared illustration. This illustration help you see the demo of production after finishing.

fotosolution_margin specification


  • Resize : Please ask resize if you want to receive completed file in difference size rather than original. Add resize parameters in pixels, inches, millimeters. As you click each section appeared illustration. This illustration help you see the demo of production after finishing.

fotosolution_resize specification


  • Other Instruction : Add your comment if there is any others requirements or notes.

fotosolution_other instruction


Add-on : we offer addition services for image editing, please turn switch on and add more add-on for your order. Depend on add-on, addition cost could be applied.

Retouching : normally, retouching is NOT included on each order, but adding retouching could help to improve your image quality. As you click each section appeared illustration. This illustration help you see the demo of production after finishing.

+ Basic retouching : adjust brightness and contrast (lighter or darker depend on your photos) plus basic color correction

+ Premium retouching : advanced brightness and contrast adjustment, advanced color correction, cleaning (remove lint, stains, threads, pins, scratches, creases, folds, dust, frayed edges), creases removing, reshaping.

fotosolution_retouching-add on


Shadow&reflection : select shadow types if you need. As you click each section appeared illustration. This illustration help you see the demo of production after finishing.

fotosolution_shadowreflection-addon

+ Natural shadow : adding shadow for object and make it realistic

+ Cast shadow : create shadow depend on light source (lamp, candle..) on the photo

+ Drop : use Photoshop drop shadow with one direction

+ Reflexion : reflexion shaImage Editing : please select correct requirements for your specification

Invisible Mannequin : basically mannequin will be removed when you use this add-on. But please make sure that you uploaded 2 images for each returning photos

+ No-3D : delivery your photo with mannequin removal in flat.

+ 3D : create 3d effect for completed photo.

fotosolution_invisible mannequin add on

Color Adjustment: You can adjust color you want with two option: No or Yes. As choosing Yes, let’s describle how you want us to adjust your image by writing the information box.

fotosolution_color adjustment-addon


Clipping Path : We create a vector shape using paths, tracing around object on the photo. Delivery files contains these paths. This add-on offer two options :

+ Clipping path for text wrap + Mask : paths are automatically created with Photoshop Magic Wand tool. Recommended for simple object or hi-contrast photos

+ Hand drawing : paths are created by hand with pen tools. Please select this if your photo contains complex object or you need exactly path.

fotosolution_clipping path addon

Specification Summarize: Sum up your customer’s request or in other words, this helps customer check their request before saving file.

fotosolution_specification summarize

  • Real Estate Photo Retouching : normally this specification is applied for HDR image editing from 1 to 3 exposure. Add-on is just optional and there is NOT additional cost.

orderfotosolution-real-estate

Including:

orderfotosolution-add-on-real-estate-2-2

  • Fire in the fireplace : we add light, lighting effects on lighting equipment : lamp, candles….. ( better use for room’s photos )
  • Picture on screen : there could be some computer monitor or tv and adding attractive picture could help photo look better.
  • High contrast : increase contrast to make objects easier to see
  • High saturation : return your photo with eye catching theme and more colorful
  • Sky on the windows : replace gray or dirty windows with blue sky for better view
  • Change blue sky : cloudy or gray sky make your photo bored, adding blue sky is always the best choice.
  • Images Enhanced for BnB Host : same specification with Real Estate Photo Retouching

create a new specification for BNB host


Note: Step 3 : Save specification: saved specification could be used for future orders, you can reuse this “specification” with the same requirement instead of wasting lots of times to fill in information again. After reviewing or specification details and total cost, please click” Create Specification” to save your specification complete this step.

(Next : )

Categories
Support Using Guide

How to create a Order Account

There are 4 ways to log in to our OMS, you can sign up by using social account to save time or sign up with your email and your own password. Signing up with social account, our system will send new password to email which you registered with social account.

You can review: Introduction – Order Fotosolution

orderfotosolution-sign-up

Pay Attention:

  • If your Facebook account are a phone number, when you create a new specification, box information will appear in order to require you provide your email account. This email address help us send the finished product for you.
  • Twitter account does not allow you to use as opened account, so when you log in Order Fotosolution account, box information will appear in order to require you provide your individual email instead of Twitter email account.

orderfotosolution-note-sign-up

  • When you need an email address, to fill out an online form or registration with, you are the only person who can see that address. So, you don’t have to worry about SPAM or anything like that.

Next, you may be interested: How to create a Order

Categories
Creative

5 Best Free Magento eCommerce Theme For Car, Motorcycle and Bike Shop

You are looking for great ideal about eCommerce theme for car, motorcycle and bike shop?. Do you feel disturbed between list of eCommerce theme for Car, motorcycle and bike shop and don’t know what do you want and choose appropriately for your project?. Here are 5 suggestions that are equivalent to 5 best free Magento eCommerce Theme for Car, Motorcycle and Bike Shop. We believe that these themes will help you find the great choice for your topic.

In modern social, to owner a website for business owners, webmaster is not too difficult but to transform and create a attractive website to customer is food for through. As far as we know, comparing to the newspapers, television, word of mouth, Internet is much more efficient as well as help business owner save money. To overcome this disadvantage, you must seek the uniqueness, the ability to stand out from the rest, to be a shiny piece of gold among the pebbles.
If you have a business plan related to car, motorcycle and bike shop, let’s visit this article below ” 5 best free Magento eCommerce theme for car, motorcycle and bike shop” to answer these disadvantages.

Velo – Responsive Magento Theme

fotosolution-5-best-free-magento-ecommerce-theme-for-car-motorcycle-and-bike-shop-03

Velo – Responsive Magento Theme is a powerful theme, best-known for its prized design for selling bicycles. In addition, the theme can also be ideal for fashion, jewelry, watches and a lot more of products. With the largest eCommerce platform, monitoring your online business would be easier because Velo that is 100% responsive with a clean, urban, somehow vintage and simple yet still very creative look that might please the eye of our most demanding clients.

Ves Bingo Responsive Theme

fotosolution-5-best-free-magento-ecommerce-theme-for-car-motorcycle-and-bike-shop-04

Ves Bing follows the latest design trends of put a strong emphasis on image showcase that surely offers you the best Magento Page Builder. Built with Bootstrap 3, using Ves Bingo Responsive Theme will help your site be fully responsive and optimized in almost all of devices. Ves Bingo is designed to bring more enjoyable shopping experiences. It is a great choice to get this theme for Clothes store, Furniture Store, Car Store, Male Fashion, Trendy Fashion store, Fashion Stylist.

Responsive Moto Store Theme

fotosolution-5-best-free-magento-ecommerce-theme-for-car-motorcycle-and-bike-shop-02

Responsive Moto Store Theme is one of amazing subject and theme for all person who are race and motos fans. This theme features the nuts design, helping the navigation become a much more interesting experience. New products include their prices and descriptions, moreover template’s logo type with those nuts looks very creative and attractive the customer’s attention.

Biker’s Store Theme

fotosolution-5-best-free-magento-ecommerce-theme-for-car-motorcycle-and-bike-shop-01

Bikers are special personalities with specific tastes, preferences and needs. You can try to satisfy them with Biker’s Store Theme. This theme is designed with modern features such as: Grungy banners with gigantic fonts are something customers’eyes cannot miss. Especially, main menu buttons have uncommon design, making menu bar design unique. If you sell bikes and their spares, this theme was designed for you.

Ves Motozz Multipurpose Responsive Theme

fotosolution-5-best-free-magento-ecommerce-theme-for-car-motorcycle-and-bike-shop-05

Ves Motozz is the best theme for all store related to vehicles from moto gear, moto helmets to car parts or bike parts. It features high quality photos that will be fancied by any customer. Also, you will impress the visitors with this smart layout content and modern features.
Ves Motozz meets all modern web design standards & the latest usability requirements. Hence, you can create and configure multi store, multi theme, multi languages at ease.

Categories
Support Tips & Tricks

DIY Guide to Beautiful Product Photography

Do you know how to shoot a beautiful product photography?. how do you feel about perfect product photography?. If you want to refer to reach to product photography, let’s discover this article: DIY guide to beautiful product photography.
A beautiful product photography may be worth a thousand words. It is sure to improve your customers’s shopping experience and increase your eCommerce sales. In fact, Showcasing your products with high-quality images will help you gain the best result for your business project. And a big part of having an attractive website these days also means having high-quality, beautiful product photography.
Before you give up on your product images, refer some guides to awesome product photography for your eCommerce store.

White Background

fotosolution-diy-guide-to-beautiful-product-photography-01

Background is one of important factors in an image and choosing suitable background is a deciding element to make beautiful photos. Moreover, the background is of fundamental importance in the composition of the image emphasizing the subject, improving the photography. If not adequate, it may cause irreparable damage to the image, making it chaotic.

For great photos, you need to create what’s known as beautiful and clear background. Simply, this is a white backdrop that sweeps from the vertical to the horizontal surface. Using white background, you don’t need to make any brightness and contrast adjustments. Because the sweep will reflect white light onto your product. Dark colors absorb light, so shooting against a dark backdrop will not give you a well-lit product image.

Or if you choose to remove the background, it’ll be a lot easier to do if the product is on a plain, white background. Let’s choose white background to make your product become more striking in photography.

Using Photography Equipment

Photography equipment is one of important and necessary parts to make beautiful product photography. The first equipment you are interested in that is camera. There are many kinds of cameras that help you shoot great photography, and DSLR camera is one of great choice for photographer.

With DSLR camera, you can use the right aperture for the right shot. A wide aperture like F2.8 or F4.5 will narrow your depth of field, leaving parts of your product out of focus. A small aperture like F8 or F11 will give you a wider depth of field, keeping your entire product crisp and in focus.

In addition, keep in mind that don’t use a wide angle lens. You will distort your product. Besides, you can use other equipment such as: smartphone – is one of useful devices for your project.
You are interested in: “How To Take Camera Setting for Brilliant Product Images“.

fotosolution-diy-guide-to-beautiful-product-photography-03

Tripod

The quality of image can be affected by your tripod. Why are tripod?. When a camera has a slow shutter, you can’t hand hold it or the subject will be blurry. Tripod is mainly answer for you. When you take a photos, you’re going to set your camera to a very small aperture so that you can have the most depth of field your camera is capable of.

Thus,you’ll need to use a tripod to stabilize your camera and easily duplicate the same shot for each of your products.

Lighting

The key to amazing product images is your lighting. If you don’t have great lighting, you won’t have great photos. There are two kind of lighting that photographers use to capture beautiful photos: natural light and artificial light. When you use an artificial light source, these can affect directly your product’s color, while using natural lighting for product photos preserves the natural color of the product.

fotosolution-diy-guide-to-beautiful-product-photography-02
An useful advice for you: Say to turn of your camera’s in-built flash because if you are not a person who have the photography skills to manipulate the flash. You’re not going to get great results using it. So, what are the advantages of natural light and artificial light?.

As far as we know, artificial light is constantly available throughout the day and night. This allows  you to skip planning your shoot around factors like the time of day and the weather has no effect on you. Based on the specific type of artificial light you select, you can even mimic sunlight or moonlight in your shots.

Natural lighting is easy and cheap. A set-up near a window is your best option, because you need to use the sun as an indirect light source. In general, morning light is bright and has less color, while afternoon and evening light often has a warm undertone. In addtion, it brings out greater contrast in your images. You can always neutralize the image and make it cooler in post-production if want a cool, dark image.

You are interested in: ” What do you choice: Natural Light v.s Artificial Light?
Below are video that guide specific how to create a beautiful product photography.

Great Product Photos from Etsy on Vimeo.

Closely, it is easy to take your own products with 4 guides how to create a beautiful product photography. Let’s post an image of your setup and a final image so everyone can see what you did. If you have any questions or concerns, please do not hesitate to contact us today for a free consultation.