Categories
Tips & Tricks

Photo Retouching Services Can Help Improve The Quality of Your Photos

Photo retouching services can help improve the quality of photos” How do you think about this quote? Do you think it’s right or wrong? Now we will discuss and find the exact answer to this quote.

Photo Retouching Services Online

Photo retouching services online can be used to improve the appearance and quality of a photograph. The type of service can be made to remove blemishes, correct skin tones, and remove unwanted objects from an image. Additionally, they can improve the brightness and color of your photos, giving them a more dynamic appearance. If you want to improve the quality of your photos, let’s consider using a photo retouching service online.

The first step to using photo retouching services online, you must upload your photos to the service’s website. When the photograph is uploaded, the user is provided with a variety of tools and options that can be made to improve the appearance of the image. The user can then download the enhanced image.

The methods used for picture retouching vary based on the sort of image that is being altered. When you are looking for photo retouching service, you need to consider some factors such as: the quality of their work, the pricing options, and the turnaround time.

Why you should use online retouching services ?

  • Going online may be more practical than physically visiting a place.
  • Compared to local businesses, online services could provide more features and possibilities.
  • People could believe that even an online service will provide better outcomes than a local one.
  • They are quick and easy to use. The majority of internet photo editing tools are relatively simple to use. You may only choose your options, submit your photograph, and pay for the service. Your image will appear at its finest in just a few minutes.
  • They are inexpensive. Particularly when compared to professional photo retouching services, the majority of internet photo editing services are relatively affordable. Without investing a lot of money, you can achieve outstanding outcomes.
  • They’re versatile. Online photo retouching services can do everything, from removing blemishes to adjusting lighting levels.

Advantages when you are choosing professional photo retouching services online

High-quality images

Businesses may save money and guarantee the greatest quality of their photos by outsourcing their image retouching. It is because skilled and knowledgeable professional retouches can provide top hits. Whether it’s removing blemishes, adjusting colors, or smoothing out wrinkles, these editors know how to make your photos shine.

If you’re looking for beautiful, high-quality photos that will impress your clients, professional photo retouching services online will be the best choice.

Save Money and Time

You can save money on software by working with a pro. Many professional editing services already have software that is expensive and difficult to learn how to use. Also, applying professional photo retouching services will help you solve this issue
A professional can also help you save time. If you are unfamiliar with photo editing software, it can be very hard to learn how to use it. It implies that the editing of your images can take longer than you would want.

Boots Your Brand’s Images

Professional photo retouching can enhance sales by making a company’s goods and services appear more enticing to potential clients. Furthermore, professionally altered images can make a company’s website stand out from the competitors and seem more credible. A cost-effective strategy to achieve excellent results that might aid in the expansion of your business is to outsource photo editing.

Customization of your images

To help you achieve the exact appearance you desire, the majority of professional picture editing services provide a wide range of customization choices. Usually, you may select from a wide range of filters, frames, and textures to use on your images. To add captions or titles, you can choose from the variety of text possibilities. With this degree of personalization, it is simple to produce distinctive, individualized images that stand out from the competition.
Fotosolution company will be one of the best choices for you.

Visit Fotosolution company, you get:

Fotosolution have successfully provided real estate image editing and image post processing services to numerous real estate agencies, advertisers, and real estate photographers.

  • You can save your time with the short turnaround time thank benefit of the time zone ( from 8-12 hours).
  • We are available 24/7 to find a solution for your photos as quickly as possible.
  • Your photos will not be published by any third party without your permission.
  • We offer 3-5 photos edited for trial without any fee
  • We use the latest image editing software such as Adobe Illustrator, Adobe Photoshop CS6 and CoreIDraw to give you the most attractive photos

If you are looking for the best image retouching services, Fotosolution is the best option. Our services can help you improve the appearance of your photos, making them look more polished and professional.. Contact us ( sales@fotosolution.com) today to get started!

Categories
Blog

The Important of Outsourcing Image Retouching

If you are looking for outsourcing image retouching services, we recommend you Fotosolution team ( sales@fotosolution.com). It is the best solution to save valuable time without damaging the quality of your photos.

Image retouching is the process of modifying pictures to make them look better. It is possible with images, drawings, and even logos. It can be applied to fix flaws, improve colors, or create unique effects.

You probably don’t have time to modify each image you use for your brand if you’re a busy business owner or entrepreneur. But do you realize that using a professional image retouched might be pricey? Wrong! There are currently several affordable alternatives to outsource image retouching, allowing you to resume managing your company.

You may choose a trustworthy picture retouching business that suits your needs and budget, like Fotosolution.com.

What is outsourcing image retouching?

Outsourcing image retouching is the process of hiring an external company or individual to perform digital editing tasks on images.

It might range from straightforward color adjustments to more intricate Photoshop work. To save time and money, many firms outsource their image retouching requirements.

So what advantages do outsourcing picture retouching have?

Save Money

To save money, several businesses are now outsourcing their picture retouching. It is because retouching can be a very time-consuming and expensive process. You may outsource the work to a third party to reduce your labor expenditures.

Focus on your listing of photos

Several things are competing for your attention when you run a business. When you are always putting out fires, it might be challenging to concentrate on anything else as your time for your family, your friends, or yourself. Image retouching services can help you process this issue. While someone else handles the image retouching for you, you may focus on other areas of running your business.

Image retouching services can help you develop a consistent brand identity and provide businesses more time to focus on their core competencies. By batch-editing your photographs, they can also help you save time and money. Most importantly, they can take some of the stress off your plate so that you can focus on other aspects of your business.

High-quality product

Businesses may save money and guarantee the best quality of their photos by outsourcing their image retouching. It is because skilled and knowledgeable professional retouches can provide top hits. Businesses may concentrate on other areas of their business by outsourcing this procedure because they know their photos are in competent hands.
If you’re looking to outsource your image retouching requirements, research and identify a reliable business or person with experience in the field.
Fotosolution company will be one of the best choices for you.

Visit Fotosolution company, you get:

Fotosolution have successfully provided real estate image editing and image post processing services to numerous real estate agencies, advertisers, and real estate photographers.

  • You can save your time with the short turnaround time thank benefit of the time zone ( from 8-12 hours).
  • We are available 24/7 to find a solution for your photos as quickly as possible.
  • Your photos will not be published by any third party without your permission.
  • We offer 3-5 photos edited for trial without any fee
  • We use the latest image editing software such as Adobe Illustrator, Adobe Photoshop CS6 and CoreIDraw to give you the most attractive photos

If you are looking for the best image retouching services, Fotosolution is the best option. We will bring the best results at the best price for you. Contact us ( sales@fotosolution.com) today to get started!

Categories
Tips & Tricks

How to Choose the Best Clipping Path Service Provider

Are you looking for the best clipping path service provider? Make sure that Outsourcing the clipping path service will be one great assistant for you.

Will your image be affected by picture editing? Is it wise to work with a clipping path service provider? High-quality photographs are essential to a company’s success in the highly competitive E-commerce market. Every image will probably need to be modified to stand out, so finding and working with a reliable clipping path company is essential. Outsourcing the clipping path service will relieve some of your work. However, you must fully understand clipping paths and their importance for photo editing before you search for the best clipping path service provider.

[twentytwenty][/twentytwenty]

What is a Clipping Path?

A particular kind of service used to remove images from backgrounds is called a clipping path. Photographs can be edited, removed from their original context, and repositioned using Photoshop for clipping path editing. Outlining the thing does this. It is applied for two different kinds of tasks: cutting an object and wrapping the words surrounding it in a picture. It is a common practice for photo editing.

Why outsource to a clipping path service?

It is necessary to use professional clipping services to easily clip the images and place them on the backdrop. Here are a few reasons why outsourcing to a clipping path service.

Improve eCommerce Companies

E-commerce businesses are building on the sale of their products. So they must emphasize high-quality product photographs while advertising their services online. For this, it’s necessary to outsource clipping path services to a competent clipping path provider. They provide photo retouching and image masking services to assist you in marketing your goods. With advanced technology and devices, they also give you HDR images.

Incredible Results

They deliver outstanding results, each shot is trimmed to perfection. Most photographers are adept at shooting pictures, yet some struggle to use the right tool or method. The optimal instrument or procedure for your goods will be known to and chosen by a competent clipping path service provider.

Save Times and Money

The best clipping path services will save you time and money by allowing you to focus on more creative, income-producing activities. If you outsource a lot of your projects, you can save money. It might help you receive discounts. Especially, at the clipping path company providing the right services, you will never miss your client’s deadlines.

Now, let’s find the reasons How to Choose the Best Clipping Path Service Provider

Do detailed research

It is among the most crucial tasks that each business or person must complete. That is doing sufficient research to locate an appropriate service provider. On the internet, there are numerous clipping path alternatives. A fast Google search is a terrific place to start, but it may also be overwhelming. If you want to know how to choose the best clipping path company, carefully research each option that pops up.

Best Quality

Keep in mind that quality is really essential.. You cannot show shady photos to your clientele. So, request that they provide examples of their products both before and after. You’ll receive the top clipping path services in this manner. Additionally, you can ask to see their portfolio.

[twentytwenty]

[/twentytwenty]

Consistent Work

You must opt for a consistent company. Their reliability in their work can only benefit the growth of your company. It’s crucial that they employ cutting-edge software, too.

Cost and Payment

You have to make sure the services fit your budget. Don’t forget to find the pricing structure and the inclusions included with the quoted rates. Different clipping path vendors have different pricing strategies. They may charge extra for images that need more involved editing, offer packages of services, or give discounts for large purchases. You can purchase a set of editing credits. It is excellent if you frequently need to alter photos: You save more money the more credits you buy.

Turnaround Time

Delivery on schedule is essential. Companies with flexible timelines for photo editing provide the best service. However, be prepared to pay a little extra during rush hours. If you need a quick response, it’s a good idea to learn about the rush fees.

Customer Services

Choose a service provider with a reliable customer support system. Verify the functionality of their call, email, and chat services. Both processing speed and delivery time for you will be strongly affected by fast assistance.

Fotosolution’ Clipping Path Service

Fotosolution have successfully provided image post processing services to numerous leading brands, retailers, and photo studios around the world.

To have amazing clipping path services of Fotosolution, you can receive the following benefits:

  • You can save your time with the short turnaround time thank benefit of the time zone ( from 8-12 hours).
  • We are available 24/7 to find a solution for your photos as quickly as possible.
  • Your photos will not be published by any third party without your permission.
  • We offer 1-2 photos edited for trial without any fee
  • We use the latest image editing software such as Adobe Illustrator, Adobe Photoshop CS6 and CoreIDraw to give you the most attractive photos

If you’re looking for the best clipping path service, we think you’ve come to the right place. Get a free trial now. Contact: sales@fotosolution.com to get more informs.

Categories
Tips & Tricks

How to use Adobe Lightroom for Product Photography

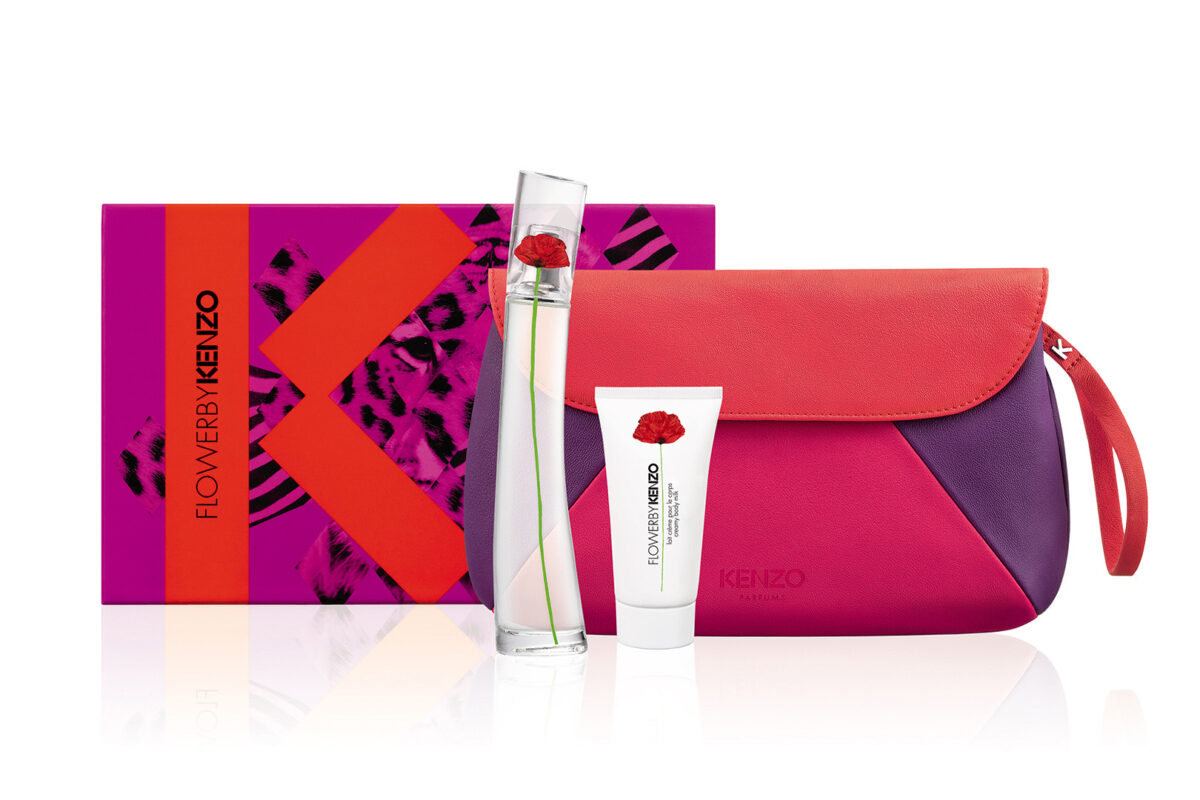
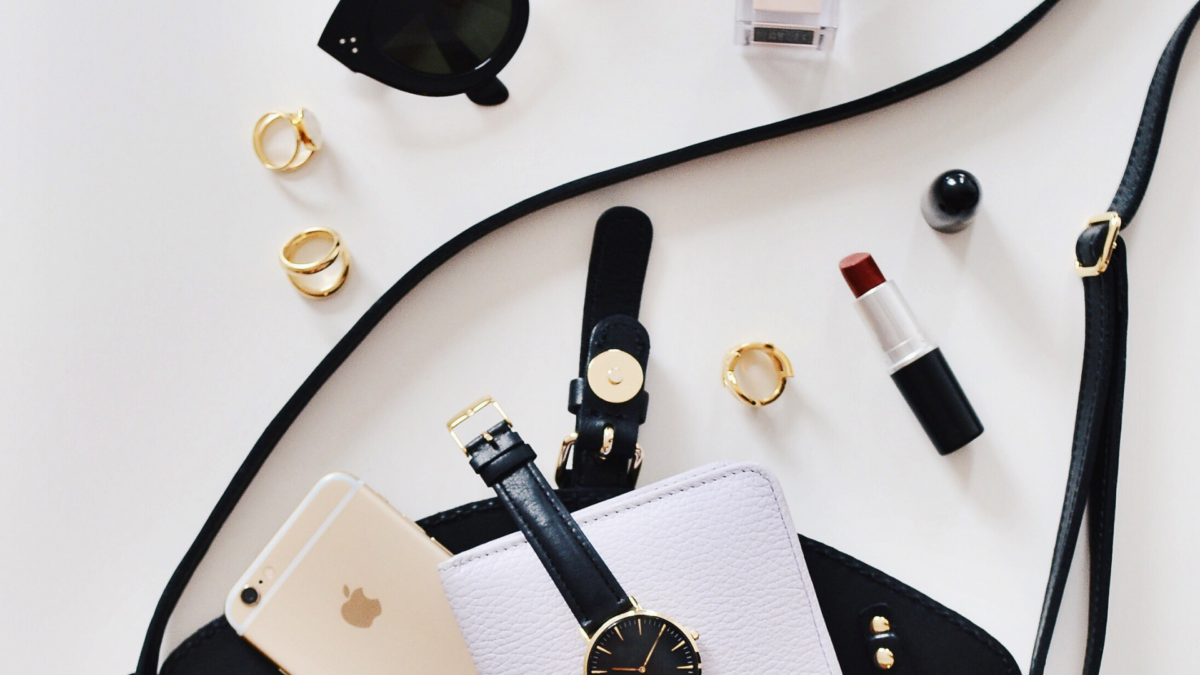
If you’re beginning to extend your product photography, you’re already familiar with Adobe Lightroom.

As far as we know, Adobe Photoshop Lightroom is a gold key for your product photography. Tethering, presets, batch editing, and other helpful tools for product photography are all there in this excellent program. Lightroom may be effectively used to produce reliable, excellent photos. Especially, it has some quick and powerful tools for product images. So, have you ever used the Adobe Lightroom tool for product photography? Today we will share some tips to help you with the product image in Adobe Lightroom.

In this document today, we will address 2 basic questions, like:

What is Adobe Lightroom?

Adobe Lightroom is software designed to be used by photographers for photo management and editing. Alternatively, cataloging and modifying It’s similar to a lightweight combination of Adobe Bridge and Adobe Photoshop if you’re familiar with other Adobe programs. But that’s selling it short.

Images can be imported, arranged, edited, and exported. You may search, bookmark favorites, make collections, and share photos. You can adjust  individual images, perform batch edits, and save sets of adjustments as “presets.

How to use Adobe Lightrom for Product Images ?

Organize Image

What images are you processing?

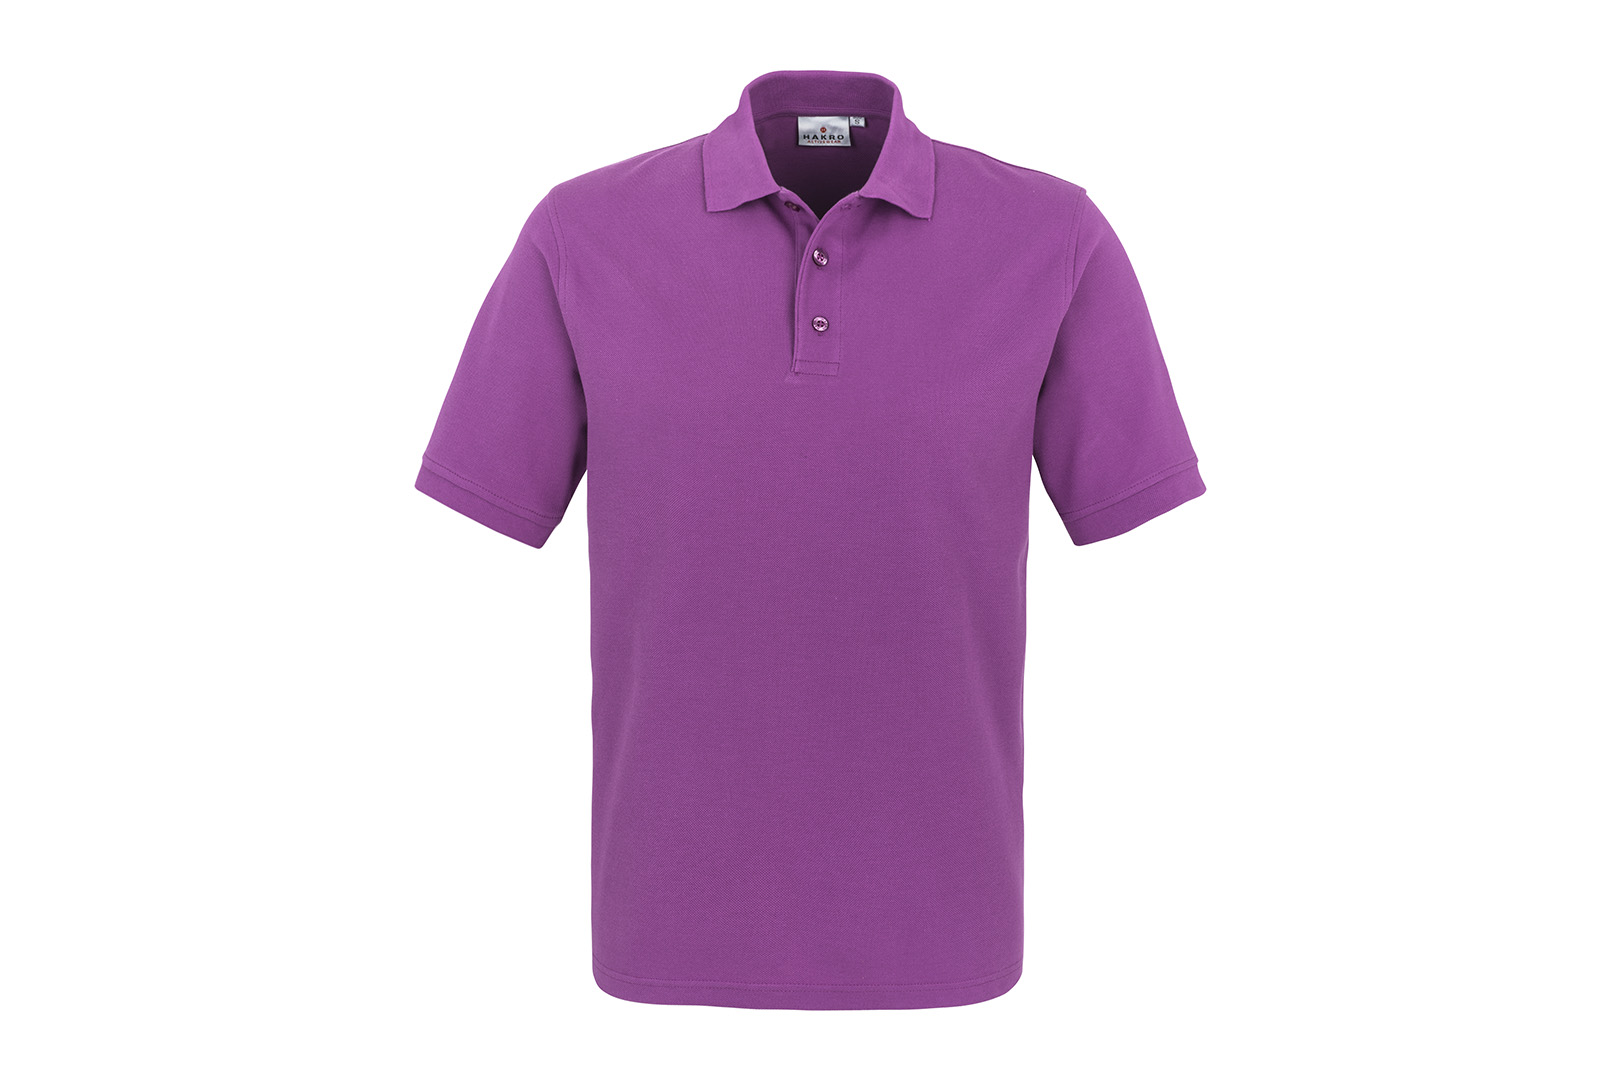
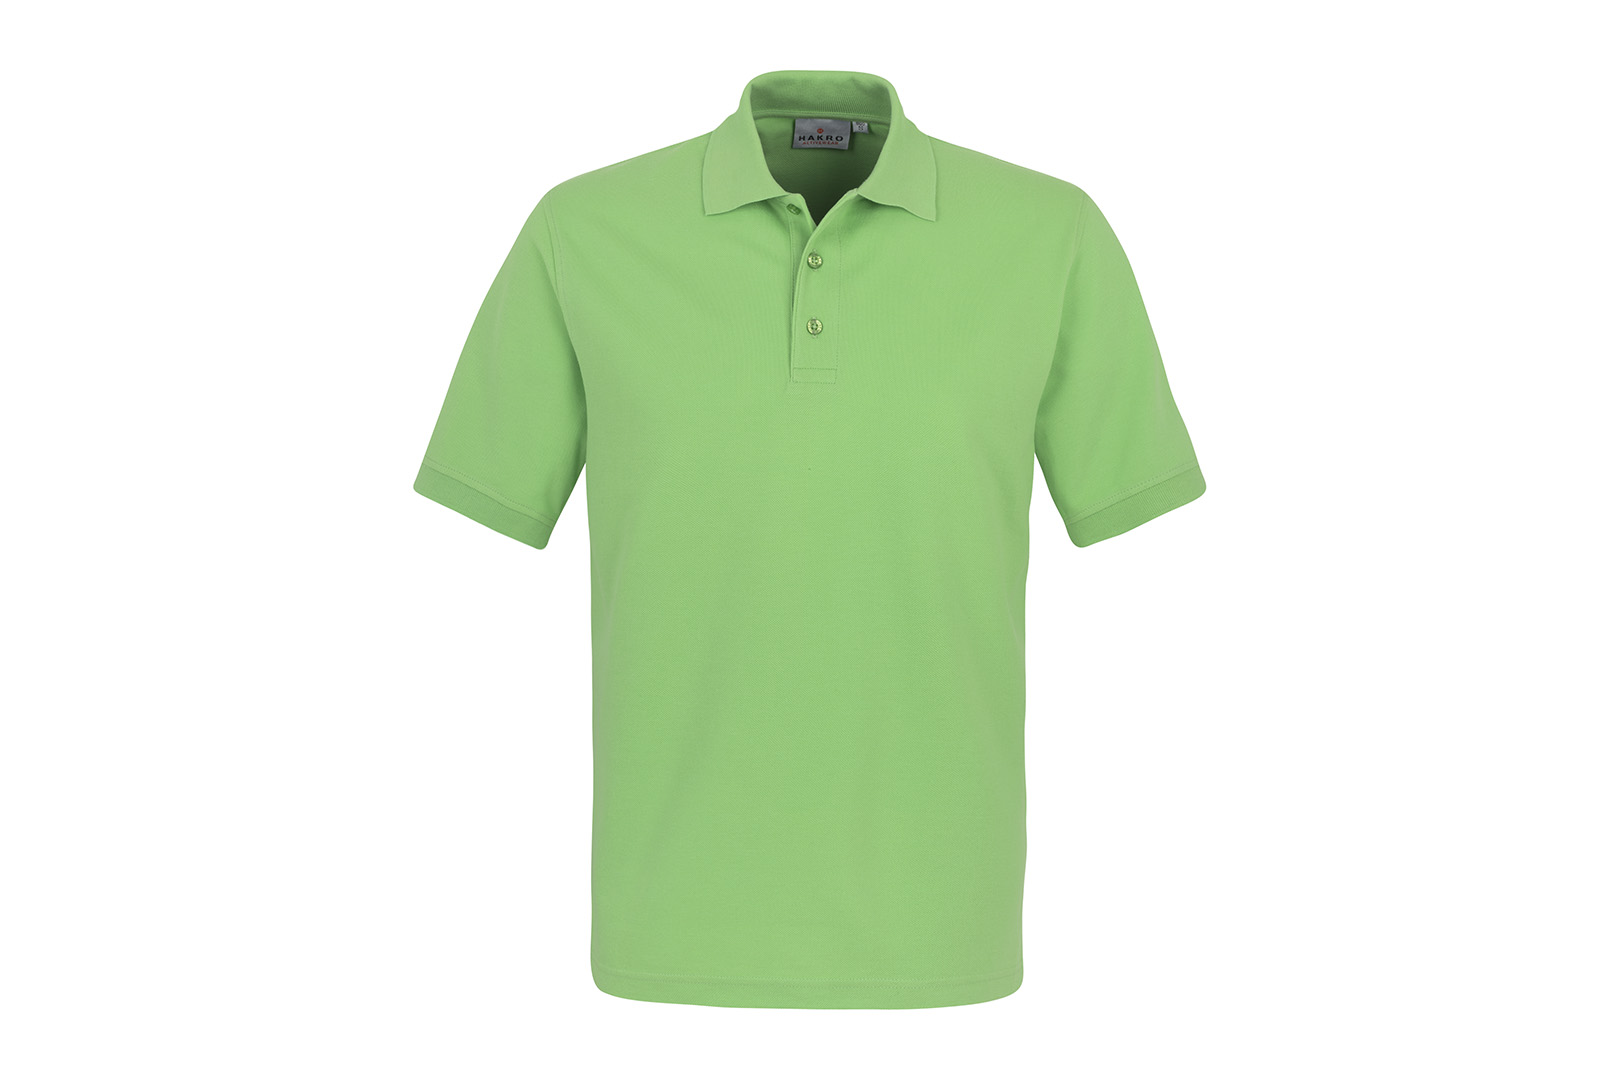
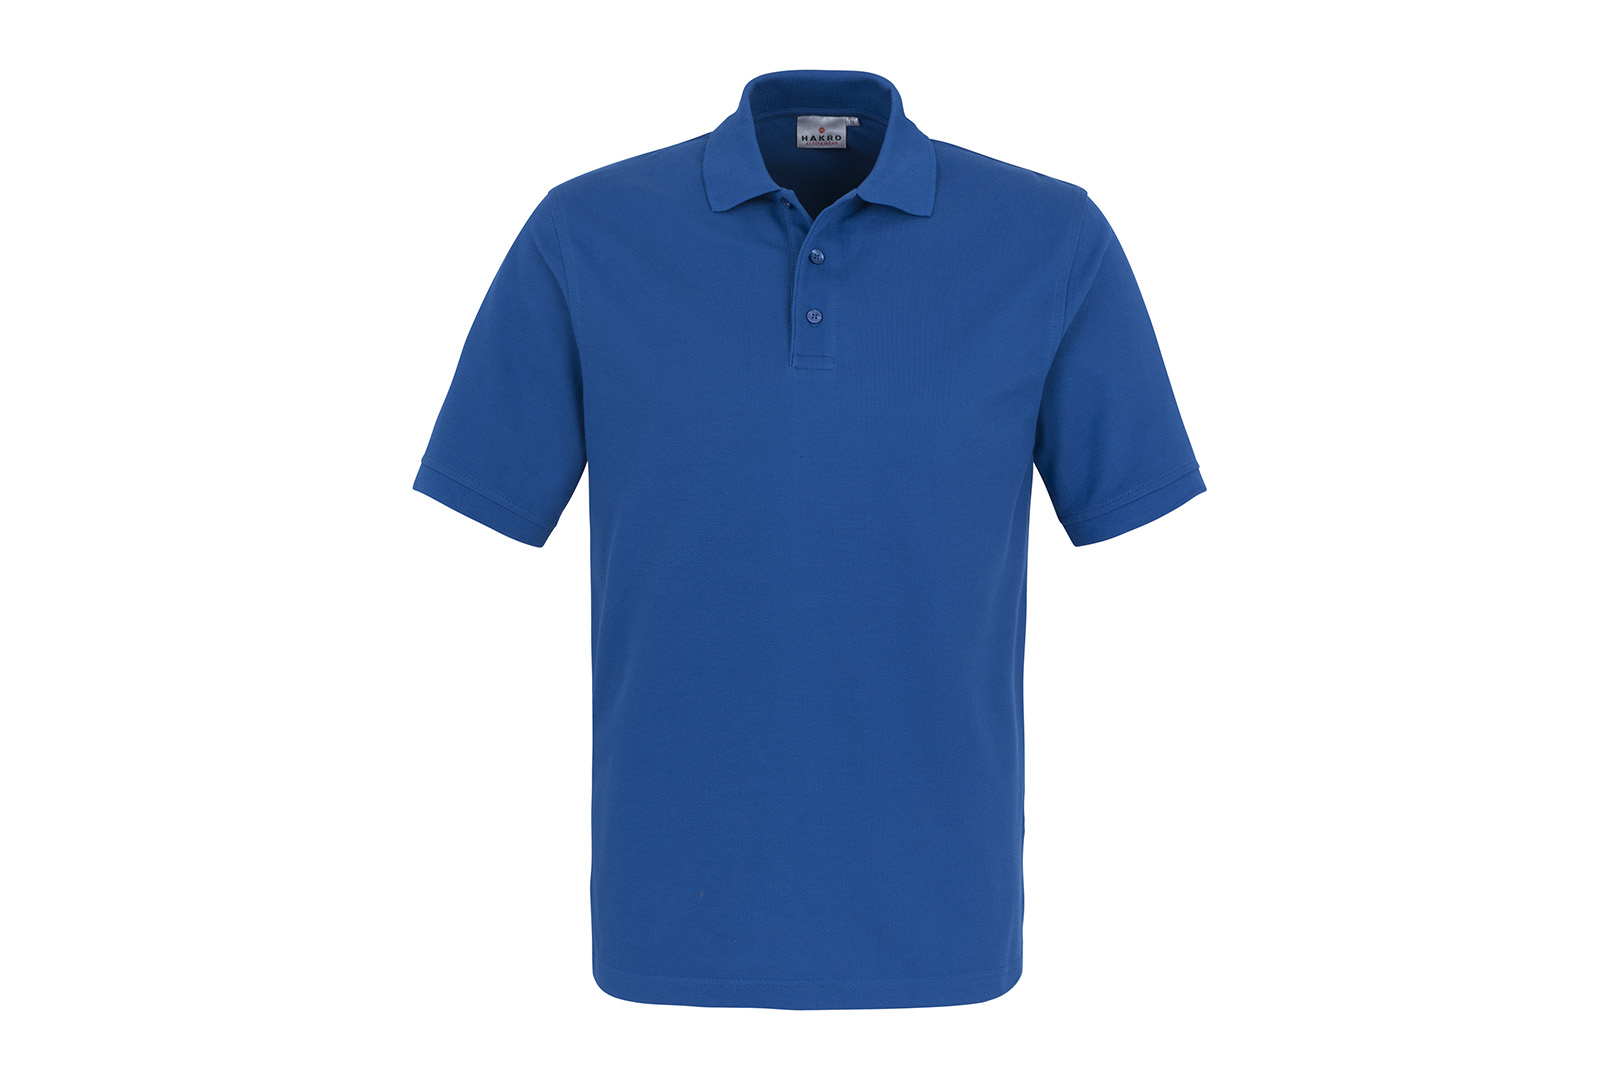
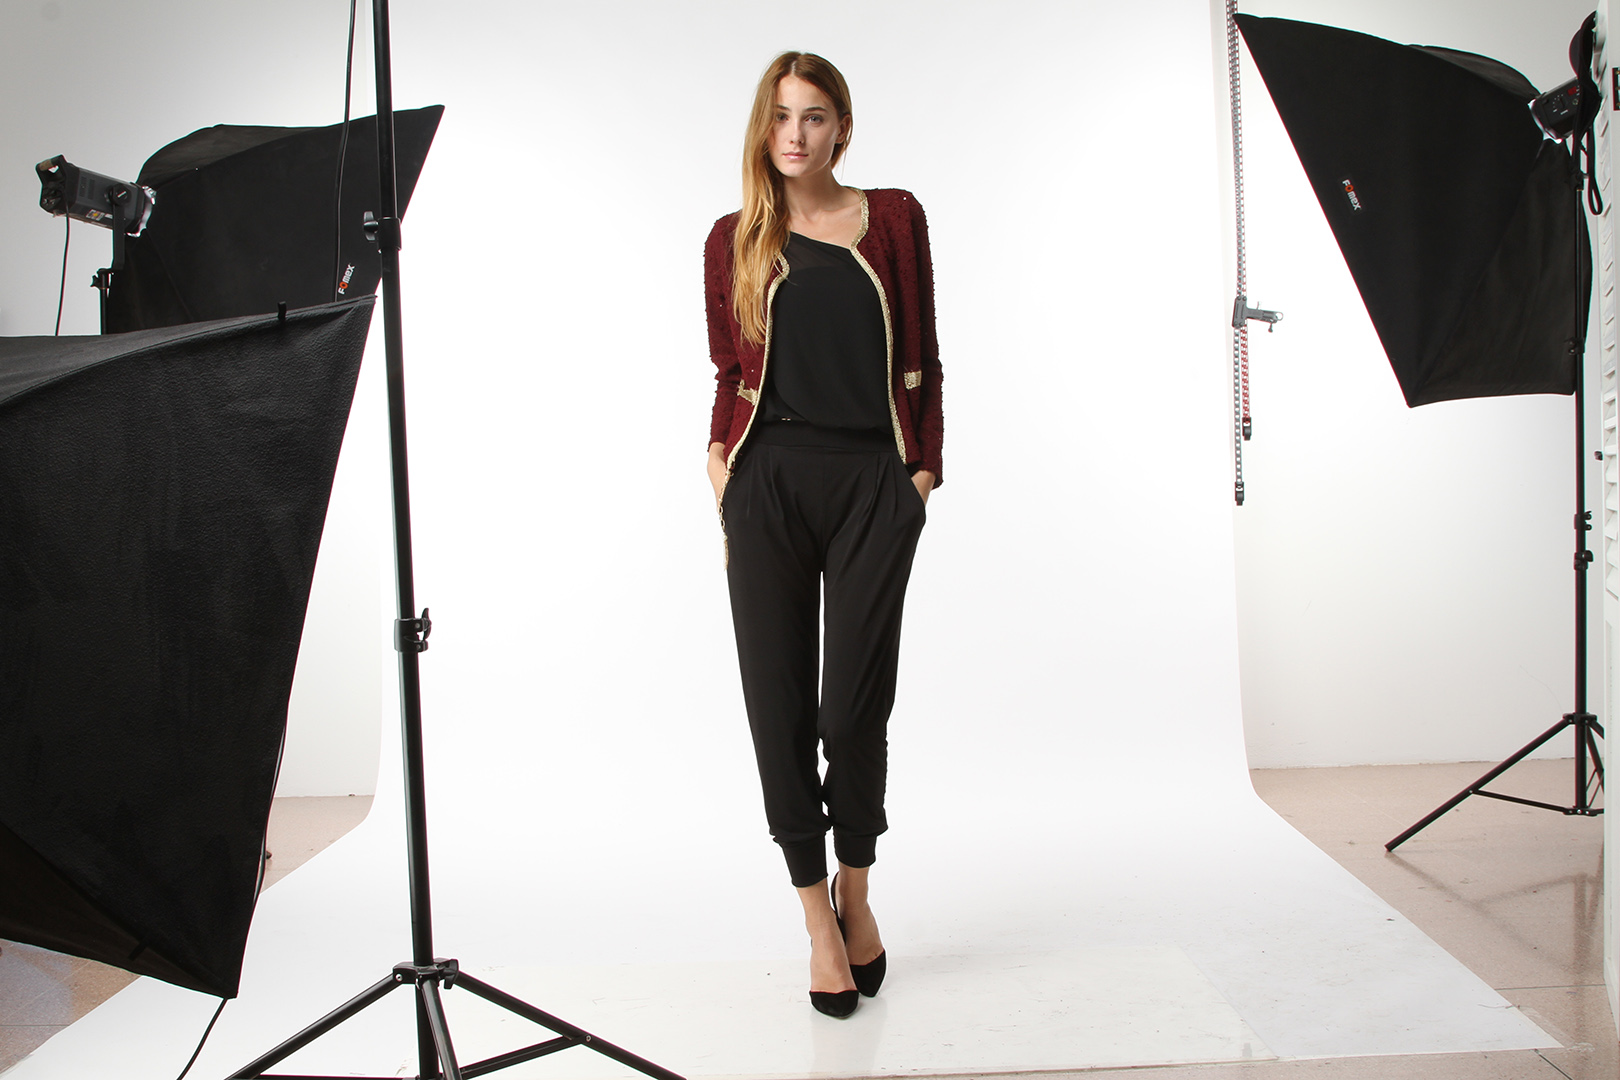
Assume for the moment that you have just concluded a picture session and are editing RAW files directly from the camera. We advise creating a single folder on your computer where you may save all of the RAW files from the shoot.

Because lighting conditions will be similar, if not identical, organizing by shoot makes logical. That means the adjustments we make will be similar, too, enabling batch processing.

https://admin.fotosolution.com/wp-admin/post.php?post=28456&action=edit

Import Image

Next, you should import the image into a folder. Below are some basic steps to help you import images.

  • Select “Import” from the menu.
  • Find the image folder using the file browser
  • “All Photos” will be checked by default
  • Click “Import” and “Adjust”
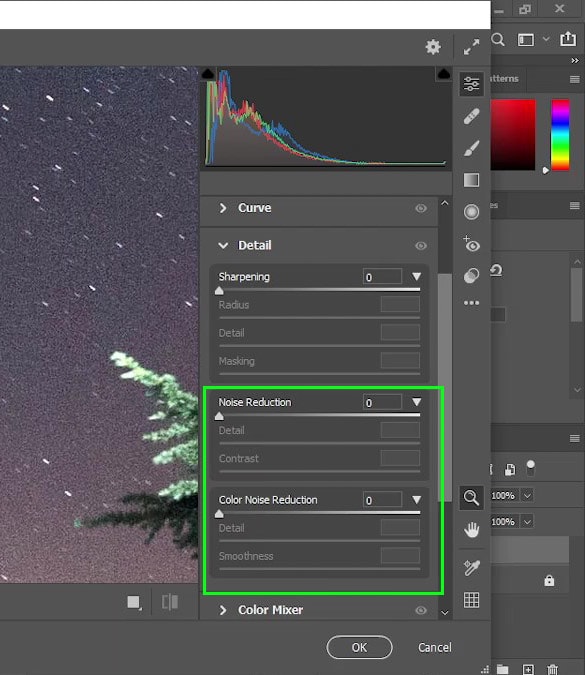
Adjust Image

After importing an image into a folder, you should choose an image from the folder. Because we’ll use this single image to perform adjustments. Then we’ll apply those adjustments to all other images. In other words, we will include

  • Choose an image from the “Library”
  • Click “Develop”
  • Expand “Basics” if not already open
  • Adjust “White Balance,” “Exposure,” “Contrast”

https://admin.fotosolution.com/wp-admin/post.php?post=28456&action=edit

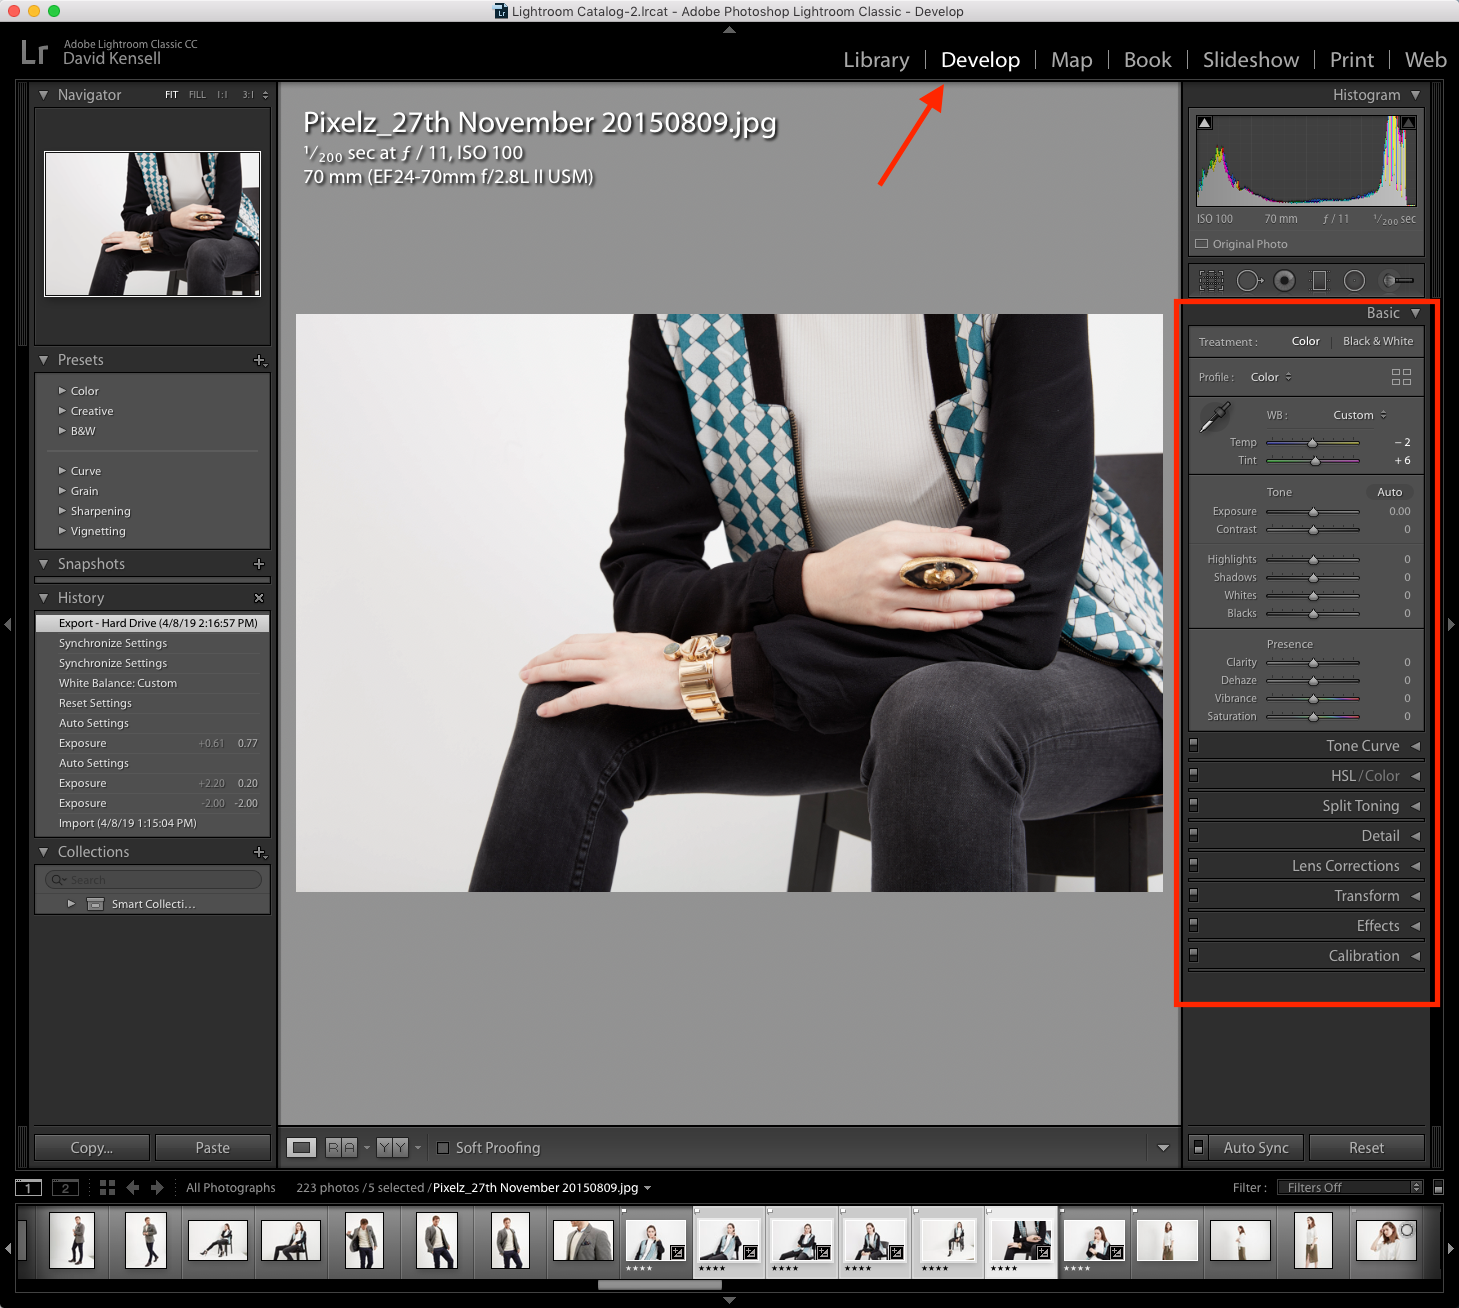
Now you need carry out 3 main steps including: White balance, Exposure and Contract tools.

White Balance

Click the dropper tool up in the top left of the “Basics” tab, and drag it over the image to a spot that should be grey. Click that spot and Lightroom will automatically white-balance your image. If you’re still not quite satisfied, let’s play about with the “Temp” and “Tint” choices until you find the perfect setting.

Exposure

Brighten or darken your image with the “Exposure” slider. Don’t feel obligated to use it just because it’s there. If the quality of your image is very well, you should not waste time adjusting.

Contrast

By lightening light mid-tones and deepening dark mid-tones, the contrast will draw attention to details. Use it to enhance minor details.

Sync Adjustment to all image

It’s time to apply those adjustments to all of your other images from the shoot:

  1. Select the rest of your images.
  2. Click the “sync” button at the bottom right of the “tools” panel.
  3. From the popup window, choose the adjustments you want to apply to the rest of your images.
  4. Click “synchronize”

Flag or Star Selects

The adjusting is finished but you still need to sort through your images to find the ones you want to use.

  • Select a photo from the filmstrip
  • Press arrow key to go to next image
  • Press “P” key to flag images you’ll use
  • Press “5” key to star hero images
  • Choose “Flagged” in the bottom right “Filter” drop down menu.
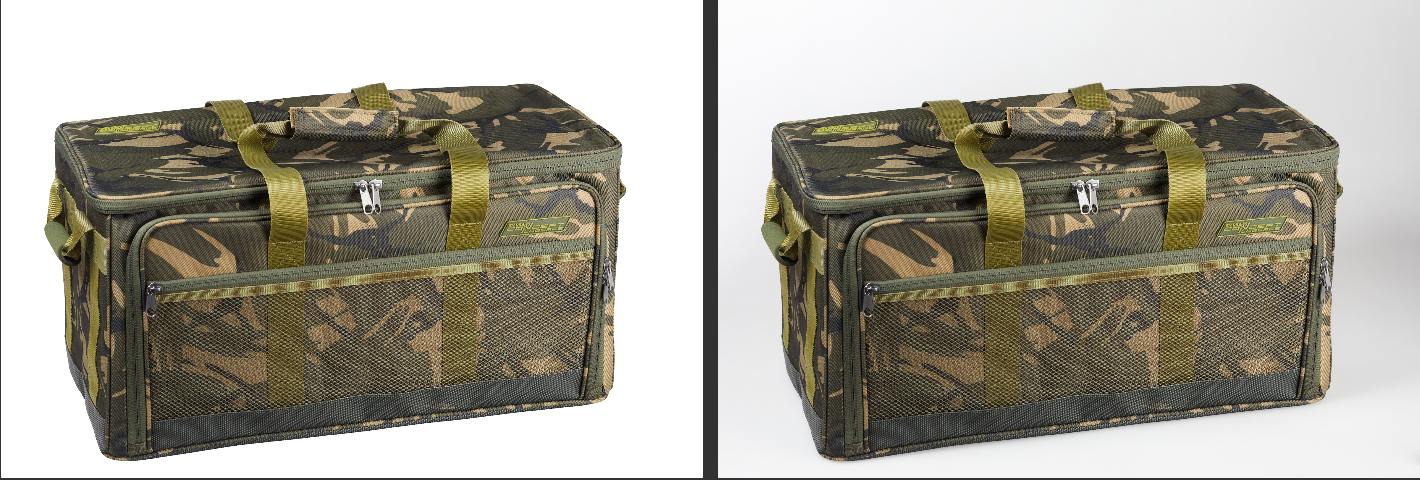
Export Image

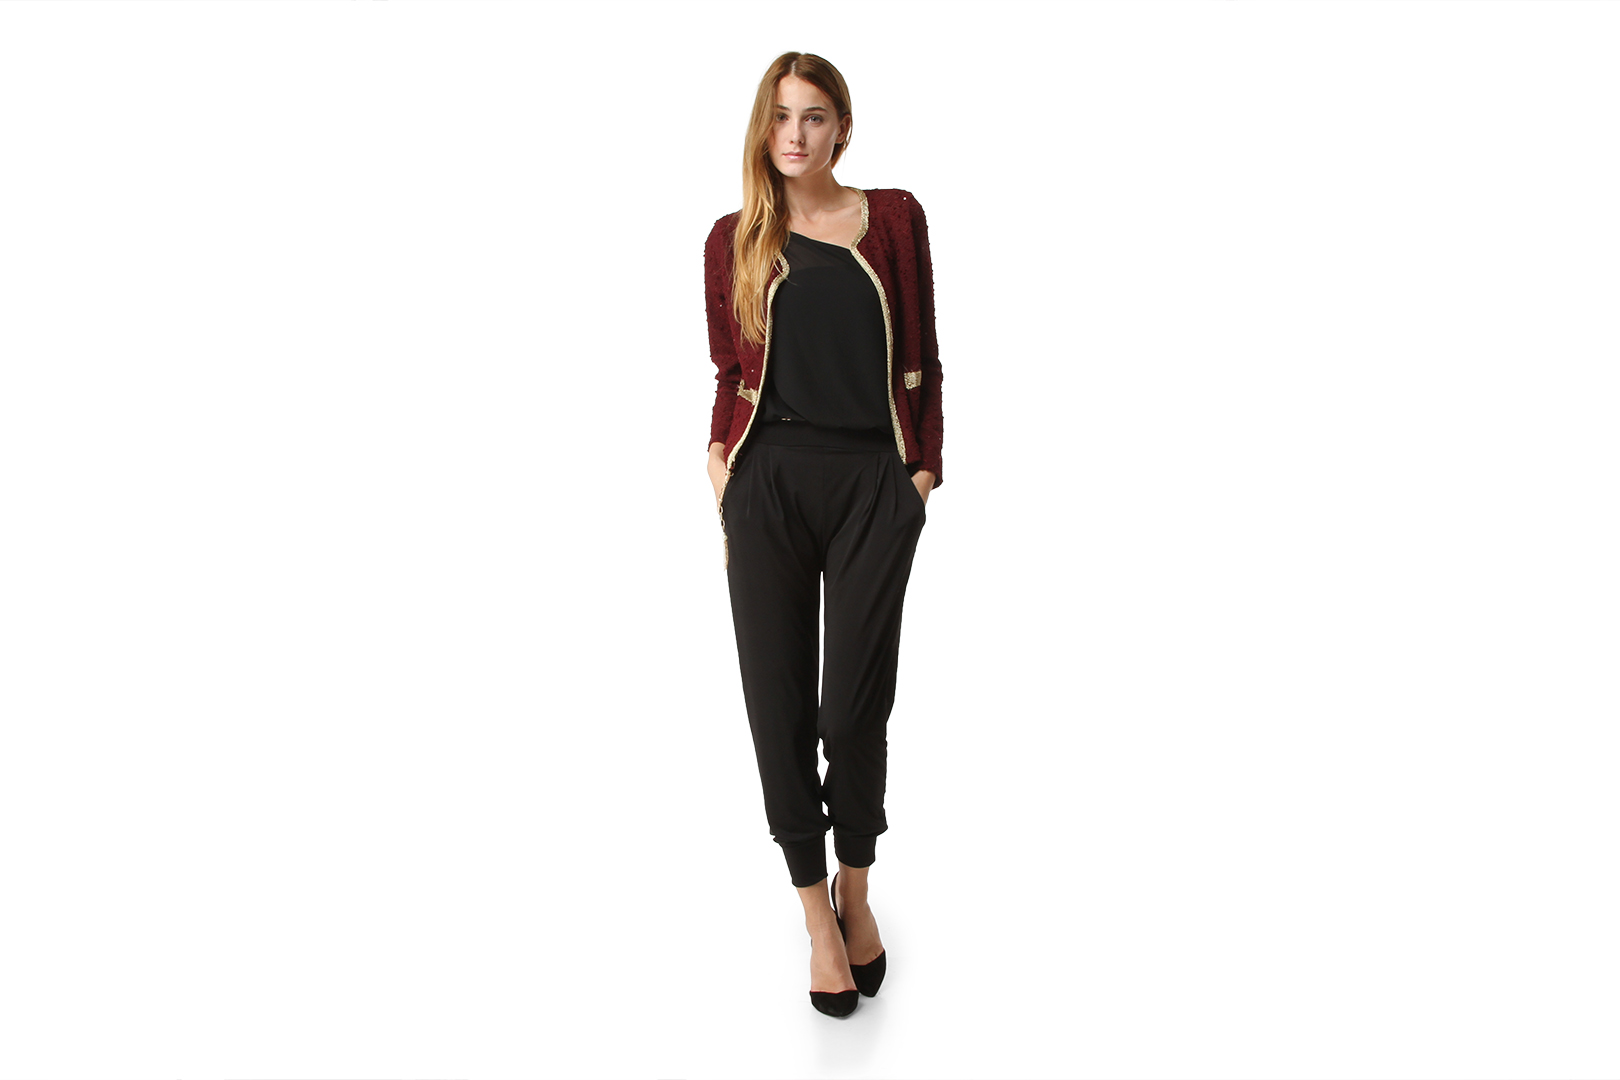
Finally, you should only export the image and save the file. Create a new folder with a descriptive name, such as “Color Corrected” or “Final,” inside the same folder as your RAW photographs. Next, you can create a naming convention for your picture files that will aid in future organization, such as style numbers.

https://admin.fotosolution.com/wp-admin/post.php?post=28456&action=edit

Depending on your workflow, you’re not going to want to continue shooting in RAW format. You might want to export your photographs as PSD or TIFF if you intend to do additional customized modifications in Photoshop. It’s JPEG time to conserve disk space, especially if you’re about to browse the web.

Here are tips to use Adobe Lightroom for product photography. The Fotosoluton’s retouching service makes it incredibly simple to get your images professionally edited, at scale, with a next morning turnaround if you don’t have the time or want to spend all day in Photoshop editing pictures. Benefit from the free trial and receive the best offers, let’s contact: sales@fotosolution.com – Mrs. Sofia Giang

If you have any opinions as well as any questions concerned about this subject, let me know your ideas in the comment below.

Categories
Tips & Tricks

How to Remove a Background in Photoshop

You don’t need to spend lots of money to add a lovely background to your shot. With a few clicks in Photoshop, you can quickly transform the background from boring to amazing. Or If you don’t have times to process them, visit the Fotosolution team and meet Sofia Giang ( sales@fotosolution.com) I will help you remove the background in Photoshop.

Remove a Background in Photoshop with the Pen Tool

The Basic Steps:

  • Open photo in Photoshop
  • Unlock the layer
  • Use a quick tool or can make a pen tool (here we use Pen Tool)
  • Click Remove Background to mask the background
  • Make any adjustments to the mask with the Brush and Refine Edge Brush tools
  • Ok

It is one of the simplest ways to remove the background of your image in Photoshop. In other words, it is the tool most advanced users prefer using when removing the background from an image. In the next section, the Fotosolution team will share how to remove the background in Photoshop with the Pen Tool

Step 1: Open the photo and unlock the layer

Open your image in the Layers panel by clicking on File-> Open and unlock the layer.

Step 2: Pick the Pen Tool

From the side menu, let’s select the Pen Tool. We’re going to apply this to get rid of the background in the picture. It’s simple to identify the Pen Tool icon.

Step 3: Draw a Path

When you have chosen the Pen Tool, you can now draw a path around the image to select it. First, zoom in to your image. Click anywhere on the edges of your subject to create your first anchor point. Please be patient as this takes some time. If you accidentally add an anchor point, you may also take it out.

Step 4: Convert Path

The next step is to convert the path you drew with the Pen Tool to a selection. Right-clicking the path in the Paths Panel will allow you to do this. Now click “ Make a selection

If you are working with a selection, you might want to increase the edge feathering because sharp edges can look unnatural, especially against a bright background.

Step 5: Click Remove Background to mask the background

Photoshop will automatically identify and create a mask to hide the backdrop from your subject. If you’re satisfied with the image, you can stop here; otherwise, you can carry on to the next stage to make any necessary edits.

Step 6: Make any adjustments to the mask with the Brush and Refine Edge Brush tools

First, let’s choose the mask icon. You can find it below the Properties header. Next, you click the Select and Mask and choose the Refine Edge Brush tool. You can use the Refine Edge Brush to soften the edges of the mask.

When you’re done making adjustments to the mask, click OK.

There are several ways you can use an image with a transparent background. And Pen Tool is one of the best choices to apply and remove background in Photoshop.

The Fotosolution team has experienced – editors who will help you process and save valuable time with the best Prices. Let’s meet Sofia Giang ( sales@fotosolution.com) to serve the best way for your product

Categories
Tips & Tricks

How to Reduce Noise in Photoshop


One of the most unexpected side effects of photography is noise, which gives your photos a low-quality appearance. It can damage an image’s sharpness and even make it hard to distinguish its original colors. Fortunately, there are many ways to remove digital noise in Photoshop. When removing noise from an image in Photoshop, you have to be careful. It is so that you can avoid applying too many effects that could distort the image or aggravate noise. Today, the Fotosolution team will show the reader how to reduce noise and make a picture clearer in Photoshop via Camera Raw.

What is the Noise?

Noise is an unwelcome interruption that sounds like a “hiss” in the background in audio signals such as music, podcasts, or transmissions. You don’t want to hear that at all. In the same way, noise in photography refers to visual distortions that appear as minute-colored specks, dots, or pixels in your image, giving the photos a grainy appearance. One of the main reasons for noise in photographs is a high ISO.

With each new generation of camera bodies, ISO performance gets better. You might be able to shoot at ISO 800, 1600, 2500, or even 5000 depending on your camera before you start to see the grain in your pictures. Even then, you may only see it after zooming into the photo. And not all noise is undesirable. If you want your image to look vintage, grain is fine. The majority of black and white photographs also look excellent with some grain. However, excessive digital noise detracts the viewer from the subject and gives the image a fuzzy, blurry appearance. There are a couple of different types of noise.

How to Reduce Noise in Photoshop

Type of Digital Noise

There are two types of digital noise: luminance and color noise.

Luminance Noise

The most typical sort of digital noise is luminance noise. In your image, this form of noise appears as sand grains. Some pixels appear brighter than others when you zoom in. Luminance noise affects the brightness of pixels, but it doesn’t harm their original colors.

Color Noise

Chrominance noise and chromatic aberration are other names for color noise. Color noise is what you see when isolated pixels stand out with a color like red or green.

To prevent this problem, you can take some steps, such as minimizing your ISO while taking pictures. When you aren’t given the option to do that, Photoshop will thankfully save the day.

How to Reduce Noise in Photoshop via Camera Raw

The Camera Raw Filter is one option to remove noise from your images. Now we will start

  • Opening the desired image, duplicating it, and making it a smart object are the first steps in the editing process.
  • Go up to Filter > Adobe Camera Raw filter.

How to Reduce Noise in Photoshop

  • Set the zoom to 100%
  • Click ‘Detail’ on the right side of the panel.
  • Move the ‘noise reduction slider to the right until you see the noise is gone. Don’t increase it too much because it might bring noise back. Moving the ‘contrast’ slider to the right brings the contrast back because losing contrast is another drawback of reducing noise.
  • Move on to the color noise reduction section. The ‘color noise reduction’ slider allows you to reduce the color noise itself. The “detail slider” restores the features that are lost when the color noise is removed. On the other hand, the “smoothness” slider is an addition to the “color noise reduction” slider.

How to Reduce Noise in Photoshop

Using the noise tools in the Adobe Camera Raw filter to remove the noise from your image is easy in Camera Raw. With this tool, you can reduce luminance noise and color noise. If you need any help, please contact with Fotosolution team via: sales@fotosolution.com – Mrs. Sofia Giang. Our team will help you process and send the best quality images for you. Thank you so much!

Categories
Design

6 Great Kitchen Staging Ideas To Impress Buyer


The Kitchen is the heart of a home or in other words, it’s the gathering place where everyone joins together in food and conversation. Therefore, to get the maximum offers when selling your home make sure the kitchen is right on target with trends to attract the highest bids. So, what should you think about kitchen staging ideas? To help you solve this issue, we will get some advice on the most popular kitchen design ideas and how to achieve them. Here are some great and brilliant kitchen staging ideas to impress every buyer.

Simple & White Kitchen

A kitchen with a color scheme dominated by white cabinets is a safe pick when it comes to kitchen design since it is simple, clean, and airy. White worktops and cabinets are neutral, allowing the room’s design components to stand out. When selecting light fixtures, back-splash tile, flooring, appliances, and window treatments for your kitchen, let’s consider choosing pops of color to prevent the space from being clinical or blinding.

6 Great Kitchen Staging Ideas To Impress Buyer

Add High-End Furniture Pieces and Decor

If a realtor needs to attract high-end prospects, they can enhance the luxury vibe with well-made kitchen staging. For that, our editors add numerous luxury components like high-end wine storage, wine cabinets, and even works of art by renowned artists. A staged kitchen will certainly help in targeting high-end prospects who seek luxurious interior designs from real estate listings.

6 Great Kitchen Staging Ideas To Impress Buyer

Connect with Contrasting Materials

One of the most simple and most efficient home staging ideas for the kitchen is to use highly contrasting materials in the same space. On the one hand, it is beneficial to visually divide the dining area from the cooking area. On the other, it adds depth and modern chic to the interior. Combining dark wood panels with light marble counters is one of the in-vogue design trends. To give the space additional intrigue, our editors frequently pair mirrored surfaces with rough textures.

Add some color and elegance

A few simple pieces of decor can provide some style and contrast, making it feel inviting. Here are a few quick ideas for kitchen counter staging:

  • Place a live plant or a vase of flowers on the counter.
  • Place a tea set, glass bottles filled with herbs, etc., on a tray.
  • Display colorful fruit in a pretty bowl or basket.
  • Place a book stand with an open cookbook set in it
  • Ensure the proper task lighting at your kitchen workstation

6 Great Kitchen Staging Ideas To Impress Buyer

Update the lighting fixtures

If the home has outdated kitchen lighting, such as fluorescent lights, replace them with more elegant or modern options. Thus, remove the old light fixtures and get some new ones. This change can instantly make the kitchen look new and modern. Avoid using lights that give out a yellow hue in the area. Choosing daylight-style lighting to give the room a fresh, spacious appearance.

Set the kitchen island or bar

An image that your kitchen has an island or a bar area with bar stools, you can put out place settings for each seat. This will make the space feel more inviting. Using a colorful placement or charger for the setting and white dishes on top, you can also use this chance to add a splash of color to the room. It doesn’t need to be expensive to look stylish.

6 Great Kitchen Staging Ideas To Impress Buyer

It takes time and money to stage a kitchen physically with real furniture and accessories. Fotosolution offers virtual kitchen staging for $ 2x per image if you’re seeking a less time-consuming and more affordable option. You won’t need to physically arrange the kitchen’s furnishings and decor if you use and choose virtual staging services. Our interior designers can transform the interiors and get any kitchen design you want. How easy is that? Contact with Fotosolution team right now: Sales@fotosolution.com to get more ideas.

Categories
Support

Color Correction in Real Estate Photo Editing


Real estate photo editing is necessary and higher in demand these days. Because they are so noticeable, color correction in your real estate photographs is necessary. Color correction in Photoshop impacts the look and feel of the photos and makes them more appealing to the viewer’s eyes. Photos taken directly from a digital camera are not always perfect. When you use Photoshop more frequently, you can discover some recurring problems with photographs that need to be fixed. For instance, some pictures might be too light while others might be too dark. Here comes the role of real estate image editing, especially the use of color correction to make your photos look amazing.

https://admin.fotosolution.com/color-correction-in-Photoshop
Color Correction in Real Estate Photo Editing

Let’s go through a few crucial real estate image editing techniques, like color correction. The post-processing process depends on it. It is important to use the strategy while maintaining the buyer’s interest. Making the images give victor a feeling of actually visiting the site and help him make his buying decision. Color correction should be done before any further editing on real estate photos. For the image to be beautiful and realistic, it needs a strong foundation. Pictures should be captivating to viewers visually.

  • Every color has its own meaning.
  • Sales are correlated and are impacted
  • Has the ability to enhance visual awareness of life
  • Achieve realistic visibility

Color Correction in Photoshop

This most important photo-editing method has the power to make or break your image. Any photograph can profit from this difference, even if a pro takes it. You can make the necessary adjustments if your image needs to feel darker. Similarly, if you want to add more color to your photos. Make them brighter and more saturated. This method aids in bringing the image up close to the property.

What are the special methods used to make this technique successful?

This correction approach will have several methods depending on the program utilized, including illumination and lighting in addition to color correction.

  1. Exposure is the amount of lighting that enters the camera during the photo shoot. It might vary from area to area. Photo editing helps in balancing this by combining layers through the stitching process.
  2. Lights generate unwanted darkness and shadows. These shadows can be eliminated with the use of mid-tone changes. Midtones are the grey zones, and altering these regions enhances the aesthetic of the image.
  3. Color and brightness impact the way light is reflected on them. The neutrality and color balancing is controlled by the white balance.
https://admin.fotosolution.com/?p=27625&preview=true
Color Correction in Photoshop

Criteria to find the best Photo Editing Services

  • Please find out the rates at which they provide their services
  • Know more about the company
  • Understand their project capacity
  • Quality should be kept at the forefront of the decision

Finally, outsource your requirements to Fotosolution, we will be more than happy to assist you with the correction process. We have a team of expert professionals highly skilled in using advanced tools and enhancing the appeal of the photos

Fotosolution team – is the best photo editing company – hope to bring more value to your production. Finally, if you need any further information, please do not hesitate to contact us. We are looking forward to hearing from you soon.

Categories
Tips & Tricks

How to edit Twilight Photos For Real Estate


Twilight photos for real estate can make an ordinary home look memorable. Looking for a practical way to increase sales and distinguish your property? Twilight Real Estate Photography is an affordable method that is incredibly attractive to visitors. First, virtual Dusk service is a process that changes a daylight photographs into dusk ones by using Photoshop techniques. Particularly, twilight or Dusk photo is the most attractive moment of the day and that professional real estate photographers can capture. However, taking sharp shots during twilight or dusk hours is an challenging task, especially for a new photographer. If ambient lighting are too weak that makes the images look dim and grainy. And the reason why we need to have professional photos editors. So, How to use Photoshop to adjust a day to dusk image for real estate photography?. Here we will discuss how to edit Twilight photos for real estate.

[twentytwenty]

How to edit Twilight Photos For Real Estate

How to edit Twilight Photos For Real Estate

[/twentytwenty]

How to Edit A Twilight Photography

  • Remove daylight shadow
  • Dusk Sky Replacement
  • Turn on Lighting
  • White Balancing
  • Image Sharpening
  • Vertical & Horizontal Straightening
  • Lens Distortion Removal
  • Brightness & Contrast Adjustment
  • Lawn Enhancement – Repair or Replace
  • Ocean/River Water Enhancement
  • Remove Pool Cleaners from Water ( if clients have request)
  • Tone Adjustment
  • TV Screen Replacement ( if clients have request)
  • Dust Spot Removal
  • Flash Reflection Removal
  • Add Fire to Fireplaces ( if clients have request)
  • HDR Bracketing with Indoor Window Replacement
  • Remove Photographer’s Reflection

Here is the guide of conversion day to night photo in Photoshop:

Fotosolution – Virtual Dusk photos services

Fotosolution have successfully provided real estate image editing and image post processing services to numerous real estate agencies, advertisers, and real estate photographers. To have amazing virtual dusk photos services of Fotosolution, you can receive the following benefits:

  • You can save your time with the short turnaround time thank to the benefit of time zone ( from 12-24 hours).
  • We are available 24/7 to find a solution for your photos as quickly as possible.
  • Your photos will not be published to any third party without your permission.
  • We offer 3 photos edited for trial without any fee
  • We use the latest image editing software such as Adobe Illustrator, Adobe Photoshop CS6, CoreIDraw to give you the most attractive photos

[twentytwenty]

How to edit Twilight Photos For Real Estate

How to edit Twilight Photos For Real Estate

[/twentytwenty]

How to order Twilight photos for real estate from Fotosolution

As I have shown, you can order twilight photos from Fotosolution with 2 ways belows:

In the first place: Contact directly to my email: sales@fotosolution.com  Or email: contact@fotosolution.com 

In the second place: You can send us the inputs via our website with your specific instructions

Simply, you just send Raw image with request ( sky style you like if you have), the easier and faster the editors can get your task done.

Shortly, it’s sharing document we would like to send to reader. Especially, if you need any helps, please let me know, Fotosolution team are ready to support for all your project. Finally, we will wait for your news!.

Categories
Tips & Tricks

6 Popular Interior Designs For Virtual Staging


It can be difficult to keep up with all the styles and trends that come and go in the broad and ever-evolving area of interior design. Choosing an interior design style that works for the project and satisfies the demands of the client is crucial whether staging a home or making a virtual house tour. Here are six of the most popular interior design for virtual staging to give you some inspiration.

Modern Style

Which interiors of houses can be called modern? Typically, they have simple, natural color palettes with clean, clear lines. These homes are frequently furnished with glass, metal, and steel accessories, and the furniture chosen for them is marked by its simplicity and contemporary appearance. Also, the Modern interior design style is the best option if you prefer minimalism, angular shapes, and neutral hues with a touch of warmth.

Below are some sample of modern style for virtual staging home

6 Popular Interior Designs For Virtual Staging

6 Popular Interior Designs For Virtual Staging

Contemporary Style

The contemporary art movement of the middle of the 20th century is where the contemporary style originated. Modern and contemporary styles are not the same as many people think they are. Because in fact, contemporary design rides on neutral colors, simplicity, and sleekness. Especially, in contrast to modern style, current style is always evolving to reflect the times. As an alternative, it is a dynamic style that reflects current events.

Below we will detail: color, lighting, furniture, materials, etc.. to help us identify this style

6 Popular Interior Designs For Virtual Staging

6 Popular Interior Designs For Virtual Staging

Color

Neutral hues like white, black, and gray are frequently employed in contemporary design. At the same time, we can still take advantage of other colors as bold accents in the design.

Lighting

Light is also a crucial element in contemporary style. Different from modern style, this style has a very clever combination of natural light and artificial light to create a unique building.

Interior furniture

Furniture with straight lines is preferred in contemporary design. But unlike modern design, where only square lines are used, this style prefers curves.

Materials

Metals like chrome, nickel, or stainless steel are frequently used in contemporary interior design. Additionally, it’s common to see contemporary flats with rough walls, cement, concrete, etc.
6 Popular Interior Designs For Virtual Staging

Traditional Style

Traditional interiors have been appreciated by centuries and are still considered incredibly popular. For people who enjoy houses with depth and layers, traditional interior design ideas are the best choice. Traditional interior design style includes classic details, expensive fabric, and dark wood home decor. Ornately detailed furniture, sumptuous upholstery like silk, linen, and velvet, and popular patterns such as stripes, floral, and plaids rule them. In additional, figurines, plants, books, globes, vases, candle stands, plates and platters, mirrors are all typical in traditional design.

Here are the sample of traditional style

Scandinavian Interior Design Style

To read and find out the Scandinavian interior design style, first you have to know what’s the Scandinavian style?. Scandinavian design combines three components: beauty, minimalism and practicality. In the mid-20th century, this particular fashion emerged, becoming popular in countries such as Sweden, Norway, Denmark, Finland and eventually the whole world. It is because of the between of warmth and ventilation, creating a comfortable living area, this style is currently very popular.

For the color, warm wood tones and strong contrast are both used in color schemes. Scandinavian interior design is renowned for its clean color schemes, inviting accents, and eye-catching modern furniture. Scandinavian interior design favors sepia and wood tones because they evoke a sense of coziness without the use of vibrant hues. In additional, the cozy and comfortable are the excellent selections when designing a Scandinavian room. So, if you like a cozy feeling, let’s choose Scandinavian style for your house.

For example

Bohemian Style

Bohemian style is one of the new style that many young people choose to design their house. These designs can incorporate historical accents with contemporary furnishings, as well as opulent accents with scuffed blankets and carpets. Since you can enjoy anything till it appeals to you and replace it when you become bored of it, this approach is ideal.

For example

Transitional Style

Transitional interior design is one of the most well-liked styles that combines the greatest features of traditional and modern decor. Despite some surprising additions, these areas appear balanced and airy. Such homes provide a serene environment with a dominance of neutral colors that makes one feel at ease.    Let’s think about how the sandy tones of the textured carpet and patterned accent wall in this bedroom seem to wrap the bed gently. The bedding is made of tactile linen in a darker organic tone and crisp white cotton, which adds depth to the room’s color scheme. Accent pillows in denim blue and aquatic sea green also give a subtle touch of organic contrast.

Finally, it’s important for any well-realized transitional style home to ensure every element stand on its own while together create a rich assortment of goods that work together fluently.

interior design for virtual staging

Visit Fotosolution, you will get:

Virtual staging is one of main services of Fotosolution team and we always try to process them best and bring to the greatest thing for all clients. The 3D experts at Fotosolution apply their diverse interior and exterior design concepts to every project. We specialize in staging, furniture replacement, and remodeling in 3D architectural visualization. Our works demonstrate craftsmanship in everything from virtual renovation and remodeling to empty room staging. The distinguishing characteristics that make us stand out from the competition include creative manipulation, meticulous attention to detail, and professionalism.

Customers have the option of independently selecting digital models for our post-production or relying on our knowledge to put their dream home’s concepts on paper.

Having amazing virtual staging photos services of Fotosolution, you can receive the following benefits

  • You can save your time with the short turnaround time thank to the benefit of time zone ( from 12-24 hours).
  • We are available 24/7 to find a solution for your photos as quickly as possible.
  • We offer 3 photos edited for trial without any fee

How To Order Virtual Staging From Fotosolution

To order interior design for virtual staging, you can

1: Contact directly to my email: sales@fotosolution.com  Or email: contact@fotosolution.com 

2: You can send us the inputs via our website with your specific instructions

Simply, You just send Raw empty room for us, the more your description for rooms is clear, the easier and faster the editors can get your task done. For example, let’s us know: your style you want or the name of room, our editors will process them better. Finally, thank you so much.

It’s sharing document we would like to send to reader. Let’s choose one favorite style you want and if you need any helps, please let me know, Fotosolution team are ready to support for all your project. We will wait for your news!