Categories
Tips & Tricks

Tips To Create Perfect Apparel Product Photography

What do you do when you go to shopping or purchase product? Look at the outfit’s colour, feel its fabric, checkout its prints and styles and then try out if it fits you? But if your customers visit your online store, they will not be able to do all this, so what will they do before buying your product. The first important factors what your customers will attract is product image or apparel product photography. High quality product photography is essential for apparel ecommerce. For many customers, your product images will determine whether or not they buy your product?.

One effective technique is by posting attractive apparel photographs on your online store. From product photography of the apparel to removing the background from the apparel photograph, there are loads of things you should do to enhance your quality product photograph.

You can shoot photographs flat or drape them over a mannequin to give a 3D effect. Many online apparel stores display their outfits flat. While this look is great for tees, baby outfits and lingerie, this technique may not be very effective when you’re displaying dresses or gowns. That’s reason why your products should look their absolute best in your images. It’s an unfortunate fact of life that clothing can become wrinkled, creased, and begin to look worn from storage and transport. Clothing samples face a particularly rough time of it, as they often cover a lot of miles and may not have been perfectly constructed to begin with. Besides, you can always use post processing techniques to remove the creases and the other elements, for best results remove those annoying creases even before you photograph the clothing product.

Choose accordant garment to be photographed. It is a crucial starting point for photographing apparel, yet many photographers skip this step and rely on Photoshop to fix wrinkles, stains, and other visible defects. Don’t do that. Photoshop isn’t magic: it takes time and expertise to master advanced editing techniques, and excessive editing risks compromising image quality.

Try to capture your garment in a state as close to perfect as possible and use Photoshop only to add final touches and color correction. Avoid harsh backlighting and other setups that cast shadows on the surface of the object. Keep the lights on the same side of the object as your camera, or slightly off to one side. In addion, during photograph accordant garment, we should pay attention to the light conditions. Flash or bright light can create a glare on the product, and the original colour of the apparel will not be clearly visible. Use soft boxes and umbrellas to diffuse light and soften it. Set the umbrella at around 45 degrees, so the light falls on the shoulder and spreads down the model enhancing the aspects of the apparel.

fotosolution-Tips-To-Create-Perfect-Apparel-Product-Photography-03


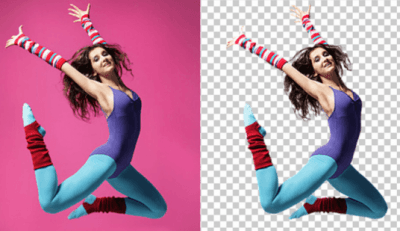
Now that you’ve got the outfit ready and the lighting setup, check out the background. Ensure the background is plain and clear, so your outfit is clearly displayed. In our opinion, you should use a white background, which is a recommended practice and even required by some marketplaces. You can take it a step further and completely eliminate possible distractions by removing the background. Removing the background will allow you more flexibility in web design and modestly decrease file size.

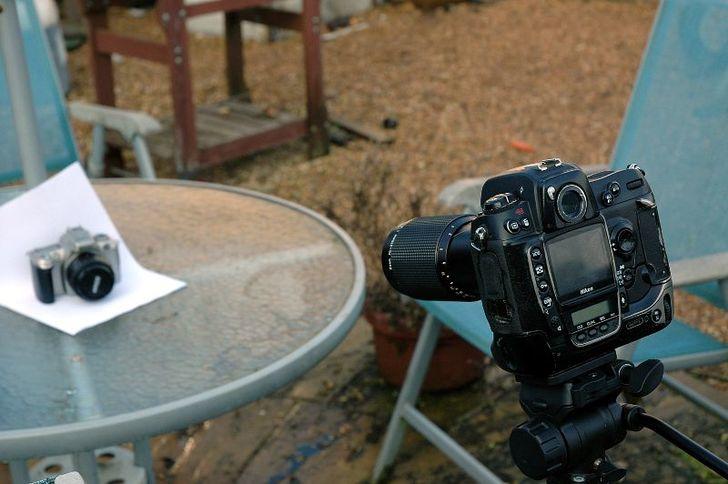
Preferably use a wide angle lens, which will allow you to cover more space. Set the camera high using a tripod for best results. The stability will eliminate camera shake and ensure your shots are consistent, while also freeing you to use your hands on other tasks. You don’t need to spend a lot of money on a tripod, but it’s essential that you use one. Morever, you should shoot the outfit from multiple angles, so you can show different views of the product on the webpage. Alternatively, while post processing, these multiple views can be stitched together to create a 360 degree view, an option that most online stores are going for now. Customers will be able to trust their impressions of the product if it’s backed up in multiple photographs from multiple angles.

After you’ve shot as many pictures of the clothing product you want, it’s time to place it under the editing scanner.This photo editing tool offers plenty of options to edit photographs before you post them online.

Color is an essential feature of post processing. careful attention to white balance, some colors—like neons, reds, and pinks—are difficult to photograph correctly in camera and often need to be tweaked in Photoshop. Let’s ensure that the colors of your garments are accurate. The bottom line is that you want the customer to see exactly what they will receive in the mail should they order your product. There are a number of ways to tweak colors, so get to know Photoshop’s offerings and choose your favorite tool. After you have fixed the colors, make sure to convert your images into SRGB format to make sure that different browsers, computer screens, and websites won’t change the accurate colors that you worked so hard to create for your customers.

Images have to be resized before they’re posted on the website. You can blow up the picture or reduce its size to create a thumbnail image. If you’re preparing a product catalog, then all the images should be cropped to the same size. Each ecommerce site has its own clothing optimal image size. If you’re planning to showcase your apparels on these marketplaces, then you should ensure that the apparel product image meets those specifications.

Mannequin or invisible man effect is another technique that a lot of online stores are using to display apparel. When you photograph clothing, you can use a mannequin or choose  a model who wear accordant product and help your product become more prominent.

Good apparel photographs will give your online store customer a great feel of the apparel, so they will be convinced of the quality and apparel style. Attract more customers to your online outlet with effective apparel photography and image editing. These some simple guide will get you well on your way to creating professional and consistent images that really make an impression with prospective customers. Hope that they will be useful for you.

Thanks for watching!.

Categories
Support Tips & Tricks

Learn How To Remove Background From Images

You know what one of the most important photo design is?. When you shot product photos, you want to upload it on your online shopping or your personality pages, you need to ensure that the quality of images is completely good especially background removal. As we know when you are trying to shot something , some unwanted elements may be present in the background you’re using . Sometimes, the images may have reflections or shadows that you don’t want. That’s  reason why you should remove the background to enhance its quality. Also a clear background will highlight the details of your image. So, wondering how to remove background from images? Looking to cut out the background from an image, but aren’t quite sure how to do it? Well, no matter if you have Photoshop or not, you’ve come to the right place. Below is some guide what help you learn about background removal.

How To Remove Background From Images

Using Photoshop Elements 12

Some of the tools using photoshop element 12 are background eraser tool, magnetic lasso, selection brush, and magnetic eraser tool.  You can use one of them to remove background from images. Firstly,  you will open the image in Photoshop, create a duplicate layer of the background to be on the safe side. After, you use the “Layers” panel to select the layer within which you wish to erase the background. Then select the Background Eraser Tool from the Toolbox and Tool Options Bar. You can use “Brush Settings” button in the Tool Options Bar to set your brush tip options as needed. In the Tool Options Bar, you can set the “Limits:” option to the preferred setting: “Discontiguous,” which erases the sampled color anywhere it appears within the brush, or “Contiguous,” which erases areas that contain the sampled color and are connected.

For the “Tolerance” setting in the Tool Options Bar, set a lower number to limit the erased color to only pixels similar to the selected ones, or a higher number to erase a broader range of similar colors. Once you have the settings on this tool set as needed, just click and drag in the image or layer to remove the background pixels.

Remove Background from Pictures using Corel Photo-Paint

Another photo editing software you can use to remove background from your product images is Corel Photo-Paint 9. You can use one of four tools of Corel Photo – Paint 9 for background removal, including: transparent color selection tool, path tool, channel mask,  scissors tool.

Transparent Color Selection Tool

It is similar to the background eraser tool found on Photoshop. This tool is very easy to use. The transparent color selection tool samples a color and replaces it with transparency anywhere it appears in your image. It differs from Photoshop’s background eraser in that you need only click once and the color is removed everywhere in the image. You do not need to click and drag with the tool, but you can click multiple times to remove several colors. When the transparent color selection tool is active, you can adjust the tool options from the property bar. In addition, you can use the transparent background image when you’re uploading product photos on to your online store. On the other hand, you can also replace the transparent background with another custom background of your choice.

Path Tool

Path Tool is Corel’s response to Photoshop’s pen tool. You can use this tool to manually trace the product’s outline to clip it out of the background.

Channel Mask

This background removal technique can be used with other methods for refined results. Before you use this technique to remove backgrounds from the picture, you should breakup the image into different color channels. You can easily do it using the split channels to RGB option available on the menu. The image is split into 3 color channels – red, blue and green. Use the channel that contains the highest details as the image mask to remove the background.

Scissors Tool

Like as the magnetic lasso tool on Photoshop, the scissors tool help you cut out the product image from the background. This technique will prove to be more effective, if the product photo has a regular outline. If you’re not very experienced in using either of the photo editing software, then you can rely on online background removal tools.

Combinations of these tools and techniques already offer users a wide range of easy, precise, and serviceable ways to remove backgrounds and isolate objects. You can use all upper tools to create perfect product photography. Now, let’s get started.

Check the tutorial video to have amazing experiences!

Thanks for watching!.