Sometimes you happen to come across a special place that looks beautiful but do you know what would you look like at night. Normally, photographers always shoot great pictures with brilliant inspiration source by natural light. In other way, they take the advantage of daylight to sketch their project. Let’s try to change and shoot your images at night.

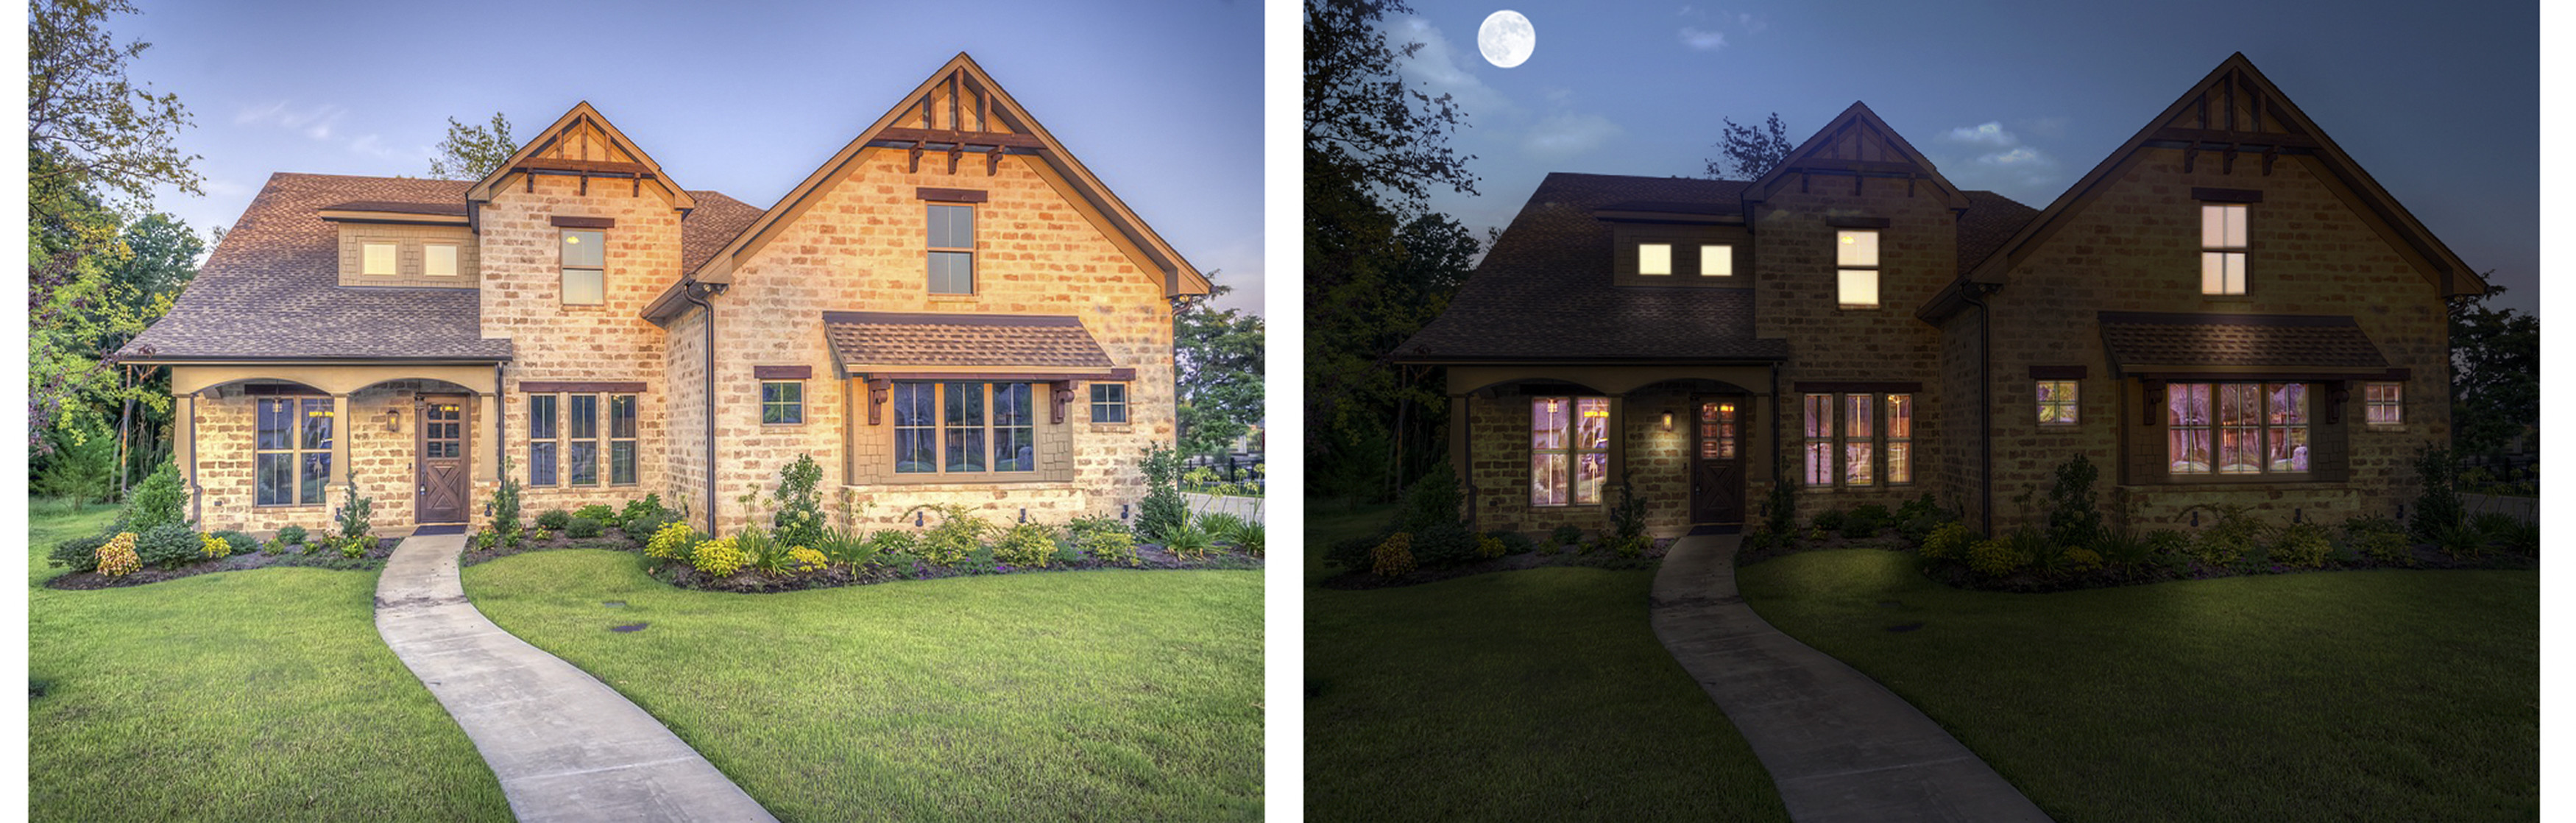
Below are we will show how to turn average daytime shot into an impressive nighttime one using Photoshop tutorial.
Step 1: Create a Curves adjustment layer.
First, choose one images from bracketed photos to turn day into night in Photoshop. Let’s darken the image with curves. Add a Curves adjustment layer by pressing Layer->New Adjustment layer->Curves and adjust the sliders. Then, you need to drag the curve down darkens the image.

Using Curves tool will allow you to adjust the relative levels of these points to create a cooler light.
Step 2: Create new layer
After creating Curves adjustment layer, let’s create new layer by click

Ctrl->Shift-> Alt->N and fill image with black or dark. Press D for default color and Alt->Backspace to fill the layer with the foreground color. You can custom the appropriate level of opacity. According to experiences, you can set up the opacity of the layer from 44% to 50%. This will make your image darker.
Step 3: Setting up Hue and Saturation
At night the colors are more desaturated compared to daylight. Hue or Saturation Adjustment Layer will help you do this. Now, let’s create Hue/Saturation adjustment layer by pressing Layer->New Adjustment layer->Hue/Saturation. Then, you need to drag the Saturation layer to the right to decrease the saturation and after that adjust the level of opacity. One useful advice for beginer are that set up the opacity of the layer to 46%.
Step 4: Creat Color Balance Adjustment Layer
Color element are indispensable part to sketch your image. Normally, photographer always choose dark and cold color to apply for night photos. You can use some colors such as: bluish, cyan, grey,…So, are you ready to put into color in night photos. Click Layer->New Adjustment Layer->Color Balance. Then, you can add a little dark color like cyan or bluish.
Step 5 Add the moon
Night is not night without the moon. Now, let’s add the moon for your image to own great night photos.
Choose Select->Color Range and click once anywhere on the black background. Then, press Ok to complete a selection. To invert it, let’s press Ctrl->Shift->I. Pressing Ctr C to copy the selection and Ctr V to paste.
In addition, you can add a little clounds to make your image more perfect.

Have any of you tried doing something like this in post production before?. We will feel happy as giving and admiting your product image through the comment below after researching and following our tutorial. If you have questions or concerns, please do not hesitate to contact us today for a free consultation.