If you own store online and you try to think what do your customers do when they go to shopping online or purchase product online?. Surely, they will attract is product image or apparel product photography what is considered as the first factor. High quality product photography is essential for apparel ecommerce. For many customers, your product images will determine whether or not they buy your product?.And to shoot beautiful images for your store online, you always use mannequin or model to showcase the unique shape and fit of each product. However, it isn’t always effective to actually show the model or mannequin in every image. So, you can shoot photographs flat or drape them over a mannequin to give a 3D effect.
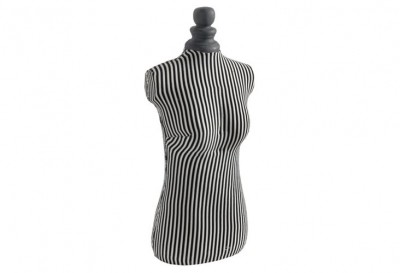
Today, we will use the mannequin to showcase product. Using mannequins for your product images is an efficient and cost-effective way to promote your products. However, mannequins can be distracting, so a great alternative is to create a ghost mannequin effect for your product images. To shoot beautiful mannequin images, small tips for you: using 3D effect to sell more. So, how to create 3D image with the ghost mannequin technique?.
Firstly, you need to capture a front and back view of your product being worn by your mannequin or model. After that, you should style and hang your product on a piece of white foam board and photograph both the front and back. To create perfect 3D effect, you should create a ghost mannequin effect what is actually quite simple given that you own the proper post-production software and that your products have been photographed correctly. You can also outsource this editing work to professional editors and get back your ghost mannequin images in 24 hours, ready to sell. Below are these basic tips to create 3D effect for ghost mannequin.
Step 1: Open your files in Photoshop and create layers
First, you will need to open the mannequin image and the top-down image in Photoshop. Choosing your mannequin image and create a new background layer. Fill that layer in with white; it will help you complete overall background It’s also helpful to label your layers.
Step 2: Use a Selection Tool to Select the Product in the Mannequin Image

After, choosing the product in your mannequin image. You need to zoom in tight and choose your favorite tool. There are 3 simple tool: quick selection, lasso or magic wand what help you accomplish your desired selection. Remember that, in most cases, when you shoot, you can remove the mannequin easily by using a white background because of the color separation between the product and the background.
Step 3: Refine and place your mask
If you have selected the entire product, refine your mask so that it is nice and tight, eliminating all of the background and mannequin by using the Refine Edge tool in the Select menu. Click OK in the Refine Edge dialogue box and place a mask on your shirt layer. The result is good and you can see your product floating freely on the white background that you created in the beginning.
Step 4: Rinse and repeat previous steps with the top-down image
Next, it’s time to switch gears and repeat Steps One, Two and Three on your top-down product image. You can feel bored when do these step again, but these is very important for your work; photographing the product inside-out will allow you to show the inside back of the dress, completing the mannequin illusion. Create a new layer, select out the product, and create and refine your mask.
Step 5: Combine the images
Cleaning masks and dragging the mask from your top-down image over to the image of your ghost mannequin product image. Organize the layers so that the top-down image is lower than the mannequin image. Then, adjust the positioning of the top-down layer and adjust its perfect proportions behind the mannequin layer.
Step 6: Remove unnecessary parts of the top-down layer
At this point, it’s a good idea to “hide” your mannequin layer and brush out the unneeded parts of the top-down layer. It’s important to remember to remove that piece in the top-down image because it’s already in place in the mannequin shot. Once you’ve done this, double check that your layers are clean and that nothing is out of alignment.
Step 7: Add Shadow and Save
Finally, add a shadow between the two layers to create the product some depth, and save a copy of the Photoshop file with all of the orginal layers. When you’ve saved the layer file, flatten or merge all of the layers together and save the image again as a different file. These will help you can make image look professional and realistic. If the editing job is done well, you will end up with an amazing 3D effect, these will improve your product presentation and help you increase sales for your online store.
With 7 basic steps you can see how to create your beautiful images with 3D effect. Using 3D effect for ghost mannequin photograph will help you improve product presentation and help you increase sales on your online store!.