Categories
Support

Color Correction in Real Estate Photo Editing


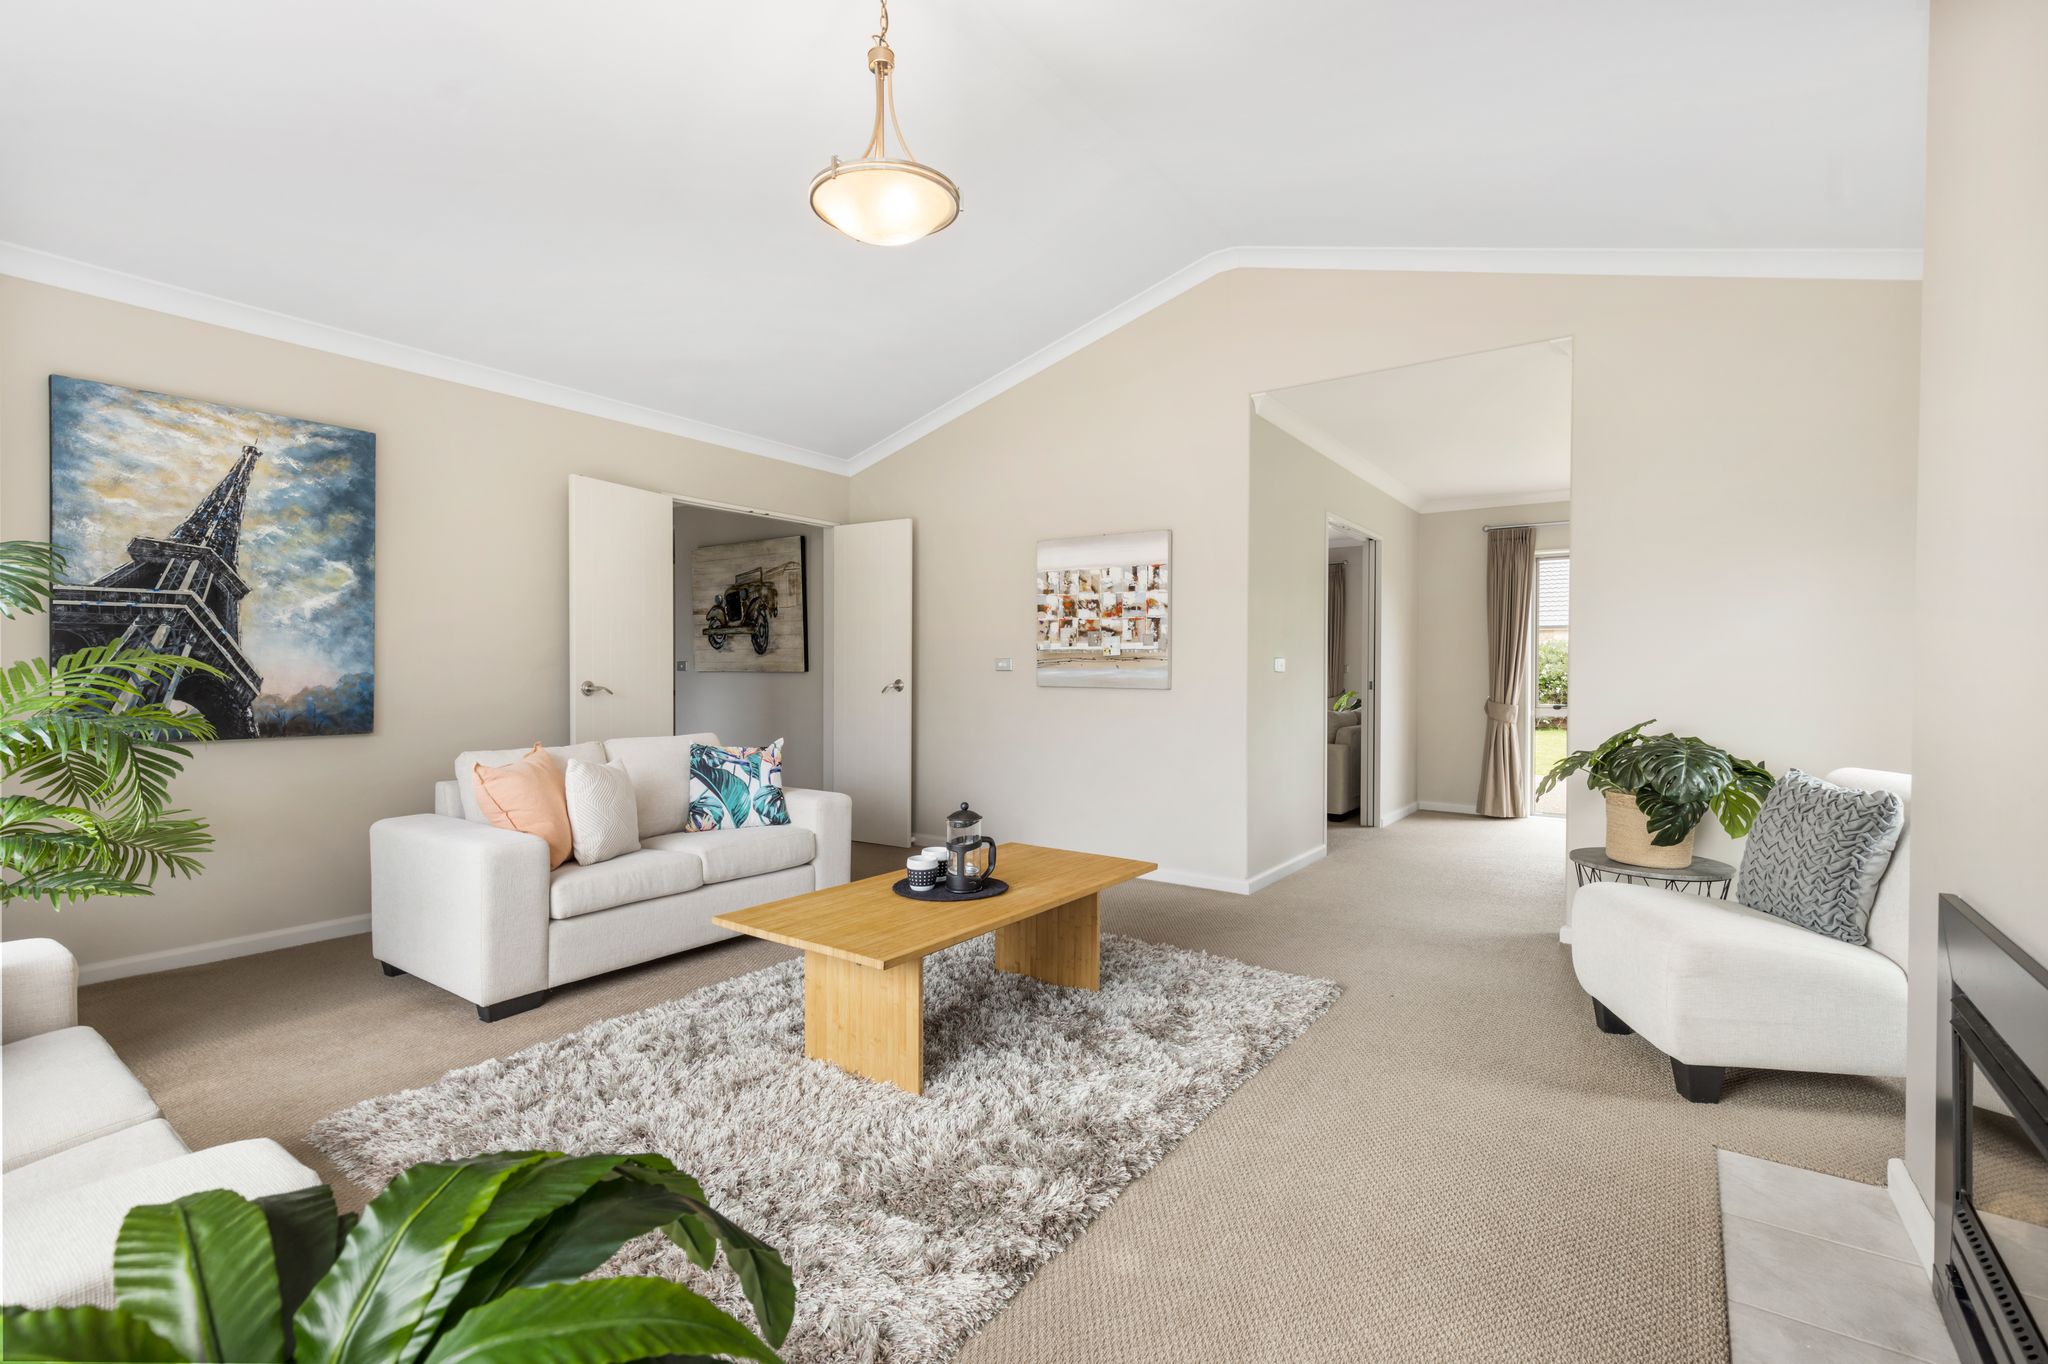
Real estate photo editing is necessary and higher in demand these days. Because they are so noticeable, color correction in your real estate photographs is necessary. Color correction in Photoshop impacts the look and feel of the photos and makes them more appealing to the viewer’s eyes. Photos taken directly from a digital camera are not always perfect. When you use Photoshop more frequently, you can discover some recurring problems with photographs that need to be fixed. For instance, some pictures might be too light while others might be too dark. Here comes the role of real estate image editing, especially the use of color correction to make your photos look amazing.

https://admin.fotosolution.com/color-correction-in-Photoshop
Color Correction in Real Estate Photo Editing

Let’s go through a few crucial real estate image editing techniques, like color correction. The post-processing process depends on it. It is important to use the strategy while maintaining the buyer’s interest. Making the images give victor a feeling of actually visiting the site and help him make his buying decision. Color correction should be done before any further editing on real estate photos. For the image to be beautiful and realistic, it needs a strong foundation. Pictures should be captivating to viewers visually.

  • Every color has its own meaning.
  • Sales are correlated and are impacted
  • Has the ability to enhance visual awareness of life
  • Achieve realistic visibility

Color Correction in Photoshop

This most important photo-editing method has the power to make or break your image. Any photograph can profit from this difference, even if a pro takes it. You can make the necessary adjustments if your image needs to feel darker. Similarly, if you want to add more color to your photos. Make them brighter and more saturated. This method aids in bringing the image up close to the property.

What are the special methods used to make this technique successful?

This correction approach will have several methods depending on the program utilized, including illumination and lighting in addition to color correction.

  1. Exposure is the amount of lighting that enters the camera during the photo shoot. It might vary from area to area. Photo editing helps in balancing this by combining layers through the stitching process.
  2. Lights generate unwanted darkness and shadows. These shadows can be eliminated with the use of mid-tone changes. Midtones are the grey zones, and altering these regions enhances the aesthetic of the image.
  3. Color and brightness impact the way light is reflected on them. The neutrality and color balancing is controlled by the white balance.
https://admin.fotosolution.com/?p=27625&preview=true
Color Correction in Photoshop

Criteria to find the best Photo Editing Services

  • Please find out the rates at which they provide their services
  • Know more about the company
  • Understand their project capacity
  • Quality should be kept at the forefront of the decision

Finally, outsource your requirements to Fotosolution, we will be more than happy to assist you with the correction process. We have a team of expert professionals highly skilled in using advanced tools and enhancing the appeal of the photos

Fotosolution team – is the best photo editing company – hope to bring more value to your production. Finally, if you need any further information, please do not hesitate to contact us. We are looking forward to hearing from you soon.

Categories
Support Tips & Tricks

How to make the color correction in Photoshop

Color correction is one of the important factors affect directly the result of images. If we have two pictures: white and black pictures and pictures with prominent color, which one do you prefer?. Beautiful images with stunning color will surely be a wonderful choice. So, color correction an image is one of the most common uses of Photoshop. How to make the color correction in Photoshop. If you don’t know the way about the color correction in Photoshop,  here some quick tips show you different ways on how to color correct on image. Let’s get started.

Color Balance Adjustment Layer

To get started, you should open an image that you think has a color board. After, you choose layer-> new adjustment layer-> color balance, this gives you information about the pixels in your image. Using the adjustment layer is the best way that it can either remove adjustment or edit the adjustment at the later time.

You will see the appearance of color board to choose, then, color balance box will appear to support your work. Before applying the color balance adjustment layer, I think that you should make a copy of the background layer, then turn off the background. Then, choose the Color Balance adjustment layer option in the Adjustments panel.

Color Balance Adjustment Layer

Selecting the slider that has the tint color and move it away from the tint color. For example, since the image has a yellow, you want to move the cyan or yellow slide towards cyan to remove the yellow tint. You may also want to adjust the other two sliders to get the color you want for the image. Let’s click on double right arrow at the top right of the panel to finish with the adjustment.

If you want to change the different color, you can always go back in and make adjustment to the color balance properties by clicking on the layer thumbnail. Besides, you can use Gradient adjustment layer to make prominent color.

Curves

With some photographers, curves in an image will an intimidation factor, it will affect directly the quality of image. Don’t worry about this, we will help you adjust the curves. To adjust the curves, you have to click on the Curves Adjustment layer in the Adjustment Layers panel. You will see the appearance of  Curves Proprieties Layer.

fotosolution-How-to-make-the-color-correction-in-Photoshop-03

Notice the drop down option next to the RGB channel. Not only can you change all channels at one time (your image is a combination of red (R), green (G) and blue (B) channels), you can also change the individual channels. If you reviewed the Color Balance Adjustment Layers above, you are also aware of the ‘opposite’ colors of each of these individual channels. The original curve is a diagonal line from bottom left to top right. If you want to effect the reds in the darker areas, I adjust the line towards the bottom left. If you want to effect the red in the lighter areas, you can adjust the line towards the top right.

If you want to remove some of the cyan introduced when we adjusted the Red channel, select the blue channel and drag the middle of that line down slightly. You can continue to adjust the curves in the various channels till you have the color you desire.

Increase Contrast

Using increase Contrast technique will a perfect choice that help your image more prominent. To crease contrast an image, you can use Levels Adjustment Layer. First, choose layer-> new adjustment layer->levels.

fotosolution-How-to-make-the-color-correction-in-Photoshop-05

The Levels properties panel shows a histogram. This is a quick visual that shows the range of tones in the image. This particular histogram shows a lack of light or white areas. The data on the histogram doesn’t extend all the way to the right, nor is it all the way to the left.

Click and drag the white arrow adjusts the light or whites area of image to the left until it under the right edge of data of the histogram see setting in above image. Click and drag that black arrow adjusts the darks or blacks to the right until it is just under the left edge of data of the histogram.

Auto Color

Auto color is considered as the quickest way to color correct an image, if you need to something quick, use auto color to solve all problems.

Choose Image->Auto color from the main menu, this technique will determine what needs to be adjusted and perform the color correction for you. However, this technique have also some disadvantages and one of them is that you are depending on Photoshop to determine the best color adjustment.

Here are four tips to color correct in Photoshop. We hope you found it interesting. Do you believe that If you have any questions or concerns, please do not hesitate to contact us and comment below this post.

Thanks for reading!