Categories
Support Tips & Tricks

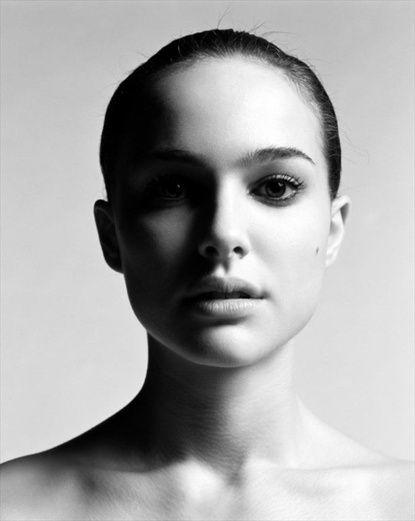
Tips to Improve Portrait Photography

Portrait photography is one of the most amazing topic that many readers are interested in. If you are new photographer, learning how to professionally capture portrait photography is one of the most important skills you can develop.

Do you know how to improve portrait photography?. Here are a few of Tips to capture best portrait photography.

Lighting is golden key

Lighting is one of best factors to describe and embellish faultless portrait photos. And the best light to shoot portrait is Rembrandt lighting. Rembrandt lighting use to capture photos in studio to increase the brightness of subject, especially it help you create holograms.This technique will create clear triangles on subject’s cheek. Keep in mind that let’s buid a 45-degree angle to straight line that link between cameras and subject.

fotosolution-Tips-to-Improve-Portrait-Photography-01

It’s that shoot portrait photography in studio, so if you take the portrait in natural light, how about that?. Shooting outdoor portrait photography, you have the best chance of getting a great look with the natural colors and skin tones. However, shooting outdoors may be tricky, because it’s difficult to control the light in most situations. Make sure that you don’t pose the subject right in front of the sun. This may cause unwanted brightness or deep shadow. Shooting in mid-day also should be avoided as much as possible. For best results, position the subject in such a way that sunlight falls on the face from the side. You may also use reflectors or an external flash to light up some parts of the face.

Building comfortable space

Background plays a vital role to a portrait. As you know, portrait is all about someone’s face. So it is important to have a background which is not interfering with the subject.

fotosolution-Tips-to-Improve-Portrait-Photography-02

Let’s build a comfortable space for taking portrait photography. You can use a long lens with long focal distance ( about 75mm) to create comfortable feeling for subject.

Focus aperture

A wide open aperture with a lower number will blur the background and make the subject stand out. A smaller aperture with a higher number will make the whole scene come into better focus. Typically f/2.0 to f/5.0 is good for portraits.

Get high or get low

Taking a portrait is not always shooting at the eye level. Positioning the camera high or low while keeping the focus on the eyes brings out interesting features and adds different flavors to the portraits. So make the model sit, stand up, climb up to the stool or ladder or stairs and shoot.

fotosolution-Tips-to-Improve-Portrait-Photography-03

Adjust Head and shoulder

As shooting subject, you need to attend head and shoulder of subject. Let’s tilt your head from time to time to limite to just our of chin and forehead.

Angle and Pose

Pose and the angle of the body and face play a key role. Looking straight at the camera with motionless expression can be boring. Try to flare up your portraits with some twist. Maybe it is an inviting smile, a sexy expression, a flamboyant look, tilting the chin down or up, turning the head back while walking forward, or sitting and looking up.

fotosolution-Tips-to-Improve-Portrait-Photography-04

Editing photos before posting

Let’s check out and remove unwanted detail after shooting portrait photography. Therefore, you should take time to edit photos through some digital software such as:  Photoshop and Lightroom to have best portrait photography.

Do you have other tips to improve portrait photography?. If you have other questions or know other tips, let’s share your experiences in the comment below or contact us: sales@admin.admin.admin.admin.admin.admin.fotosolution.com to get more information.
Categories
Support Tips & Tricks

10 Best Photoshop Resouces

Are you interested in Photoshop resources?. Do you want to improve Photoshop as well as your image editing skill?.

As far as we know, Photo editing software Photoshop is great part of choice for many designer and artists. Photoshop can be used for almost every little task that involves graphic design and your web design company, regardless of who it is, uses it for at least some of their processes. There are many Photoshop resources that help you refer and grips with the image editing software.

Adobe

Adobe is a great tool of choice for many designer especially for beginner. It provide many tutorials and excellent videos for beginner. It will help you learn basic lesson related to image editing software.

fotosolution-10-Best-Photoshop-Resouces-01

Pixel2Life

Pixel2Liffe is a giant tutorial search engine on the internet, which is intended for graphic designers and programmers. It has an immense choice on Photoshop training with literally hundred of tutorials to choose from. The site also features a really useful sidebar of sub-categories. It will support you to look for lessons in the effects you want to wind up.

fotosolution-10-Best-Photoshop-Resouces-02

PhLearn

PhLearn is an amazing and free online Photoshop resource. It provides various high quality photography and Photoshop instruction. One of impressive thing as use PhLearn is some image and joke that come on the screen. The special thing will help keep the viewer’s attention. Do great informative and flexible entertaining attract you?.

fotosolution-10-Best-Photoshop-Resouces-03

Envatotuts+

Envatotuts+is a useful blog that offers some of the best Photoshop tutorials. The site has a large collection of tutorials covering many different areas, including 3D, illustration and text effects to name but a few.

fotosolution-10-Best-Photoshop-Resouces-12

Photoshop tutorials on DeviantArt

There’s a excellent range of Photoshop tutorials on online art community DeviantArt. They are seven different categories, including a beginner and web design company. It’s considered as special thing that help you find the specific tutorials you’re interested in. This Photoshop resource provide not only useful and interesting lessons for beginner but also tutorial system that you can submit. Let’s check the site for terms and conditions.

fotosolution-10-Best-Photoshop-Resouces-05

Photoshop Roadmap

Photoshop Roadmap is also flexible site what shares tutorials on Photoshop, as well as Photoshop brushes and plugins. These Photoshop tutorials are attached to categories like Animation and Interactivity and Photo retouching.

fotosolution-10-Best-Photoshop-Resouces-06

PSD Vault

PSD Vault is a greate Photoshop tutorial site – best suggestion for designer and web design company. It focus on writing about things such as designing a floating Eiffel Tower in Photoshop and creating a vintage car poster. They also regularly give away design-related freebies.

fotosolution-10-Best-Photoshop-Resouces-07

Photoshop Essentials

If you’re a newbie who familiar with Photoshop lessons especially Photoshop Essentials, which has easy to follow, step-by-step style training. It offers lessons on everything related to Photoshop from basics to intermediate including photo editing and retouching, text effects and more. The site is clean, innovative and easy to use. It also has helpful sidebars highlighting the latest and most popular tutorials.

fotosolution-10-Best-Photoshop-Resouces-08

Pluralsight

Pluralsight has an immense range of tutorials that help you learn, master and discover the creative lessons of Photoshop. To register Pluralsight site that you need to access the majority of the training. However you can also sign up for a free demo account, where you’ll find a list of free Photoshop tutorials at your choice.

fotosolution-10-Best-Photoshop-Resouces-09

Tutorial9

Tutorial9 is an amazing resource for Photoshop tutorials, all of which are entirely free. It contains 30 pages of training available so you are easy to look for something of interest. There is also a search option. You can filter your options to find the newest tutorials submitted by either Tutorial9 itself or submitted by other users.

fotosolution-10-Best-Photoshop-Resouces-11
Do you have other Photoshop resource that could improve and enhance your image editing skill?. If you have questions or know other best Photoshop resource, let’s share your experiences in the comment below.

Categories
Support Tips & Tricks

How to use Patch Tool in Photoshop

If you are photographer, designer who always use Photoshop technique to create best photos, certainly, you don’t feel of unfamiliarity with Patch tool. Patch tool is one of the best tools Photoshop has to offer. It is popular and nice tool, so, why should you use and choose Patch tool in Photoshop.

This tool is easy to use and with each version of Photoshop, it has gotten ever better. As far as we know, Patch tool is part of the headling brush set of tools. The Patch tool is used to repair larger area of an image or get rid of any distractions and blemishes. In addition, you can also use it to duplicate parts of your photos. Using the Patch tool, you can save your time when trying to make some adjustment to your image.

The Patch Tool was introduced into Photoshop at the same time as the Healing Brush. Like that Healing Brush, it matches the texture, lighting and shading of the sampled pixel to the source area. But instead of brushing like Healing Brush, it is used to choose defined areas. Therefore, the Path Tool will help you create a photos more natural than the other tools.

In today’s subject, we will show you:

How to use an amazing Patch Tool in Photoshop.

  • Step 1: Choose your image what you need to the aim of Patch Tool: Open-> Image File.
  • Step 2: Select The Patch Tool and draw an area around your selection. After dragging mouse over to better skin and let’s go.
  • Step 3: Move the cursor over the selected area and drag it to the left, right or in any direction. If you don’t feel happy with your previous done step, you can use Ctrl+Z or use Layer Mask to hidden them.
  • Step 4: Reduce circles under eyes

Having shadows round one’s eyes is one of basic disadvantages that have directly affected to the result of images.  To fix this issue, you can choose area – the circles under eyes and replace it with beautiful skin area.

However, you should use Fade patch tool to increase the effect of image, this will make your photos more natural and more truly.

Click Edit-> Fade patch selection. This window will pop up and move the slider to fade the patch selection. Let’s press Ok when you research your desired result.

  • Step 5: Keep your eyes bright

After removing the circles under eyes, you can keep your eyes bright to make your photos more stunning. First, let’s create a new layer and add Layer Mask. Then, choosing Dodge tool and make sure your exposure that is set between 30-35%. Then, take a large brush and sweep over the eyes just, including the brow area. In other words, if you want to duplicate your layer, it’s simply that add a layer mask in case you want to tweak your dodging.

In the case, the part of eyes or eyebrow are too bright, you can adjust them by using Layer opacity or Layer mask to balance.

  • Step 6: Check out and layer transplant

You should check out your images after finishing. If you want to add the other details for image, you can create back-up layer by click History->Layer Palette and create a new snapshot for your images. After, you can join layer in the effective way.

You are interested in: Fotosolution.com/How to use the Patch Tool in Photoshop

How to Use the Patch Tool in Photoshop – Video Tutorial from Yanik Chauvin on Vimeo.

Finally, The Patch tool is one of the perfect tool in Photoshop. It support your digital image in the most amazing way.  We hope you found this article useful. Do you use the Patch Tool in Photoshop?. Please let me know in the comments below.

Categories
Support Tips & Tricks

The differences between Basic, Pro and High End Level as editing photography

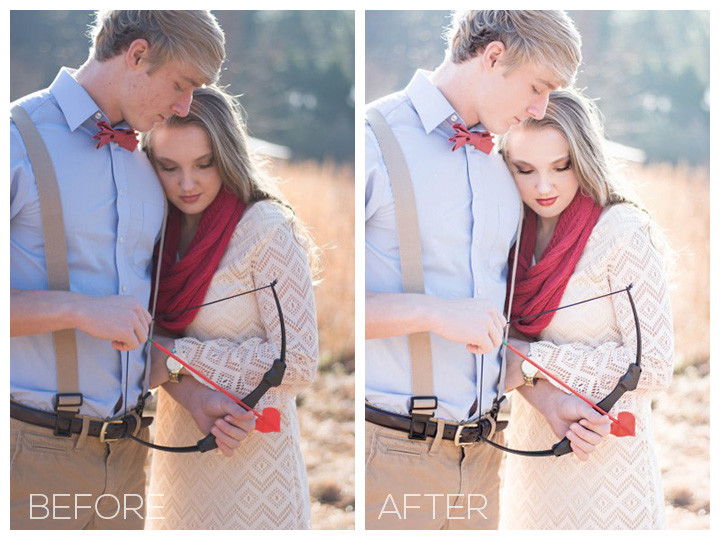
Photography used to be an expensive hobby, tallying camera, film and developing costs. Besides, it is considered as the second face that represents the business as well as their product. Also, great photography will best great condition to send message. In addition, it also attracts the customer’s attention. To business or online shop, they have been been frequently required to show a review of retouching levels, namely, basic, professional, high end of the same image. Therefore, they have a chance to compare them.

The level of editing photography include basic, professional and high end. They are 3 main factors to decide the perfection of image. Normally, photographers can select from 5 retouching packages, which differ by editing level, the retouching price, the turnaround time and by the editor’s skills. So, do you want to know more the level of editing?. Below we will show you the differences between basic, pro and high level of editing in order to be knowledgeable in this matter.

Now Here are examples of illusion to help you determine the differences between basic, pro and high end level of editing in one shot.

Basic level of post-production

First, basic level of editing in photography is the post-production process which make a photos look better retouches. The level of editing consists of skin smoothening, blemishes removal(scars, zits, acnes, pimples), teeth whitening, removing stray hair on a face, shoulder, back, color correction.

fotosolution-The-differences-between-Basic-Pro-and-High-End-as-editing-photography-01

Pro level of post-production

Seconds, different to basic level of post-production, pro level will enhance the quality of image. The pro level of post-production contains: professional skin editing ( blemishes removal, smoothening), color correction, background enhancement ( solid color replacement, extending), stray hair removing, weight reduction, small objects removing.

fotosolution-The-differences-between-Basic-Pro-and-High-End-as-editing-photography-02

High level of post – production

Thirds, high end level of post-production is one of best choice that all photographers always believe and use. You can see that the image takes more expensive and expressive form as if from the cover of popular magazine. The high end level includes the pro correction, working on the detail ( remove from the clothes), the liquify effect, stylization.

fotosolution-The-differences-between-Basic-Pro-and-High-End-as-editing-photography-03

Finally, all photographers look for their style and turn them into amazing artwork before the eye’s viewers. These 3 types of editing photography are great choices to aim to build their images. If you are interesting in this subjects, let’s share this articles to your friends. Or, if you have any opinions concerned about this subject, let me know your though in the comment below.

Categories
Support Tips & Tricks

How to make HDR images in Photoshop

Creating HDR images is typically contained a quite time-consuming workflow that consist merging, tone – mapping and post processing, possible spanning several different software program. To generate HDR images as you would expect, smoothyly and professionally, Photoshop will brilliant tool that help you make great HDR images.

Below we show how to make HDR images files from your bracketed images in Photoshop. Hope that you will find it interesting.

fotosolution-How-to-make-HDR-images-in-Photoshop-01

Step 1 : Launching Photoshop and opening bracketed photos

Using the data images for creating HDR images, one of the useful images sources are that from bracketed photos. Therefore, you have the option of opening bracketed images or select automatically all open merges to merge into HDR images instead of navigating and selecting them yourself. Two of ways will help you save much time.

Step 2: Choosing file images to realize HDR images

Choose File -> Automate-> Merge to HDR pro are three basic manipulation as make HDR images. After completing three options, you will see the appearance of the Merge to HRD pro dialog box. Let’s use this dialog box to add your source images.

fotosolution-How-to-make-HDR-images-in-Photoshop-02

Step 3: Choosing source images

As you opened the images and saw the Merge to HDR pro dialog box, you press “ Add open files” button. In case, the image doesn’t choose, click File-> Automate-> Merge to HDR pro and Merge to HDR pro dialog box shown, let’s click “browse” -> File images-> press choosen images. In other words, as you press “ Browse”, navigate to the folder that include the bracketed photos and select them.

fotosolution-How-to-make-HDR-images-in-Photoshop-03

Step 4: Select the Attempt to automatically align source image

After finishing the choice of images from bracketed photos, the next step you can realize are that click “ Attempt to automatically align source image”. This option help you align details in images and is especially useful for hand-held brackets. However, in case, you take the pictures using a tripod, you might not need to align the source of image.

Step 5: Click “ OK” to continue

Photoshop merges the files into an HDR images. After pressing “OK”, the Manually Set EV will be displayed in Photoshop. This Manually Set Ev box will allow you adjust and check the exposure value of images. Enter the correct camera parameters in the Exposure Time, f-Stop and ISO or choose EV and enter the exposure value in the EV box, then click OK.

When finished, the Merge to HDR dialog box will appear with a new form and you can see some of parameter in the right screen.

Step 6: Select the images and custom

Let’s select image you want to remove from the preview from the under image and select them again to add them back.  This allows you to change the balance of the HDR file toward under- or overexposure. You can see some of parameter under big image through “-“ or “+”. You can custome this size of image you want.

Step 7: Choose approriate Bit/Channel from the Bit Depth drop-down list

To hold up the most flexibility, you should choose approriate bit/channe. This allow you to save the resulting HDR file. If you set it with 16 Bit/Channel or 8 Bit/Channel and click OK, Photoshop automatically starts the HDR conversion process and reduces the bit depth of the image. We recommend you that you should use 32 bit/channel, it will help you retain the bit depth of image. If you don’t need to save the HDR file, selecting the bit depth saves time.

fotosolution-How-to-make-HDR-images-in-Photoshop-04

Step 8 Drag the set white point review to alter the image’s exposure

After choosing 32 bit/channel from the bit depth drop-down list, you will see “set white point review” part. This part will allow you review and finalize image’s exposure during HDR conversion.

Step 9: Click Ok and save file HRD images

Click “Ok” to complete HDR image. Choose file and save images are the last mission for your project. Note that Photoshop support many different HDR file types, including the standard Radiance and OpenEXR formats.

Finally, we can affirm that Photoshop are invaluable support tool for your images project. Today, some steps help you create great HDR images. Let’s start now and own HDR images file yourself. If  you have questions or concerns, please do not hesitate to contact us today for a free consultation. Interested in hear your thoughts in the comment below.

Categories
Support Tips & Tricks

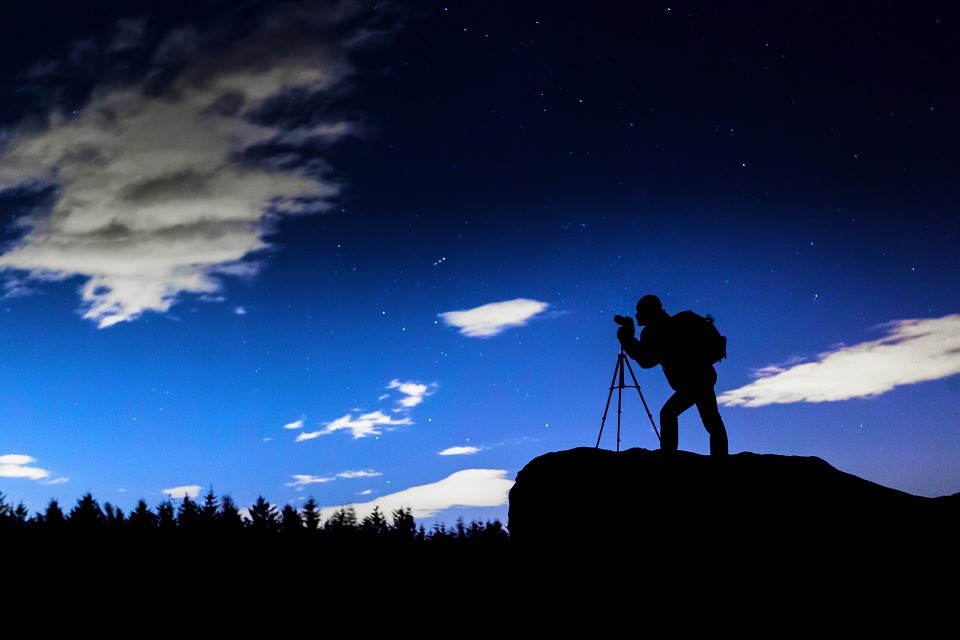
Tips for shooting night photography

Shooting night photography is great artwork and intelligent and best tips will allow photographer to own perfect night photography. The main challenge when photographing at night is getting a proper exposure. If you want to own and shoot great night photography, here we will show tips for night photos we’ve learned with you and hear your thoughts on this diverse and fascinating style of photography.

Get high quality night shoot

fotosolution-Tips-for-shooting-night-photography-04

If you want to have the best night shots you need to take a best image quality and it means that you need to determine RAW format. By shooting in Raw, your picture will retain the best information, this will allow you to adjust your images in Adobe Camera Raw and other raw-processing software. In additional, Raw is useful tools that has special advantages when shooting night. Because it make you clear-headed if you want to change things such as colour temperature or white balance, accurately increase or decrease your exposures.

Use the tripod for sharp images

fotosolution-Tips-for-shooting-night-photography-02

Take a picture at night is surely less light and therefore slow shutter speeds. From 1 to 30 seconds are long time that help you retain your cameras by hand. So, you need to bring a tripod if you want to own sharp images. Let’s make sure your tripod is set up correctly and rock solid and it is easy to end up with soft images because you haven’t double-checked. Remember that don’t retain the tripod when you’re shooting with slow shutter speeds because any slight movement can mean blurred photos.

Choose approriate photography locations

fotosolution-Tips-for-shooting-night-photography-03

If you want to save time for shooting images, you need to choose approriate photography locations instead of finding locations as it’s time to shooting. Thus, Choosing the best place where have many lighting and the best amazing architecture. For example, if you’re looking to shoot traffic light trails, check which roads are busiest, when is the best time for traffic and it is best location to capture images.

Use best apertures of the lens

Use the sweet spot range of apertures for your lens – always are between F/8 and F/16 but try to shoot to find and check this aperture. By using apertures in the middle of the available range you’ll increase your chances of capturing the sharpest shots with your lens.

Night photography setting

To take control your exposure and it’s best to shoot in Manual mode, you can choose the best narrow aperture and slow shutter speed for night photography. Begin by composing and focusing your shot, set a narrow aperture around F/16 then dial in the right shutter speed until the exposure level mark is in the middle of the exposure level indicator. You can try to shoot some images and check them on your LCD.

Don’t touch cameras

As you shoot your exposures at night, even touching your cameras to press the shutter button can create the movement. This will make your images blurred. To avoid your problems, let’s use and set up time mode to shoot automatically.

Here are some tips for shooting night photography we want to share with readers. The practice of night photography is rich with community engagement. Let’s take your time, applying these tips to own best night photography. Got any of your own favorite photo tips to share with friends ? We’d love to hear about them in the comments section below.

Categories
Support Tips & Tricks

5 Basic Types For Portrait Photography Lighting

Finding 5 basic types for portrait photography lighting. First, light is one of the important elements in all photos. Whether a grand landscape or an intimate portrait, light always play the essential role to make the success or to break your images. So, it is important you should know that understand the different types of lighting and how to make the most out of each. Here we will show you 5 basic types for portrait photography lighting. Hope that you find it interesting.

Split lighting

First, we will present readers split lighting. What is the split lighting?. Like its name, split lighting splits the face exactly into equal halves with one side being in the light, the other in shadow. Basically, this light is often used to create dramatic images for things such as a portrait of a musician or an artist. However, it tends to be a more masculine pattern so, it is usually more appropriate on man than for women. Using split lighting for your artwork, you should put the light source 90 degree to the right or the left of subject or possibly slightly behind the subject. Hence, this will depend on the face of subject in picture.

fotosolution-5-Basic-Types-For-Portrait-Photography-Lighting-01

Let’s check how the light falls on them and adjust correctly. Besides, you should note that if place the light too close, then you’ll end up losing the side lighting effect. Or, if you can’t adjust the light source, you can adjust the direction that turn of the object.

Loop Lighting

Loop lighting is made by creating a small shadow of the subjects noses on their cheeks. In addition, it is one of the most used lighting set up for portrait photography. Creating loop lighting, the light source must be slightly higher than eye level and about 30-45 degrees from the camera.

fotosolution-5-Basic-Types-For-Portrait-Photography-Lighting-02

Rembrandt Lighting

Rembrandt lighting is named after Rembrandt , the well-known Dutch painter. He was famous for his low key and high contrast lighting style. It is identified by the triangle of light on the cheek. Unlike loop lighting where the shadow of the nose and cheek do not touch, in Rembrandt lighting they do meet which, creates that trapped little triangle of light in the middle.

fotosolution-5-Basic-Types-For-Portrait-Photography-Lighting-03

To set up a Rembrandt lighting set up, first place a key light at about 45 degrees from your subject and slightly above the subject’s head. As the subject faces the camera, you need to make out position the light:the right or the left angle. Thus, this will allow you to see the small triangle of light on the opposite side of the subject’s face.

Butterfly lighting

Butterfly lighting is  named for the butterfly shaped shadow that is created under the nose by placing the main light source above and directly behind the camera. It is most often used for glamour style shots and to create shadows under the cheeks and chin. Moreover, it is appropriate to older subject because it help photographer blur the wrinkles of object.

fotosolution-5-Basic-Types-For-Portrait-Photography-Lighting-04

To create this lighting, you should set up light that is positioned right in front the subject but at a steep angle facing down, therefore creating a shadow right underneath the subject’s nose that resembles a butterfly.

Broad Light

Broad lighting is when the subject’s face is slightly turned away from centre, the side of the face which is toward the camera that is in the light. This type of lighting makes a person’s face look broader or wider. This can be used on someone with a very slim face to widen it.

fotosolution-5-Basic-Types-For-Portrait-Photography-Lighting-05

All you need to do is to have your subject face away from the light, which most of the times is positioned at 45 degrees from the subject. Or in other words, you should put broad lighting illuminates the largest part of the face showing.

Here are 5 basic types for portrait photography lighting that give photographer many choices. Let’s try them out on different subjects and choice one of them that is appropriate to your style. Got any of your own favorite portrait photo tips to share with other readers? We’d love to hear about them in the comments section below.

Categories
Support Tips & Tricks

6 Tips For Best Portrait Photography

Portrait photography is one of popular subject that all people are interested in. The subject may be our friend, family member, a model, or a perfect stranger. You always own good portrait images, so, do you have great tips for better portrait photography?. Here we will show 6 tips for best portrait pictures.

Lighting

fotosolution-6-Tips-For-Best-Portrait-Photography-01

Lighting is one of useful effects to create best and real images especially portrait photography. If you take the portrait in natural light, you have the best chance of getting a great look with the natural colors and skin tones. However, you shouldn’t abuse the benefit of natural light because it maybe also become a weak point to break your images. For instant, if you take a pictures in the harsh light like direct sunlight, can be unflattering for a portrait. So, how you can avoid this?. Great advice is that you can use reflectors or an external flash to light up some parts of the face. If you are shooting indoors, make sure that you use a soft, evenly distributed light source to light up the subject.

Background

fotosolution-6-Tips-For-Best-Portrait-Photography-02

Background plays a vital role to a portrait photography. It is considered as talented supporting characters for portrait photography. Choosing asimpler and less cluttered background works better for portraits. You should avoid choosing complicated background or more detailed. Let’s shoot images with large aperture, this will help the subject in pictures stand out and make background be overshadowed.

Angle and Pose

Pose and the angle of the body and face play a key role. Looking straight at the camera with motionless expression can be boring. Try to flare up your portraits with some twist. Maybe it is an inviting smile, a sexy expression, a flamboyant look, tilting the chin down or up, turning the head back while walking forward, or sitting and looking up will are great ways to create portrait photography.

Avoid using the on-camera flash

On-camera flash gives great ideas look to even the most beautiful subject.  Because the light is perfectly in line with the lens, the light hits the subject squarely and creates a flat light that is far from flattering.  If you choose to use a flash, it’s truly necessary to get an external flash that can be mounted to the side of the photographer.

Choose Clothing

fotosolution-6-Tips-For-Best-Portrait-Photography-03

Those colors undoubtedly catch the viewer’s attention. You should choose great and appropriate clothing for yourself, this suits will make you more attractive and more stunning. In addition, the color of clothes also fit for color of background.

Make up

Makeup is an essential element for most portrait photography. Makeup not only covers up blemishes, it may also makes a face glow and look even. Some creative makeup also can be done to give your model a sophisticated or trendy or different type of look based on her personality. It may also make your model feel more confident.

Here are 6 basic tips for better portrait photography that allow photographer to have basic look about it. There are many interesting tips to own great portrait photography we should learn. If you have amazing sharing about this subject or have any questions or concerns, please do not hesitate to contact us and comment or share your experiences below this post.

Categories
Support Tips & Tricks

6 Tips to Take Best Shots of Apparel For Your Store Online

Best shots of apparel are important elements that help your product attract the customer’s attraction in the first time. So, how to own best shots of apparel for your store online?. This subject’s today will show reader 6 tips to take best apparel photos for your store online.

You are planning on building your own store online, you want to make all things what appear in your online shopping or your personality page more perfectly before the viewer’s eyes. Beautiful and sharp-looking product shots or best shots are a sure way to garner consumer confidence. Besides, this has a significant effect on your overall drive sales.

The first important factors what your customers always buy fashion ecommerce, will attract is apparel product photography. Taking professional photos of your apparel so as to improve the look and performance of your online shop involves simple tips and tricks as highlighted below. Incorporate them in your clothing photography for the best results.

Show off the Details

If you compared between the jewelry photos and the garment photos , you will shows details on apparels isn’t all that tricky. Preparing garments to be photographed is a crucial starting point for photographing apparel. Yet many photographers skip this step and rely on Photoshop to fix wrinkles, stains, and other visible defects. You should complete your product with some close-ups of the feature you wish to emphasize on. Tags, patterns, buttons, stitching— any detail you think makes your garment to stand out, focus on it.
Use props

Props and tools are a great way to ensure your ecommerce fashion product fits the model or dummy much better. Don’t be afraid to use props and tools to help you make the product fit the mannequin or model better. If the clothing available is larger than your model or mannequin, pin the loose portions at the back using a laundry clip.

  • Use magic tape and transparent tape to fix loose portions at the side. You can also tape any tags if they’re visible.
  • If the dummy has a small bust, insert a padded bra inside the apparel to enhance it.
  • You want a dress or skirt to look ‘flowy’, let the model wear a petticoat inside the clothing.
  • When you want to add some movement to the garment, use a fan on a low setting but from a distance.
  • Use an iron to get rid of any wrinkles before you shoot. A steam iron will give you the best results, but you can also use a regular flat iron.

Use a Model

fotosolution-6-Tips-to-Take-Best Shots-of-Apparel-For-Your-Store-Online-01

Photographing a garment on a mannequin or a model is the best way to demonstrate shape and fit, while also encouraging customers to visualize themselves wearing it. Using models make clothing come to life. Professionals are extremely expensive and you’ll have to mutually agree on a more convenient time, which sometimes isn’t easy. But the best thing about models is that they can strike any pose or even work with any given angle that accentuates your piece, helping you create the most amazing in-context shot or best shots for your apparel.

Tips: You should choose models who represent and can resonate well with their target customer.

Use a mannequin

fotosolution-6-Tips-to-Take-Best Shots-of-Apparel-For-Your-Store-Online-02
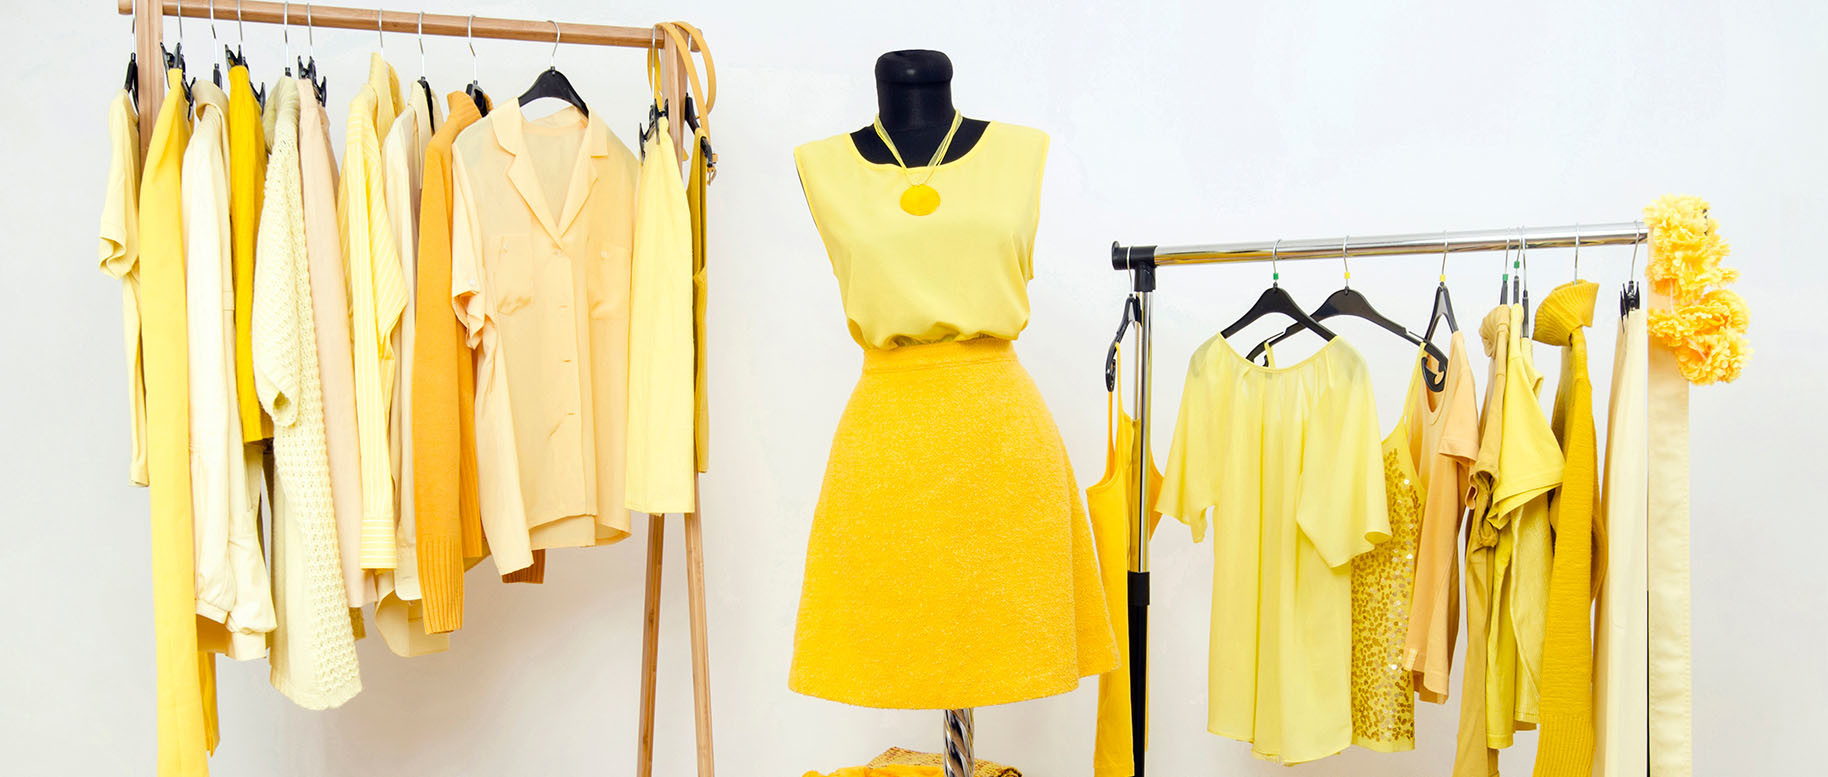
                                                                                                                          Dressing closet with yellow clothes arranged on hangers and an outfit on a mannequin

When you hire a model for store online, you will lost much money but using a mannequin, this will help your budget can save much better. As we know, when it comes to fashion ecommerce, displaying your clothing in a more realistic form is of more importance to your target customers. Since your customers can’t try on your apparels, and naturally they are more hesitant. If they can’t see picture how the piece will look on them. Using mannequins are an affordable alternative for best shots and easy to work with. Take time to style your product on the mannequin. If your garment looks too big, try fitting it closer to your mannequin by pinning it and tucking it until it fits properly. And you’re concerned a mannequin may be distracting or cheapen your product, you can use the invisible mannequin technique in post-production processing. A few additional shots of each product will allow you to remove the mannequin from your product images and present a 3D image that demonstrates shape and fit.

Create a Ghost Mannequin

fotosolution-6-Tips-to-Take-Best Shots-of-Apparel-For-Your-Store-Online-02

Using mannequins for your product images is an efficient and cost-effective way to promote your products. However, mannequins can be distracting, so a great alternative is to create a ghost mannequin effect for your product images. In order to create the “ghost mannequin” illusion, you will need to first photograph your product being worn by a model or a mannequin from multiple angles. The plus side to this is that you will be able to use these images in your product galleries alongside any “ghost” images that you create. By displaying a few sections of the inside of your attire, your product will achieve a three-dimensional human form. Though the process of creating a ghost mannequin can be difficult, the end result is certainly worth it and it help you save your budget instead of hiring models.

Steps to Creating a Ghost Mannequin

Take a best shots of the product from the front. Then take a photo from the back, but turn the product inside out. You should use a tripod for this and avoid changing the amount you zoom. A good idea is to also mark a spot on the floor for your mannequin so it’s in the same spot for both photos. The next step involves background removal, as the background needs to be visible from the front. Using the pen tool will give you the best results, but it does take a bit of practice to learn how it works or using Photoshop to place the front on top of the back; this should be easy especially if both photos are taken from the same angle and distance. This process requires some skill and also takes some time. If you ever need help fixing this, remove background can professionally create for you the final ghost images.

Now you can take photos of your apparel!

Here are some tips useful sharing for your store online, we hope that you will find its interesting. What other tips to own best photography have you known?. Let’s add to the list? Leave one in the comments below!.

Categories
Support Tips & Tricks

5 Pro Tips To Shoot Great Home Photography

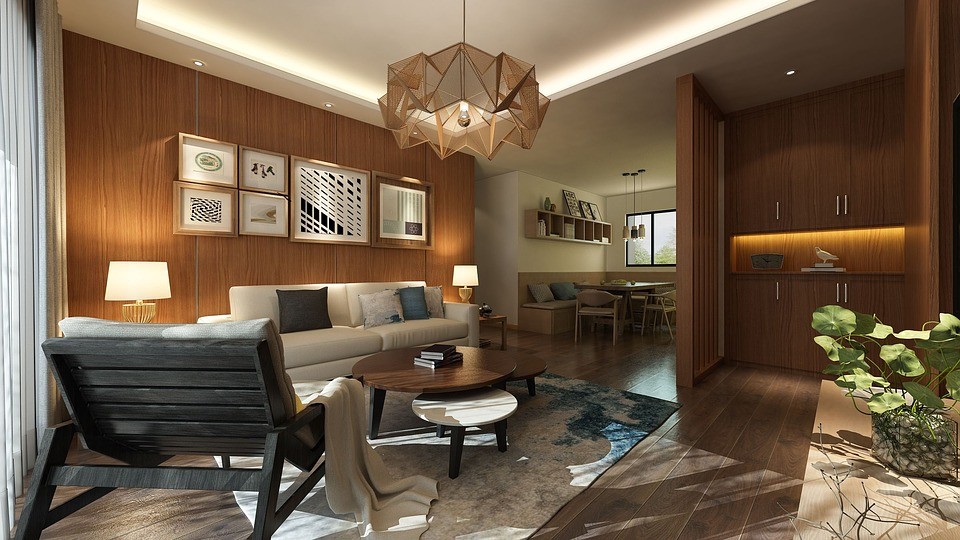
The housing demand is a crucial issue that many people are interested. So how do you make a good impression with your real estate photos or great home photography?. As a professional interior photographer for magazines, we will share reader some experiences to help you take better photographs of your home’s interior or design project. You can use some basic ways related to shooting home photography. Using a tripod, shooting from straight on and avoiding wide-angle lenses can take you a long way toward standard practices. Many professional photographers use them every day.
With useful tips, we hope that you’ll find special ideas that offer inspiration for your own home photography.
fotosolution-5-Pro-Tips-To-Shoot-Great-Home-Photography-1