Categories
Support Tips & Tricks

Why should you choose black and white photography

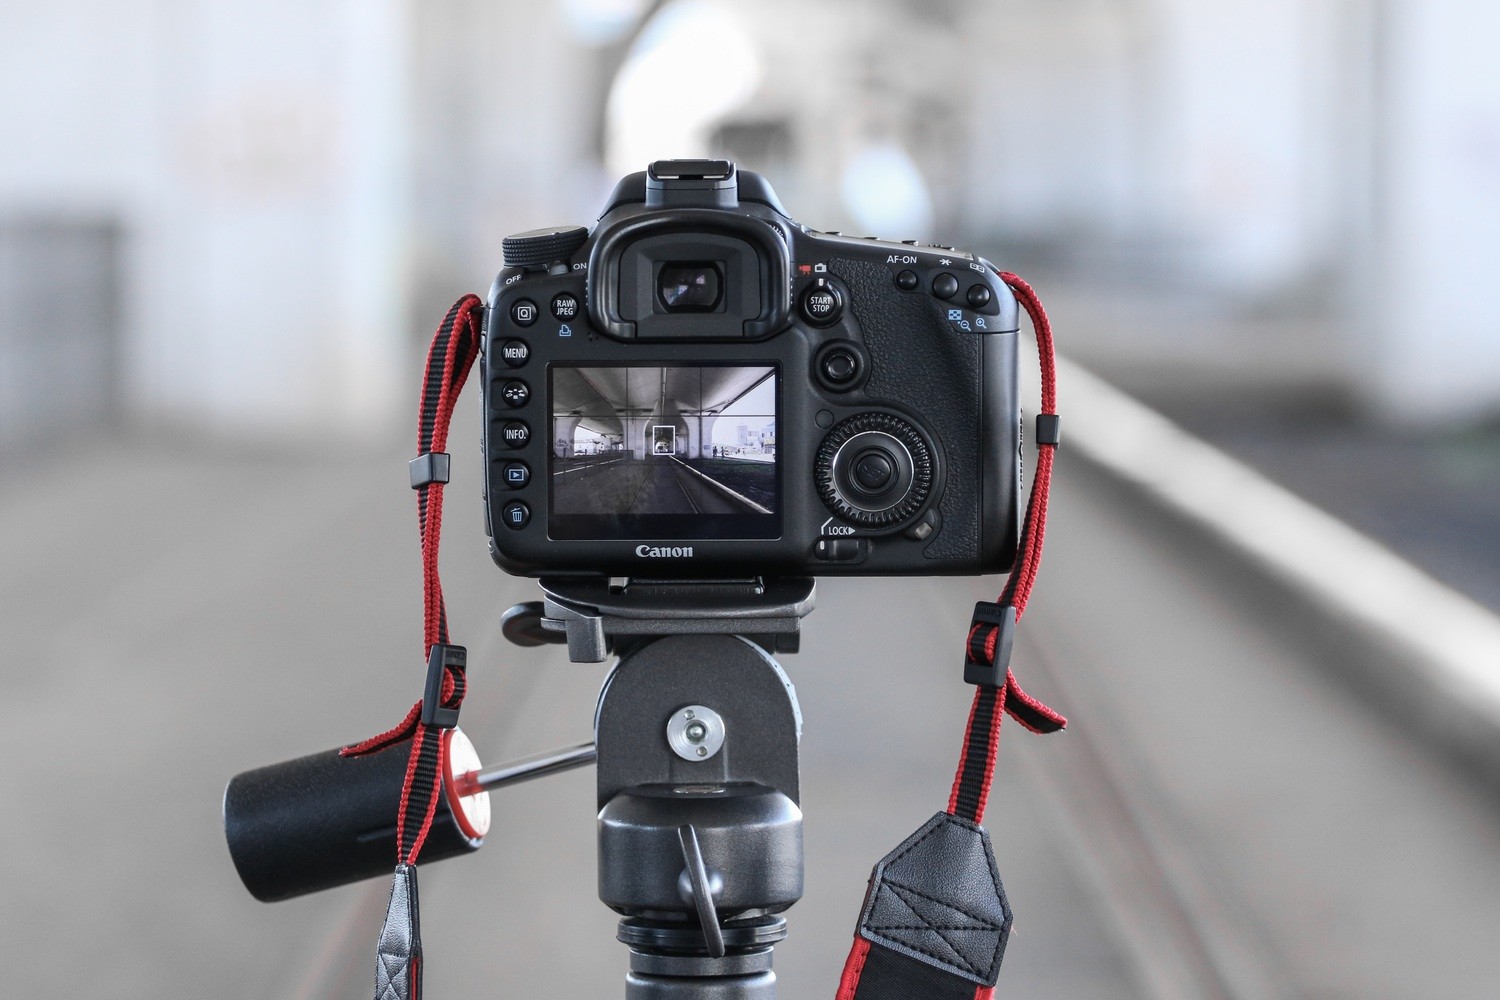
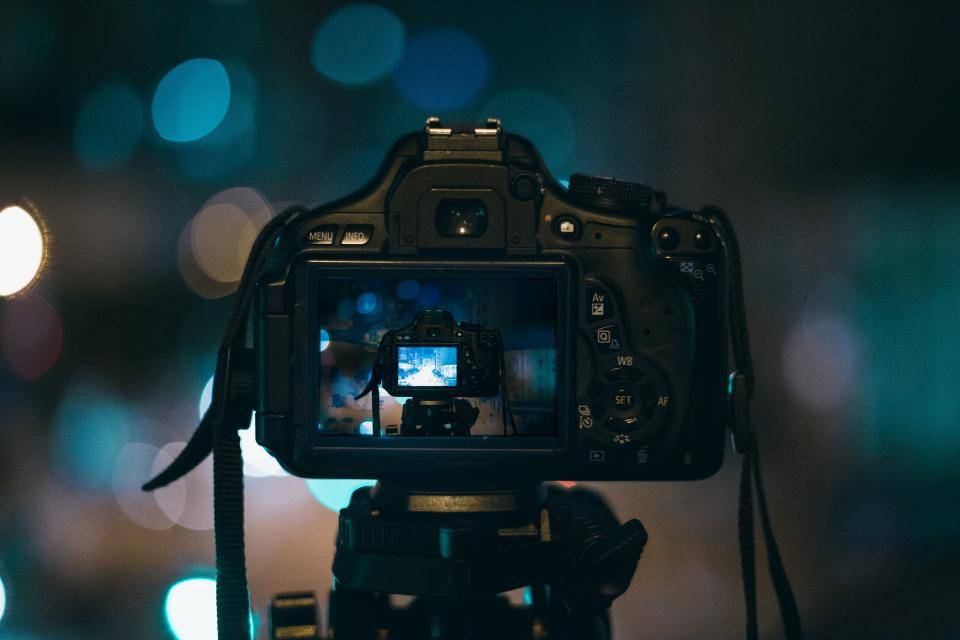
Black and white photography will allow photographer to create the great photos that own the same tones of color. This will help them focus on structure, layer and the body of subject.

As far as we know, black and white photos are very permanent or in other words, these photos always exist with times. These photos will increase the depth of subject and expand photographers creative ideas.

Here are a few of reasons that help readers answer the question: Why should you choose black and white photography?.

Focus on subject

One of the important and necessary elements for photographer is that focus on subject. Why should we say that?. A basic reason is that clothing, color temperature differences in ambient light sources, cars and colorful background distractions have stopped being an issue. These elements can be terribly distracting in some images and can take the focus away from your subjects. However, if you use black and white, it will help you limite your risk. Black and white allows you to focus on think about these key elements such as lighting, composition, element in and out of the frame.

In addition, it help emphasize emotion. For example, when we look at someone’s face, or into their eyes, without the distraction of color can provide a stronger emotional connection to your subject. This will help your artwork transmit message to readers and make your artwork more realistic.

The Timeless Quality from Black and White

fotosolution-Why-should-you-choose-black-and-white-photography-1

Black and white colors remind the past and the classic moment for viewers. Especially, black and white photos will allow photographer to keep the quality of images according to the change of time. And it is one of the most common reasons people especially photographers want to shoot in black and white.

Highlighting the beauty and skin tones of model

Black and white photography provides wonderful tonal range between the deepest blacks and the whitest whites. Pigments, discoloration and distracting elements of the skin can become less obvious. The colorful makeup for model would be distracting the strong point of subject. Using black and white colors will help your artwork avoid this mistake and highlight the beauty and skin tones.

fotosolution-Why-should-you-choose-black-and-white-photography-2

Moreover, black and white also support photographer to shape it into a myriad of shapes. And black and white images can be strong, high contrast and powerful – or they can be so soft, gentle and subtle.

Have you ever taken black and white photography?. Do you like black and white photos?. We hope that you will find some reasons in this article interesting. Let’s have experiences with black and white photography now. If  you have questions or concerns, please do not hesitate to contact us today for a free consultation. Interested in hear your thoughts in the comment below.

Categories
Support Tips & Tricks

5 Bad Habits Photography That You Should Give Up

Bad habit photography is always one of the essential issues that obstruct the photographer’s success. As far as we know, photography is a fun and exciting hobby when we have a free time and are a important job for many people. However, whatever you do, the first criteria of every people are that shooting beautiful image collection. Especially, whatever you are professional photographer or normal photographer, you can also avoid the basic mistakes. Understanding these issues, here are 5 bad habits photography that we wanna share with readers and hope that they are useful for your project.

Failling to check your equipment before shooting

Check your equipment before shooting are important and essential thing for all people but we always forget or don’t take care this because the simply reason that we always believe ourself. The fact that have you ever discovered one or more essential pieces of equipment missing when you arrive at a shooting location?. Let’s check your camera bag before leaving home to avoid unexpected thing that to happen. Make sure it contains the camera bodies, lenses, memory cards, batteries, filters and cleaning equipment you need plus any peripherals like tripods, flash units and reflectors that may be required.

Hesitate and Fear before shooting

fotosolution-5-Bad-Habit-Photography-That-You-Should-Give-Up-1

If you are shy person, you feel anxious when taking images before the crowd or you may be concerned about what people think. Are you feeling the urge to take a shot of your crying child?. All things are basic factors but main things maybe affect direct the result of your images. Do you believe that there are many successful images that shoot in the random times?. So, if you hesitate to shoot the nice moment, it may be become a unfortunate thing. So, be confident and passionate expression of your creativity.

Falling to customise your camera

Custom cameras or white balance are one of the useful way to help you save your time when you are shooting. You can set up groups of camera settings to cover subjects like landscapes, portraits, sports; pretty much any type of subject you shoot regularly. This will allow you to easy to re-configure the camera to your pre-sets by simply selecting that mode from the custom memory bank.

Avoid centering a subject

fotosolution-5-Bad-Habit-Photography-That-You-Should-Give-Up-2

Subject of images are the first thing that photographer always take care. Centering can definitely be used with to great effect once you know what you are doing, but if you are too attentive for subject and forget the nice background that are around the theme, it is a mistake for your project. Learning the rules of composition will help your photography immensely.

Relying too much on postcapture editing

No matter how capable you think you are with any editing application, it’s best to get as much as possible right when you take the shot. That means exposure, focus and white balance for starters and plus consideration of ISO and noise potential.

This should be your objective. When it is achieved, there will be scope for subtle fine tuning on your computer.

Let’s think that do you make one of these five bad habits photography?. Bad habits are easy to pick up, and difficult to break. If you tried so hard to give up the bad ones, you’re sure to see your technique, and your photos, just keep getting better and better. What other bad habits have you known?. Let’s share the other bad habits and your tips in the comments below.

Categories
Support Tips & Tricks

How To Make Beautiful Real Estate Photos

Real Estate photos is one of exciting subjects that attract many readers especially people who are interested in real estate. Great real estate is one of the most important elements that affect directly business sales. If you’re selling your home, of course you want it to be presented in the best possible things. However if you are looking to buy, you don’t want to visit a potential property only to discover it doesn’t look anything like the photographs listed. You must attend many factors such as: lights, furniture, space,.. in house.

If you own a shopping online or you don’t have many times to find and look at directly all real estate, you can easily find their information on Internet. Thus, photos are usually the first thing a potential buyer sees, and if that initial impression doesn’t result in an interest to visit the property in person, then getting a sale could be difficult. So, how to make beautiful real estate photos that attend the viewer’s attention?.fotosolution-Tips-How-To-Make-Beautiful-Real-Estate-Photos-02

There are beautiful homes with superb design, architecture, and lighting. And there are homes that lack all three of these. So, what is the goal of a residential interior photographer? They must make and transform the ugliest home look appealing and more special. This guide below will help you how to choose the right equipment, use proper lighting, prep a home for a shoot, and create an appealing composition or how to make the beautiful real estate photos.

The essentials things that you’ll need for interior photography include a tripod, electronic flash, and non-distorting lenses. You need to choose wide angle for shooting. If you can, you should use prime lenses over zoom lenses as this will minimize curvature.

Great architects understand the importance of light and design houses around this. If you are fortunate enough to have a well designed lighting system, you might be able to get away with only using existing light.

Let’s turn on all the lights in the house, it will help you add more depth and color variance to your photos. Be sure that the lights do not show up as reflections in pictures, windows, mirrors, or other reflective surfaces. You can use a simple tactic is to replace the incandescent bulbs with more powerful tungsten bulbs instead of using the external lighting such as flashes or strobes. These products are more consistent in color temperature with outdoor lighting.

If you use a portable flash, you need to avoid pointing the light directly at your scene. Instead, aim it at a wall or ceiling. This will diffuse and spread the light throughout the entire room. Use caution with colored walls as the color may transfer to the light. Let’s avoid the bright and large windows because they can be cause various problems in an interior shoot. They distract the viewer and can cause exposure problems. Planning your shoot when the sun isn’t at its strongest or entering directly into the window is an easy solution to this.

fotosolution-Tips-How-To-Make-Beautiful-Real-Estate-Photos-01

The goal of residential interior photography is to present an attractive, beautiful things of home. You’d be quite lucky if you can find a home with everything perfectly staged and orderly. But often you’re going to want to rearrange furniture and tidy up the area.

Every room has a key element that you will want to feature prominently in your photos. Let’s move around every room is a great way to lure viewers’ eyes to these special factors in room. Simply, you just give bright objects on these key elements (fireplaces, stairs, grand piano, etc.) will make them stand out from other objects in the room.

After you’ve completed all the pre-production phases of interior photography, now comes the actual photo taking! Below are a few tips for taking better residential interior photos.

Be Spacious

To make rooms appear more spacious, you should avoid shooting straight at walls. This will make the photo look flat and can also warp the perspective. You need to shoot into the corners of rooms. This will create more depth and make the room appear larger. Photographing from a lower angle and with a wider angled lens is also a great way to increase the perceived size of the room.

Choose Attention Grabbing Areas

There is no way to photograph a room in one picture. When you photograph a room, let’s select the interesting parts in that room. Remember that choose objects of importance or parts of the room with more interesting architecture. This will help your photos lure the viewer’s eyes in the first times.

Keep the Lines Straight

Be sure that the vertical and horizontal lines in your photos are straight. If your photos are appeared the crooked lines, it means that signs of poor technical skills and will detract from the image.

Know Your Goal

Are you photographing the house to feature the architectural design or the ambiance? Understand your goals for the photo shoot and compose accordingly.

fotosolution-Tips-How-To-Make-Beautiful-Real-Estate-Photos-03

With the basic guide, we hope that you can find it interesting. Fotosolution team – we provide image processing services from an image. Real Estate images will be cleaned, retouched and made to pop. Also, there might be the need to manipulate the images for their colors, size and density. You can create a products entry for multiples style with our support.

To receive free test sample or products with various colors and size without spending too much times, details of our quotation or any further information, please do not hesitate to contact us.

Now go experiment and show me what you can make!.

Categories
Support Tips & Tricks

Why Product Visualizations Improve Drive Sales

Are you not sure how to approach your customers or to improve business sales?. Product visualizations are one of new products that many business prefered to use. They are already changing the way many industries function from design to market. Imagine if your sales team could more accurately qualify and identify the prospects most likely to purchase your product?. Let’s product visualizations answer this issues. Here are this article that we will learn more about how product visualizations can change your business and help you increase sales.

If you use product visualizations, you’ve probably seen product before sleeking perfectly lit product shots. This will help your customers have a real look about your product. Besides, instead of explaining verbally what a product will look like, you can give potential customers a hands-on experience before the product has ever been manufactured.

fotosolution-why-product-visualizations-improve-drive-sales-1

3D Visualization

Anyone who views your visualization can spin your product 360 degrees. So, let’s apply unlimited configurations and variations and zoom in sharp HD.

There’s a direct correlation between the richness of your product visualization and completed sales. When your customers see your real and concrete product more, you sell more because this will help them have big belief for your product.

As your customers can personalize your products and view any combination from any angle, the choice of customer are very high and your sales are more improved.

If you use product visualizations, you deliver detailed understandings of your product’s technical viability. With product visualization, this will allow not only architecture, designer, … However, your customers to see product and save times instead of reading information on it.

Moreover, using 3D visualization also bring many other advantages. It helps creators add animated effects and extra details in post-production to make a product or service appear more attractive. It allows engineers and concept artist to think out out of the box. In addition, 3D visualization come up with content ideas never before imaged.

fotosolution-Why-Product-Visualizations-Improve-Drive-Sales-

In conclusion, product visualization are effect product that can increase your sales. It also create a better look to attract your customers. Have you ever tried to use product visualization. Now, let’s learn more about how you can sell more by using product visualization?. Finally, if  you have questions or concerns, please do not hesitate to contact us today for a free consultation or let us your thought below.

Categories
Support Tips & Tricks

5 Tips To Own Best Nature Photography

Nature photography always friendly subject that win popularity. A best product photograph need to use many different elements. Natural lighting is one of essential factors to create the success of product photograph. If you love nature photos or you are photographer, have you ever used natural lighting for your photograph?. Below is some useful tips what help you learn how to make better nature photography.

Natural light is extremely straightforward: it’s daylight. You can work in late morning and early afternoon: the times of beautiful sunlight. These gives sufficient lighting near windows or in the shade. If you take a nature photography, viewers loves a great nature photo. It’s easy for viewers to put themselves into the picture. Even if they’ve never been to the mountains, people enjoy looking at pictures of mountains. It transports them, at least for a brief moment, to a peaceful place. So in order to help you get the most out of the time you spend outdoors with your camera, here are some fundamental tips for taking better nature photos.

Get close, get closer

This is a visual directive, not simply about moving closer. You can, of course, get visually closer to a subject by zooming in with a zoom lens. However, for wildlife photography, you need a big telephoto.

http://admin.admin.admin.admin.admin.admin.fotosolution.com/5-tips-to-own-be…ture-photography/

That means using a digital single lens reflex (SLR) that can hold at least a 300mm focal length lens or one of the large-zoom compact digital cameras that have an equivalent focal length of 300mm or more.

Look up, look down and look all around

There are many wonderful things to photograph above our heads, and even greater opportunities for creative photography. You can use interesting and dramatic cloud formations, and incorporate clouds in your shots of other natural scenes. Remember that hardly anyone likes looking at an uninteresting sky, so try and compose your shots with that in mind.

fotosolution-Tips-for-better-the-nature-photography-12

It doesn’t stop at merely looking for cool cloud formations either. Get instant creativity in your shots by using leading lines, and vertical perspectives to give your images a uniqueness, that is sure to catch the attention of your viewers. The key thing to remember here, is that your goal is to show things in nature in ways that most people don’t get to see, or have not even considered looking for in the first place.

Be patient to capture the best moments

As you know, the light changes from hour to hour and day to day. To create natural lighting for your own photos, you should shoot your photos at the brightest time of day. The perfect glint of sunlight playing off your prize rose bushes will not happen any sooner or later than you want it to. Keep your camera at the ready, and don’t force the shot. You may arrive five minutes too late for a great shot, but you may be five minutes early for the perfect shot. A small suggestion for you, you can work in late morning and early afternoon – the times of beautiful sunlight and these gives sufficient lighting near windows or in the shade. In general, morning light is bright and has less color, while afternoon and evening light often has a warm undertone and brings out greater contrast in your images. You can always neutralize the image and make it cooler in post-production if want a cool, dark image.

Understand the feature of nature

Nature have pure and simple beauty that bring to you many advantages when shooting photos but we also confirm one thing that you cannot fight the changes of Mother Nature. You should have plan on working with the elements of the natural environment you photograph because simply, animals, trees, bushes, grass,…everything associated with nature functions uniquely in different weather conditions. If you’re looking for a “money” shot, you need to understand the conditions you’re working in, and the subject matter you are photographing.

You can understand the feature of nature as well as the main subject that you want to capture to have a fantastic shooting.

Use and Capture The Light

Light is one of the important factors that contribute the success for beautiful photography. It is the basic force behind all nature photography. It illuminates your subjects, and brings shadows and contrast to your photos. Learning to understand the nature of light is a lifelong journey for any photographer. And using the natural light is one of the best way to help your images become more powerful and more prominent. In addition, direction of light is also very important, and can make a place or object look completely different depending on the angle of the sun. You can choose correctly direction and find as well as try on many different locations at varying times of day, this will help you find and choose the most beautiful moments.

fotosolution-Tips-for-better-the-nature-photography-13

Follow these five simple tips and make the most of your time shooting out in our amazing natural world. Be sure to share them in the comments below as well as your nature images. Moreover, if you have great tips, don’t hesitate, let’s share your experiences for us by give your opinions below.

Categories
Support Tips & Tricks

Why should you buy Mirrorless cameras?

Mirrorless cameras have been appeared on the market for a decade. They have really begun to make waves in the past few years. With many amazing features, Mirrorless cameras are more and more attractive and meet the need of users. Mirrorless cameras are usually lighter and smaller than their DSLR counterparts. They are good focus speed and and better photographers when focusing during video recording.

Today, choosing a mirrorless camera can be a daunting task with lots of options. Here we will show and give you the information you need if owning Mirrorless cameras. Buying your new cameras should a nice experience, let this guide help you have corrective choice.

Size and Weight

The easiest thing we can mention that the size of Mirrorless is small and light. It is very convenient for users. Using Mirrorless cameras – a lighter camera makes you for less strain on your shoulders and neck during a long day of shooting. In addition, the basic principles of Mirroless don’t use mirroless, so its body are slimmer.

Autofocus

Another strong point of Mirrorless camera is autofocus. Once considered a weakness of mirrorless cameras especially compared with the autofocus speed of DSLR. In fact, all mirrorless cameras assess focus from their imaging sensor rather than a separate module. They are able to be more accurate and consistent, especially when focusing wide-aperture lenses.

fotosolution-why-should-you-buy-mirrorless-cameras-1

So if you plan on shooting a lot of video or often need to hold the camera below waist level or above your head and compose. Using the rear screen, you’ll get much faster focus times with a mirrorless camera, especially when locking onto subjects near the edges of the frame.

Video quality

Mirrorless use hybrid autofocus mechanism (hybrid AF) and with superior autofocus in most models. Mirrorless cameras provide the best results for most filmmakers. Moreover, mirrorless cameras focus with continuous contrast-detection, you can maintain focus on moving subjects in your frame.

fotosolution-why-should-you-buy-mirrorless-cameras-2

Especially, when you use video camera, you will be able to control the depth of field via the aperture, and also manually focus your shot. This gives you greater creative control. Besides, the duration of Mirrorless video is better than DSLR’s duration, maybe lengthen from 30-40 minutes to meed your demande.

Superb lenses

Mirrorless camera systems offer an impressive range of lenses. The Micro Four Thirds mount alone boasts more than 60 compatible lenses. Mirrorless models are more restricted, offering access to a small number of lenses from the camera maker. If you choose Mirrorless camera, you may find that there are more modern, more affordable lenses available for some mirrorless systems than are available for the big DSLR brands.

fotosolution-why-should-you-buy-mirrorless-cameras-3

With these advantages of using Mirrorless cameras, we believe that you will find it interesting, however, Mirrorless cameras have also some disadvantages that you are interested in and attend when buying a new cameras.

If you are compared with DSLR cameras, the autofocus speed of DSLR are better and faster than Mirrorless. Mirrorless cameras were restricted to a technology called contrast detection, which uses the image sensor to detect the highest contrast. That’s the reason why the contrast detection is slower than DSLR.

Furthermore, the need to constantly power the sensor and screen while shooting, combined with attempts to capitalize on the size benefits of mirrorless. It mean that battery life is much more limited on most mirrorless cameras.

Mirrorless cameras are better than they’ve ever been before and we’ve highlighted the best models and the weak points that we’ve experiences here. With amazing sharing here, we hope that you can now be willing to choose the mirrorless camera that best suits your needs. If you have amazing sharing about Mirrorless cameras. If you have questions or concerns, please do not hesitate to contact us. Let us your thought below!.

Categories
Support Tips & Tricks

The best features of DSLR Cameras you should know

Discover the best features of DSLR Cameras you should know below. DSLR Cameras are increasingly becoming a type of camera that is in the reach of the average photographer. It becomes popular and friendly for users with many amazing features. If you are interested in DSLR cameras or are owning it, have you known all features of this types?.

All digital SLR cameras have a variety of features that make your job as a photographer much easier, more pleasant, and more creative. Here are some best features of DSLR cameras will help you as well as photographers have a clearer look.

Balance correction with integrated balance size

Almost landscape photographers have many experiences but they sometimes make mistakes due to shooting images that are tilted especially photos have horizons that are not entirely straight. Although you can adjust and edit mistakes but you have to take a lots of time.

Solution: Balance correction with integrated balance size are useful for photographers. It will help them avoid mistakes and errors what are easy to make mistakes.

Lenses and more lenses

fotosolution-the-best-features-of-dslr-cameras-you-should-know-1

Many non-SLR cameras are outfitted with “do-everything” lenses but they don’t do everything. Only a digital SLR, which lets you pop off the lens currently mounted on your camera and mount another one with different features, has that capability.

Faster Operation

All functions of a dSLR camera autofocus to storing an image on your memory card, are likely to operate faster and more smoothly than with other types of digital cameras.

Speeding Mode

The ability to shoot a burst of images quickly by just holding down the shutter release. This is very great for sports and action photography. DSLRs vary both in the number of frames that they can shoot per second as well as how many images they can shoot in a single burst

ISO rating

Most DSLRs will offer a good range of ISO settings. This increases the camera sensor’s sensitivity to light.

Focus Modes

fotosolution-the-best-features-of-dslr-cameras-you-should-know-3

There’s fixed focus and servo focus, as well as a hybrid mode. Which is best to use depends on the movement of your subject.

Depth of Fields

Digital SLR cameras allow you to choose between shallow and extensive depth of field. This is a measure of how much of the scene is in focus and is most easily controlled by changing the aperture.

Flash Control

Knowing when and how to control your flash is important when lighting your image. This will allow you adjust images and ensure the stable exposure parameters when you change the subject in shooting.

Image Quality

Due to the larger size of image sensors in DSLRs which allows for larger pixel sizes which makes them more sensitive to light and less prone to grainy artifacts called noise.

You can refer some features of DSLR cameras here to understand more about your product if you want to own. We hope that you can find its interesting. If you know other features of DSLR cameras, let us know your thought!.

Categories
Support Tips & Tricks

5 tips to shoot great HDR images

How do you create great and successful HDR images?. It is a question that photographers or person who love photograph always query and wanna find the best answer. Understanding their anxiety, here are list of 5 tips to shoot great HDR images that we wanna show and share readers.

Using Tripod

fotosolution-5-tips-to-shoot-great-hdr-images-4

While most HDR rendering software can attempt to line up images, you really want clear consistent frames because stability is key. Using tripod will one of an amazing way to support your images project. A tripod will not only allow you to stabilize each individual image and some of which may be fairly long shutter speeds but also get you better quality. In addition, tripod also allow you to avoid touching the camera while making frames. This will good for sequences and long exposures.

Don’t tone map a single exposure and call it HDR

As far as we know, when they or you shoot an images, you can create an underexposed, neutral, and over exposed image in Lightroom from the same RAW file, and then merge those three images into one HDR photo, but it’s really not the same as capturing individual images. And you always ask yourself why?. It is simple that when you capture one exposure at a given set of settings of this exposure values on the exposure triangle you are recording data within that given range. And whatever you do, you can not also change this data, you only change the way to show images when they are on the screen.

When you capture three or more images at different exposures (EV), then those three images are all going to have different levels of data from which you can pull; allowing for a truly high dynamic range photograph. The more images you capture the more data you’ll have at your disposal.

Know when you need HDR and when you don’t

HDR all about light or it stands for ‘high dynamic range’. Sometimes it’s from a single file. Often it means getting various exposures at different lightness levels. It is simple thing that we should know and understand when need HDR and when don’t to have a best preparation. If you’re photographing a scene where the lighting is fairly even from shadows to highlights, you don’t need to do HDR.

fotosolution-5-tips-to-shoot-great-hdr-images-1

So, when you need HDR?

Using it during sunrise or sunset, especially when you are photographing into the sun. Or use it to photograph architecture or man-made objects are great ideas for your project.

Invest software technology

To make a good meal, you should know great raw materials and understand the processing of raw materials and refining product. Like a good meal, to shoot a beautiful images, you need also to prepare many things to ensure high – quality pictures as great and lighting space to create stunning images anaphase.

Here, we will show you two great programs that we have experiences: HDR Soft’s Photomatix Pro or Nik Software’s HDR Efex Pro. There are two programs that have free version, but we think that they don’t do as good of a job at tone mapping. Remember the tone mapping process is done algorithmically so the more powerful the software’s algorithms, the better the end results.

Control yourself

fotosolution-5-tips-to-shoot-great-hdr-images-5

This is one of reasons of the argument when using HDR. Some people say that it’s their style to create over the top, surrealistic style and other’s say that they are destroying the world of photography by creating these highly saturated and oddly lit photographs.

It’s easy to get carried away with tone mapping your images, but if your goal is to recreate what you saw, the best way to do this is to remember to tone it down a bit before you press that process button.

fotosolution-5-tips-to-shoot-great-hdr-images-3

Here are some useful sharing for HRD images, we hope that you will find its interesting. And with these 5 tips are good start to get you on the right track to capture your first high dynamic range photos. If you have some tips, let’s add to the list? Leave one in the comments below!.

Categories
Support Tips & Tricks

DSLR & Mirrorless Which is great and appropriate choice for you?

DSLR & Mirrorless are two famous cameras lines that are interested in and popular for photographer. The competition between DSLR or Mirroless has never ended because of the development of them. It is difficult to find and answer DSLR or Mirroless which is the best for users due to depending on many factors. But the first step we have to know and understand the basic knowledge about DSLR and Mirroless.

DSLR is a digital camera that uses mirrors to direct light from the lens to the viewfinder. When you press the shutter button, the mirror flips up, a shutter opens and the light falls onto the image sensor. A mirrorless camera is a digital cameras without using mirrorless, light passes through the lens.  When you take the photos,  you need to focus on LSC screen or put your eyes in the electronic viewfinder (EVF).

Today, nobody including famous specialistes and photographers can confirm that DSLR or Mirrorless which is the better or the best for users. Each camera line has the own advantages and the important thing we are interested in the quality of images. Here we will share some advantages and disadvantages of DSLR and Mirrorless.

Size and Weight

fotosolution-dslr-and-mirrorless-which-is-great-and-appropriate-choice-for-you-2

The easiest thing we can mention that the size of Mirrorless is smaller and lighter than DSLR because basic principles of Mirroless don’t use mirroless. So its body are slimmer. For DSLR, its body are comparatively larger, because it includes mirror and a prism. If you need to choice a camera for travel, for portrait shooting,.. mirrorless will a great companion for you.

Autofocus Speed

Autofocus speed is viewed as the most obvious differences of two camera lines. In term of technique angles, the autofocus speed of DSLR are better and faster than Mirrorless. Mirrorless cameras were restricted to a technology called contrast detection, which uses the image sensor to detect the highest contrast. That’s the reason why the contrast detection is slower than DSLR. But, Mirroless camera has some camera lines as: Sony A6000 or Niko V3 that have a big development step on autofocus speed.

However, when you shoot some images as: sport athletes, birds flying in the sky, the deer herd, herd of horses running in the woods .. using DSLR with tele lens and automatic autofocus speed will great and effective solution.

The quality of image

Generally, both types of camera can take high – quality pictures and similar resolution. If Canon’s 5D with resolution passed  50.6 MP , Sony’s A7 line of cameras use the even larger full-frame sensor type found in the best professional DSLRs. To summary, with equivalent sensors and image processors, we can confirm that both camera types can take great photos with high – quality color as well as resolution.

Video quality

fotosolution-dslr-and-mirrorless-which-is-great-and-appropriate-choice-for-you-3

Both types of camera are together owning the best modern camera with the effective 4D video quality. However, principles of DSLR are that use mirrorless and this is one of weak points. So, when photographer choice DSLR, they have to use the slower, less accurate, contrast-detection focus method. This leads to the familiar blur-blur look in the middle of a video when the camera capture for the right focus.

Mirrorless use hybrid autofocus mechanism (hybrid AF) that help them avoid the restriction like DSLR. With superior autofocus in most models, mirrorless cameras provide the best results for most filmmakers. In addition, the duration of Mirrorless video is better than DSLR’s duration because of the overheating of DSLR. This make the duration of DSLR dropped sharply, only from 15-20 minutes in while Mirrorless video are from 30-40 minutes.

Lenses and Accessories

The early appearance and the development of DSLR help it own many various lenses comparison with Mirrorless. Choosing a DSLR gives you access to a plethora of lenses from a number of manufacturers, ranging from cheap and satisfactory to professional and wildly expensive. Mirrorless models are more restricted, offering access to a small number of lenses from the camera maker.

fotosolution-dslr-and-mirrorless-which-is-great-and-appropriate-choice-for-you-5

Recently, many manufactories like Zeiss, Samyang, Laica and voigtlander,…are published list of products to meet the needs for Mirrorless cameras. This is lighting point will help Mirrorless’s lenses have to catch up the development of DSLR.

In conclusion, depending on the purpose of users to help them find the best cameras that approriate with invidual preferences. If you are photographer who like shooting the flying birds, wildlife or are sport photographers, DSLR fullframe are great choice for you. And if you are person who love traveling, like to shooting portrait, landscapes,.. Mirrorless camera will are right for your project because of its convenience.

What do you think about this? Please share your thoughts below!.

Categories
Support Tips & Tricks

How To Take Camera Setting for Brilliant Product Images

How to take camera setting for brilliant product images are hot subject that anybody are interested in. If there’s one thing that’s true when it comes to ecommerce, it’s that the perceived value of your products and the trustworthiness of your business is often judged by the quality of your web design. And a big part of having an attractive website these days also means having high-quality, beautiful product photography. Sure thing; using epic images to showcase your products can make the difference between your conversions and no sales at all. So, you want to take camera setting that perfect product photography—sharply focused and perfectly lit so as to attract the attention of customers? Below is some tips to make brilliant product images.

Let’s check them out…

Camera mode

fotosolution-how-to-take-camera-setting-for-brilliant-product-images-1

Once you have your camera, tripod and product in place, you can start by selecting your camera mode. Most cameras offer a variety of settings but I usually stick to using three modes: Manual, Aperture priority and Automatic. As you can see, image taken with my manual mode looks much more pleasing to the eye. This is simply because you can be able to control all your image settings without worrying about the camera using the wrong automatic settings like aperture, flash, shutter speed etc.

ISO Settings

ISO Setting is one of the important factors to perfect product images. Now, let’s select our ISO setting based on the light in our studio. As a general rule, the better the light in the room, the lower your ISO value needs to be. By adjusting your ISO setting just right, you will be able to produce crisp and clean photos.

I would recommend first setting your ISO at 200 and using the viewfinder to evaluate its effect on the product image. If the image appears too dark, increase the ISO value to a setting that is more suitable. If your studio or space is too dark for shooting, raise the ISO value to a range between 600-1400.

ISO measures the sensitivity of the image sensor which takes your image. The lower the number the less sensitive your camera is to light and the finer the grain in your images. This means your image will have less grainy ‘noise’ or what I like to call speckles! Higher ISOs are generally needed in darker situations unless you are using a tripod.

Images Format

As we will be reviewing the manual mode in this post, let’s start by choosing our image format. If you have the option to choose your images as RAW, absolutely do so. You will have more flexibility afterwards in post production. If you do not have the RAW option, then we suggest that choose the largest image size & format that your camera will allow you to select, which in most cases will be a JPEG.

Aperture

fotosolution-how-to-take-camera-setting-for-brilliant-product-images-1

When you choose aperture, you’ll be putting up your exposure settings. For a home studio, F16 is considered ideal as you’ll need to have the whole product in focus so as to shoot clearer photos for your customers

The rule of thumb recommends the use of Aperture settings of more than F11 to ensure nearly (if not the whole) product is in focus. In essence, the higher your aperture gets the better for your images. If for some reason your camera will not reach as high, the highest aperture your camera will allow is perfect or you can even try the auto settings!

Light meter

Finally, ensure your camera automatically focuses on your product images. This allows your digital camera’s light meter to detect the amount of light reaching the product. This will help the camera’s internal light meter defect how much light is falling on the product. We can then adjust our settings (aperture & shutter speed) according to the light meter reading on the camera. Since we know we want to have a higher aperture like F16, set it to that. By using the light meter in your camera, this will then help you adjust your shutter speed.

There are lots of techniques for shooting successful product photography, we hope that some useful tips help you take perfect camera setting for brilliant product images. If you love images and a peson who photographs products everyday, this tutorial has been specifically crafted for business owners on a budget, and it’s been designed to be simple while producing excellent high quality results with most product types.

Thanks for watching!