Categories
Support Tips & Tricks

Mistakes Photographer Make That They Should Avoid

Photoshop is one of an essential tool that photographer use to highlight and turn into perfect artwork. We have all been there. We have discovered some new tool and technique. Using Photoshop can help your image become amazing image, we are doing it to everyone, but we’re really doing ourselves more harm than good. Also, we need to use Photoshop in the most effective way and avoid the mistakes especially photographers.

In this tutorial, you’ll learn common mistakes photographer make and why you should avoid it.

Creating to Many Layers

Creating to many layers will one of reasons that obstructed the success of your artwork. Too layers make you no focus on main layer, this will create big limitation for your plan. In some cases, getting more granular about your editing can be useful, but more often than not the sign of an amateur who doesn’t know how to properly use adjustment layers and Smart Objects. Approving the first mistake, you should learn to group them or how to use Smart Object organise.

fotosolution-Mistakes-Photographer-Make-That-They-Should-Avoid-01

Not Using Smart Object

Smart Object is a perfect tool that support your image to become more stunning. For example, with Smart Object, you can perform nondestructive transforms. You can scan, rotate, skew, distort,….or warp layer without losing original image data. Or when you covert a new layer to Smart Object, you can easily replace it content. Also, if you don’t know the benefit of Smart Object and take advantage of them, it is big mistakes for you. You need to understand that Smart Object is one of Photoshop’s most powerful and valuables features.

fotosolution-Mistakes-Photographer-Make-That-They-Should-Avoid-02

Using the Wrong Document Setting

When it comes to resolution, pixel dimensions matter… DPI does not. DPI will only affect your printed image. Also, if you are planning to print, stop converting your image to CMYK before printing. Your printer probably has it’s own custom color profile that will produce more accurate results than Photoshop conversion. In other words, DPI doesn’t make a difference if you don’t print it, don’t convert CMYK. Let’s your printer it.

Unnecessary Luminosity Masking

Light is an important element to highlight your image. Light helps to create a particular mood within the photograph and can bring emphasis to key elements within a frame. In addition, light can help create depth and textures in an image by creating a mix of highlights and shadows.

fotosolution-Mistakes-Photographer-Make-That-They-Should-Avoid-03

If the ability to affect Shadows, Highlights, and Midtones individually is built into a tool, use luminosity masking is great choice. Many of Photoshop’s filters and effects will let you specifically target highlights, shadows or midtones anyway.If you forget to use luminosity masking for your project, let’s stop wasting time and use the build-in masks.

Overprocessing

The need of HDR is in the growing use of panoramic images. An HDR panorama will provide more immersive detail, providing detail observable to the human eye in the real-life scene that would otherwise be lost by traditional photography.

So, let’s stop with the plastic frequency separation, overcooked HDR and ridiculous vibrance levels. No matter how advanced a Photoshop user, are immune to making post-processing mistakes.

Here are some sharing information about mistakes Photographer make that they should avoid. What mistakes have you made with Photoshop that you’ve ended up regretting?. Let’s us know and show show off some of your own failures in the comment.

If you have any opinions as well as any questions concerned about this subject, let me know your though in the comment below.
Categories
Support Tips & Tricks

5 Creative Ways to Help Make You A Better Photographer

Let’s create new ideas for your subject as shooting. It’s not difficult if you practise very hard. Here we’re gathered a few tricks that seem to consistently help you refine your skills. Let’s talk about exercises you can do every day to make you a better photographer.

Find a new Subject

Subject is one of the most important and indispensable things for photographers. Every photographer has a favorite subject. However, they always want to find a new subject for their artwork. This will help them keep the viewer enjoy their artwork.

Also, the first challenge is to find a new subject. It should be something that you haven’t photographed before. Even better if it helps you learn new photography techniques.

fotosolution-5-Creative-Ways-to Help Make-You-A-Better-Photographer-04

It’s a new things and have small difficult for photographer because the new subject is not main subject what they always shoot.

For example, are you a landscape photographer who has never taken photos at night? Then set yourself the challenge of taking some great photos of the night sky. This challenge will allow photographer know and learn new photography techniques as well as new performance.

Shoot Daily

fotosolution-5-Creative-Ways-to Help Make-You-A-Better-Photographer-02

Practice every day are the best way to help you become a better photographer. Photography requires regular practice to keep both your creative and technical sides in top order. Don’t hesitant!. Let’s put a camera on your neck for at least a half-hour a day and shoot amazing images what you like. You’ll find this keeps your mind viewing the world from a photographic perspective and will expand your horizons as unforeseen opportunities pop up throughout the day.

fotosolution-5-Creative-Ways-to Help Make-You-A-Better-Photographer-03

Restrict yourself

If you want to become a good photographer, not only need to try but also restrict yourself. Sometimes, having a lot of options is a bad thing. It can be overwhelming and leave you unsure of where to start. Imposing restrictions on yourself is a great way to overcome this, as well as an excellent method to hone in on and develop specific skill sets. In addition, restrict yourself  will force you to think in new ways creatively, which you can then draw upon in future endeavors.

Use A Wrong Lens

The earlier exercise of picking your images from the previous 12 months should highlight the lens you prefer to use for your favourite subject.

fotosolution-5-Creative-Ways-to Help Make-You-A-Better-Photographer-01

The idea here is to use the wrong lens for the job. For landscape photography, most people say that you use a wide lens, while the 50mm is considered by some to be the portrait lens.

So when you’re out making photographs, make a practice of choosing the “wrong” focal length. For example, use a telephoto lens for landscapes, a wide lens for wildlife, or a fisheye for portraits. Using a non-conventional lens helps you see your subject from a different perspective, which pushes your visual imagination and creativity.

Look at your previous work

Time give you perspective. Also, you should look at your previous work. This will allow you get best result. You’ll notice habits, ideas and technical facet that you tended toward that may well inform your work in the present.

Finally, we hope that these lessons will help you become a better photographer. Feel free to adapt and combine them. Try these exercises and let us know how they’ve helped you. Also, if you have any exercises of your own, leave a comment detailing how you develop your skills. Moreover, if you have any opinions as well as any questions concerned about this subject, let me know in the comment below.

Categories
Support Tips & Tricks

5 good habits for photographer

In the last subjects, we have discussed about 5 bad habit for photographer and share experiences to reader to improve these issues. Next to the vote of readers, we will show new subject with 5 good habits for photographer. Hope that readers will find it interesting.

Shooting everyday

If you are member of flickr or friendly users of flickr to opt images, you will family with 365 projects. This 365 project is one of amazing image projects that many users are interested in. It not only provide the large number of images but also enable joiner to take ay least one shot every single day. Shooting everyday is really a great habit for all photographers. So, what are the benefit of shooting everyday?.

fotosolution-5-good-habits-for-photographer-02

  •    Enhance your skill and your capabilities
  •    Create a good habit: see the world photographically and frame scene your mind’s eyes.
  •    Record the moment in your life. This doesn’t always seem important at the time, you’ll look at those shots.

Leave your camera at home

It seems kind of contradictory to the first habit, but leaving your camera at home can be a great habit to get into.

I learned to harness the power of my phone’s camera to record memories without intruding on those moments with my massive SLR. Additionally, SLRs can be really impractical, and dangerous. I’m surprised my kids haven’t had concussions from some of the times I’ve bent over and hit them in the head with my camera!.

Keep notes

Let’s start keep notes with your ideas, your inspiration and color schemes. This will help you capture your best moments to have creativity. You can make a physical notebookwith written notes and images.

For example, Pinterest will a great choice for you if owing and collecting interesting image resources with different subjects. And Evernote is useful app that allow you to keep notes across all my computers and devices.

fotosolution-5-good-habits-for-photographer-01

Keep notes is good habit to arouse inspiration and build your creativity as you have difficult in creating shooting ideas.

In addition to keeping notes for inspiration, keeping records from shoots is a great habit that will really pay off.

Back up

One of the best habit you should start now is that back up datas. Let’s make sure that you have noted and saved data in your computer or devices because many photographer have had their history lost. This is simply reason that they didn’t back up their hard devices.

First, back up to physical hard drives using a disk cloning program or an automated system you don’t need to think about. Seconds,  you can backup by using online cloud storage. Thirds, you can backup to disks.

In short, whatever ways you can keep your files completely saves. You will be thankful you did if something happens.

Look at photography and refer

You need to create the “see”’s habit and evalue images to build images resource. Let’s become a fan of photography, not just making it but enjoy it. You should choose an author, a painter or a photographer …who you have best love or who have inspired their artwork.

fotosolution-5-good-habits-for-photographer-04

Don’t be afraid to copy. Photography stand alone in so many ways. One way is that we’re afraid to admit what photographer inspire our work. As you copy their images, this is considered as useful lesson to support your creativy for your images. And you can apply them for your images project in future.

Don’t only view genre of images you would like.  Let’s expand your passion with different subjects and you can store up valuable experiences. Learn to read images. When you view pieces, stop for a moment and really soak it in. This can be hard these days when we’re chasing content faster than ever before.

These have only been five habits and we are sure there are many more. What amazing habit do you have?. Let’s share your experiences and your thought in the comment below.

Categories
Support Tips & Tricks

3 Important Things You Should Know as Started Photography

There are some useful lesson we all know and learn the hard way. Shooting best photos is an example, you should know and learn to own wonderful photos. Trial and error, even arduous, we will learn from failures than successes.

More than anything, you wish you would have learned a few things sooner. There are so many lessons that would have benefitted you if you had only understood them on the front end of your trip into the photographic unknown.

Below are 3 important things we wanna share with photographer as started photography. Hopefully these hard fought teachings will help you move forward and give you the mentality you need to start creating better images. Here they are in no particular order.

Choosing approriate Cameras

Camera is one of neccessary tool for all photographer. If you think that just having beautiful cameras, owing best photos are sure things, you make big mistakes. Choosing approriate cameras is important things and is one of first things to decide the success of your galery.

DSLR and Mirroless are two famous camera lines that are interested in and popular for photographer or person who love photography. DSLR is a digital camera that uses mirrors to direct light from the lens to the viewfinder. When you press the shutter button, the mirror flips up, a shutter opens and the light falls onto the image sensor.

fotosolution-3-Important-Things You Should Know-as-Started-Photography-02

A mirrorless camera is a digital cameras without using mirrorless, light passes through the lens and right onto the image sensor, which captures the final images.  When you take the photos,  you need to focus on LSC screen or put your eyes in the electronic viewfinder (EVF).

Or sometimes, some people now earn a living with only the cameras in their smartphones.

The thing to remember is that most cameras are capable of  producing images of astonishing quality when couples with a proficient users. Whatever cameras you might have is likely more than enough. Especiallys, allow your skills to mature and uou will know it’s time to upgrade.

Perfect your post – processing

Post – processing is a neccessary skill for a digital photographer. It’s a simple facts that straight out of the digital camera, your image don’t look anything like the original scene they captured. Post – processing help you bring back that beauty by adjusting thing like contrast, brightness, sharpness and saturation.

fotosolution-3-Important-Things You Should Know-as-Started-Photography-03

Post-processing is not something to be avoided but rather embraced as a logical second step towards achieving your visualization regardless of what that visualization may be.

Perfection is unattainable

That’s right. No photograph is perfect and very few photographs are ever elevated to the level of fine art, whatever that means. This was an illusion that burdened novice during the early days while learning to create photographs. Best photos depends on private emotion and each person’s perception. Also, don’t put pressure on yourself.

fotosolution-3-Important-Things You Should Know-as-Started-Photography-04

Your photographs will certainly become stronger as you hone your technique and acquire more capable. The craft of photography is a practice in personal evolution. It is a journey of constant learning. So take a breath, relax, and enjoy the process for wonderful artworks.

These are just a few of things that I wish someone had told me when I first began making photographs. There’s no end to what you can learn as a photographer. So what are you waiting for?. Let’s share and list them in the comments below!.

Categories
Support Tips & Tricks

Shadows and basic things you should know

Shadows are one of the necessary factors that make photos more soulful. A professional photographer or some viewer understand the important subtle details that can create the product photos you need. Adding shadows to product images is one of the greatest examples what help you can do to achieve great results. So, why is the shadows important?. How many shadows are photographers or designers use?.

Next step we will present the values or the important of adding shadows to make best product images.

When we take a  product photography, we need to appreciate truely the value of detailes what make perfect product. Adding shadows to product images is an excellent example of what you can research and learn. When we add the shadow in product photograph, this will create a powerhouse effect. That’s a reason why would we say that?. Simply, shadows can obscure a beautiful product and make product photography look unprofessional. However, we should know the difference of shadows on a product and shadows cast by a product. Product image editing lets you use shadows to your advantage. There are three types of shadow that you can refer and learn:

  • – Natural shadows
  • – Reflection shadows
  • – Drop shadows

Each types have the outstanding advantages what build the success of product photographs. Below is some guides that you can learn about each of them.

Natural Shadowsshadow-graffiti-03

Nothing will look more realistic than your product’s real shadow, it is called Natural shadow. When we take natural shadow during the shooting process is almost always best, but we has not to be confirmed that all things is easy if we have never do it. The shape of your product and the challenge of lighting it properly may prevent you from capturing a perfect natural shadow, but one can still be added in post-production.

The best way to create natural looking shadows is to use a light source while shooting the product. Make sure that the light source, whether daylight or artificial, is positioned to the side of your subject. This factor enables it to cast the shadow at an angle from your product and give it a more three dimensional look. You should combine natural light with a white background, it will help you make the natural shadow look nice

To understand more about natural shadows, then here’s some tips what help you learn how to add the natural shadow.

  • Open your photo what you’re preparing in Photoshop, then you need to create a new layer with the white fill-in background, which is underneath the product image layer. Choosing a white area around the image to mask out your product from its background. Don’t forget to refine the edges so it establish smooth transitions.
  • Select the areas under the toe and behind the heel to create a curved layer mask.  Feather the curved mask
  • You should use the adjustment or the curve tool to create curves layer mask. This way make the simulation shadow even more effective.
  • Carefully brush out areas of your shadow layer manually to achieve the desired look. To achieve translucency, you may need to focus on certain areas over others. This make it look more realistic.
  • Finally, tweak your images layer mask by reducing its opacity a little so it doesn’t look so harsh against your shadow. This helps your product images to soften the created shadows against the real ones.

How To Apply Reflection Shadows

Reflection shadows are great ideas to make your product look nice if  was photographed on a reflective surface. It can make your product images more visually appealing and create a sense of environment, so they don’t look like they’re floating in space. It’s particularly effective with products what is combined with bright lights and reflective surfaces. Jewelry and sunglasses is good examples for combination.Reflection-Shadow

However, to creat perfect reflection shadows and to know how to manage light to eliminate reflections are not simple. Light spots can also be a problem.

If you want to know more about reflection shadows , here are some basic steps for you:

  • You need to create a new layer and fill it by using a white background.
  • Then you move your newly created white layer to the bottom of your layer stack.
  • You should create 2 product layers by duplicating the product layer
  • Create a tight selection around your product, and then efine your selection’s edges to make it less harsh.
  • Rotate your duplicate product layer 180 degrees with different angles, then you need to create two products between your two layers: one right side up and one upside down.
  • Align the bottom of your product together, which will make the upside down product looks like a reflection of the other pair.
  • Then adding a mask to the upside down images layer with the gradient tool
  • Add a mask to the upside down sunglasses layer and use the gradient tool until you get the desired look. You’ll want the opaque portion to be nearest to the eye frames of the glasses that are right-side-up. This will help to create a perfect natural reflection to get away from your subject
  • You have your sides and top brushed out around the reflected images’ base. You also need to continue to brush out or add your reflection to make your photos look natural
  • Have the layers flattened.

How To Apply Drop Shadows

Drop shadows like natural shadow or reflection shadow help the impression of sunlight coming from above. The usage of drop shadows is popular and effective with a wide variety of products. Below is some useful ways about adding drop shadow for your photograph.

You need to choice the white background of your chair image by using selection tool. then, you can refine the edge of your selection by smoothing out your transition.

  • Make a layer mask on your image layer and invert your selection, so you will just see photograph and no background.
  • Make a new layer, fill with white, and placing it as the background layer behind the image layer.
  • Adjust your chair to center it and allow for room for your shadowing. Have anything else in the background masked out.
  • You can duplicate this image layer with your new mask selection.
  • Have your bottom image layer with mask, transformed through vertical flipping. It should now look upside down.
  • Transforming and turning your product photos to make the back angles line up to its matching one.
  • Using your gradient tool, you’ll begin tapering the angles from more distinctive to less visible. You can continue with it to  find the right opacity and gradient.
  • Using your brush to tweak out your mask and brush out all of the other angles and needless items in your frame, other than that one angle.
  • Play with the opacity and brushing out to make it seem more natural..
  • You should duplicate this layer before moving it to your other back angle of your photos
  • Using your straight selection tool to create a diamond shape under your chair between the angles’ points..
  • Lots of feathering along the edge of your product will create a nice gradient. Brushing in some of your sides to allow for a nice fall off under your photos
  • Make a slim V-shaped selection on your front two angles, and then refine the edge to begin feathering your selection
  • You can create a curves layer and darken it so it looks like a shadow. This should be done for both legs at the front.
  • Flatten your layers and create your new file and save.

As you can see, shadows in product photos is a useful and convenient tool. After learning how to apply shadow in product photos with many different ways, how do you feel about it?. Which one is right for you? This depends on your product and your photography setup.  We hope that you will choose the most effective types to make your perfect product photos.

Categories
Support Tips & Tricks

How to make Beauty Retouching Photoshop Tutorials

Beauty retouching is one of the most popular application  areas in which Adobe Photoshop that contribute to make beautiful images. The basic problem with most of the Photoshop techniques we’ve experimented with over the years (burning & dodging individual pores, Surface Blur filter, Dust and Scratches filter, etc.) is they waste times but the effect of images is not good like they expected.

In this article we are going to show you a beauty retouching techniques we regularly use that results in beautiful, smooth skin that still looks totally real. Beauty-retouching is a quite deceptive art. This will help your image become more stunning but no less real photos.

Let’s challenge yourself with beauty retouching application now and below are How to make beauty retouching Photoshop tutorials attached video tutorials.

Beauty Retouch

Beauty Retouch from Lindsay Adler on Vimeo.

  • Step 1: Choose one favourite photos that make beauty retouching. You should use a high – quality image and especially a close up face photography.
  • Step 2: First, we can begin with the basic skin retouch by using Spot Healing and Patch tool. The first step is that click double Ctr+J and give the name for two new layer with name “ Blur” and “ Texture”.
  • Step 3: Starting with “Blur” layer by choosing Filter-> Blur-> Gaussian blur and choose approriate number for Radius. Next, press “ Texture” layer and choose Filter->Other-> High Pass and click “ Ok”.  Then pressing “ Normal” and click “ Liner Light” that is one of important elements for beautiful images. We’re now set to smooth tones in the skin and start removing blemishes.
  • Step 4: Press “ Image” -> Apply Image, this box will be appeared including necessary information. Choosing Layer “Blur”,  Blending “ Subtract”, Scare “ 2” and Offset “158”, then click “ Ok”.
  • Step 5: Smoothing Skin for image by using Lasso Tool to delineate the points on the skin to edit. You can use Zoom tool to avoid omission of limited points.
  • Step 6: Now is time for final skin color. Edit and improve the colors on your image as much as you can with curves and hue/saturation corrections tools.

This tutorial is all about beauty retouching and how to use adjustment layers, lighting, dodging and burning, and frequency separation to create stunning skin tones and textures for a true beauty photography retouch. We hope that this article will a great lesson for your Photoshop learning. Let’s post an image of your setup and a final image so everyone can see what you did. We would be really grateful if you upload and share your photos in comment below.

Categories
Support Tips & Tricks

Mock-Up Technique and Basic Things You Should Know

Mock-up technique and use Mock-up for photographers, designer as well as business become popular methods. Today, we will show mock-ups technique again and basic things of its you should know. Hopefully, this article will bring to reader a clear and deeper look about using mock-up.

As far as we know, mock-up is a scale or full-size model of a design or device. Especially, it is used for teaching, demonstration, design evaluation, promotion, and other purposes.

Software UI mock-up allow users to range from very simple hand drawn screen layouts, through realistic bitmaps, to semi functional user interfaces developed in a software development tool. Normally, we always use this technique to create devices mock – up and items mock-up. Using mock-up technique is a great opportunity to present your product. In other words, you can present your brand, badge or logo design as well as features of your product in a photo-realistic way.

A successful and selling product on the market requires many elements including images and quality of products, and one of the basic elements is presentation. Good presentation is a half success for your product. Moreover, Mock – up technique will help you achieve this target. These mock-up is a great way to show your client what their future product will look like. In addition, they help you save time and make your brand look like eye candy and more professional.

There are many ways to create mock-ups like: create mock-up from scratch, use Smart Object, Photoshop Action,…. Thus, this article will show brieftly about using Smart Object to create mock-up.

How to create mock-up

  • Step 1: Open Photoshop software and choose image file and create new layers
  • Step 2: Use rectangle tool to draw on the screen of devices or items what you wanna choose.
  • Step 3: Click right mouse and press ” Convert to Smart Objects” on Layers Pannel

How to use mock-up

  • Step 1: Open the other layers with images was taken or available.
  • Step 2: Paste that images into Smart Object when you open new layers, save layers and you have mock – up product.

Besides, you can easily change label and colors to make it your own when using mock-up technique.

Below are video that guide specific how to create product mock-up you can refer.

It’s simple and easy to create and use mock-up technique. Let’s post an image of your setup and a final image so everyone can see what you did. Or if you have any questions or concerns, please do not hesitate to contact us today for a free consultation.

Categories
Photography

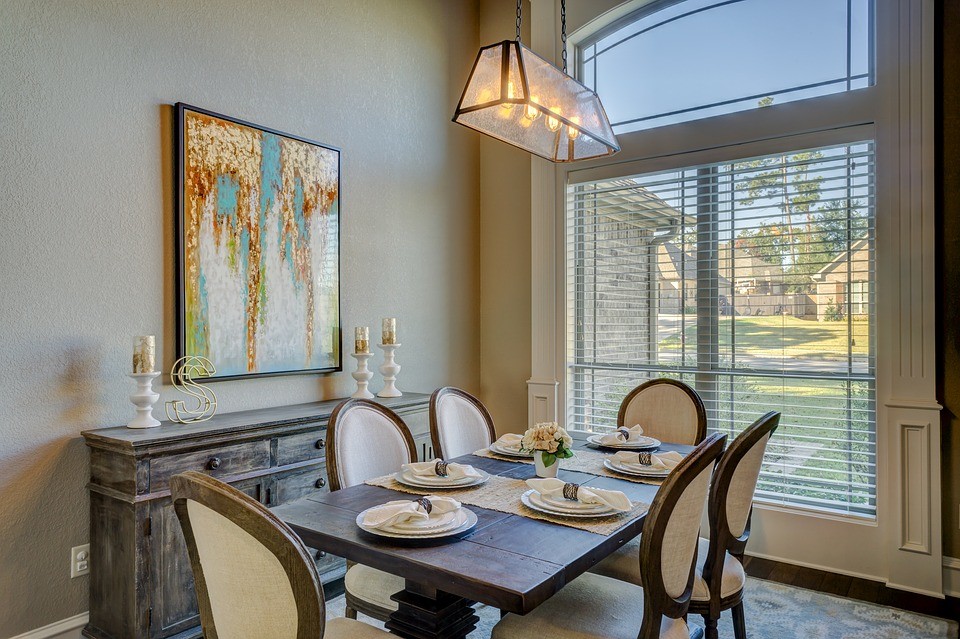
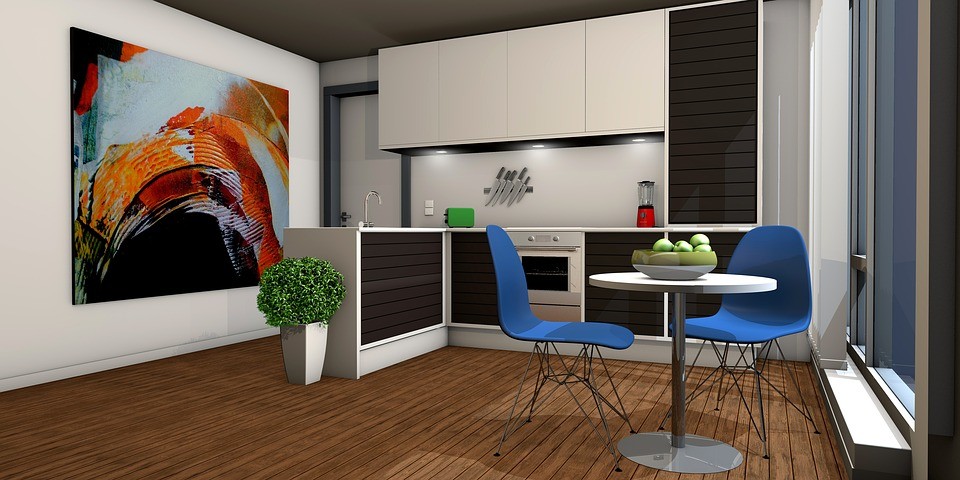
20 Creative Furniture Photography For Your Design

Open your mind and admire collection with 20 creative furniture photography for your design. As far as we know, furniture photography is a specialist of ours as we have the resources to complete your job with minimum fuss and maximum quality. In addition, furniture photography might not take precedent in the process, but it benefits makers immensely to show off each facet of their lovely creations. We understand the importance of furniture photography to give your range the most professional and high quality look available. Have a look through our gallery for a taste of what we can do or can help you build your furniture ideas for your project. Download free furniture photography on Fotosolution and install it on computing devices to unleash creativity for your furniture project.

  • Topic: Furniture
  • Free high-quality stock photos,  use on the personal and commercial projects.
  • Update and add new photos by sharing and following us on Facebook, Twitter, and Instagram
  • Creative and Outstanding normal: Stunning lifestyle imagery for modern creatives
  • Photo Credit: Annie Spratt/Stephen Di Donato/Rob Bye/Jeff Sheldon
  • FREE images download for your next print  and web project.
    FREE high resolution photos for your blog and your collection
    FREE high – quality stock photo for your next project.
  • Items: 20
  • Size: 1500 x 1085
  • Keep in mind, click” Like & Share” to unlock
  • Download: admin.admin.admin.admin.admin.admin.fotosolution.com
 If you’d prefer upload them to your favorite photos sharing site and leave the link to them. Check out our collection Best Creative Furniture Photography for your design inspiration.
Categories
Support Tips & Tricks

How to remove background in Photoshop CS6 for the beginner

You know what one of the most important photo design is?. You always want to make your images become more stunning and perfect before the viewer’s eyes while posting product. But we know that when happening the break-down , some unwanted elements may be present in the background you’re using . That’s  reason why you should remove the background to enhance its quality. Also a clear background will highlight the details of your image. So, wondering how to remove background from images? Looking to cut out the background from an image, but aren’t quite sure how to do it?. Today, we will show video that guide you how to remove the background in Photoshop CS6 for the beginner.

You can refer writing – document: http://admin.admin.admin.admin.admin.admin.fotosolution.com/learn-how-to-remove-background-from-images/ to be able to understand it fully.