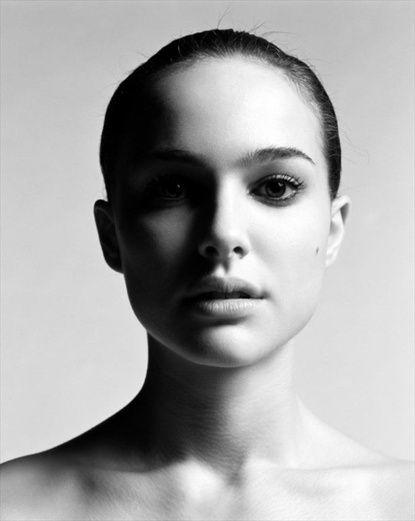
Finding 5 basic types for portrait photography lighting. First, light is one of the important elements in all photos. Whether a grand landscape or an intimate portrait, light always play the essential role to make the success or to break your images. So, it is important you should know that understand the different types of lighting and how to make the most out of each. Here we will show you 5 basic types for portrait photography lighting. Hope that you find it interesting.
Split lighting
First, we will present readers split lighting. What is the split lighting?. Like its name, split lighting splits the face exactly into equal halves with one side being in the light, the other in shadow. Basically, this light is often used to create dramatic images for things such as a portrait of a musician or an artist. However, it tends to be a more masculine pattern so, it is usually more appropriate on man than for women. Using split lighting for your artwork, you should put the light source 90 degree to the right or the left of subject or possibly slightly behind the subject. Hence, this will depend on the face of subject in picture.
Let’s check how the light falls on them and adjust correctly. Besides, you should note that if place the light too close, then you’ll end up losing the side lighting effect. Or, if you can’t adjust the light source, you can adjust the direction that turn of the object.
Loop Lighting
Loop lighting is made by creating a small shadow of the subjects noses on their cheeks. In addition, it is one of the most used lighting set up for portrait photography. Creating loop lighting, the light source must be slightly higher than eye level and about 30-45 degrees from the camera.
Rembrandt Lighting
Rembrandt lighting is named after Rembrandt , the well-known Dutch painter. He was famous for his low key and high contrast lighting style. It is identified by the triangle of light on the cheek. Unlike loop lighting where the shadow of the nose and cheek do not touch, in Rembrandt lighting they do meet which, creates that trapped little triangle of light in the middle.
To set up a Rembrandt lighting set up, first place a key light at about 45 degrees from your subject and slightly above the subject’s head. As the subject faces the camera, you need to make out position the light:the right or the left angle. Thus, this will allow you to see the small triangle of light on the opposite side of the subject’s face.
Butterfly lighting
Butterfly lighting is named for the butterfly shaped shadow that is created under the nose by placing the main light source above and directly behind the camera. It is most often used for glamour style shots and to create shadows under the cheeks and chin. Moreover, it is appropriate to older subject because it help photographer blur the wrinkles of object.
To create this lighting, you should set up light that is positioned right in front the subject but at a steep angle facing down, therefore creating a shadow right underneath the subject’s nose that resembles a butterfly.
Broad Light
Broad lighting is when the subject’s face is slightly turned away from centre, the side of the face which is toward the camera that is in the light. This type of lighting makes a person’s face look broader or wider. This can be used on someone with a very slim face to widen it.
All you need to do is to have your subject face away from the light, which most of the times is positioned at 45 degrees from the subject. Or in other words, you should put broad lighting illuminates the largest part of the face showing.
Here are 5 basic types for portrait photography lighting that give photographer many choices. Let’s try them out on different subjects and choice one of them that is appropriate to your style. Got any of your own favorite portrait photo tips to share with other readers? We’d love to hear about them in the comments section below.


