Categories
Tips & Tricks

Amazing Product Photography Retouching: Before And After

Product photography retouching is a necessary aspect of digital photography. In recent years, it has grown in popularity as a means to make items look better.

A poor product image can lead to loss and reduce sales, which is why it is important for photographers and businesses to ensure high standards and hire professionals like Fotosolution.com for retouching their product photos.

What is product photography retouching ?

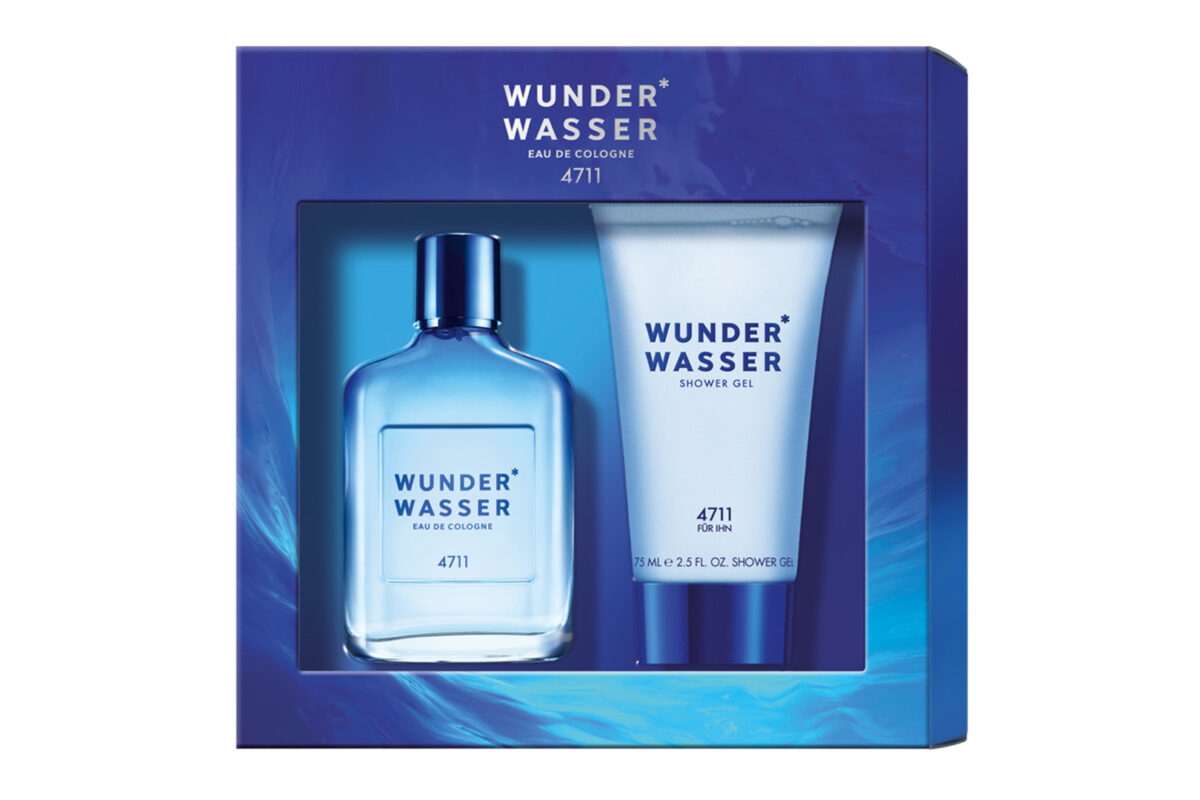
It is the procedure for making a product photo look better. This can involve removing blemishes, adjusting lighting and color, and adding effects like filters or borders. It can make a product appear more polished and marketable.

Businesses could choose to edit their product photos for a variety of reasons.

Improve the aesthetic appeal of their products

Businesses may utilize picture editing to enhance the aesthetic appeal of their products in a world where first impressions are necessary. Companies can improve sales by editing photographs to make their products more enticing to potential buyers.
It can be applied to correct flaws or highlight particular aspects of an image. Retouching can be used, for instance, to remove a little scratch from the photo of a product. Or, retouching can be used to brighten and make a product that was photographed in low light appear more attractive.
Retouching can be a great tool that allows businesses to showcase their products in the best possible way, even though others may consider it as cheating.

Correct inaccuracies or inconsistencies in an image

Retouching images is a technique that can be ultilised to fix errors or inconsistencies in a photo. It might be designed to enhance the product’s overall appearance or make it appear more exact than its actual counterpart. Retouching product images can be used to correct problems with lighting, contrast, and coloration. Additionally, it can be done to clean up any blemishes or other flaws in the picture.

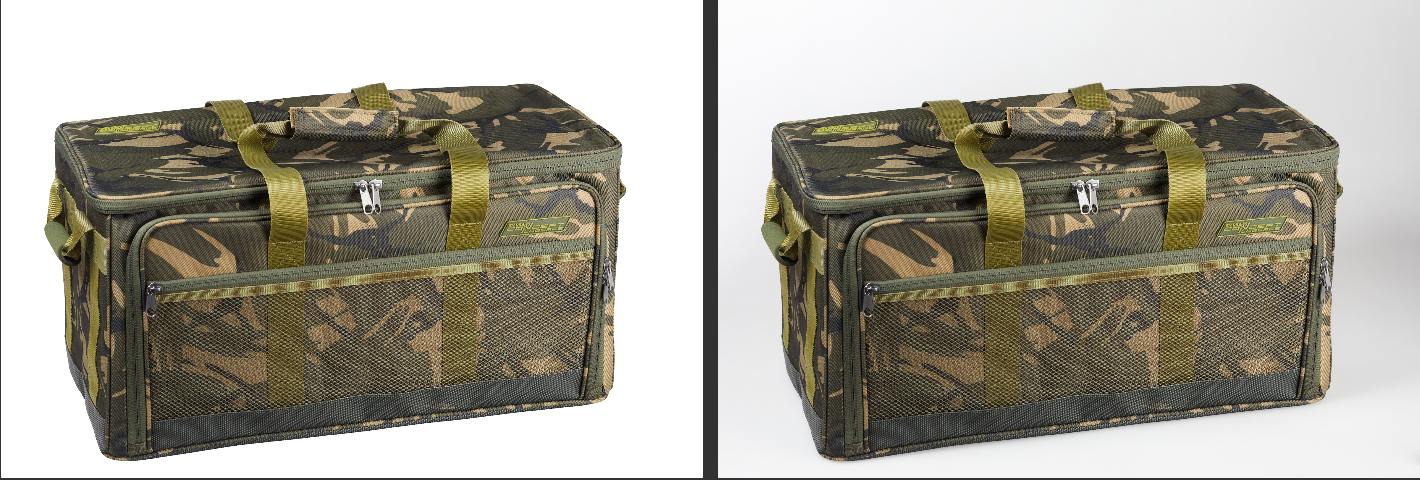
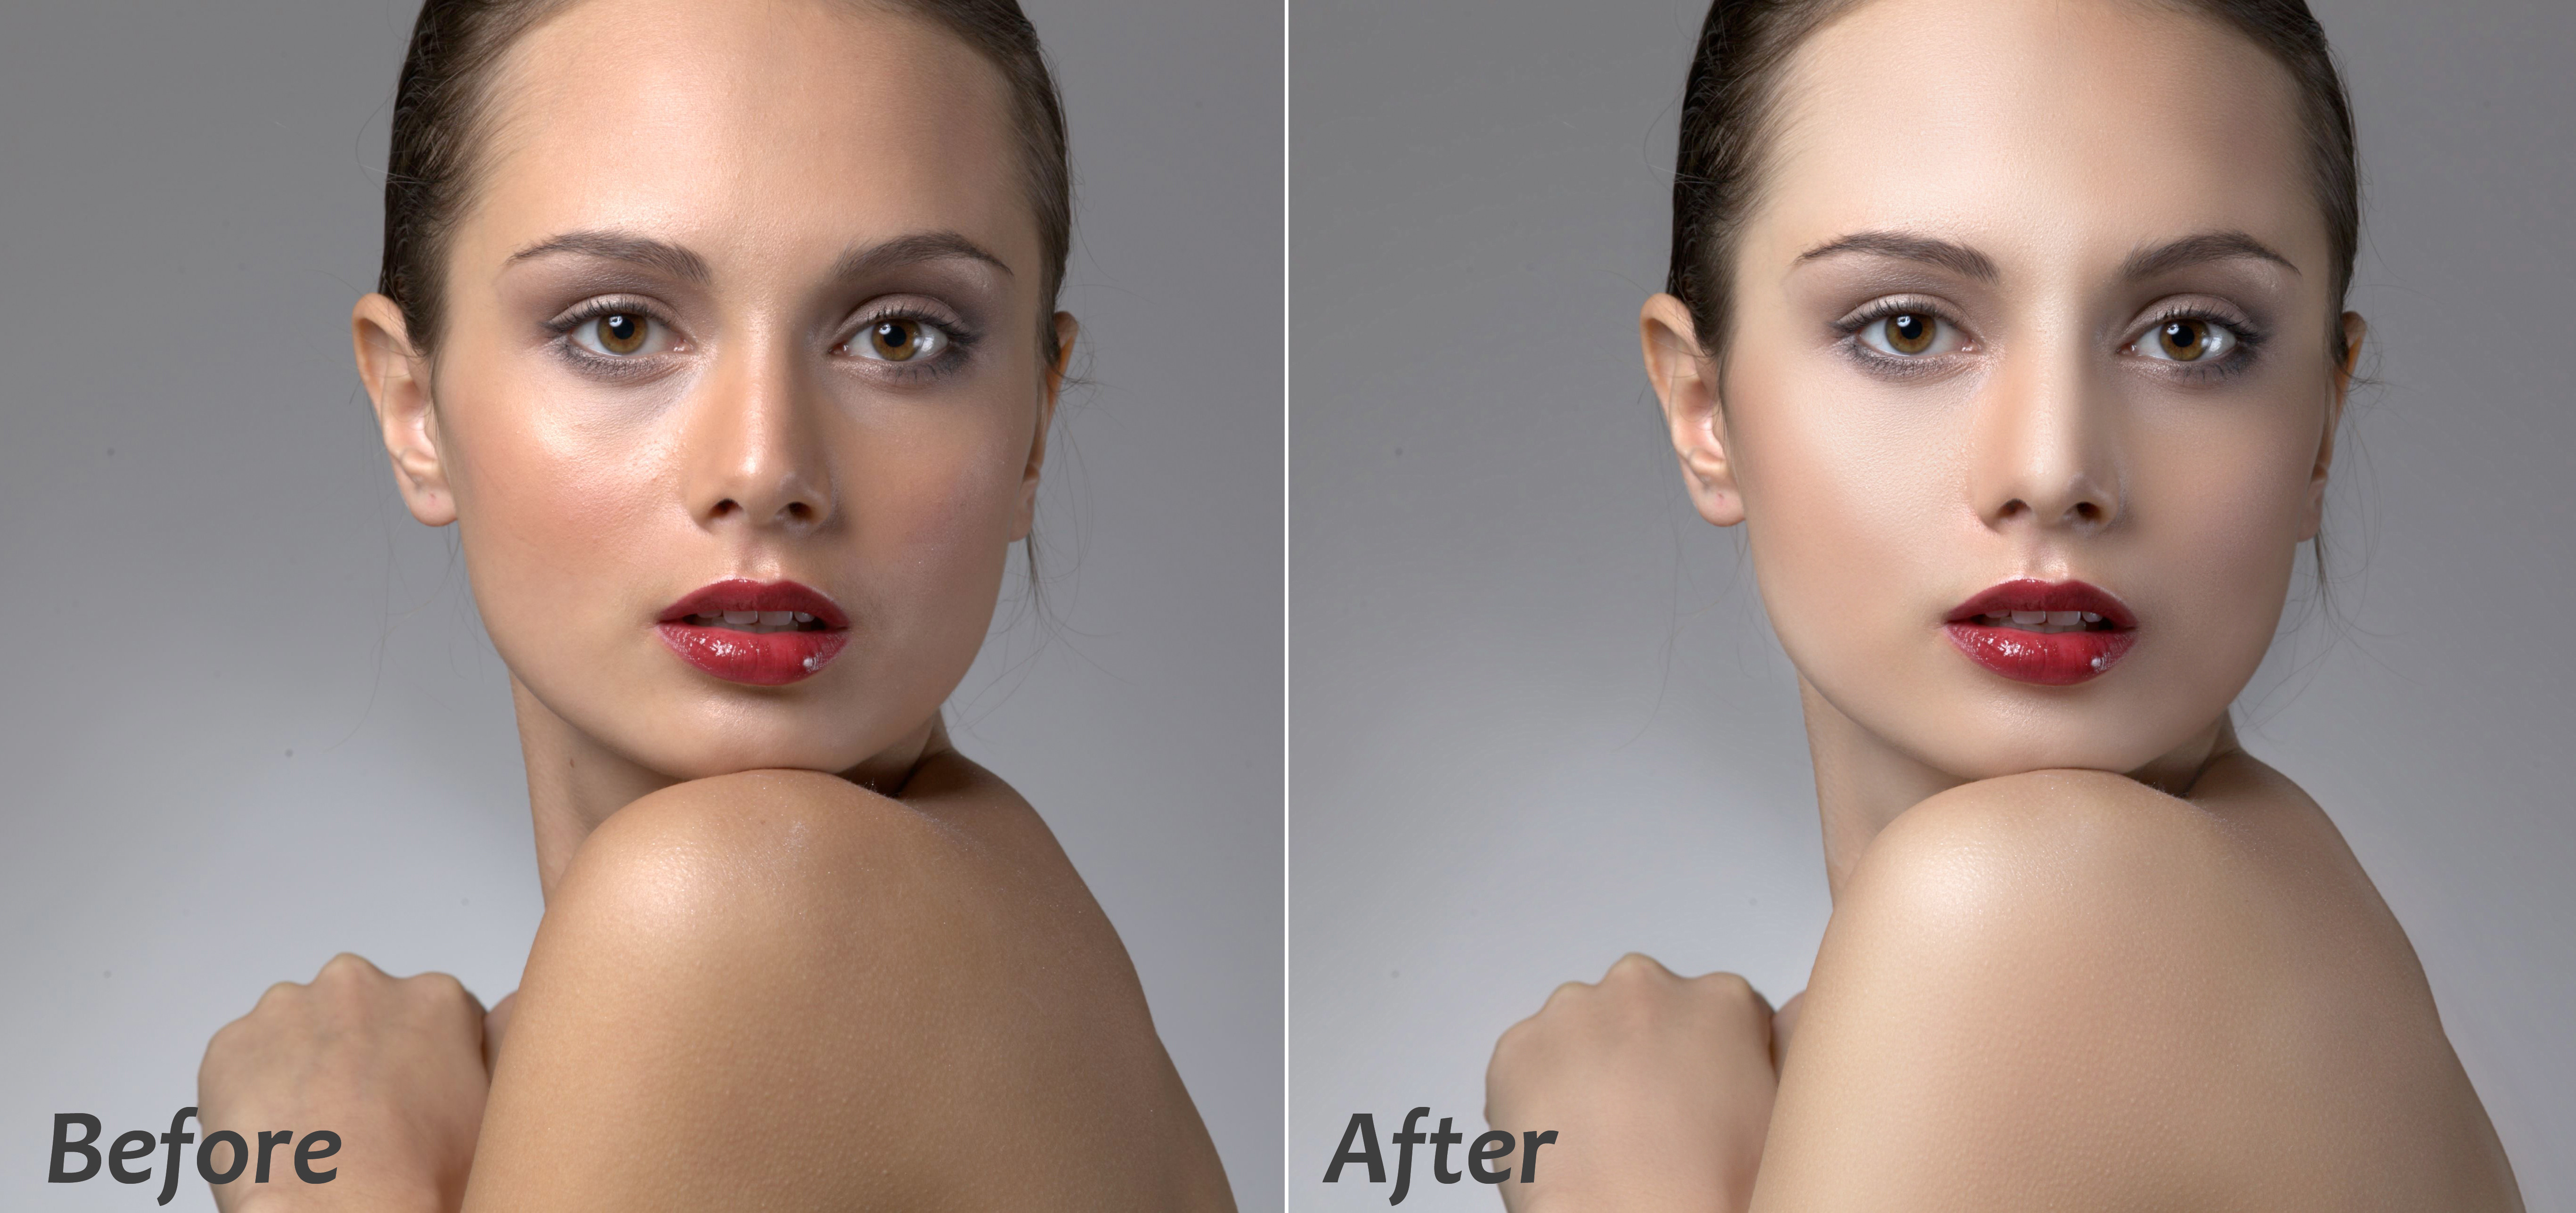
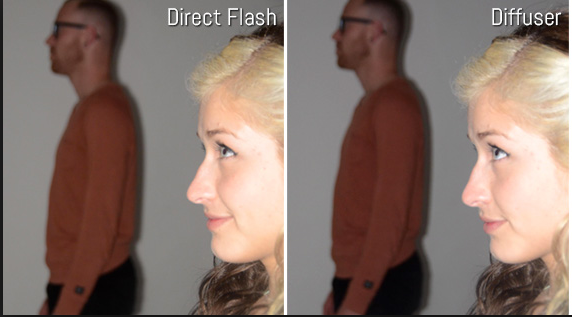
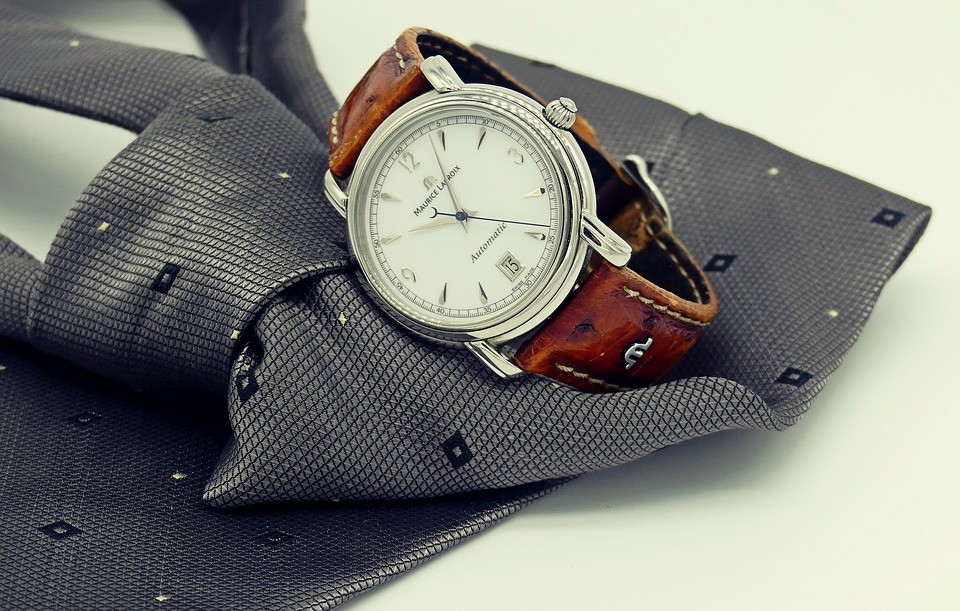
Product Photography before image retouching

Product photos are frequently a necessary component of marketing efforts and can be helpful in persuading customers to purchase a product. They might also be outdated and imperfect, which would harm sales.
So, is it possible to enhance photographs before using them?
Yes, images can be improved before being utilized by being retouched to make them appear more contemporary and polished. It may enhance the perception that customers have of the product and increase sales. This kind of image improvement is possible thanks to a number of software tools, which makes it simple for firms to achieve their goals.

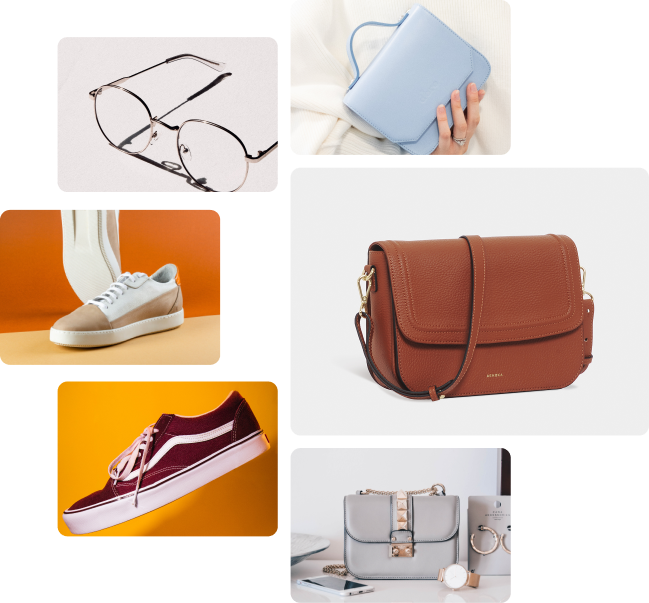
Product Images after image retouching

Product photography is one of the most important aspects of promoting a product. It can help to sell a product, as well as show off its features and make it look more attractive.
Product photographs can be enhanced via software or by employing experts like Fotosolution.com, who can enhance the image’s appearance and increase its viewer appeal.

So, following-image retouching methods include :

  • Brightening: Increasing the contrast in an image can make it appear brighter. To do this, change the level of white and black in the picture.
  • Shadows can be removed by selectively darkening portions of the image while leaving other portions unaffected. As a result, the shadows are less visible and are more likely to blend into the background.
  • Reducing Noise: By removing sharp edges and patching up small rips in the photo layer, background noise can be decreased.

Advantage of Product image retouching

  • Cost-effectiveness
  • Time-saving
  • Acing the social media game
  • A boost in sales and conversions
  • Competitive advantage
  • Notable reduction in returns
  • Minimized shooting time
  • Assurance of quality
  • Better results

Professional image retouching services

Professional image retouching services are necessary for any business that sells products online. It can be hard to make your products look their best when they are displayed on a website or in an e-commerce store, but with the assistance of a skilled retoucher, you can get the ideal look for your product photographs.
A skilled retoucher will be familiar with a variety of software packages, able to bring back lost detail and remove flaws from a photograph. They might also be able to change the color and lighting or add additional features.
Generally speaking, a skilled retoucher will take the time to comprehend your unique requirements and objectives for your product photographs and will provide results that you will be pleased.

Fotosolution – Product photography retouching services

Fotosolution is a trustworthy image retouching service that can assist you in enhancing images that have issues with contrast, color, and other factors.

Your photographs will be improved by their professionals using a variety of ways, so you can be confident that they will produce the outcomes you desire.

Working and choosing the services of Fotosolution, you will get:

  • You can save time with the short turnaround time thank benefit of the time zone ( from 8-12 hours).
  • We are available 24/7 to find a solution for your photos as quickly as possible.
  • Your photos will not be published by any third party without your permission.
  • We offer 3-5 photos edited for trial without any fee
  • We use the latest image editing software such as Adobe Illustrator, Adobe Photoshop CS6and CoreIDraw to give you the most attractive photos

If you are looking for the best image retouching services, Fotosolution is the best option. Our services can help you improve the appearance of your photos, making them look more polished and professional. Contact us ( sales@fotosolution.com) today to get started!

Categories
Tips & Tricks

How to use Adobe Lightroom for Product Photography

If you’re beginning to extend your product photography, you’re already familiar with Adobe Lightroom.

As far as we know, Adobe Photoshop Lightroom is a gold key for your product photography. Tethering, presets, batch editing, and other helpful tools for product photography are all there in this excellent program. Lightroom may be effectively used to produce reliable, excellent photos. Especially, it has some quick and powerful tools for product images. So, have you ever used the Adobe Lightroom tool for product photography? Today we will share some tips to help you with the product image in Adobe Lightroom.

In this document today, we will address 2 basic questions, like:

What is Adobe Lightroom?

Adobe Lightroom is software designed to be used by photographers for photo management and editing. Alternatively, cataloging and modifying It’s similar to a lightweight combination of Adobe Bridge and Adobe Photoshop if you’re familiar with other Adobe programs. But that’s selling it short.

Images can be imported, arranged, edited, and exported. You may search, bookmark favorites, make collections, and share photos. You can adjust  individual images, perform batch edits, and save sets of adjustments as “presets.

How to use Adobe Lightrom for Product Images ?

Organize Image

What images are you processing?

Assume for the moment that you have just concluded a picture session and are editing RAW files directly from the camera. We advise creating a single folder on your computer where you may save all of the RAW files from the shoot.

Because lighting conditions will be similar, if not identical, organizing by shoot makes logical. That means the adjustments we make will be similar, too, enabling batch processing.

https://admin.fotosolution.com/wp-admin/post.php?post=28456&action=edit

Import Image

Next, you should import the image into a folder. Below are some basic steps to help you import images.

  • Select “Import” from the menu.
  • Find the image folder using the file browser
  • “All Photos” will be checked by default
  • Click “Import” and “Adjust”

Adjust Image

After importing an image into a folder, you should choose an image from the folder. Because we’ll use this single image to perform adjustments. Then we’ll apply those adjustments to all other images. In other words, we will include

  • Choose an image from the “Library”
  • Click “Develop”
  • Expand “Basics” if not already open
  • Adjust “White Balance,” “Exposure,” “Contrast”

https://admin.fotosolution.com/wp-admin/post.php?post=28456&action=edit

Now you need carry out 3 main steps including: White balance, Exposure and Contract tools.

White Balance

Click the dropper tool up in the top left of the “Basics” tab, and drag it over the image to a spot that should be grey. Click that spot and Lightroom will automatically white-balance your image. If you’re still not quite satisfied, let’s play about with the “Temp” and “Tint” choices until you find the perfect setting.

Exposure

Brighten or darken your image with the “Exposure” slider. Don’t feel obligated to use it just because it’s there. If the quality of your image is very well, you should not waste time adjusting.

Contrast

By lightening light mid-tones and deepening dark mid-tones, the contrast will draw attention to details. Use it to enhance minor details.

Sync Adjustment to all image

It’s time to apply those adjustments to all of your other images from the shoot:

  1. Select the rest of your images.
  2. Click the “sync” button at the bottom right of the “tools” panel.
  3. From the popup window, choose the adjustments you want to apply to the rest of your images.
  4. Click “synchronize”

Flag or Star Selects

The adjusting is finished but you still need to sort through your images to find the ones you want to use.

  • Select a photo from the filmstrip
  • Press arrow key to go to next image
  • Press “P” key to flag images you’ll use
  • Press “5” key to star hero images
  • Choose “Flagged” in the bottom right “Filter” drop down menu.

Export Image

Finally, you should only export the image and save the file. Create a new folder with a descriptive name, such as “Color Corrected” or “Final,” inside the same folder as your RAW photographs. Next, you can create a naming convention for your picture files that will aid in future organization, such as style numbers.

https://admin.fotosolution.com/wp-admin/post.php?post=28456&action=edit

Depending on your workflow, you’re not going to want to continue shooting in RAW format. You might want to export your photographs as PSD or TIFF if you intend to do additional customized modifications in Photoshop. It’s JPEG time to conserve disk space, especially if you’re about to browse the web.

Here are tips to use Adobe Lightroom for product photography. The Fotosoluton’s retouching service makes it incredibly simple to get your images professionally edited, at scale, with a next morning turnaround if you don’t have the time or want to spend all day in Photoshop editing pictures. Benefit from the free trial and receive the best offers, let’s contact: sales@fotosolution.com – Mrs. Sofia Giang

If you have any opinions as well as any questions concerned about this subject, let me know your ideas in the comment below.

Categories
Support Tips & Tricks

How to Color Correction Product Photography in Adobe Lightroom

As far as we know, Adobe Photoshop Lightroom is a gold key for your product photography. It has some quick and powerful tools for color correcting your images. Have you ever used Adobe Lightroom tool for color correction product photography?. Below are some tips to help you change colore correction product image in Adobe Lightroom.

There are five steps to color correction including: organize image, import, adjust, sync adjustment to image and export.

fotosolution-How-to-Color-Correction-Product-Photography-in-Adobe-Lightroom

Organize Image

The first thing to note before anything else is that you should be shooting in raw. One of the most fundamental benefits of raw is the ability to adjust white balance after capture with no penalty on image quality.

Import Image

Next, you should import image in a folder. Below are some basic steps to help you import image.

  • Choose “File” > “Import Photos And Video”
  • Use the “Source” panel to find the image folder
  • Make sure the “Add” button is selected
  • Choose the “Select All” button
  • Click “Import” and “Adjust”

Adjust Image

After importing image into a folder, you should choose an image from the folder. Because we’ll use this single image to perform adjustments. Then we’ll apply those adjustments to all other images.

Adjusting image you should carry out 3 steps including: White balance, Exposure and Contract tools.

fotosolution-How-to-Color-Correction-Product-Photography-in-Adobe-Lightroom-01

White Balance

Click the dropper tool up in the top left of the “Basics” tab, and drag it over the image to a spot that should be grey. Click that spot and Lightroom will automatically white balance your image.

Exposure

You can use this tool to brighten or darken your image. Don’t feel obligated to use it just because it’s there. If the quality of your image is very well, you should not waste time to adjust.

Contrast

Contrast is the go-to tool for making details stand out. Adjust it to help you accentuate light and dark.

Sync Adjustment to all image

It’s time to apply those adjustments to all of your other images from the shoot:

  1. Select the rest of your images.
  2. Click the “sync” button at the bottom right of the “tools” panel.
  3. From the popup window, choose the adjustments you want to apply to the rest of your images.
  4. Click “synchronize”

Export Image

Finally, you should only export image and save file. You should create a new folder within the same folder that contains your RAW images and name it something descriptive, like “Color Corrected” or “Final.” Then, you carry out file naming and save. Your images have been color corrected.

fotosolution-How-to-Color-Correction-Product-Photography-in-Adobe-Lightroom

Here are tips to color correction product photography in Adobe Lightroom. Do you have any color correction tips or challenges? Do you use different software to perform batch processing and color grading?. If you have not known about Adobe Lightroom for color correction, let’s refer this article here.

If you have any opinions as well as any questions concerned about this subject, let me know your though in the comment below.

Categories
Support Tips & Tricks

Top 5 Best Free Apps For Product Photography

Product photography is very important to convince customer’s choice before buying your product. There are many product photography tips to increase the effect of your services as well as your product. Keep in mind that you use not only digital cameras but also smartphones especially in advanced technology era. Today, with the help of growing technology, you can find several smartphones which have better lenses then many semi-professional cameras. In addition, using modern smartphones will help you save your budget in stead of buying expensive professional cameras. Capturing the demande of customer, today there are a lot of best free apps that can help you take photos, edit them via your phone. Below are top 5 best free apps for product photography.

Photoshop Express

  • Available platforms: iOS, Android and Windows devices
  • Cost: Free

If you are interested in photography, most probably you are familiar with Adobe Photoshop. Photoshop Express will a great choice for your plan. This free app gives you robust photo editing tools right in the palm of your hand. You can import images from your phone or take photos right in the app. Especially, the interface of the app lets you to change the hue, brightness, exposure and contrast values.

fotosolution-Top-5-Best-Free-App-For-Product-Photography-01

Although the app is free to use, if you want use additional specific features, you can purchase more to use free. However, if you have an Adobe account, you can use all features without any additional cost by logging account. Photoshop Express have 20 “looks” which is same with filters. You can apply those filters to get better results

Aviary Photo Editor

fotosolution-Top-5-Best-Free-App-For-Product-Photography-04

  • Available platforms: iOS and Android devices
  • Cost: Free

Aviary is a good post-production photo editor. Aviary Photo Editor does not provide professional features as exposure and ISO adjustment tools like the other apps. However, the suite of filters is very nice and perfect. Aviary has various editing and image adjustment tools. The easy to use interface lets you to make adjustments on the images very quickly.

The filters of Aviary is totally free to use, however to use all nice filters you can invest your budget to have fully experiences.

VSCO Cam

  • fotosolution-Top-5-Best-Free-App-For-Product-Photography-03Available platforms: iOS and Android devices
  • Cost: Free

VSCO Cam is another free to use tool for iOS and Android devices. It has the usual editing tools like exposure, contrast, and color balance. Taking about VSCO Cam apps, we need to know take advantage of VSCO’s filters. With simple clicks you are able to enhance your photos. By that way, you will have product images with artistic look.

In addition, VSCO Grid is a publishing and curation platform that lets users share their images, is integrated into the app. You can also send your product images via email and share them on social networks.

PicMonkey

fotosolution-Top-5-Best-Free-App-For-Product-Photography-06

  • Available platforms: iOS and Android devices
  • Cost: Free

PicMonkey is another great online photo editor. One of the best features of PicMonkey is Collage. You can take various photos and arrange them together. Especially, if you have a lot of photos, you can collage them together as perhaps a banner image for your store or your email.

Fotor

fotosolution-Top-5-Best-Free-App-For-Product-Photography-05

  • Available platforms: iOS and Android devices
  • Cost: Free

Fotor is other professional free apps are mostly not user friendly. It offers editing and beauty retouching. It also has HDR image support so you can turn your product images into HDR ones. You can make photo cards within the app. Moreover, it owner special feature: High Dynamic Range feature. You can take three photos with different exposures to combine them into a single image, with the best light and tone from each of the separate photos.

Smartphone cameras are becoming an increasingly good choice for creating high-quality product photography. Also there are some brands providing you built-in photo editing software, there are better ones in the market. In this article, we provide 5 best free apps for product photography that help you improve the quality of image, Besides, you don’t need to pay anything for good looking product images.

Do you have a favorite tool for editing your photos? Share it as well as your thought below.

Categories
Support Tips & Tricks

What is Adobe Photoshop Lightroom?

Have you ever heard about Adobe Photoshop Lightroom?. As far as we know, product photography begins under the cameras but it only finished after post – processing step. And Adobe Photoshop Lightroom is a gold key for your product photography.

fotosolution-What-is-Adobe-Photoshop-Lightroom-01

Adobe Lightroom is the DIY or budget-conscious product photographer’s best friend. It can be used to both streamline your workflow during the shoot, and to quickly edit images in bulk afterwards. In addition, Photoshop Lightroom helps you import, organize, management and find your images. Especially, it is photo management and photo editing, combined into a single tool.

In fact, Adobe Lightroom retains your original images and keeps a record of your edits, then applies them when you export your images. You can come back minutes, hours, days, months, or years later and reverse the edits.

When should you use lightroom?

First, you take photo a raw photos and import your photo in Adobe Lightroom. Keep in mind that adobe lightroom is a raw file editor so you don’t need Adobe Camera Raw.

Using Adobe Photoshop Lightroom will a perfect choice that help you carry out basic photo editing. Lightroom’s task is that cropping, white balance, exposure, histogram adjustments, tonal curves, black and white conversion, spot removal, red eye corrections, gradients, local adjustments, sharpening, noise reduction, lens profile corrections, vibrance, and saturation.

fotosolution-What-is-Adobe-Photoshop-Lightroom-02

If you’re a beginning photographer, you’ll most likely be satisfied with these features. Because it is also much easier to use than Photoshop.

In fact, Photoshop and Lightroom are great software packages that have the ability to bring out your post processing creativity. Especially, as you are getting started with photography, Lightroom is the best way to begin.

Do you prefer using Photoshop or Adobe Lightroom?. Here are some interesting sharing about Lightroom that help reader have best look. Finally, just choose the right tool for your photographic needs on a project.

If you have any opinions as well as any questions concerned about this subject, let me know your though in the comment below.

Categories
Support Tips & Tricks

Tips for Owning Best Product Photography

Best product photography entails taking photos of a product on its own and with a clear background to remove any unexpected and make you capture the viewers’ attention. Whether you have your eCommerce site, product photography is always the best option to use and help you close to your customers. A good product image will enhance your listing more effective and will also increase your sales. Product photography will with no doubt help your eCommerce site thrive. Practicing product photography may seem simple but without the proper knowledge can prove to be hard. Below are tips to help you practice and improve product photography easily and perfectly.

Gets lots of light

This is the most important tip of all. Having enough light ensure the product photo is clear and appears as the original item. Whatever you are photographing, whatever shooting indoor and outdoor, lighting is a key to capturing a great photo. Having good use of lighting, you need to take advantage of natural light and artificial light.

fotosolution-Tips-for-Owning-Best-Product-Photography-01

Especially, natural light is the best and works best for all photo types. It is thus prudent to shoot photos during the day.

In this case, if shooting in indoor or in studio, you need to use take advantage of artificial light. This may require that you set up lighting, or manipulate the available light using things like reflectors or a flash. Certainly, use the artificial light will have cost more than natural light.

Use a tripod and a timer

When taking a photo even the slightest vibration can cause blur in the photo. You should also keep in mind that the closer you move to an object the more you’ll cause blur on the objects photo. Tripod is an essential tools to support your project. Hand-holding your camera with interior photography not only looks unprofessional, but it will result in blurred shots every time. Arm yourself with a tripod and a remote shutter release to eliminate the risk of camera shake when taking a shot.

fotosolution-Tips-for-Owning-Best-Product-Photography-02

You can use the cameras in built timer to ensure you minimize vibration while maximizing sharpness.

Edit the photos

Taking photos is always the beginning next comes editing. Edit the photos will an important step to check the comprehensive process before uploading your website. First, while preparing to put the photos on your site you should know the size of photos required. Re-size the product photos you’ve taken so that they can fit in your site. Editing also involves removing any bad sections that may have appeared in the photo. For best results, let’s ensure you use the best photo editing service.

fotosolution-Tips-for-Owning-Best-Product-Photography-03

Lastly always remember that captivating photos are the key to bringing and keeping traffic in your site. They are also the key to increasing sales. If you have any opinions as well as any questions concerned about this subject, let me know your though in the comment below.

Categories
Support Tips & Tricks

How to Use Natural Lighting for Best Product Photograph

A best product photograph need to use many differents elements and natural lighting is one of essential factors to creat the success of product photograph. If you love photograph and are photographer, have you ever used natural lighting for your photograph?. Below is some useful tips what help you learn how to use natural lighting for best product photograph.

When you use an artificial light source, these can affect directly your product’s colour, while using natural lighting for product photos preserves the natural colour of the product. So, natural lighting complements products photos really well. However, the light changes from hour to hour and day to day. You can choice the suitable light for your product.

Select the camera angle

Choosing the camera angle is a important parts when you take the product photos with natural light. When photographing with window light at low ISOs your exposure can be upwards of several seconds, depending on your aperture.

fotosolution-how-to-use-natural-lighting-for-best-product-photograph-2

Suggestion: you should use ISO 100 to keep the noise levels down.

Choose the best time of day

As you know, the light changes from hour to hour and day to day. To create natural lighting for your own photos, you should shoot your photos at the brightest time of day. You can work in late morning and early afternoon – the times of beautiful sunlight and these gives sufficient lighting near windows or in the shade. In general, morning light is bright and has less colour, while afternoon and evening light often has a warm undertone and brings out greater contrast in your images. You can always neutralise the image and make it cooler in post-production if want a cool, dark image.

fotosolution-how-to-use-natural-lighting-for-best-product-photograph-1-1

Avoid reflecting of your shadow fall because this shadow will hide some details of your product and lost some of it sparkles. Avoid spending times to take your photos in sunset. Sunset is considered as golden hour to make a beautiful photos but use too much, it can create harsh shadows or be too warm for a simple product photo. If you’re shooting indoors, you should put your item in place where has lots of windows. Don’t forget that you can weaken the light source by covering the window with a thin, solid curtain or various types of paper. Be careful!

Remember that you need to focus on the product – it is the most important things to decide your best photos. Producing a nicely arranged photo of your product in use can be really effective and natural lighting can often produce beautiful effects but you must guarantee the quality of product.

Natural lighting will help your photos look great. We hope that our useful tips will bring you precious experiences to make beautiful product photograph and increase your online sales.

Categories
Support Tips & Tricks

Tutorial Guide For Product Photography of Shiny

As you may know that this lesson about digital photos or related to product photography always essential factors for photographers. Great apparel images is one of important factors what contribute the success of product and the effective of budget. To creat beautiful apparel images, we should use many factors such as: colors, garment, model or mannequins,… Of course , lighting is indispensable element. Great apparel images are produced when lighting flatters your product. Shiny products like jewel, glass or metal can be tricky to photograph owing to their highly reflective nature. However, to control shape light, eliminating reflections and any unbecoming distractions can not be easy as take a normal cameras.

In this post, we will present three tutorial guide to setup natural lighting that can flatter your shiny product.

Window Lighting

Natural resources are an efficient lighting setup for your polished and highly reflective product. Using natural light as the only light source meant they were just starting out, were too poor to afford lights. It were not smart enough to figure out lighting. To ensure the space is not cramped up. For perfect product images, it is important to provide adequate space for your photography equipment without compromising on your comfort.

SONY DSC

Once you set up your equipment, it should be easy to tear down and repeat if needed. Or leave your equipment in place if you have the space to do so.

Firstly, find a large window that filters plenty of light into the room at a 90-degree angle in relation to your product. If the light streaming through the window is rather harsh, try hanging up a sheer, white sheet.

Secondly, it is to create the ideal backdrop for your product. You don’t have to make it too wide, but ensure there’s adequate space above and around your subject so as to fill your frame. A stand may come in handy in holding your backdrop intact in its rightful place. Keep in mind that a white background always helps shiny products to stand out free of distractions, giving your imagery a clean and highly professional look. If you find that you still have too much shadow on the opposite side to the window, then try using a reflector.

Enclosed Lighting System

One of the best ways to photograph a shiny product is the use of an enclosed lighting system. The benefits are many. The enclosed system wraps even and balanced light around the entire product you’re photographing. The advantages include an even distribution of light, consistent natural lighting, elimination of glare, illumination of hard to reach spots.

Generally, the use of flash photography produces hot spots and glares. But continuous natural lighting will help to accurately and evenly reproduce all the stunning colors in the various elements of your shiny product photography.

Diffused Lighting

fotosolution-Tutorial-Guide-For-Product-Photography-of-Shiny-1

When illuminating s shinny product photography, you have to make sure never to expose it to light directly, as direct light will be reflected on the shinny product, and will create hot spots and shadows. What you need to do is expose jewelry through diffused lighting, which is light that has passed through some sort of light diffuser. The diffuser evenly spreads the light, and eliminate all hot-spots, shadows and reflections. Remember, that all of our product photography lighting systems already include natural daylight. It is exposed through the boxes’ thermoplastic housing that acts as light diffusers.

White balance

It is a vital element of outstanding product photography. Be sure to adjust the white balance settings on your camera. Although many cameras will come with pre-program options or presets you need at least one custom white balance option. This means that the camera can “read” and self-adjust itself to be able to take pictures under many light conditions. This feature is very important. White balance means that the camera needs to adjust itself to the ambience light you are using. This give you accurate and true colors of the items being photograph.

Avoiding unnecessary shadows and reflections

visibility_02_reflect_refract

When photographing shiny product, there are certain shadows and reflections that might be necessary to create a three-dimensional look. Yet, there are other reflections and shadowsthat are unnecessary and that you want to avoid in order to have a photograph that presents your shiny product in the best way possible. The first thing you need to understand about reflections and shadows.  You should know how they are produced and why they appear or exist and then work on lighting to have the desired effect.

These some tutorial guides will get you well on your way to creating product photograph of shinny that really make an impression with prospective customers.

Categories
Support Tips & Tricks

How To Take Camera Setting for Brilliant Product Images

How to take camera setting for brilliant product images are hot subject that anybody are interested in. If there’s one thing that’s true when it comes to ecommerce, it’s that the perceived value of your products and the trustworthiness of your business is often judged by the quality of your web design. And a big part of having an attractive website these days also means having high-quality, beautiful product photography. Sure thing; using epic images to showcase your products can make the difference between your conversions and no sales at all. So, you want to take camera setting that perfect product photography—sharply focused and perfectly lit so as to attract the attention of customers? Below is some tips to make brilliant product images.

Let’s check them out…

Camera mode

fotosolution-how-to-take-camera-setting-for-brilliant-product-images-1

Once you have your camera, tripod and product in place, you can start by selecting your camera mode. Most cameras offer a variety of settings but I usually stick to using three modes: Manual, Aperture priority and Automatic. As you can see, image taken with my manual mode looks much more pleasing to the eye. This is simply because you can be able to control all your image settings without worrying about the camera using the wrong automatic settings like aperture, flash, shutter speed etc.

ISO Settings

ISO Setting is one of the important factors to perfect product images. Now, let’s select our ISO setting based on the light in our studio. As a general rule, the better the light in the room, the lower your ISO value needs to be. By adjusting your ISO setting just right, you will be able to produce crisp and clean photos.

I would recommend first setting your ISO at 200 and using the viewfinder to evaluate its effect on the product image. If the image appears too dark, increase the ISO value to a setting that is more suitable. If your studio or space is too dark for shooting, raise the ISO value to a range between 600-1400.

ISO measures the sensitivity of the image sensor which takes your image. The lower the number the less sensitive your camera is to light and the finer the grain in your images. This means your image will have less grainy ‘noise’ or what I like to call speckles! Higher ISOs are generally needed in darker situations unless you are using a tripod.

Images Format

As we will be reviewing the manual mode in this post, let’s start by choosing our image format. If you have the option to choose your images as RAW, absolutely do so. You will have more flexibility afterwards in post production. If you do not have the RAW option, then we suggest that choose the largest image size & format that your camera will allow you to select, which in most cases will be a JPEG.

Aperture

fotosolution-how-to-take-camera-setting-for-brilliant-product-images-1

When you choose aperture, you’ll be putting up your exposure settings. For a home studio, F16 is considered ideal as you’ll need to have the whole product in focus so as to shoot clearer photos for your customers

The rule of thumb recommends the use of Aperture settings of more than F11 to ensure nearly (if not the whole) product is in focus. In essence, the higher your aperture gets the better for your images. If for some reason your camera will not reach as high, the highest aperture your camera will allow is perfect or you can even try the auto settings!

Light meter

Finally, ensure your camera automatically focuses on your product images. This allows your digital camera’s light meter to detect the amount of light reaching the product. This will help the camera’s internal light meter defect how much light is falling on the product. We can then adjust our settings (aperture & shutter speed) according to the light meter reading on the camera. Since we know we want to have a higher aperture like F16, set it to that. By using the light meter in your camera, this will then help you adjust your shutter speed.

There are lots of techniques for shooting successful product photography, we hope that some useful tips help you take perfect camera setting for brilliant product images. If you love images and a peson who photographs products everyday, this tutorial has been specifically crafted for business owners on a budget, and it’s been designed to be simple while producing excellent high quality results with most product types.

Thanks for watching!

Categories
Support Tips & Tricks

DIY Guide to Beautiful Product Photography

Do you know how to shoot a beautiful product photography?. how do you feel about perfect product photography?. If you want to refer to reach to product photography, let’s discover this article: DIY guide to beautiful product photography.
A beautiful product photography may be worth a thousand words. It is sure to improve your customers’s shopping experience and increase your eCommerce sales. In fact, Showcasing your products with high-quality images will help you gain the best result for your business project. And a big part of having an attractive website these days also means having high-quality, beautiful product photography.
Before you give up on your product images, refer some guides to awesome product photography for your eCommerce store.

White Background

fotosolution-diy-guide-to-beautiful-product-photography-01

Background is one of important factors in an image and choosing suitable background is a deciding element to make beautiful photos. Moreover, the background is of fundamental importance in the composition of the image emphasizing the subject, improving the photography. If not adequate, it may cause irreparable damage to the image, making it chaotic.

For great photos, you need to create what’s known as beautiful and clear background. Simply, this is a white backdrop that sweeps from the vertical to the horizontal surface. Using white background, you don’t need to make any brightness and contrast adjustments. Because the sweep will reflect white light onto your product. Dark colors absorb light, so shooting against a dark backdrop will not give you a well-lit product image.

Or if you choose to remove the background, it’ll be a lot easier to do if the product is on a plain, white background. Let’s choose white background to make your product become more striking in photography.

Using Photography Equipment

Photography equipment is one of important and necessary parts to make beautiful product photography. The first equipment you are interested in that is camera. There are many kinds of cameras that help you shoot great photography, and DSLR camera is one of great choice for photographer.

With DSLR camera, you can use the right aperture for the right shot. A wide aperture like F2.8 or F4.5 will narrow your depth of field, leaving parts of your product out of focus. A small aperture like F8 or F11 will give you a wider depth of field, keeping your entire product crisp and in focus.

In addition, keep in mind that don’t use a wide angle lens. You will distort your product. Besides, you can use other equipment such as: smartphone – is one of useful devices for your project.
You are interested in: “How To Take Camera Setting for Brilliant Product Images“.

fotosolution-diy-guide-to-beautiful-product-photography-03

Tripod

The quality of image can be affected by your tripod. Why are tripod?. When a camera has a slow shutter, you can’t hand hold it or the subject will be blurry. Tripod is mainly answer for you. When you take a photos, you’re going to set your camera to a very small aperture so that you can have the most depth of field your camera is capable of.

Thus,you’ll need to use a tripod to stabilize your camera and easily duplicate the same shot for each of your products.

Lighting

The key to amazing product images is your lighting. If you don’t have great lighting, you won’t have great photos. There are two kind of lighting that photographers use to capture beautiful photos: natural light and artificial light. When you use an artificial light source, these can affect directly your product’s color, while using natural lighting for product photos preserves the natural color of the product.

fotosolution-diy-guide-to-beautiful-product-photography-02
An useful advice for you: Say to turn of your camera’s in-built flash because if you are not a person who have the photography skills to manipulate the flash. You’re not going to get great results using it. So, what are the advantages of natural light and artificial light?.

As far as we know, artificial light is constantly available throughout the day and night. This allows  you to skip planning your shoot around factors like the time of day and the weather has no effect on you. Based on the specific type of artificial light you select, you can even mimic sunlight or moonlight in your shots.

Natural lighting is easy and cheap. A set-up near a window is your best option, because you need to use the sun as an indirect light source. In general, morning light is bright and has less color, while afternoon and evening light often has a warm undertone. In addtion, it brings out greater contrast in your images. You can always neutralize the image and make it cooler in post-production if want a cool, dark image.

You are interested in: ” What do you choice: Natural Light v.s Artificial Light?
Below are video that guide specific how to create a beautiful product photography.

Great Product Photos from Etsy on Vimeo.

Closely, it is easy to take your own products with 4 guides how to create a beautiful product photography. Let’s post an image of your setup and a final image so everyone can see what you did. If you have any questions or concerns, please do not hesitate to contact us today for a free consultation.